
Popular categories
Looking for a yarn?


Comments / Questions (16)
![]() Elena wrote:
Elena wrote:
Salve. Quando si inizia il diagramma M1 c'è un gettato. Quindi devo spostare il segnapunti sul gettato e che così diventa la prima maglia del giro? Se è così il segnapunti viene spostato su ogni gettato di inizio giro di M1. Perché altrimenti il gettato che c'è all inizio di alcuni giri di M1 diventa l ultima maglia del giro. Spero di essere stata chiara. Grazie
29.11.2024 - 11:55
![]() Kay Fleming wrote:
Kay Fleming wrote:
Lovely designs
15.02.2023 - 08:06
![]() Synnøve Jacobsen wrote:
Synnøve Jacobsen wrote:
Hei. Når jeg skriver ut oppskrifter fra nettsiden deres, får jeg ikke med diagrammene som skal være med. Hvorfor ikke? Det har vært sånn lenge og begynner å irritere meg. Vær så snill å fiks det. Mvh Synnøve J.
07.02.2020 - 14:08DROPS Design answered:
Hei Synnøve. Husk bare å klikke på "Skriv ut" ikonet på oppskriftssiden og ikke File-Print/eller hurtigtast Ctrl+P. Evnt må du ta en titt på dine innstillinger til skriveren din. Vi har ingen problemer med å skrive ut oppskriften. mvh DROPS design
10.02.2020 - 15:07
![]() Karin Brinch-Nielsen wrote:
Karin Brinch-Nielsen wrote:
Jeg er meget glad for svaret.\r\nMvh Karin Brinch-Nielsen
14.10.2019 - 14:55
![]() Karin Brinch-Nielsen wrote:
Karin Brinch-Nielsen wrote:
Jeg har et barnebarn, der er ekstremt følsomt overfor uldgarn. Jeg påtænker at strikke modellen “Selina”. Tror du det kan gå an ? Hvis nej, kunne du anbefale et andet garn, der kunne bruges til opskriften ?
13.10.2019 - 16:55DROPS Design answered:
Hej Karin, vi har et meget blødt garn som består af både bomuld og den blødeste merinould. DROPS Cotton Merino. Hvis hun slet ikke kan tåle uld, så har vi DROPS Cotton Light og DROPS Muskat som kan strikkes med samme strikkefasthed som der står i opskriften. God fornøjelse!
14.10.2019 - 08:31
![]() Barbara Rose wrote:
Barbara Rose wrote:
The diagram for Selina Tunic. On Diagram 3 can you tell me when I make the increases, what colour do I use to increase on. The diagram shows the increase stitch ok, but what colour do I use for the next stitch, regards Barbara
14.12.2017 - 14:49DROPS Design answered:
Dear Barbara, diagram M.3 is worked with the background colour, ie all sts and increases will be worked with the same colour. In diagram M.1 (yoke), work the YO's (= increases) in the background colour (= ex round 1 = red, round 2 = off white). Happy knitting!
14.12.2017 - 16:57
![]() Alexandra Gallo wrote:
Alexandra Gallo wrote:
Kann ich fäden gleich mit einweben oder lieber locker hinter der Arbeit mit führen
11.03.2016 - 17:09DROPS Design answered:
Liebe Alexandra, wir haben gestern gleich geantwortet, siehe dort.
12.03.2016 - 14:22
![]() Alexandra Gallo wrote:
Alexandra Gallo wrote:
Kann ich fäden gleich mit einweben oder lieber locker hinter der Arbeit mit führen
11.03.2016 - 13:58DROPS Design answered:
Liebe Alexandra, eine Faustregel ist, dass man die Fäden über bis zu Maschen ohne Verkreuzen mitführen kann, ab dieser Mschenzahl sollte man die Fäden verkreuzen.
11.03.2016 - 14:32
![]() Alexandra Gallo wrote:
Alexandra Gallo wrote:
Fange ich mit der Muster Einteilung in der hinteren Mitte an da wo der anfangsfaden ist
02.03.2016 - 15:26DROPS Design answered:
Ja, Sie beginnen in der markierten hinteren Mitte (=Rundenanfang).
02.03.2016 - 16:33
![]() Alexandra Gallo wrote:
Alexandra Gallo wrote:
Mache ich in der ersten Runde erst einen Umschlag und stricke dann 6 maschen usw und in der zweiten Reihe dann 7 maschen stricken und einen umschlag
24.02.2016 - 20:01DROPS Design answered:
Liebe Alexandra, ich vermute, Ihre Frage bezieht sich auf die ersten Reihen in einem der beiden kleineren Diagramme von M.1. Wenn dies so ist, ist es korrekt.
02.03.2016 - 14:03
|
||||||||||||||||
Selina#selinadress |
||||||||||||||||
 |
 |
|||||||||||||||
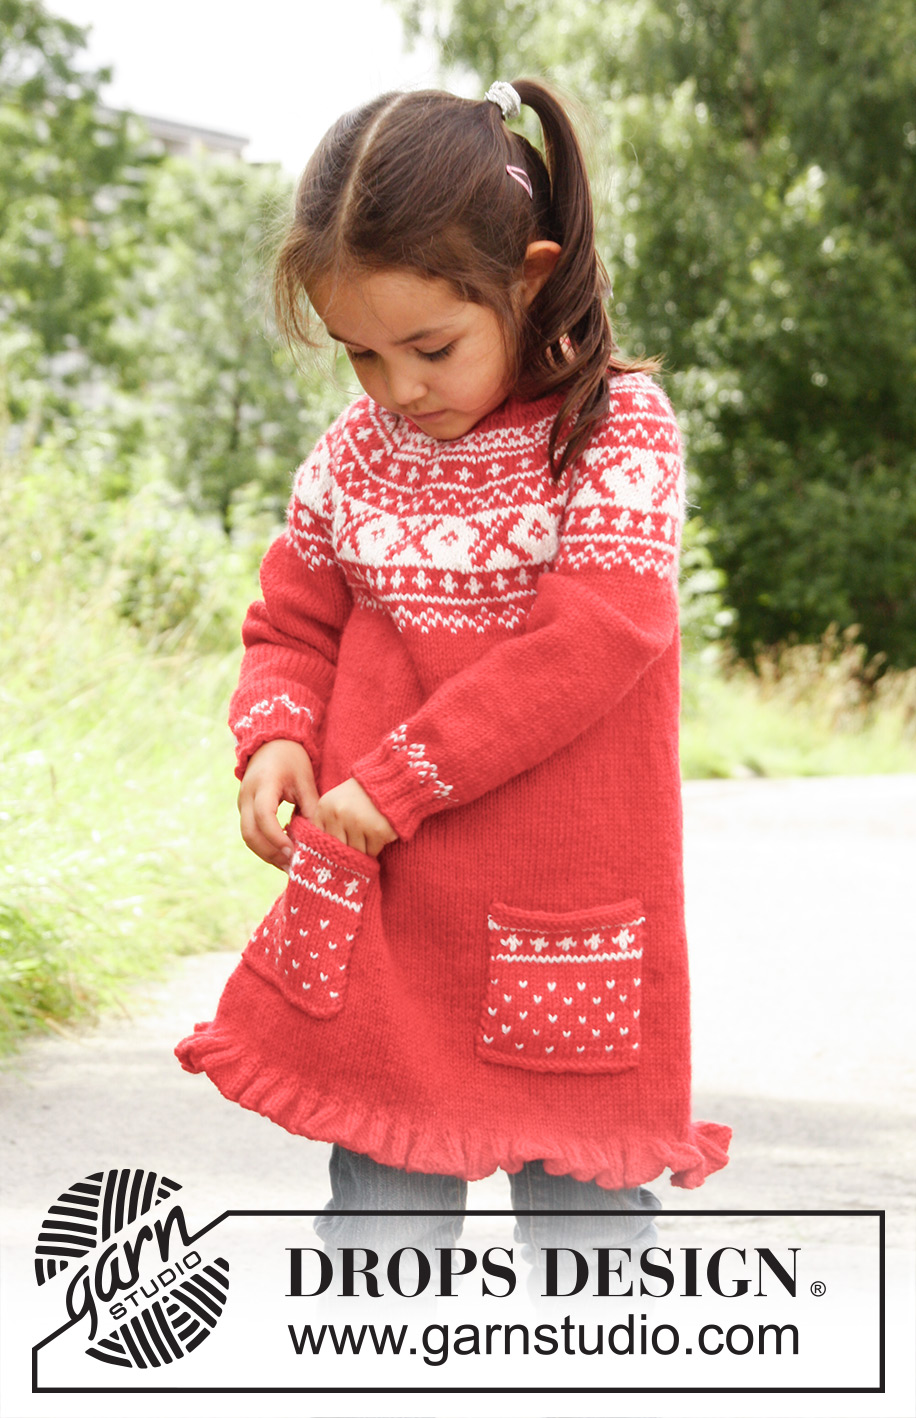
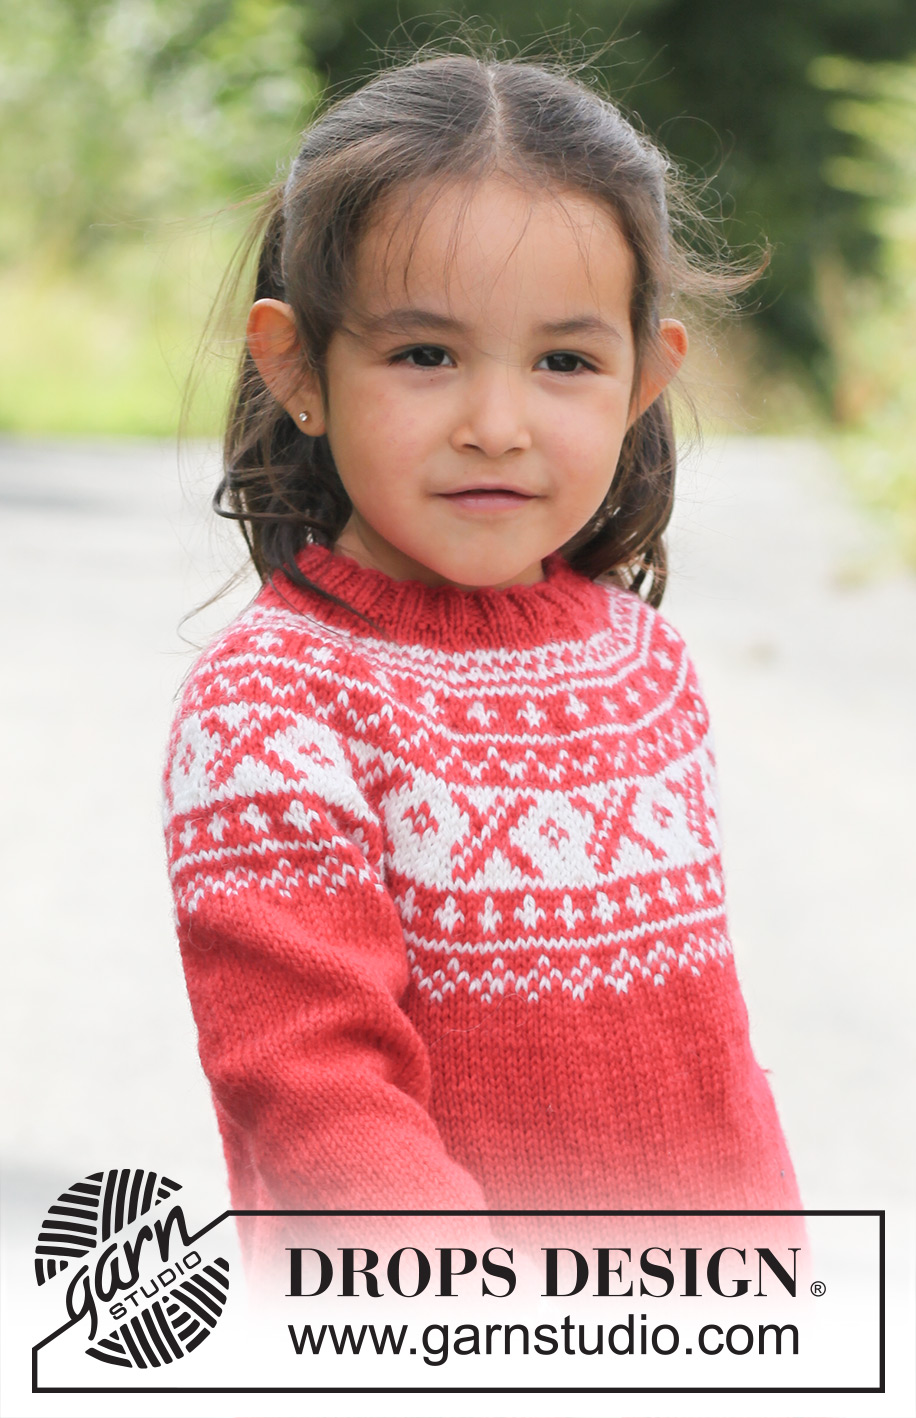
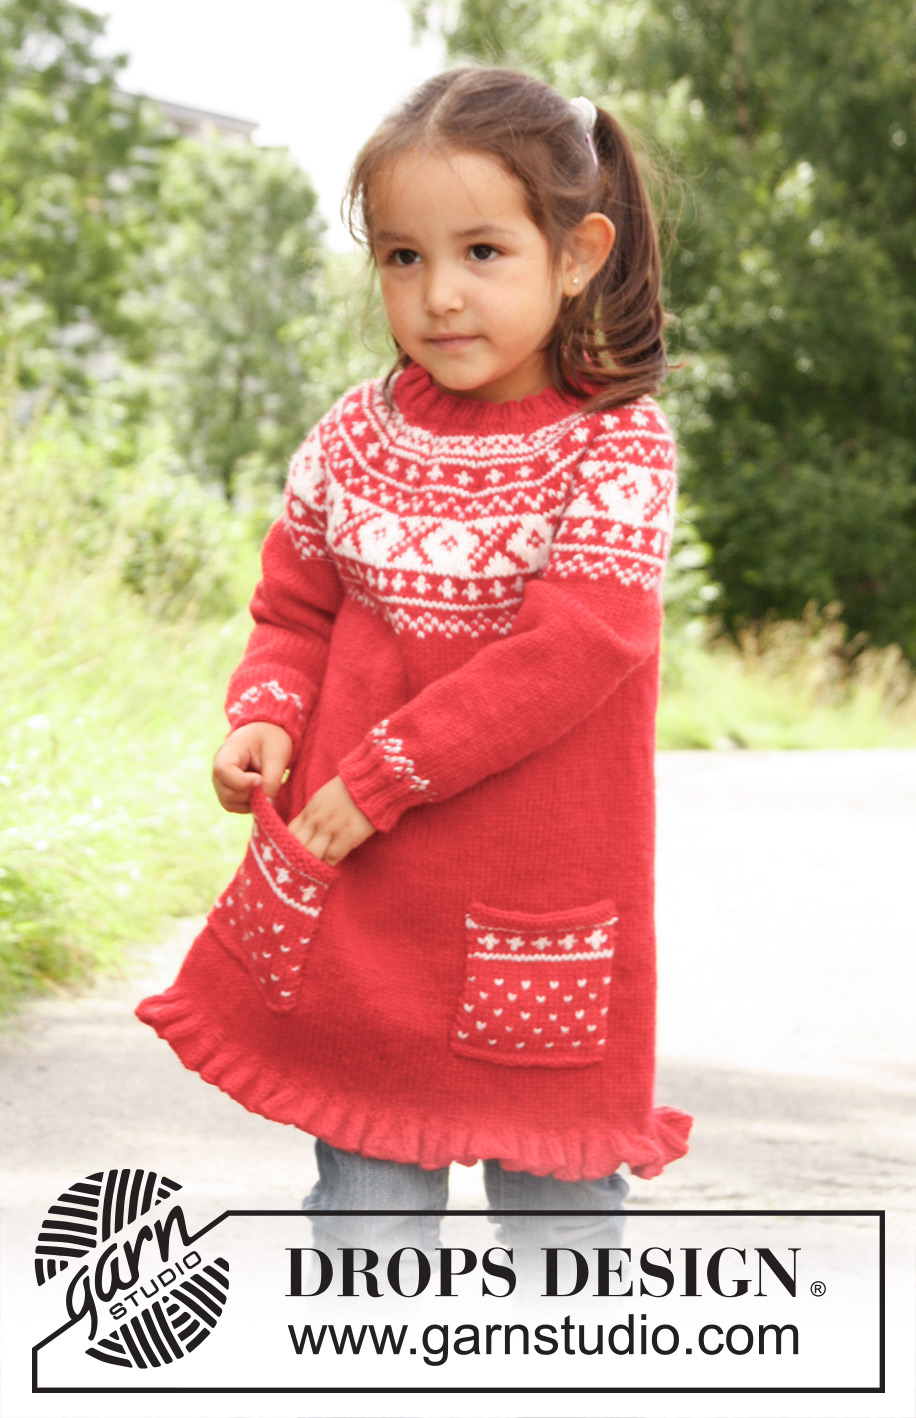
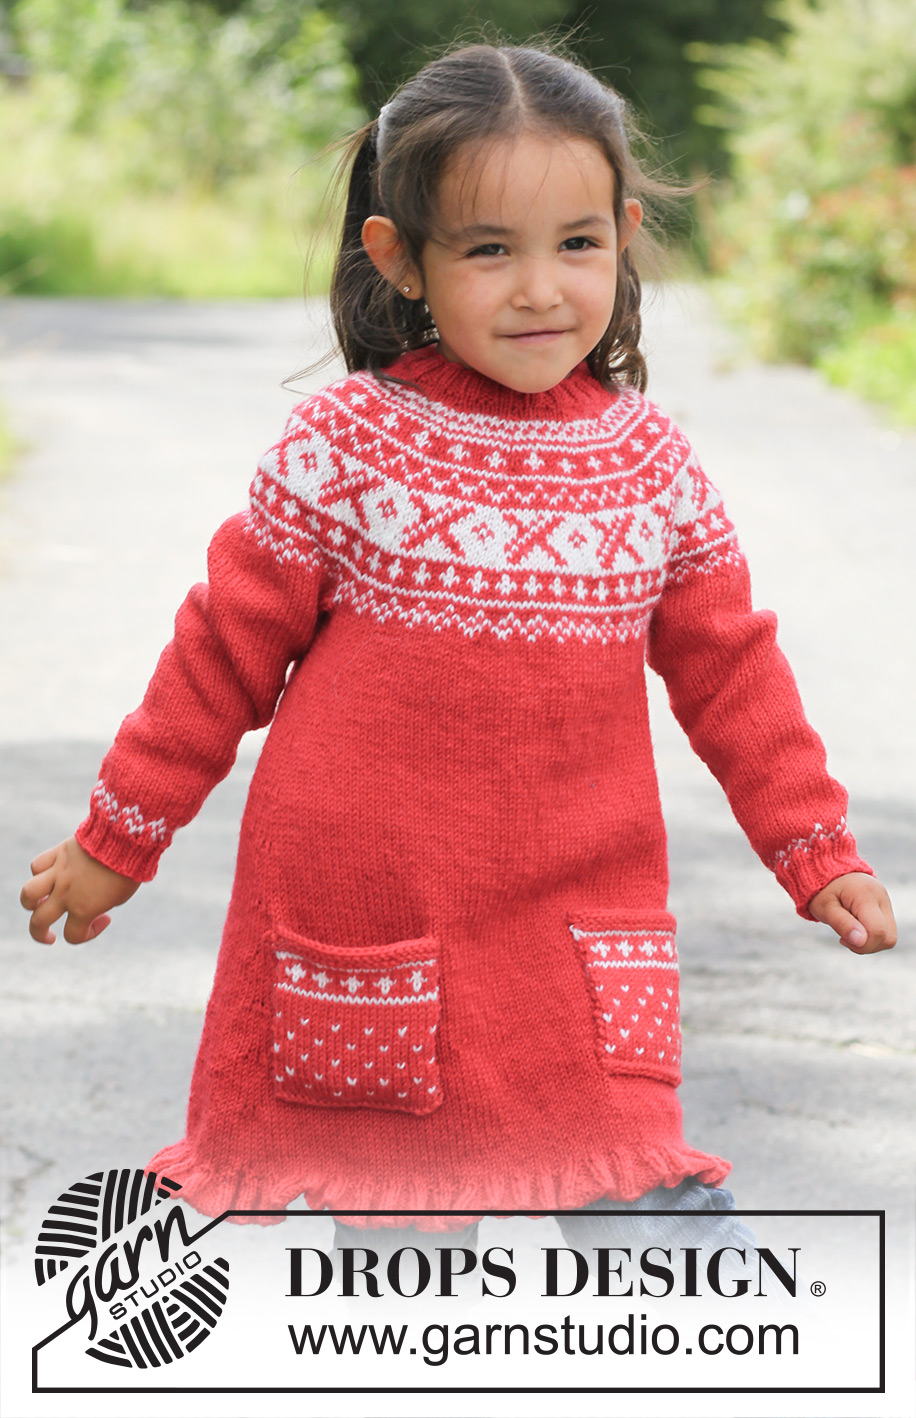
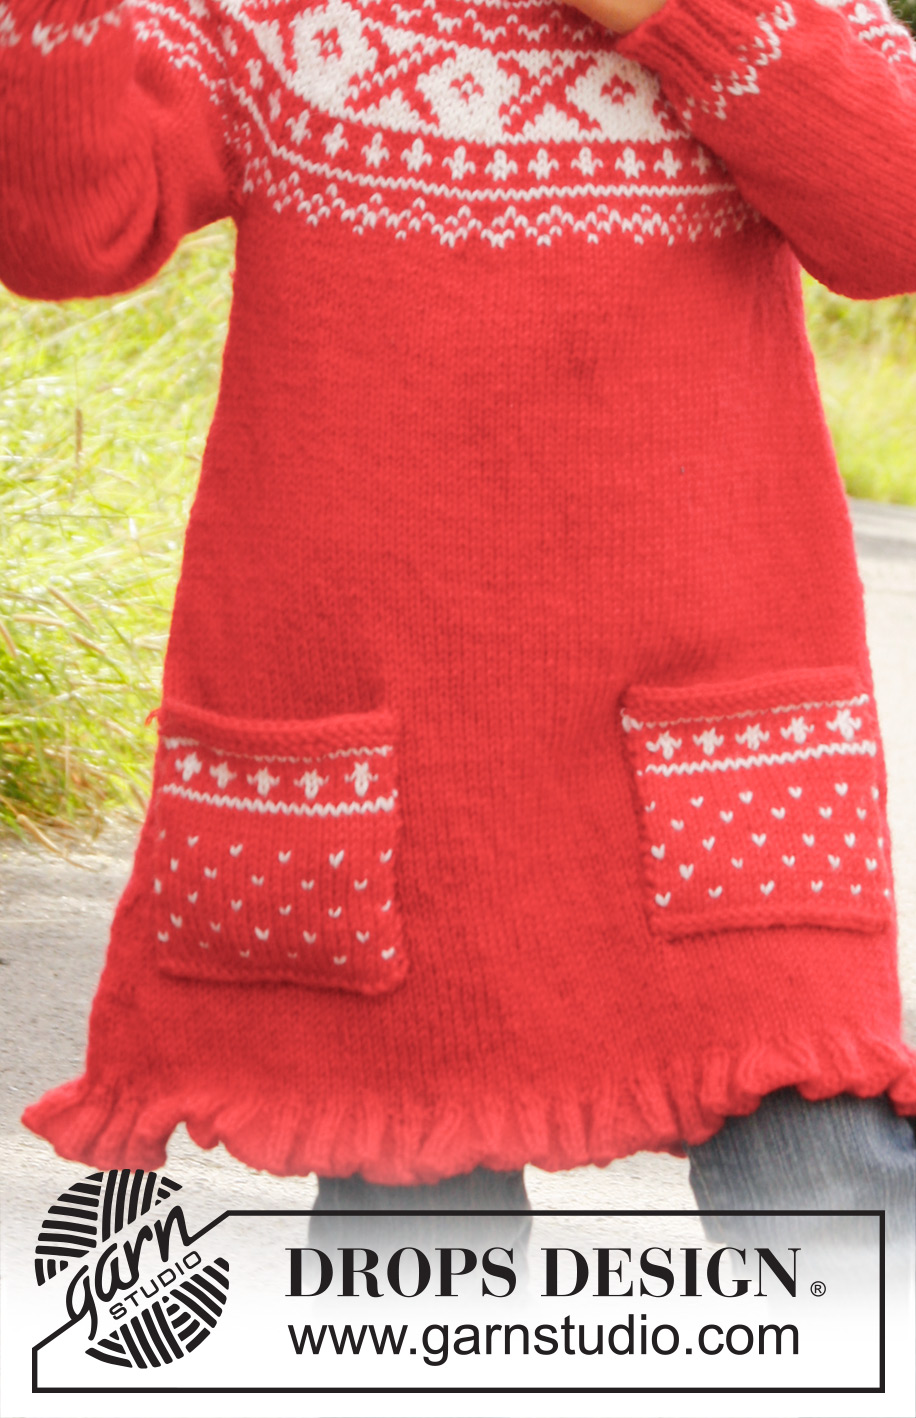
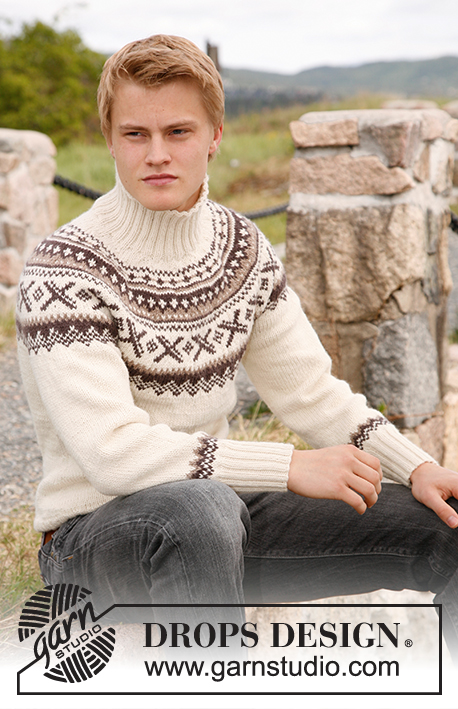
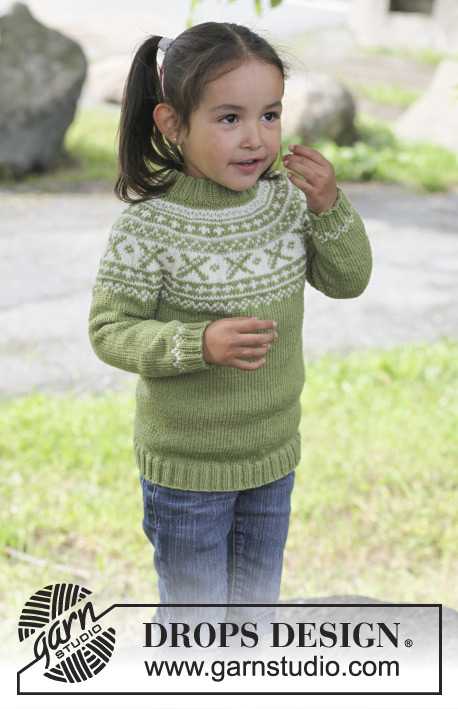
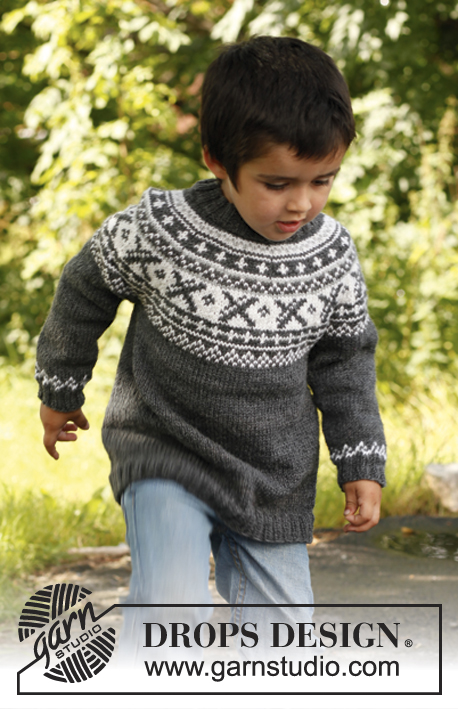
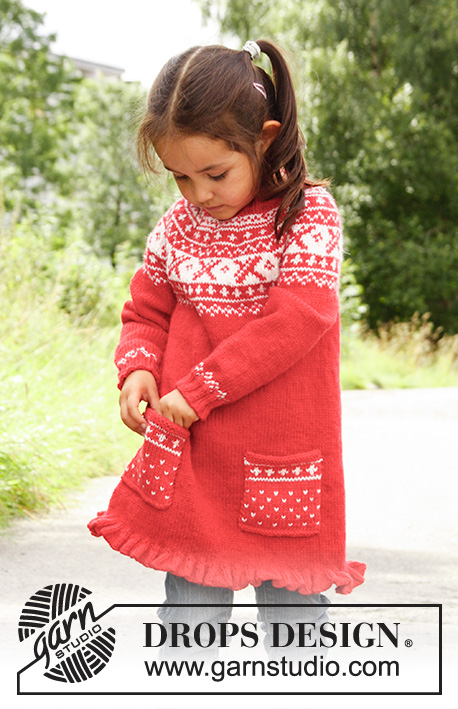
Knitted DROPS tunic worked top down in ”Karisma” with round yoke and Norwegian pattern. Size 3 - 12 years.
DROPS Children 22-20 |
||||||||||||||||
|
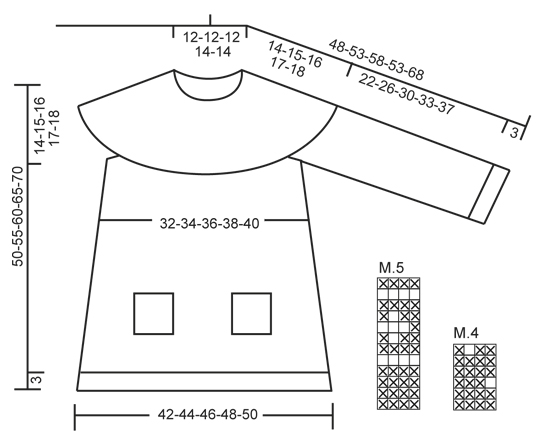
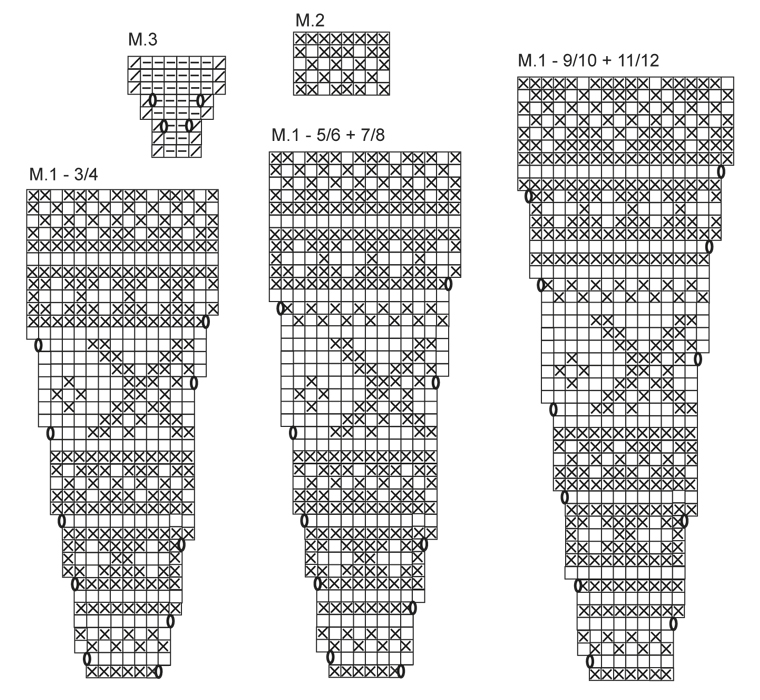
PATTERN: See diagram M.1 to M.5. Diagrams M.1, M.2, M.4 and M.5 are all worked in stocking st. -------------------------------------------------------- TUNIC: Worked in the round, top down. YOKE: Cast on 84-88-92-96-100 sts on a short circular needle size 3 mm with red, insert a marker at beg of round (= mid back). Work rib = K 2/P 2 for 2-2-3-3-3 cm (= neck). Switch to a short circular needle size 4 mm. K 1 round while at the same time adjusting no of sts to 78-84-90-98-105. Then work an elevation at the back as follows in stocking st: K 8 sts past marker, turn, tighten thread and P 16 sts on return, turn, tighten thread and K 24 sts, turn, continue by working 8 sts more on every turn until a total of 48-48-64-64-80 sts have been worked, turn and K 1 round until marker mid back again. Then work diagram M.1 – see diagram for correct size! Switch to a longer circular needle when there are enough sts. When diagram M.1 has been worked, there are 208-224-240-252-270 sts on needle, work 0-0-1-0-1 cm more with red. Piece now measures approx. 14-15-16-17-18 cm mid front (measured without rib in the neck). Work with red and in stocking st until finished measurements. First work 1 round while at the same time inc 4-4-4-12-10 sts evenly = 212-228-244-264-280 sts. Work next round as follows: Work 31-33-35-37-39 sts, slip the next 44-48-52-58-62 sts on a stitch holder for sleeve (without working them first), cast on 6 new sts (insert a marker in the middle of these sts = the side), work 62-66-70-74-78 sts (= front piece), slip the next 44-48-52-58-62 sts on a stitch holder for sleeve (without working them first), cast on 6 new sts (insert a marker in the middle of these sts = the side), work 31-33-35-37-39 sts. BODY: = 136-144-152-160-168 sts. NOW MEASURE PIECE FROM HERE! Continue in the round in stocking st. When piece measures 4 cm, inc 1 st on each side of both markers. Repeat inc every 3-3-3½-4-4 cm a total of 10 times = 176-184-192-200-208 sts. When piece measures 33-37-41-45-49 cm (from where sts were slipped on stitch holders for sleeve), switch to circular needle size 3 mm. Work 1 round while at the same time inc 36-36-36-40-40 sts evenly = 212-220-228-240-248 sts. Then work diagram M.3. When diagram M.3 has been worked, there are 424-440-456-480-496 sts on needle. Cast off with K over K and P over P. SLEEVE: Slip sts from one stitch holder on double pointed needles size 4 mm, cast in addition on 6 sts mid under sleeve (insert a marker in the middle of these sts) = 50-54-58-64-68 sts. NOW MEASURE PIECE FROM HERE! Work in stocking st in the round with red. When sleeve measures 2 cm, dec 1 st on each side of marker. Repeat dec every 4½-3½-4-3-3½ cm a total of 5-7-7-10-10 times = 40-40-44-44-48 sts. When sleeve measures 20-24-28-31-35 cm, work diagram M.2, then switch to double pointed needles size 3 mm. Work rib = K 2/P 2 for 3 cm, then cast off with K over K and P over P. Work the same way over the sts on the other stitch holder. POCKET: Worked back and forth on circular needle. Cast on 23-23-23-27-27 sts on needle size 4 mm with red. K 1 row from WS. Continue as follows: 1 st in garter st, diagram M.4 over the next 21-21-21-25-25 sts (work the last st as the first st in diagram) and 1 st in garter st. Work diagram M.4 until there are 5-5-6-6-6 lines of dots, then work diagram M.5 one time vertically over diagram M.4. Then K 4 rows (= 2 ridges) with red, then cast off. Knit another pocket. ASSEMBLY: Sew the openings under the sleeves. Place the pockets on front piece, approx. 8-8-9-9-10 cm from bottom edge and approx. 10-11-12-14-15 cm apart (cast off edge = up). Fasten pockets with neat little stitches in sts in garter st. |
||||||||||||||||
Diagram explanations |
||||||||||||||||
|
||||||||||||||||
|
||||||||||||||||
|
||||||||||||||||
Have you finished this pattern?Tag your pictures with #dropspattern #selinadress or submit them to the #dropsfan gallery. Do you need help with this pattern?You'll find 15 tutorial videos, a Comments/Questions area and more by visiting the pattern on garnstudio.com. © 1982-2025 DROPS Design A/S. We reserve all rights. This document, including all its sub-sections, has copyrights. Read more about what you can do with our patterns at the bottom of each pattern on our site. |
||||||||||||||||


With over 40 years in knitting and crochet design, DROPS Design offers one of the most extensive collections of free patterns on the internet - translated to 17 languages. As of today we count 314 catalogues and 11821 patterns translated into English (UK/cm).
We work hard to bring you the best knitting and crochet have to offer, inspiration and advice as well as great quality yarns at incredible prices! Would you like to use our patterns for other than personal use? You can read what you are allowed to do in the Copyright text at the bottom of all our patterns. Happy crafting!
Post a comment to pattern DROPS Children 22-20
We would love to hear what you have to say about this pattern!
If you want to leave a question, please make sure you select the correct category in the form below, to speed up the answering process. Required fields are marked *.