
Categorías populares
¿Buscas un hilo?


Escribe un comentario sobre DROPS 239-28
¡Nos encantaría saber qué piensas acerca de este patrón!
Si quieres escribir una pregunta referente al patrón, por favor asegúrate de elegir la categoría correcta en el formulario debajo, para acelerar el proceso de respuesta. Los campos obligatorios están marcados con un *.
|
||||||||||||||||||||||||||||
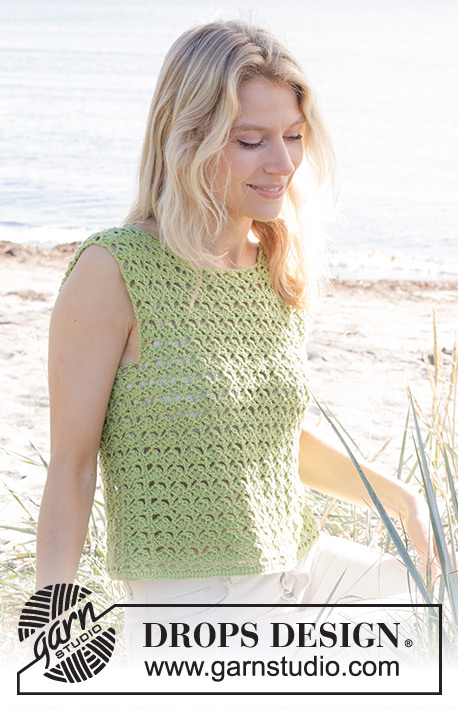
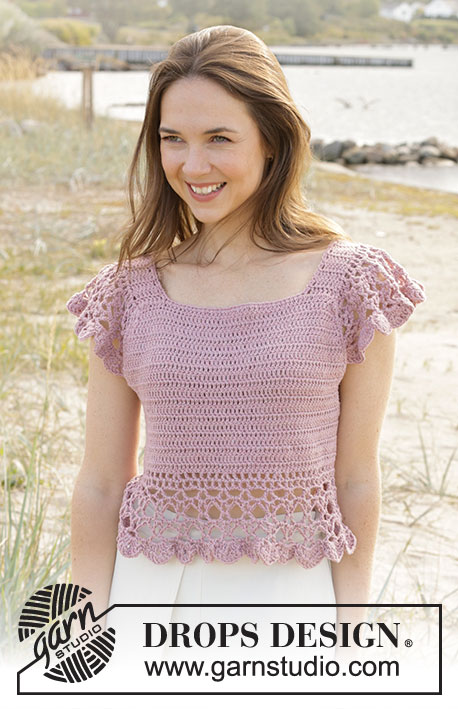
Charming Clover Top |
||||||||||||||||||||||||||||
 |
 |
|||||||||||||||||||||||||||
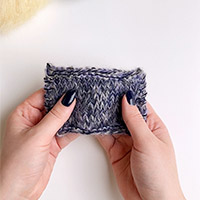
Top a ganchillo en DROPS Cotton Light. La pieza está elaborada con patrón de calados y tirantes. Tallas XS – XXL.
DROPS 239-28 |
||||||||||||||||||||||||||||
|
EXPLICACIONES PARA REALIZAR EL PATRÓN: ------------------------------------------------ INFORMACIÓN PARA TRABAJAR A GANCHILLO: PUNTO DE CADENA: Si se trabaja en la punta de la aguja de ganchillo, el punto de cadena quedará demasiado apretado; 1 punto de cadena debe ser tan largo como el ancho de 1 punto bajo/punto alto. PUNTOS ALTOS: Al principio de cada hilera de puntos altos trabajar 3 puntos de cadena, estos puntos de cadena sustituyen al primer punto alto, es decir, saltar el primer punto de la hilera anterior. PUNTOS BAJOS: Al principio de cada hilera de puntos bajos trabajar 1 punto de cadena, este punto de cadena sustituye al primer punto bajo, es decir, saltar el primer punto de la hilera anterior. PATRÓN: Ver diagramas A.1 a A.10. TIP PARA TRABAJAR A GANCHILLO: Si se desea que el top cubra ligeramente más al frente, se pueden trabajar las copas juntas con un pequeño traslape en el centro. Posicionar las copas con traslape y trabajar puntos bajos debajo, ajustando el número de puntos a cuánto traslape se tiene. ------------------------------------------------ COMENZAR LA PIEZA AQUÍ: ------------------------------------------------ TOP – RESUMEN DE LA PIEZA: Las copas se trabajan separadamente, de ida y vuelta, después se unen. El cuerpo se trabaja de ida y vuelta y las copas se cosen o se fijan al cuerpo a ganchillo. Trabajar 1 tirante para cada copa y un tirante para atar el top al centro de la espalda. COPAS: Trabajar 14-15-16-20-21-22 puntos de cadena con aguja de ganchillo tamaño 3.5 mm y DROPS Cotton Light. Leer INFORMACIÓN PARA TRABAJAR A GANCHILLO arriba. Trabajar 1 punto alto en el 4º punto de cadena a partir de la aguja de ganchillo, después 1 punto alto en cada uno de los 9-10-11-15-16-17 puntos de cadena siguientes (1 punto de cadena restante), trabajar el diagrama A.1 en este último punto de cadena (parte de arriba de la copa). Virar y trabajar debajo de la hilera de puntos de cadena, con 1 punto alto en la parte de abajo de cada uno de los 11-12-13-17-18-19 puntos altos trabajados a lo largo del otro lado de la hilera de puntos de cadena (el último punto alto se trabaja en la parte de abajo de los 3 puntos de cadena que sustituyeron al primer punto alto). Hay 26-28-30-38-40-42 puntos altos y 1 punto de cadena en la hilera. Virar. Trabajar de ida y vuelta con 1 punto alto en cada punto, pero alrededor del punto de cadena en el centro de A.1 trabajar el diagrama A.1 (4 puntos altos aumentados en la hilera). ¡RECORDAR MANTENER LA MISMA TENSIÓN DE LA MUESTRA! Trabajar así hasta tener 5-6-7-8-9-10 hileras de puntos altos. Hay 42-48-54-66-72-78 puntos altos y 1 punto de cadena en la hilera. Trabajar de acuerdo a los diagramas A.2 y A.6 de la manera siguiente: HILERA 1: Trabajar A.2 sobre 3 puntos, A.3 hasta el punto de cadena central en A.1 (6-7-8-10-11-12 veces), trabajar A.4 en el punto de cadena, A.5 hasta que resten 3 puntos (6-7-8-10-11-12 veces) (el patrón es simétrico a cada lado de A.4), trabajar A.6 sobre 3 puntos. Virar. HILERA 2: Trabajar A.6 sobre A.6, A.5 entre cada grupo de puntos altos hasta el primer punto de cadena en A.4 (5-6-7-9-10-11 veces), trabajar A.5 alrededor del primer punto de cadena en A.4, A.4 alrededor del punto de cadena central en A.4, A.3 alrededor del último punto de cadena en A.4, A.3 entre cada grupo de puntos altos (5-6-7-9-10-11 veces), A.2 sobre A.2. Terminar la hilera con 1 punto bajísimo en el 3er punto de cadena de la 1ª hilera = 52-58-64-76-82-85 puntos. Cortar y asegurar el hilo. Trabajar 1 copa más de la misma manera. ENSAMBLANDO LAS COPAS: Leer TIP PARA TRABAJAR A GANCHILLO arriba. Usar aguja de ganchillo tamaño 3.5 mm y DROPS Cotton Light. Trabajar aprox. 29-32-36-39-43-47 puntos bajos a lo largo de la parte de abajo de la primera copa, después aprox. 29-32-36-39-43-47 puntos bajos a lo largo de la parte de abajo de la segunda copa. Cortar y asegurar el hilo. CUERPO: Trabajar 123-136-145-168-190-213 puntos de cadena con aguja de ganchillo tamaño 3.5 mm y DROPS Cotton Light. Leer INFORMACIÓN PARA TRABAJAR A GANCHILLO arriba. Virar. Comenzar en el 2º punto de cadena a partir de la aguja de ganchillo y trabajar los diagramas A.7 a A.10 de la manera siguiente: HILERA 1 (lado revés): Trabajar A.7, después alternadamente A.8 y A.9 hasta que resten 1-5-5-1-5-1 puntos de cadena, trabajar A.9 0-1-1-0-1-0 veces y A.10. Hay 109-121-129-149-169-189 puntos bajos. HILERA 2 (lado derecho): Trabajar A.10, A.9 hasta que resten 4 puntos y terminar con A.7. HILERA 3 (lado revés): Trabajar A.7, A.9 hasta que resten 3 puntos y terminar con A.10. Repetir las hileras 2 y 3 hasta que la pieza mida 16-17-18-16-17-17 cm o hasta obtener el largo deseado. Cortar y asegurar el hilo. ENSAMBLAJE: Posicionar las copas en el centro del cuerpo, colocarlas a lo largo de los puntos de cadena del principio del cuerpo y coserlas o fijarlas a ganchillo al cuerpo. Coser en el bucle externo del punto más externo o trabajar puntos bajísimos de manera que la costura quede plana y prolija. TIRANTES: Usar aguja de ganchillo tamaño 3.5 mm y 2 hilos DROPS Cotton Light. Trabajar puntos de cadena hasta obtener 110-115 cm de largo o el largo deseado. Trabajar 3 tirantes, uno para cada copa y uno para cerrar el cuerpo en la espalda. Doblar un tirante al centro, insertar el bucle obtenido a través de la parte de arriba de una copa, pasar las puntas a través del bucle y apretar. Fijar el otro tirante de la misma manera en la otra copa. Doblar el cuerpo, con los lados cortos enfrentados. Pasar el extremo del último tirante a través de cada lado en la parte de arriba, después cruzar de ida y vuelta, pasando a través de los lados alternadamente, con las puntas saliendo en la parte de abajo del cuerpo. Atar las puntas juntas. |
||||||||||||||||||||||||||||
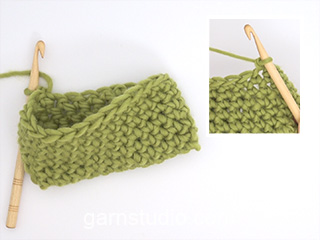
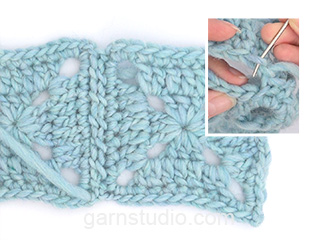
Explicaciones del diagrama |
||||||||||||||||||||||||||||
|
||||||||||||||||||||||||||||

|
||||||||||||||||||||||||||||

|
||||||||||||||||||||||||||||
|
¿Has realizado este u otro de nuestros modelos? ¡Etiqueta tus fotografías en las redes sociales con #dropsdesign para que podamos verlos! ¿Necesitas ayuda con este patrón?Encontrarás videos tutoriales, un espacio para comentarios/preguntas y más visitando la página del patrón en garnstudio.com © 1982-2024 DROPS Design A/S. Todos los derechos reservados. Este documento, incluyendo todas sus sub-secciones, está protegido por los derechos de autor (copyright). Lee más acerca de lo que puedes hacer con nuestros patrones en la parte de abajo de cada patrón de nuestro sitio. |
||||||||||||||||||||||||||||


Con más de 40 años en el diseño de modelos de punto y de ganchillo, DROPS Design ofrece una de las más vastas colecciones de patrones gratuitos en el internet - traducidos en 17 idiomas. Al día de hoy, contamos con 304 catálogos y 11422 patrones - de los cuales 10437 están traducidos en español.
Nosotros trabajamos con mucho esmero para brindarte lo mejor que las labores de punto y ganchillo tienen para ofrecer,inspiración y consejos, así como hilos de magnífica calidad a precios increíbles! Te gustaría usar nuestros patrones para otro fin además del uso personal? Puedes leer acerca de lo que estás permitida a hacer en el texto de Copyright en la parte de abajo de todos nuestros patrones. Felices labores!
Comentarios / Preguntas (24)
I have started on the BODY section. I have completed ROW 1 with the correct number of stitches. I completed Row 2 and 3. My problem is now when I repeat ROW 2 again, the 3 trebles do not line up with the ones in the previous ROW 2 and when I am almost at the end of the row and I count the stitches I have too many stitches. PLease can you explain how this works with the pattern as written? It seems that having the 3 trebles at either end of the row will add to the stitches each time. Thanks
30.05.2023 - 09:38DROPS Design answered:
Dear Mrs Buckley, starting from WS you will first crochet A.7 and then alternately A.8 and A.9, end with A.9 (in some sizes only), then end with A.10 = there are 109-121-129-149-169-189 double crochets. Now work 2nd row from RS (read diagram from left towards right): A.10, then repeat A.9 and end with A.7. Now work 3rd row from WS (read diagram from right towards left): A.7, repeat A.9 and end with A.10. When repeating 2nd and 3rd row the same way, the treble crochets should be worked lined up with those from first 2nd row. Happy crocheting!
30.05.2023 - 11:37In the body, Row 1 states there should be 109 double crochets.. It does not mention the number of double on rows 2 3 and 4. Do I take it that there should be 109 double filor the whole pattern to end. I seems to be adding more stitches somehow and the back us getting wider. I have tried a few times but it increases in width.
28.05.2023 - 23:06DROPS Design answered:
Dear Alexandra, there is no increase at this point; the number of stitches is not supposed to change, this means you should have 109 double crochets on 3rd row (when diagrams are done one time in height); adding a marker/marker thread between each repeat can help you checking/tracking the number of stitches as you go. Happy crocheting!
30.05.2023 - 10:59Thank you. I get that and it will work but am still confused why row 1 (WS) is worked right to left and row 2 R to L In this case is it just telling you this is the wrong side and right side of the work. As your instruction shows red arrow going right to left for RS and blue arrow for Left to right for WS. Hope you understand what I am saying.
23.05.2023 - 04:12DROPS Design answered:
Dear Alexandra, in crochet charts, we start reading the first row from right to left, regardless of the side you are working on, unless otherwise stated. Usually, we can follow the way of reading explained in the lesson, because the first row worked is from the RS. However, in this case, we start with a row from the WS, which would be an exception to the case in the lesson. Therefore, the first row will be read from right to left and the second row from left to right, regardless of the actual side of the garment. Happy crocheting!
28.05.2023 - 18:08Sorry I meant to say i am referring to the Body part of the pattern. Also when you are working the symbol on a left to right row is the symbol read left to right,? Hope that makes sense to you.
21.05.2023 - 22:35DROPS Design answered:
Dear Alexandra, start A.7 (from WS) with 1 chain and start A.10 (from RS) with 3 chains, 2 treble crochets in the same double crochet. Happy crocheting!
22.05.2023 - 13:08Thank you.which direction is row 1 2 and 3 worked. It says in pattern row 1 is wrong side and in yr instructions it says the wrong side is always worked left to right. But it doesnt seem the case here. Please confirm directions of these rows.
21.05.2023 - 22:31DROPS Design answered:
Dear Alexandra, you are right, read diagrams from the right towards the left there, ie row 1 (from WS) reading A.7, A.8, A.9 and A.10 from the right towards the left and read row 2 (from RS) reading diagrams A.10, A.9 and A.7 from the left towards the right. Read row 3 (from WS) as for row 1, ie read A.7, A.9 and A.10 from WS. Repeat row 2 and 3. Happy crocheting!
22.05.2023 - 13:07Could you please explain rows 2 and 3. In row 2 is A10 and A9 worked alternately across the row or us it just A9. Or A10 on the first stitch only. Row 3 do we work A7 and A9 alternately across the row or A 7 on first stitch only. Please explain Row 1 also I am very co fused with it
20.05.2023 - 02:46DROPS Design answered:
Dear Alexandea, in row 1: work A.7 once. Then, alternate between A.8 and A.9 until 1 or 5 chain stitches are left, depending on your size. If your size has only 1 chain stitch left, don't work A.9 and work only A.10 to finish. If your size has 5 stitches left, work A.9 once and then A.10 once to finish. In row 2: work A.10 once, then repeat A.9 and finish with A.7 once. In row 3: work A.7 once, then repeat A.9 and finish with A.10 once. Happy crocheting!
21.05.2023 - 19:51Het patroon voor het lijf klopt niet. Telpatronen A.7 en A.10 zouden maar 2 stokjes mogen bevatten in plaats van 3. Anders wordt het werk elke keer 2 steken breder
05.05.2023 - 18:53The finished measurements are wrong. "Chest measurements: 122-134-144-166-188-210 cm" - can't possibly be chest size 210 cm, I think they were doubled by mistake
15.04.2023 - 08:04DROPS Design answered:
Dear Mrs Galbin-Pristavu, you are right, whole circumference is shown in the chart and are 61-67-72-83-94-105 cm (under chest). US-pattern will be edited, thanks for noticing. Happy crocheting!
17.04.2023 - 08:51Hot kola
21.01.2023 - 22:48Coffee break
21.01.2023 - 11:01