
Categorías populares
¿Buscas un hilo?


Comentarios / Preguntas (11)
![]() Marja Stravers escribió:
Marja Stravers escribió:
Ik wil de sjaal graag maken, maar met een andere kleur Fabel dan op het patroon. Nu heb ik Fabel print gekozen maar die blijkt met pen 3 te worden gebreid. Een heel verschil. Is de print een dunnere kwaliteit dan de Fabel van het patroon?
02.12.2023 - 17:12DROPS Design respondió:
Dag Marja,
De pendikte kan in het patroon soms afwijken van de aanbevolen pendikte die bij het garen staat, om bijvoorbeeld een bepaald effect te creëren (bijvoorbeeld opener of dichter breiwerk). De pendikte in het patroon is leidend, maar wat vooral belangrijk is , is dat de aangegeven stekenverhouding in het patroon overeen moet komen. Maak dus altijd een proeflapje en pas eventueel de pendikte aan zodat het proeflapje overeen komt zoals aangegeven in het patroon.
02.12.2023 - 17:39
![]() Alma escribió:
Alma escribió:
Tip... Because there won't be holes on the side of the scarf where the decreases are made, and you want it to be even. Knit 2 sts together, a yarn over, 2 sts together. The cover compensates for the extra reduction that occurs.
14.10.2023 - 10:05
![]() Alma escribió:
Alma escribió:
Tips... Eftersom det inte blir hål på den sidan av skarfen som minskningarna sker, och du vill ha det lika. Sticka 2 m ihop, ett omslag, 2 m ihop. Omslaget kompenserar den extra minskning som blir. Så gjorde jag och båda sidorna blev lika
12.10.2023 - 06:03
![]() Cristina escribió:
Cristina escribió:
Salve, per favore vorrei sapere se i “buchi “ si devono formare solo durante gli aumenti. In caso contrario come si ottengono durante le diminuzioni? Grazie
17.02.2023 - 15:15DROPS Design respondió:
Buonasera Cristina, i buchini si formeranno solo con gli aumenti. Buon lavoro!
20.02.2023 - 18:54
![]() Cristina escribió:
Cristina escribió:
Salve, per favore vorrei sapere se i “buchi “ si devono formare solo durante gli aumenti. In caso contrario come si ottengono durante le diminuzioni? Grazie
17.02.2023 - 15:12DROPS Design respondió:
Buonasera Cristina, i buchini si formeranno solo con gli aumenti. Buon lavoro!
20.02.2023 - 18:54
![]() Sharon Hunt escribió:
Sharon Hunt escribió:
Hi, a quick question. Are the decreases down on the same side as the increases? I suspect it is but I want to make sure. When I did the increases I ended on the wrong side row after knitting the yarn over. I had to knit one row to start counting the beginning of the 4 rows to start the decreases. Hence the question. The pattern says that this Shawl measured 30 cm in the middle I don’t quite understand is the middle where the decreases started? S
17.02.2023 - 07:00DROPS Design respondió:
Dear Mrs Hunt, yes the decreases should be worked on the same side, ie you increased at the beginning of every 4th row (increase on first/next row from RS, work 3 rows) and repeat from (to); then you decrease at the beg of every 4th row (decrease on first/next row from RS, work 3 rows). The middle of the shawl is the middle of the total width/wingspann, where the tip is, now you work the other way, decreasing instead of increasing. Happy knitting!
17.02.2023 - 11:58
![]() Sharon Hunt escribió:
Sharon Hunt escribió:
Hei! When do you start to count 4 rows for the next increase. Does one start counting after completing the 2 row increase? Am not sure. but I would knit 4 rows. Work these to rows: INCREASE TIP: All increases are worked from the right side! At the beginning of the row: Knit 1, make 1 yarn over. On the next row knit the yarn over (leaves a hole). After which I would start counting 4 rows and then work the increase rows. Is this correct?
11.02.2023 - 23:43DROPS Design respondió:
Dear Sharon, you increase every 4th row, only the yarn over counts as an increase; when you knit the yarn over from the previous row, that row is already the first of the 4 rows before the next increase. So, work the increase row, knit the yarn overs in the next row, knit 2 more rows and then work the increase row again. Happy knitting!
13.02.2023 - 00:36
![]() Christina escribió:
Christina escribió:
Kommer det saknas hål på sidan vi minskar på Ökning sker ju med omslag =lika med hål
11.10.2022 - 16:01DROPS Design respondió:
Hei Christina. Det skal bare være hull på den ene siden. mvh DROPS Design
17.10.2022 - 10:30
![]() Anna escribió:
Anna escribió:
Caleidoscope
07.08.2022 - 18:43
![]() Janine escribió:
Janine escribió:
Fun in Fall
06.08.2022 - 09:57
|
|
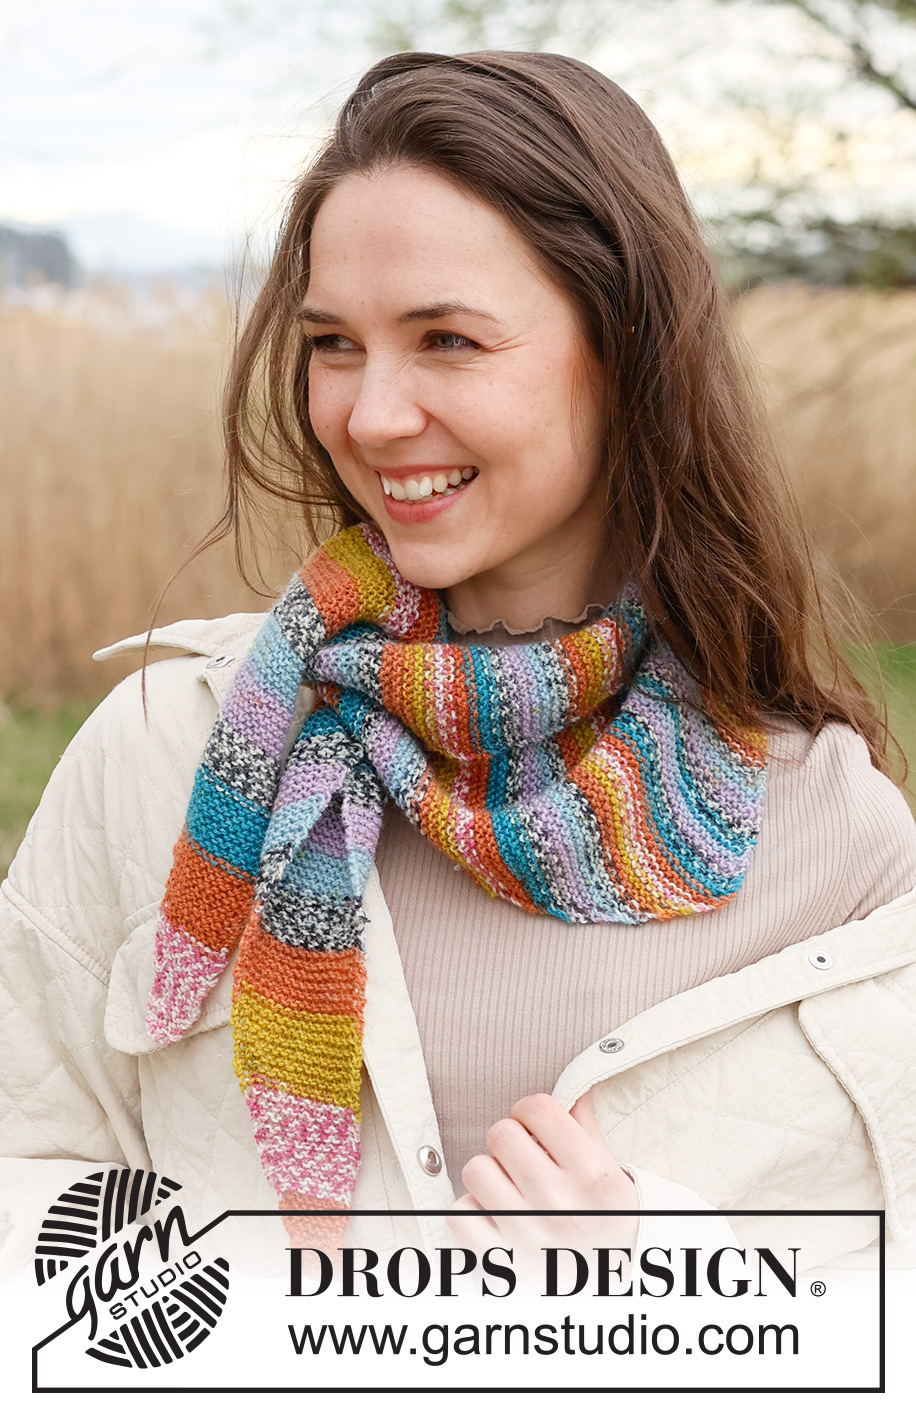
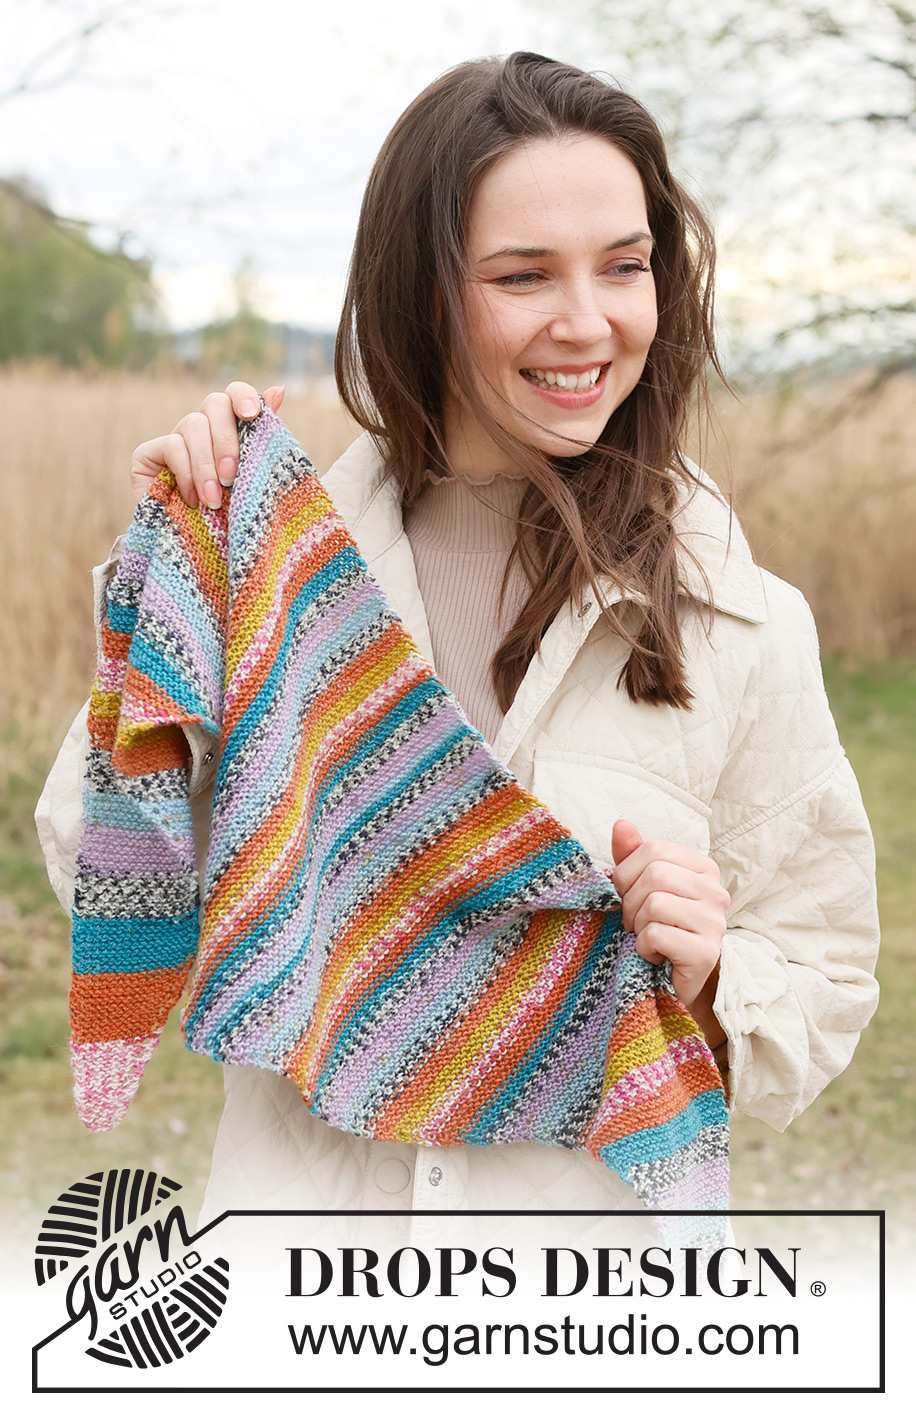
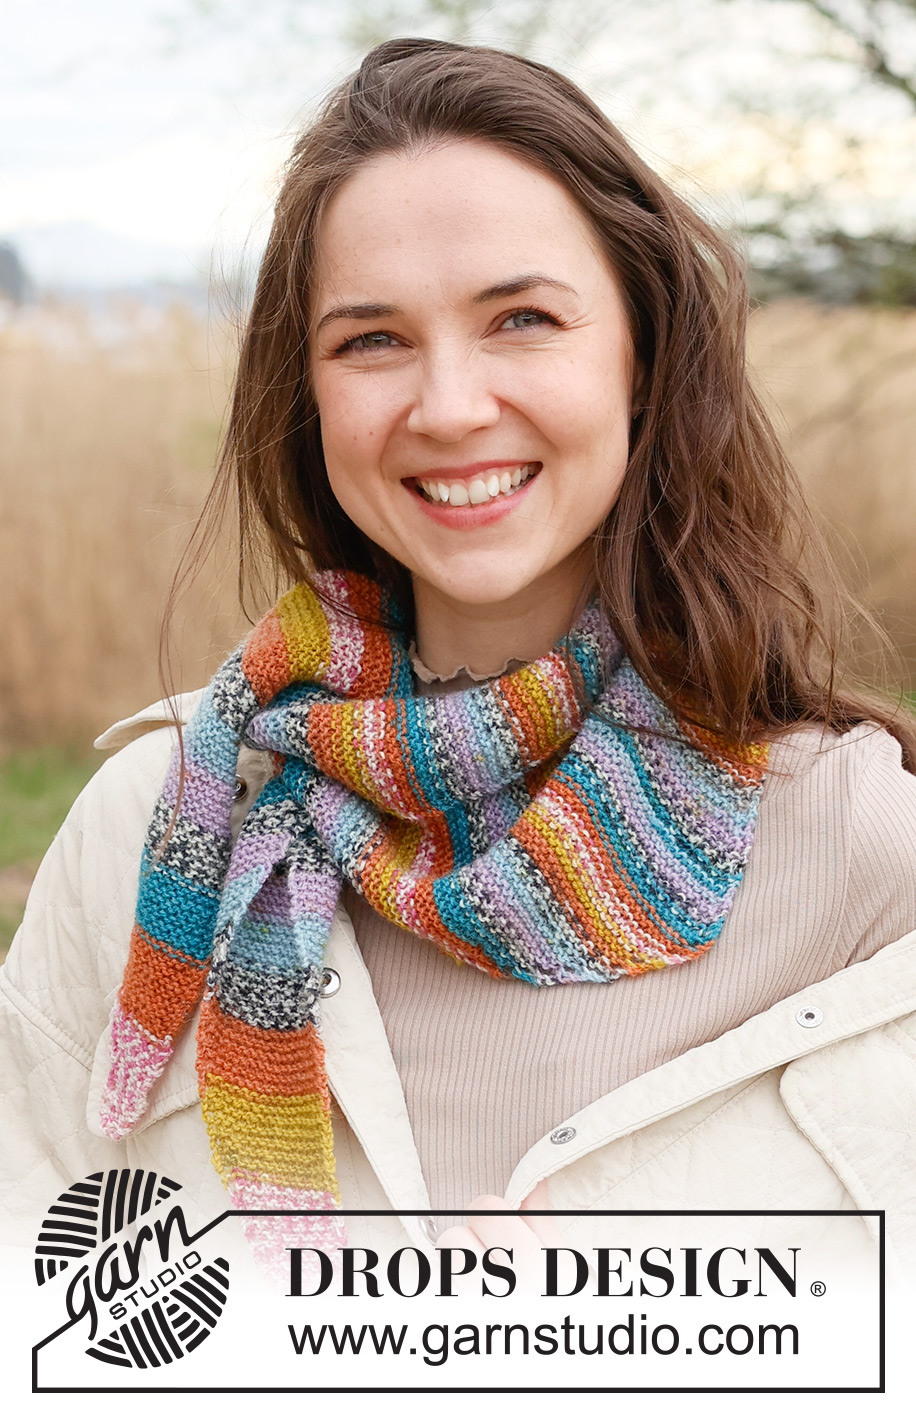
Autumn Fair Wrap#autumnfairwrapshawl |
|
 |
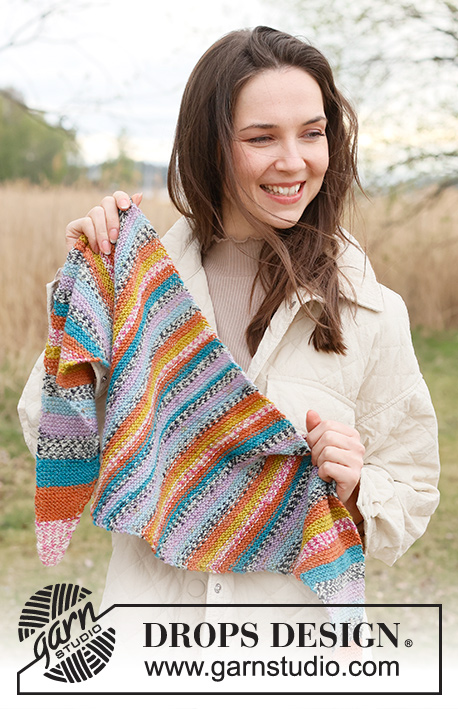 |
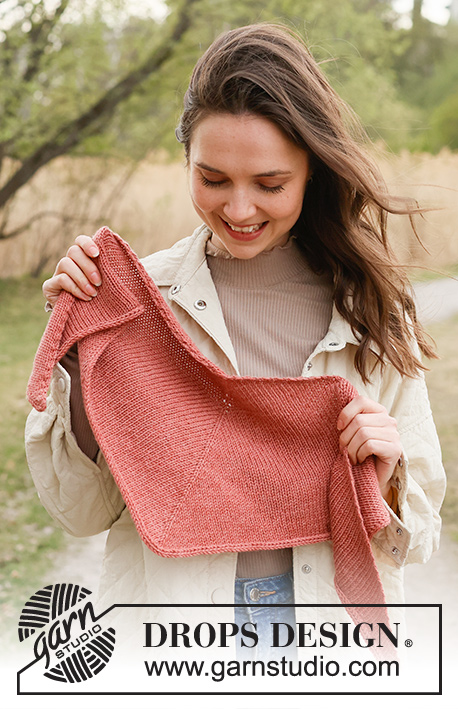
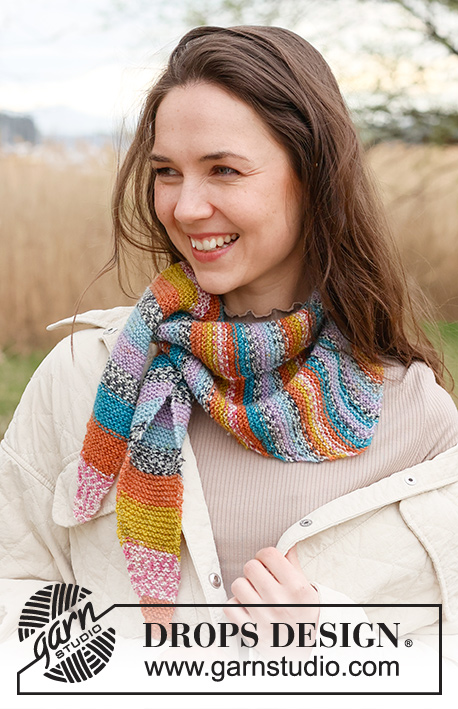
Chal a punto en DROPS Fabel. La labor está realizada desde el lado con punto musgo.
DROPS 234-48 |
|
|
EXPLICACIONES PARA REALIZAR LA LABOR: ------------------------------------------------------- PLIEGUE/ PUNTO MUSGO (de ida y vuelta): Trabajar todas las filas de derecho. 1 pliegue = 2 filas de derecho TIP PARA LOS AUMENTOS: Todos los aumentos se trabajan por el lado derecho! Al inicio de la fila: 1 derecho, hacer 1 hebra. En la siguiente fila trabajar la hebra de derecho (queda un agujero). TIP PARA LAS DISMINUCIONES: Todas las disminuciones se trabajan por el lado derecho! Al inicio de la fila: 1 derecho, trabajar 2 puntos juntos de derecho. ------------------------------------------------------- COMENZAR LA LABOR AQUÍ: ------------------------------------------------------- CHAL - RESUMEN DE LA LABOR: El chal se trabaja desde el lado en punto musgo, de ida y vuelta en la aguja. Comenzar en una esquina, trabajar y aumentar hasta el centro del chal, después disminuir hasta la otra esquina. CHAL: Montar 5 puntos con agujas de 4 mm y DROPS Fabel. Trabajar en PUNTO MUSGO - leer las explicaciones arriba - al mismo tiempo aumentar 1 punto al inicio de cada 4ª fila - leer TIP PARA LOS AUMENTOS arriba. RECORDAR MANTENER LA TENSIÓN DEL TEJIDO! Después de aumentar 64 veces, hay 69 puntos y el chal mide aprox. 30 cm medidos por el centro hacia abajo. Ahora comenzar con las disminuciones. Disminuir 1 punto al inicio de cada 4ª fila hasta que queden 5 puntos en la aguja - leer TIP PARA LAS DISMINUCIONES arriba. Cerrar todos los puntos. La labor mide aprox 114 cm desde el borde de montaje. |
|
¿Terminaste este patrón?Entonces, etiqueta tus fotos con #dropspattern #autumnfairwrapshawl o envíalas a la galería #dropsfan. ¿Necesitas ayuda con este patrón?Encontrarás 10 videos tutoriales, un espacio para comentarios/preguntas y más visitando la página del patrón en garnstudio.com © 1982-2025 DROPS Design A/S. Todos los derechos reservados. Este documento, incluyendo todas sus sub-secciones, está protegido por los derechos de autor (copyright). Lee más acerca de lo que puedes hacer con nuestros patrones en la parte de abajo de cada patrón de nuestro sitio. |
|


Con más de 40 años en el diseño de modelos de punto y de ganchillo, DROPS Design ofrece una de las más vastas colecciones de patrones gratuitos en el internet - traducidos en 17 idiomas. Al día de hoy, contamos con 314 catálogos y 11822 patrones - de los cuales 11158 están traducidos en español.
Nosotros trabajamos con mucho esmero para brindarte lo mejor que las labores de punto y ganchillo tienen para ofrecer,inspiración y consejos, así como hilos de magnífica calidad a precios increíbles! Te gustaría usar nuestros patrones para otro fin además del uso personal? Puedes leer acerca de lo que estás permitida a hacer en el texto de Copyright en la parte de abajo de todos nuestros patrones. Felices labores!
Escribe un comentario sobre DROPS 234-48
¡Nos encantaría saber qué piensas acerca de este patrón!
Si quieres escribir una pregunta referente al patrón, por favor asegúrate de elegir la categoría correcta en el formulario debajo, para acelerar el proceso de respuesta. Los campos obligatorios están marcados con un *.