Comments / Questions (17)
![]() Dea wrote:
Dea wrote:
Buongiorno, c'è un errore nella spiegazione dello sprone. Dove si parla della divisione corpo- maniche a un certo punto dice di "lavorare 45-51-55....ecc maglie rovescio" ... è impossibile si lavorare in tondo tutto a diritto.
31.12.2024 - 16:56DROPS Design answered:
Buonasera Dea, grazie per la segnalazione: abbiamo corretto il testo. Buon lavoro!
01.01.2025 - 21:42
![]() Michelle Badsberg wrote:
Michelle Badsberg wrote:
Jeg forstår ikke hvordan jeg skal strikke mønstret videre efter raglan Jeg strikker en medium, og jeg skal således tage ud til raglan 14 gange og derefter strikke A1 videre uden at tage ud. Men hvordan får jeg så mønstret til at passe? For eftersom jeg ikke tager ud til raglan mere, har jeg ikke samme antal masker på pinden som der er på diagrammet.
10.01.2023 - 18:22DROPS Design answered:
Hej Michelle, du sørger for at mønsteret passer over det mønster du allerede har strikket, øvrige masker strikkes i glatstrik :)
12.01.2023 - 14:01
![]() Zuzi wrote:
Zuzi wrote:
Hello! Just wanted to ask, whether you think it would be suitable to knit this design in DROPS LIMA ( 2 yarns together) or combine DROPS LIMA with DROPS KID-SILK ( 1 yarn each)? I love the look of the original SNOW or WISH yarn in this design, but I would prefer the knitwear a bit lighter, less thick, but still with the similar effect. Thanks for your answer. Z
24.10.2022 - 18:35DROPS Design answered:
Dear Zuzi, Lima belongs to yarn group B and even with 2 strands this is not the best alternative to Snow or Wish, rather use 2 strands yarn group C (Air or even Brushed Alpaca Silk for example) or 4 strands yarn group A as Kid-Silk. Read more about changing yarns and calculating new amount here - your DROPS Store will also help you if necessary - even per mail or telephone. Happy knitting!
25.10.2022 - 09:17
![]() Jennie wrote:
Jennie wrote:
Varför är det omslag på bilden och diagrammet men inte i teckenförklaringen?
26.09.2022 - 21:49DROPS Design answered:
Hej Jennie, tack för info, det är rättat :)
27.09.2022 - 09:16
![]() Irene Kindlund wrote:
Irene Kindlund wrote:
Jag förstår inte diagram A1 tredje raden nerifrån. Stickar man: två räta, sticka ihop två räta, lyft 1 maska och sticka två räta tillsammans och dra den lyfta maska över maskorna som skickades ihop två gånger? Då räcker inte antalet maskor. Mvh Irene
26.09.2022 - 21:11DROPS Design answered:
Hej Irene, vi har precis rettet diagrammet, så ringen betyder omslag, uppdatera sidan eller skriv ut diagrammet igen :)
27.09.2022 - 10:31
![]() Julia wrote:
Julia wrote:
Hi! Is the bobble pattern supposed to go on the back of the sweater as well?
08.08.2022 - 11:32DROPS Design answered:
Dear Julia, yes - the pattern is same on both the front and the back piece. But if you don't want to you can of course knit the back piece plain. Happy knitting!
08.08.2022 - 11:38
![]() Domi wrote:
Domi wrote:
Buongiorno, vorrei farmi questo maglione, ma ho riletto più volte il testo e non capisco dove stiano i bottoni... Potete chiarificarmi? Grazie infinite. D
23.02.2022 - 17:22DROPS Design answered:
Buonasera Domi, abbiamo corretto il testo: questo modello non ha bottoni. Grazie per la segnalazione. Buon lavoro!
23.02.2022 - 22:13
![]() Patrizia wrote:
Patrizia wrote:
Chiedo scusa ma penso di aver risolto il problema che avevo posto in precedenza, se è corretto che il gettato dopo la linea del raglan si lavora a diritto nel filo dietro (ma nella traduzione italiana c'è scritto a rovescio nel filo dietro). Grazie infinite
09.02.2022 - 12:33DROPS Design answered:
Buonasera Patrizia, grazie per la segnalazione, abbiamo corretto il testo. Buon lavoro!
09.02.2022 - 20:58
![]() Patrizia wrote:
Patrizia wrote:
Buongiorno sto lavorando questo modello e sono allo sprone, ho lavorato il 1° giro come nella descrizione, al 2° giro ho lavorato i gettati come richiesto ma A 1 era sempre di 21 maglie, solo al 3° giro sono 23. Quindi anche il diagramma va lavorato a giri alterni? Grazie
09.02.2022 - 11:35DROPS Design answered:
Buonasera Patrizia, il diagramma mostra tutti i ferri del lavoro. I gettati vengono incorporati nel motivo sul corpo. Buon lavoro!
09.02.2022 - 20:57
![]() Birgitta wrote:
Birgitta wrote:
Varför finns det två symboler med exakt samma beskrivning? Den ena är ritad över 3 maskor i mönstret och den andra är ritad över två maskor i mönstret. I mönstret framgår det inte att man vartannat varv ska lägga ut de maskor som minskas i mönstret? Om möjligt tacksam för en bättre beskrivning. 🙏
06.02.2022 - 12:18
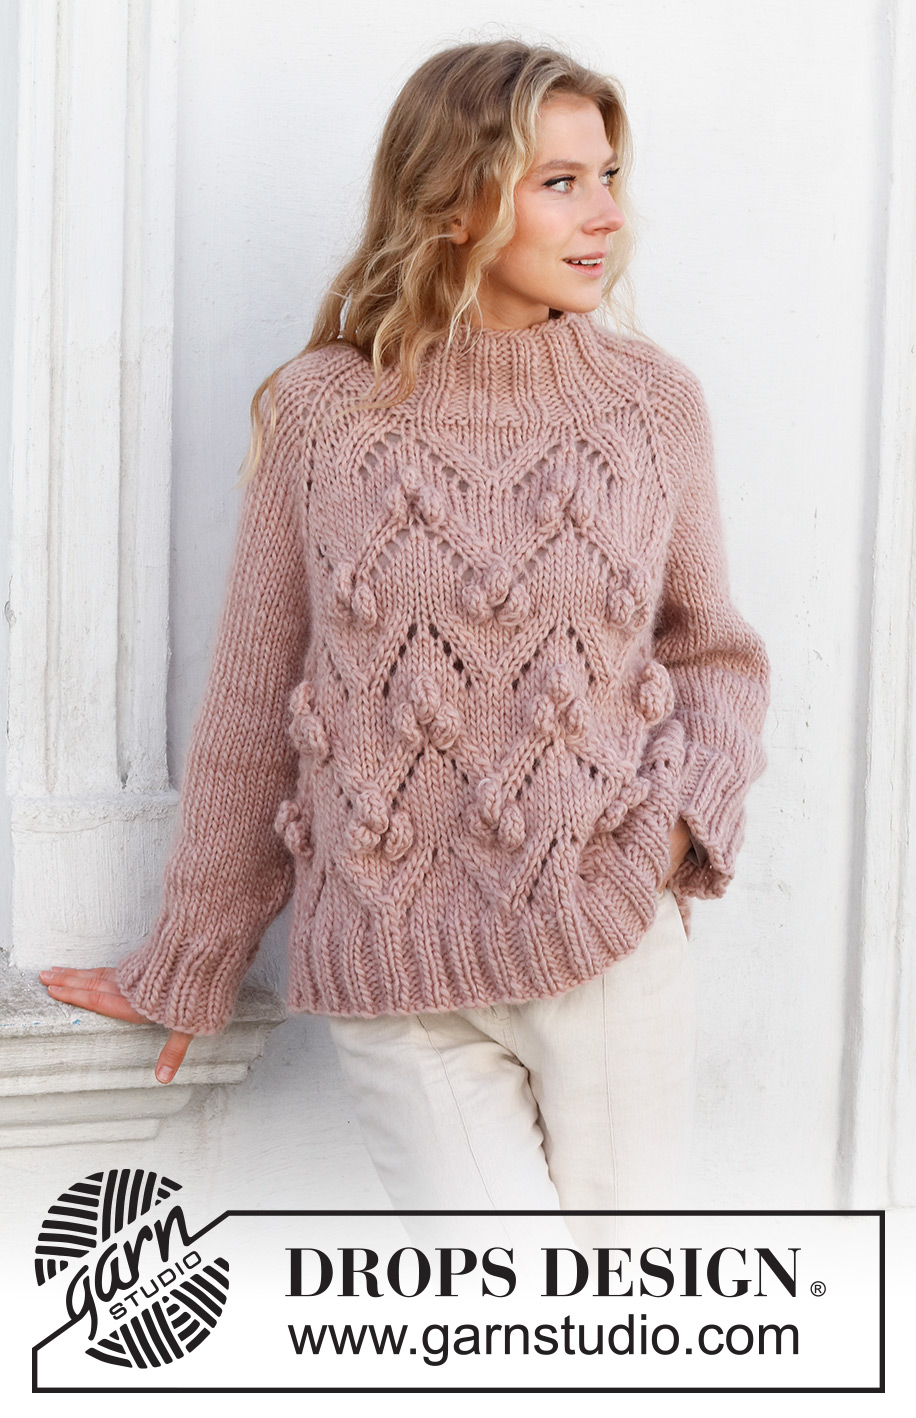
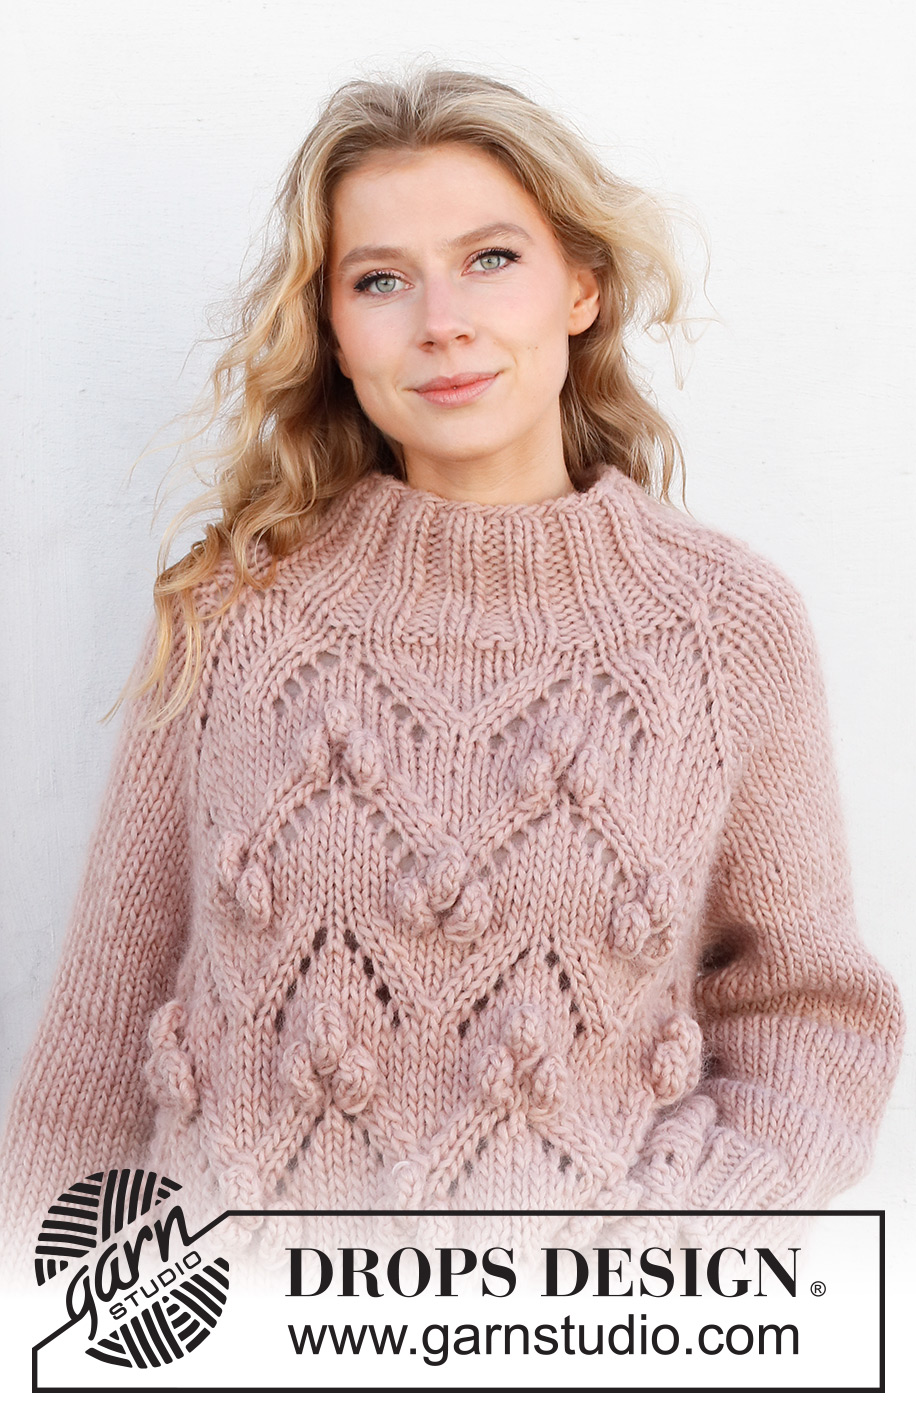
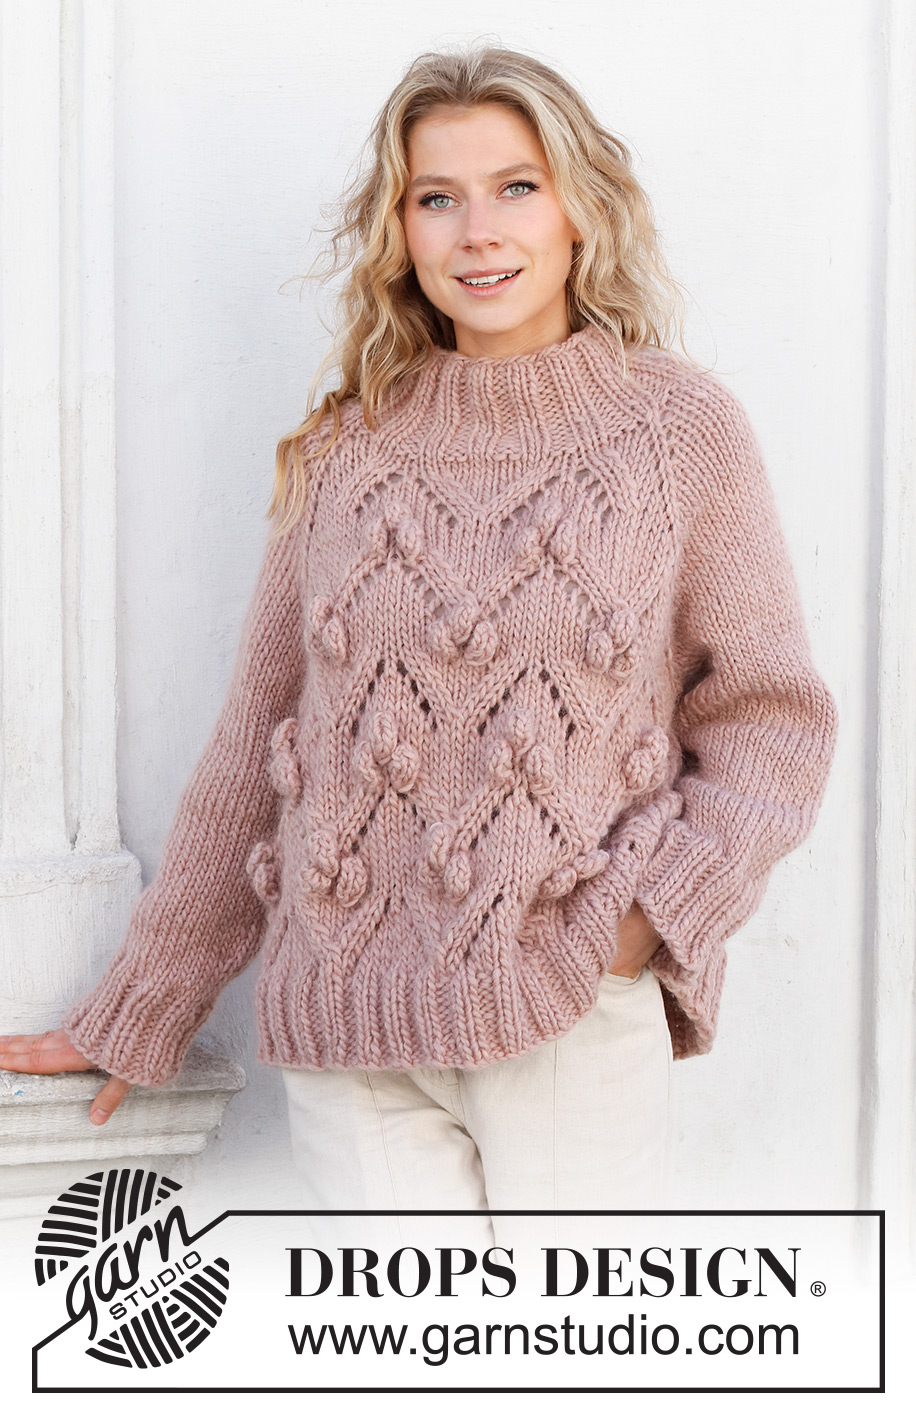
Rosé Bubbles#rosébubbles |
|||||||||||||||||||
 |
 |
||||||||||||||||||
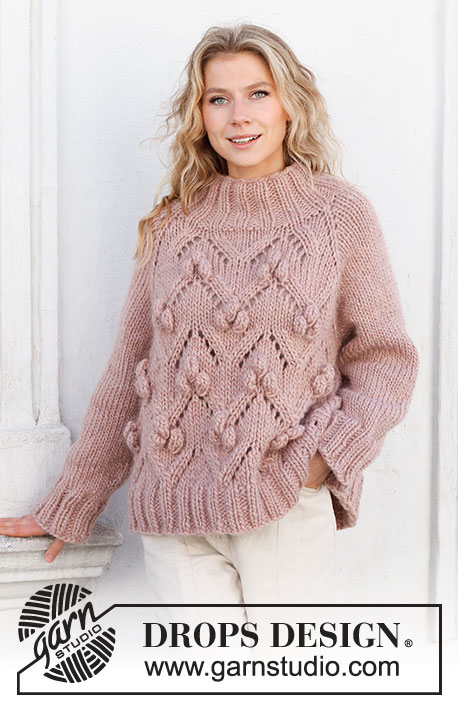
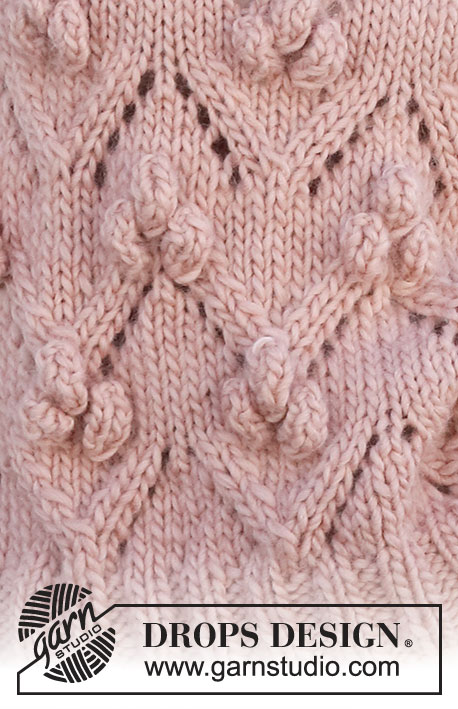
Knitted jumper in DROPS Snow or DROPS Wish. The piece is worked top down with raglan and lace pattern. Sizes S - XXXL.
DROPS 227-24 |
|||||||||||||||||||
|
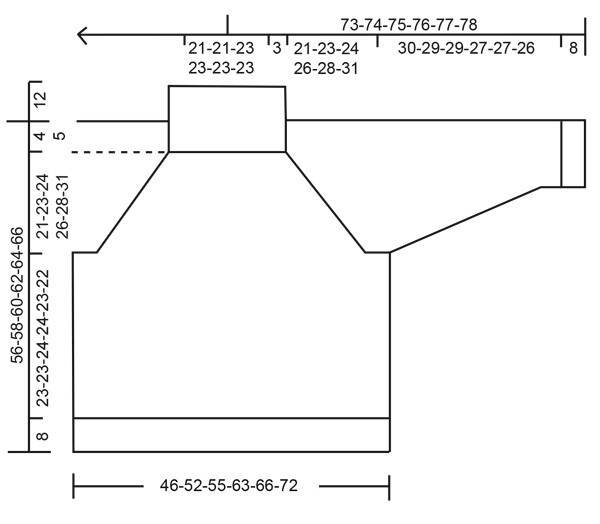
------------------------------------------------------- EXPLANATIONS FOR THE PATTERN: ------------------------------------------------------- RAGLAN: Increase by making 1 yarn over on each side of 1 knitted stitch (raglan-line), in each transition from body to sleeves (= 8 stitches increased on the round). On the next round work the yarn overs as follows: BEFORE RAGLAN LINE: Slip the yarn over onto the right needle as if to knit, place it back on the left needle (it is now twisted), knit in the front loop (the yarn over twists to the right). No hole. AFTER RAGLAN LINE: Knit in the back loop of the yarn over (the yarn over twists to the left). No hole. Then work the increased stitches in stocking stitch on the sleeves and in pattern on the front/back pieces. PATTERN: See diagrams A.1 to A.4. INCREASE TIP (evenly spaced): To work out how to increase evenly, count the total number of stitches on the needle (e.g. 102 stitches) and divide by the number of increases to be made (e.g. 10) = 10.2. In this example, increase by making 1 yarn over after approx. each 10th stitch. On the next round work the yarn overs twisted to avoid holes. CASTING-OFF TIP: To avoid the cast-off edge being tight you can cast off with a larger size needle. If the edge is still tight, make 1 yarn over after approx. each 4th stitch at the same time as casting off; the yarn overs are cast off as normal stitches. DECREASE TIP (for sleeves): Decrease 1 stitch on either side of the marker thread as follows: Work until there are 3 stitches left before the marker thread, knit 2 together, knit 2 (marker thread sits between these 2 stitches), slip 1 stitch as if to knit, knit 1 and pass the slipped stitch over the knitted stitch (2 stitches decreased). ------------------------------------------------------- START THE PIECE HERE: ------------------------------------------------------- JUMPER - SHORT OVERVIEW OF THE PIECE: The neck, yoke and body are worked in the round with circular needle, top down. The sleeves are worked with short circular needle/double pointed needles, top down. NECK: Cast on 64-64-68-68-72-72 stitches with circular needle size 7 mm and DROPS Snow or DROPS Wish. Knit 1 round. Work rib (knit 2, purl 2) for 12 cm. Knit 1 round where you decrease 2 stitches evenly spaced = 62-62-66-66-70-70 stitches. Change to circular needle size 8 mm. Insert 1 marker, THE YOKE IS MEASURED FROM HERE! YOKE: Start in the transition between the left sleeve and the back and work as follows: Knit 1 (= raglan-line), make 1 yarn over, work A.1, 1 yarn over, knit 1 (= raglan-line), 1 yarn over, knit 8-8-10-10-12-12 (= sleeve), 1 yarn over, knit 1 (= raglan-line), 1 yarn over, work A.1, 1 yarn over, knit 1 (= raglan-line), 1 yarn over, knit 8-8-10-10-12-12 (= sleeve), 1 yarn over. The first increase to RAGLAN – read description above, is now finished. Continue this pattern and increase to raglan every 2nd round a total of 11-14-16-19-21-23 times (see arrow for your size in A.1) – REMEMBER THE KNITTING TENSION! After the last increase there are 150-174-194-218-238-254 stitches. Continue the pattern without further increases until the yoke measures 21-23-24-26-28-31 cm from the marker. The next round is worked as follows (make sure it is a knitted round without pattern): Knit 45-51-55-61-65-69 (= back piece), place the next 30-36-42-48-54-58 stitches on 1 thread for the sleeve, cast on 6-6-6-8-8-10 stitches (= in side under sleeve), knit 45-51-55-61-65-69 (= front piece), place the next 30-36-42-48-54-58 stitches on 1 thread for the sleeve, cast on 6-6-6-8-8-10 stitches (= in side under sleeve). THE PIECE IS NOW MEASURED FROM HERE! BODY: = 102-114-122-138-146-158 stitches. Cut the strand and begin in the middle of the new stitches under one sleeve. Start on the rounds in A.2 - A.4 which match the stitches from A.1 and work as follows: Knit 1-4-6-10-0-3, A.2, A.3 is worked 3-3-3-3-5-5 times, A.4, knit 2-8-12-20-0-6, A.2, A.3 is worked 3-3-3-3-5-5 times, A.4, knit 1-4-6-4-6-3. Work until the body measures 23-23-24-24-23-22 cm from the division. There is 8 cm left to finished length; try the jumper on and work to desired length. To avoid the following rib being tight, knit 1 round where you increase 10-14-14-14-14-14 stitches evenly spaced – read INCREASE TIP = 112-128-136-152-160-172 stitches. Change to circular needle size 7 mm and work rib (knit 2, purl 2) for 8 cm. Loosely cast off with knit over knit and purl over purl – read CASTING-OFF TIP. The jumper measures approx. 56-58-60-62-64-66 cm from the shoulder down. SLEEVES: Place the 30-36-42-48-54-58 stitches from the thread on the one side of the piece on short circular needle size 8 mm and knit up 1 stitch in each of the 6-6-6-8-8-10 stitches cast on under the sleeve = 36-42-48-56-62-68 stitches. Insert a marker thread in the middle of the new stitches under the sleeve. Start at the marker thread and work stocking stitch in the round for 3 cm. Now decrease 2 stitches under the sleeve – read DECREASE TIP. Decrease like this every 15-8-8-4-3½-3 cm a total of 2-3-4-6-7-8 times = 32-36-40-44-48-52 stitches. Continue working until the sleeve measures 30-29-29-27-27-26 cm from the division. There is approx. 8 cm left; try the jumper on and work to desired length – NOTE! Shorter measurements in larger sizes due to wider neck and longer yoke. Change to double pointed needles size 7 mm and work rib (knit 2, purl 2) for 8 cm. Cast off with knit over knit and purl over purl – remember CASTING-OFF TIP! The sleeve measures approx. 38-37-37-35-35-34 cm from the division. Work the other sleeve in the same way.. |
|||||||||||||||||||
Diagram explanations |
|||||||||||||||||||
|
|||||||||||||||||||

|
|||||||||||||||||||

|
|||||||||||||||||||
|
|||||||||||||||||||
Have you finished this pattern?Tag your pictures with #dropspattern #rosébubbles or submit them to the #dropsfan gallery. Do you need help with this pattern?You'll find 26 tutorial videos, a Comments/Questions area and more by visiting the pattern on garnstudio.com. © 1982-2025 DROPS Design A/S. We reserve all rights. This document, including all its sub-sections, has copyrights. Read more about what you can do with our patterns at the bottom of each pattern on our site. |
|||||||||||||||||||







Post a comment to pattern DROPS 227-24
We would love to hear what you have to say about this pattern!
If you want to leave a question, please make sure you select the correct category in the form below, to speed up the answering process. Required fields are marked *.