Comments / Questions (6)
![]() Sharon Hunt wrote:
Sharon Hunt wrote:
Hi I have now inserted all markers. I am now about to increase at the 3. My question is am I supposed to increase then slip the marker or slip the marker then work the increase? Many thanks for your help.
25.02.2023 - 14:05DROPS Design answered:
Dear Sharon, if you increase before the marker, then your increase will be the stitch right before the marker. If you are increasing after the marker, then you slip the marker and increase right after it. You increase BEFORE the markers at the 1st and 3rd markers and AFTER the markers at the 2nd and 4th markers. Happy knitting!
26.02.2023 - 20:58
![]() Sharon Hunt wrote:
Sharon Hunt wrote:
Hi! Am working on the neck warmer in this sett. To place the markers I knitting across the so stitches then placed the markers, this seems logical, but is it correct? I am wondering how would I know the end and beginning of the round? Am assuming the end of the round would be after knitting the 21 stitches which is now increased according to the instructions at the first and 4 marker? This is the first time am making a neck warmer this way so am not sure if what have done so far is correct.
18.02.2023 - 15:48DROPS Design answered:
Dear Sharon, the markers are introduced without working. Start from the beginning of the round (the same beginning as in previous rounds) and introduce the markers as indicated for your size. If you are working the smaller size, insert as follows: 5sts, 1st marker, 7sts, 2nd marker, 11 sts (insert the mid-front marker after the 6th st, then count 5 more), 3rd marker, 7 sts, 4th marker, 6 sts remain until the beginning of the round (= 36 sts). Then, proceed to increase before or after the 4 markers as indicated in the pattern. The mid-front marker is not used for the increases. Happy knitting!
19.02.2023 - 22:20
![]() Sharon Hunt wrote:
Sharon Hunt wrote:
Hi! Could this hat be done in the round?
04.02.2023 - 12:35DROPS Design answered:
Dear Sharon, yes, you could work it in the round; remember to remove the edge stitches. Happy knitting!
05.02.2023 - 23:06
![]() Maggi Vermcrantz wrote:
Maggi Vermcrantz wrote:
I instruktionen står det tex strumpstickor nummer 12. Men i länken har stickorna inget nummer. Skall jag tolka nummer 12 som grovlek 12 mm?
26.12.2022 - 22:36DROPS Design answered:
Hei Maggi. Litt usikker på hva du mener med länken , men halsen strikkes med pinne 12 mm, det brukes både rundpinne og settpinner ( i str. 12 mm, kan også skrives som bare 12). mvh DROPS Design
02.01.2023 - 13:11
![]() Maria Krbalová wrote:
Maria Krbalová wrote:
Dobrý den. Prosím poraďte s určením lícové strany u cepic s ohrnutím: když si zvolím lícovou stranu na ohrnovací části, zbytek čepice je v tomto případě je rubová strana, protože před ohrnutím "lícová" strana ohrnovací části byla na rubové straně. Mám pak potíže si určit, v které řadě a jak mám ujímat. Děkuji
20.11.2022 - 13:50DROPS Design answered:
Dobrý den, Mario, nejsnazší je podívat se na úplný začátek pletení, na nahozenou řadu. Z jedné strany je nahozený okraj tvořený řadou "čárek", z druhé strany má malé hrbolky. Tu stranu práce, která má v první řadě malé hrbolky, si v tomto případě označíme jako lícovou = po ohrnutí se hrbolatý lem schová a na lícu zůstane ten úhledný "čárkovaný" (který máme nyní na rubu) . Hodně zdaru! Hana
08.03.2023 - 10:25
![]() SUZAN wrote:
SUZAN wrote:
Merhaba, bu siteden bakarak boyunluğu yaptım. Omuz arttırmayı öğrendim. Birçok proje var ve hepsi harika. Çok teşekkürler...
25.12.2021 - 10:22
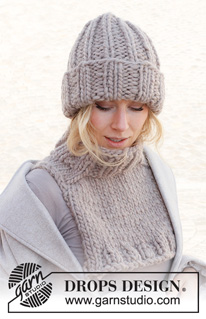
Willow Winds#willowwindsset |
|
 |
 |
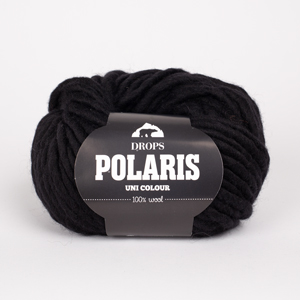
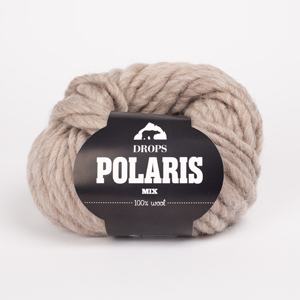
Knitted hat and neck warmer in DROPS Polaris. Piece is knitted in rib.
DROPS 225-39 |
|
|
---------------------------------------------------------- EXPLANATION FOR THE PATTERN: ---------------------------------------------------------- GARTER STITCH (back and forth): Knit all rows. 1 ridge vertically = knit 2 rows. INCREASE TIP-1 (applies to neck): BEFORE MARKER: The new stitch is twisted towards the right. Use left needle to pick up yarn between 2 stitches from round below, pick up yarn from the back and knit stitch in front loop of stitch. AFTER MARKER: The new stitch is twisted towards the left. Use left needle to pick up yarn between 2 stitches from round below, pick up yarn from the front and knit stitch in back loop of stitch. INCREASE TIP-2 (evenly): To calculate how to increase evenly, use the total number of stitches on row (e.g. 54 stitches), minus stitches in garter stitch in each side (e.g. 4 stitches) and divide stitches by number of increases to be done (e.g. 12) = 4.2. In this example increase by making 1 yarn over after approx. every 4th stitch. On next row work yarn overs twisted to avoid holes. CAST-OFF TIP: To avoid a tight cast-off edge when casting off, you may use a larger needle. If this still is too tight make 1 yarn over after approx. every 6th stitch while casting off (cast off yarn overs as stitches). ---------------------------------------------------------- START THE PIECE HERE: ---------------------------------------------------------- HAT - SHORT OVERVIEW OF THE PIECE: Worked back and forth on needle, and sewn together when finished. HAT: Cast on 40-44 stitches on circular needle size 12 mm with DROPS Polaris. Work rib back and forth over all stitches (= knit 2/purl 2). REMEMBER THE KNITTING TENSION! Insert 1 marker on the side of piece that has small buckles on first row of piece = right side, this is done to make the bottom edge on hat pretty when the edge is folded up later. When piece measures 12 cm, purl 1 row from wrong side decreasing 1-2 stitches evenly = 39-42 stitches. Then work rib (= knit 1/purl 2), seen from right side. Work until piece measures 31 cm in total from cast-on edge – adjust so that next row is worked from right side (= the side with marker). Now decrease at the top of hat as follows: ROW 1 (= right side): Knit all stitches together 2 by 2 until 1-0 stitches remain, knit 1-0 stitches = 20-21 stitches. ROW 2 (= wrong side): Purl from wrong side. ROW 3 (= right side): Knit all stitches together 2 by 2 until 0-1 stitch remains, knit 0-1 stitch = 10-11 stitches. Cut the yarn and pull yarn through the remaining stitches and tighten together. Sew sides together on hat in outermost loop of edge stitch, make sure to sew from right side and that the seam is flat. Cut and fasten the yarn. Fold the bottom 12 cm of hat. ----------------------------------------------------------------------------------------- NECK WARMER - SHORT SUMMARY OF PIECE: Work piece top down from mid back. Work first in the round until increase for shoulder is done. Then work front piece and back piece back and forth separately. NECK: Cast on 36-40 stitches on double pointed needles size 12 mm with DROPS Polaris. Knit 1 round. Then work rib = knit 2/purl 2. Work rib like this for 10 cm. Insert a marker after 18-20 stitches (= mid front) - MEASURE PIECE FROM HERE! In addition insert 4 new marker in the piece as explained below - this is done without working the stitches, and each of these 4 markers are inserted between 2 stitches. Use markers when increasing for saddle shoulder and use a different colour than marker for measurement. Now insert 4 markers in the piece as follows: 1st marker: Begin mid back, count 5-6 stitches (= half back piece), insert 1st marker before next stitch. 2nd marker: Count 7 stitches from 1st marker (= shoulder stitches), insert 2nd marker before next stitch. 3rd marker: Count 11-13 stitches from 2nd marker (= front piece), insert 3rd marker before next stitch. 4th marker: Count 7 stitches from 3rd marker (= shoulder stitches), insert 4th marker before next stitch. 6-7 stitches remain on back piece after 4th marker. Move these 4 markers upwards when working, increase at each of these markers later. Work in stocking stitch in the round. AT THE SAME TIME on first round increase 4 stitches for saddle shoulder as follows: Increase BEFORE 1st and 3rd marker and increase AFTER 2nd and 4th marker – read INCREASE TIP-1. Increase only on front piece and back piece, and number of shoulder stitches stays the same. Continue in the round like this and increase the same way on every round 6-7 times in total = 60-68 stitches. REMEMBER THE KNITTING TENSION! Work next round as follows: Knit until shoulder stitches, cast off by knitting over the 7 shoulder stitches - read CAST-OFF TIP, knit over the next 23-27 stitches before slipping them on a thread for front piece, cast off the next 7 shoulder stitches, work until mid back. Cut the yarn. BACK PIECE: = 23-27 stitches. Work in stocking stitch back and forth with 1 edge stitch GARTER STITCH - read explanation above, in each side. When neck measures 20-21 cm from marker inserted after the neck, increase 5-5 stitches evenly - read INCREASE TIP-2 = 28-32 stitches. Now work rib from right side as follows: 1 stitch in garter stitch, * knit 2, purl 2 *, work from *-* until 3 stitches remain, knit 2 and finish with 1 edge stitch in garter stitch. Continue rib like this for 4 cm. Cast off with knit over knit and purl over purl (cast off stitches in garter stitch by knitting), back piece measures approx. 24-25 cm from marker at the neck. FRONT PIECE: Slip stitches from thread back on circular needle size 12 mm and work the same way as back piece. |
|
Have you finished this pattern?Tag your pictures with #dropspattern #willowwindsset or submit them to the #dropsfan gallery. Do you need help with this pattern?You'll find 28 tutorial videos, a Comments/Questions area and more by visiting the pattern on garnstudio.com. © 1982-2025 DROPS Design A/S. We reserve all rights. This document, including all its sub-sections, has copyrights. Read more about what you can do with our patterns at the bottom of each pattern on our site. |
|







Post a comment to pattern DROPS 225-39
We would love to hear what you have to say about this pattern!
If you want to leave a question, please make sure you select the correct category in the form below, to speed up the answering process. Required fields are marked *.