
Beliebte Kategorien
Suchen Sie nach einem Garn?


Kommentare / Fragen (40)
![]() Trude hat geschrieben:
Trude hat geschrieben:
Kan man strikke denne her i Drops you og hvor mange masker legger man opp til da?
29.03.2026 - 09:40DROPS Design hat geantwortet:
Hei Trude. Du kan bruke både DROPS Love You # 7 og DROPS Love You # 9, du må bare bruke den pinne str. som gir deg den oppgitte strikkefastheten (17 m x 22 p glstrikk på 10 x 10 cm med 2 tråder). Du kan da følge oppskriften / maskeantallet. mvh DROPS Design
07.04.2026 - 08:44
![]() Danielle hat geschrieben:
Danielle hat geschrieben:
When doing the bind off for the front and back pieces are you only binding off on the knit side only or are you binding off on both knit and purl sides? I’m knitting a size medium. Is there a grand total of 24 bind off stitches between the front and back pieces? Or is there a grand total of 30 bind off stitches for the pattern in a size medium? Does it matter if I do the front first and then the back when I finish the body piece?
14.04.2022 - 18:54DROPS Design hat geantwortet:
Dear Danielle, it doesn't matter which piece you work first, between the back or the front pieces. Usually, you bind off only on the right side, unless stated otherwise in the pattern. For the back, you bind off 24 sts for the back and for the front 12+ 4+4 + 2+ 2 = 24 sts. So you cast off 24 sts both for the front and back. Happy knitting!
14.04.2022 - 19:10
![]() Danielle hat geschrieben:
Danielle hat geschrieben:
After I knit the body piece and I move on to the back piece and the two front pieces, am I knitting in the round or flat? Also for the back piece size medium it says I should start with 68sts and bind off 6 sets with in 3 rows and then have 56sts. Is this a typo or am I understanding it wrong? Is there a video to help with how the back piece and front two pieces are made? I’ve never done anything like it before.
09.02.2022 - 03:14DROPS Design hat geantwortet:
Hi Danielle, Each of the front and back pieces is worked back and forth. When binding off for the armholes in M, you bind off 3 stitches x 1 on each side, then 2 stitches x 1 on each side and finally 1 stitch x 1 on each side. A total of 12 stitches bound off leaving you with 56 stitches. Finish the back piece, then continue each front piece separately. Happy knitting!
09.02.2022 - 07:56
![]() Sandrine GREKOV hat geschrieben:
Sandrine GREKOV hat geschrieben:
Je tricote ce modèle en M mais en tricotant les manches entièrement en aller-retours. ''À 35-35-34-33-32-31 cm de hauteur totale, rabattre 6 m sous la manche''. Mais lorsque j'arrive à 35cm je n'ai pas encore terminé les 10 augmentations à faire tous les 3 cm. Pourtant mon échantillon est juste. Je ne comprends pas. Pouvez-vous m'aider ? Merci beaucoup.
04.05.2020 - 17:29DROPS Design hat geantwortet:
Bonjour Mme Grekov, vous commencez à augmenter à 6 cm puis tous les 3 cm = 2ème augmentation à 9 cm, puis: 12, 15, 18, 21, 24, 27, 30, 33 cm. La dernière augmentation se fait ainsi à 33 cm, soit 2 cm avant de rabattre les mailles du milieu sous la manche. Bon tricot!
05.05.2020 - 10:24
![]() Sandrine GREKOV hat geschrieben:
Sandrine GREKOV hat geschrieben:
EN MÊME TEMPS, à 49-50-51-52-53-54 cm de hauteur totale, rabattre 6 m de chaque côté pour les emmanchures (= 3 m de chaque côté des marqueurs) et terminer chaque partie séparément. En tricotant en rond, je rabat les 3 premières mailles qui sont après le 1er marqueur en début de tour, puis les 6 suivantes (3 avant et 3 après le 2ème marqueur) mais comment rabattre les 3 dernières mailles qui sont avant le 1 er marqueur à la fin du tour ? Merci.
28.04.2020 - 04:51DROPS Design hat geantwortet:
Bonjour Mme Grekov, rabattez simplement ces 3 dernières mailles (veillez à ce que votre nombre de mailles pour le dos/le devant soit bien juste) et passez le fil dans la dernière maille, coupez le fil, puis tricotez le dos. Si vous ne voulez pas couper le fil, commencez ce tour par rabattre les 3 m avant la fin du tour + les 3 premières m du tour et 3 m de chaque côté de l'autre marqueur. Bon tricot!
28.04.2020 - 10:34Berit hat geschrieben:
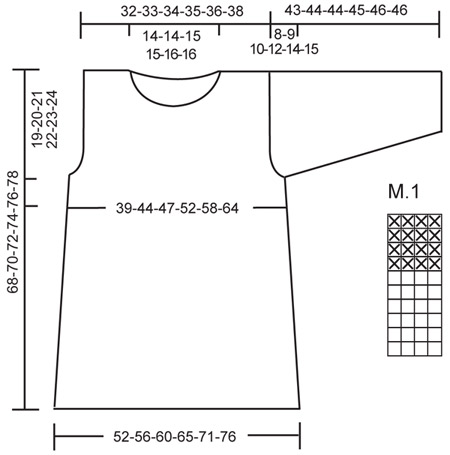
M1 ist natürlich Muster 1! Sonst würde es ja 1 M heissen.
21.08.2016 - 21:47
![]() Birgit Villain hat geschrieben:
Birgit Villain hat geschrieben:
Bei Modell 120-11 heißt es beim Ärmel 1M 9Mal in der Höhe Stricken. Was ist damit gemeint?
21.08.2016 - 21:32DROPS Design hat geantwortet:
Liebe Birgit, es ist nicht 1 M sondern M1 bzw. M.1. Das ist der Mustersatz, der unten neben der Schnittzeichnung abgebildet ist.
25.08.2016 - 18:17Vanda hat geschrieben:
Hallo, could this pattern be done with 1 thread of bomull-lin? Thank you.
26.06.2015 - 12:06DROPS Design hat geantwortet:
Hi Vanda. Yes, you can, but don't forget to make a swatch first to check your gauge. Happy knitting!
26.06.2015 - 13:29
![]() Dani hat geschrieben:
Dani hat geschrieben:
Modello veramente semplice da eseguire anche per chi è alle prime armi, di ottima riuscita anche con cotone Muskat
18.05.2013 - 22:10
![]() Vera hat geschrieben:
Vera hat geschrieben:
Det ska vara 2 trådar Safran
05.12.2012 - 14:54
|
|||||||
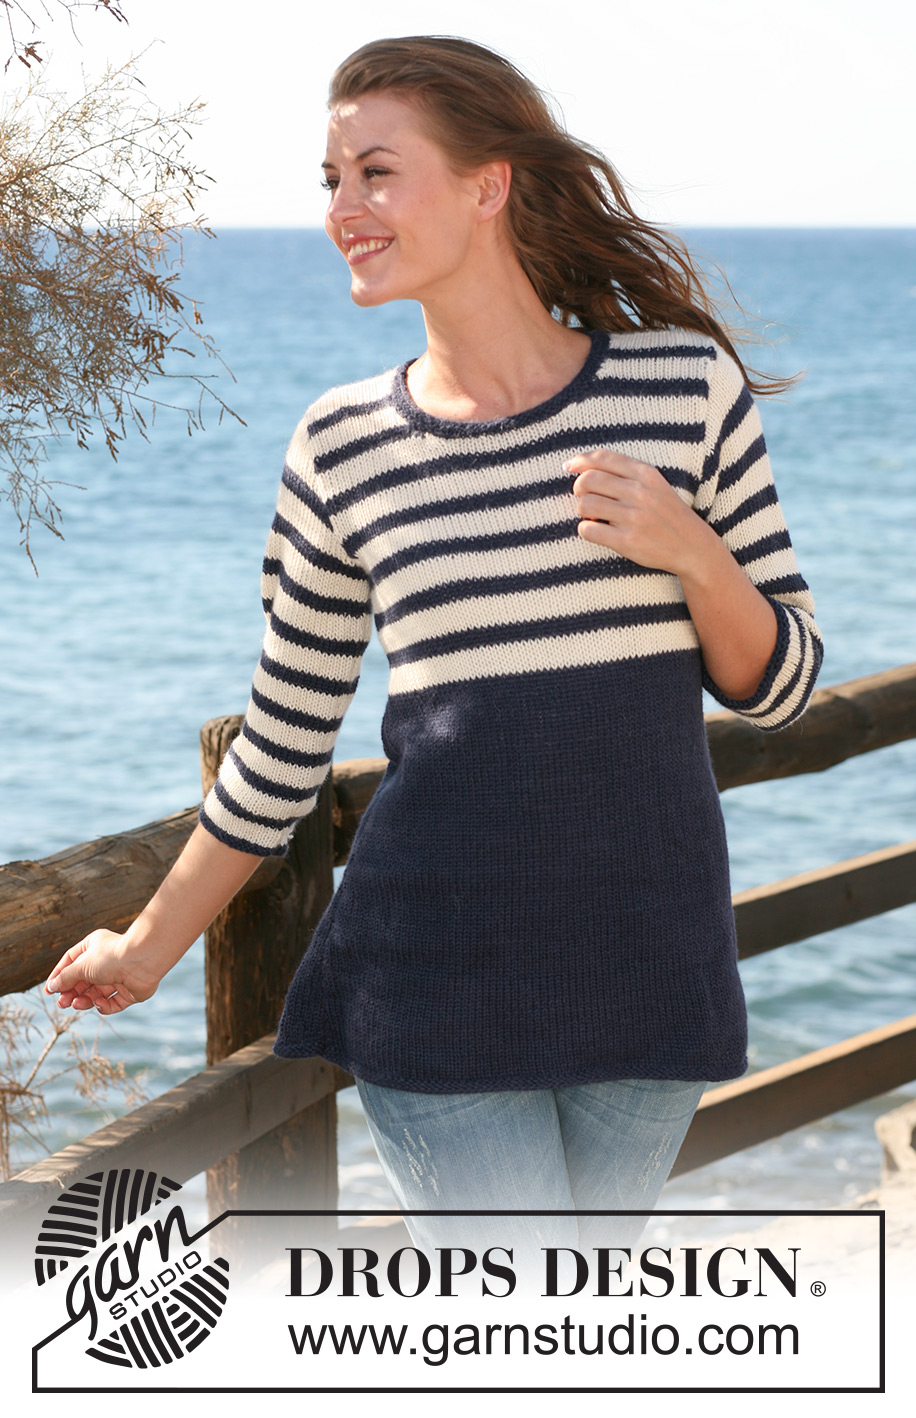
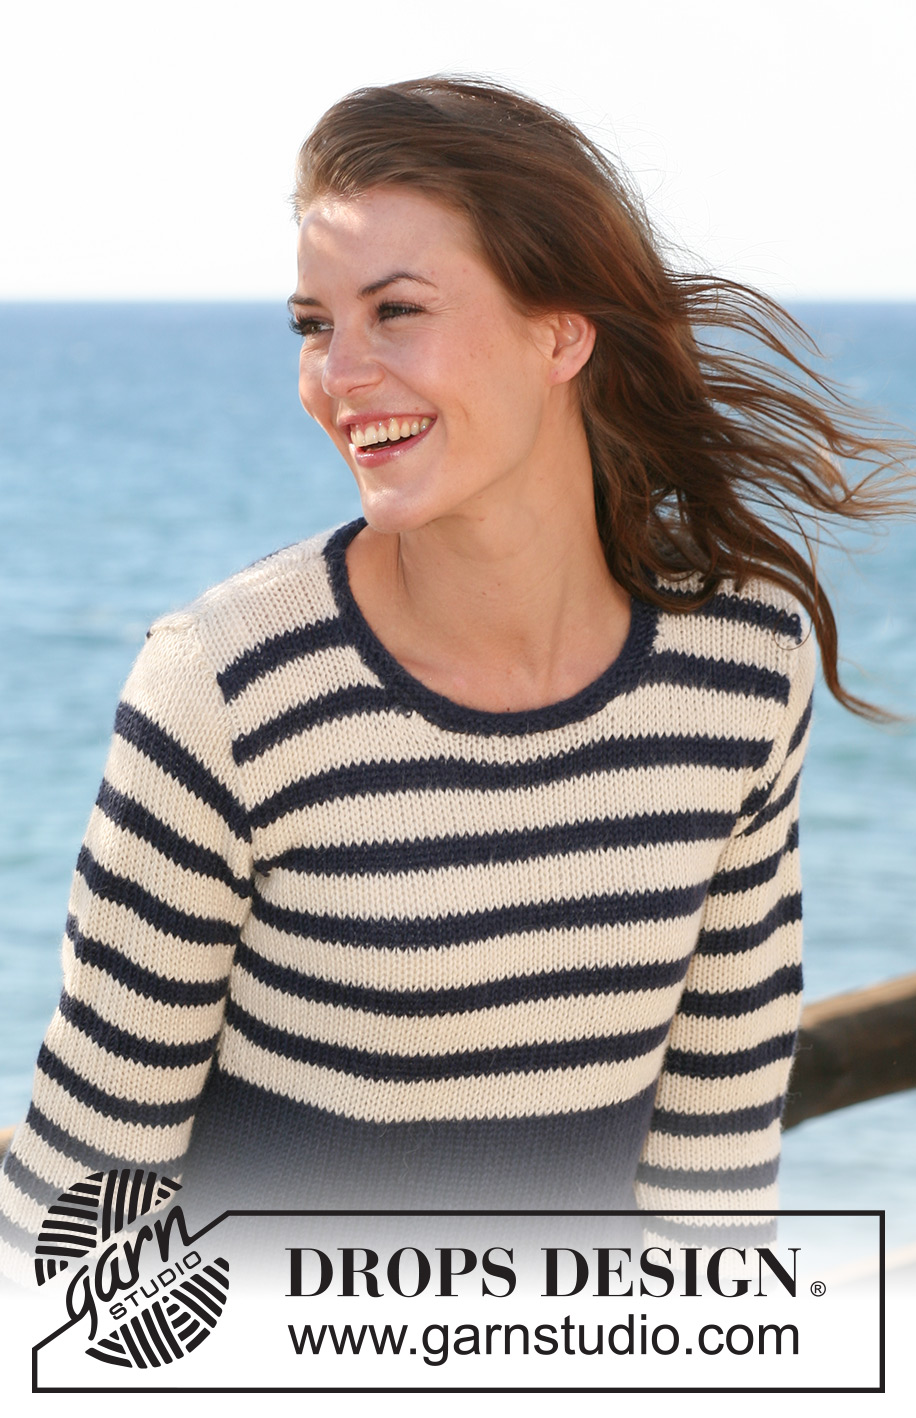
Ship Ahoy#shipahoysweater |
|||||||
 |
 |
||||||
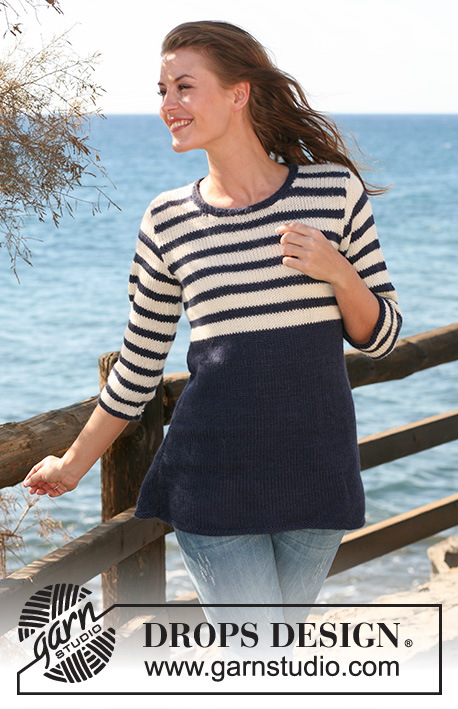
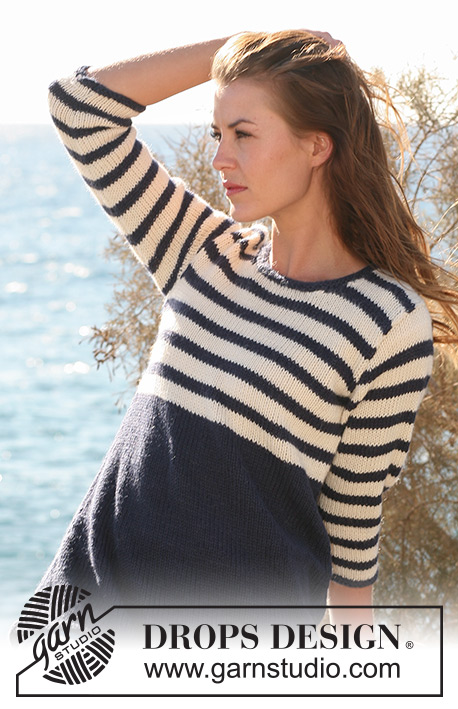
Gestrickte DROPS Tunika mit Streifen in ”Alpaca”. Mit 2 Fäden gestrickt. Grösse S - XXXL. DROPS design: Modell Nr. Z-486
DROPS 120-11 |
|||||||
|
-------------------------------------------------------- KRAUSRIPPE (rund gestrickt) 1 Krausrippe = 2 Runden. 1. R.: li., 2. R.: re. MUSTER: Siehe Diagramm. Das Diagramm zeigt das Muster von der Vorderseite. -------------------------------------------------------- -------------------------------------------------------- VORDER- UND RÜCKENTEIL: Die Arbeit wird rund gestrickt. Mit 2 Fäden dunkel indigo auf Rundnadel Nr. 4,5, 176-192-204-220-240-260 M. anschlagen und 2 Krausrippen stricken - siehe oben. Zu Rundnadel Nr. 5 wechseln und glatt stricken. Jetzt am Anfang und nach 88-96-102-110-120-130 M. je einen Markierungsfaden einziehen. Nach 4-4-5-5-5-6 cm auf beiden Seiten der Markierungsfäden je 1 M. abn. (= 4 Abnahmen). Alle 2½-3-3-3-3½-3½ cm total 11 Mal wiederholen = 132-148-160-176-196-216 M. GLEICHZEITIG nach 31-33-35-37-39-41 cm M1 total 7 Mal in der Höhe stricken. Danach mit 2 Fäden eco natur fertig stricken. GLEICHZEITIG nach 49-50-51-52-53-54 cm auf beiden Seiten je 6 M. abk. (d.h. je 3 M. auf beiden Seiten des Markierungsfadens). Danach die Teile separat fertig stricken. RÜCKENTEIL: = 60-68-74-82-92-102 M. weiter am Anfang jeder R. für das Armloch abk.: 3 M. 0-1-1-2-2-3 Mal, 2 M. 1-1-2-2-3-3 Mal und 1 M. 1-1-1-1-3-4 Mal = 54-56-58-60-62-64 M. Nach 66-68-70-72-74-76 cm die mittleren 22-22-24-24-26-26 M. für den Hals abk. Weiter bei der nächsten R. 1 M. gegen den Hals abk. = 15-16-16-17-17-18 M. Nach 68-70-72-74-76-78 cm abk. VORDERTEIL: = 60-68-74-82-92-102 M. Wie am Rückenteil für das Armloch abk. = 54-56-58-60-62-64 M. Nach 60-62-64-65-67-69 cm die mittleren 12-12-14-14-16-16 M. für den Hals abk. und die Teile separat fertig stricken. RECHTES VORDERTEIL: = 21-22-22-23-23-24 M. Weiter bei jede R. gegen den Hals wie folgt abk.: 2 M. 2 Mal und 1 M. 2 Mal = 15-16-16-17-17-18 M. Nach 68-70-72-74-76-78 cm abk. LINKES VORDERTEIL: Wie das rechte Vorderteil nur spiegelverkehrt. ÄRMEL: Mit 2 Fäden dunkel indigo auf Nadelspiel Nr. 4,5, 40-42-44-46-48-52 M. anschlagen und 2 Krausrippen stricken. Am Anfang der R. einen Markierungsfaden einziehen. Zu Nadelspiel Nr. 5 wechseln und glatt stricken. GLEICHZEITIG M1 8-9-9-9-9-9 Mal in der Höhe stricken. Danach mit 2 Fäden eco natur weiterfahren. GLEICHZEITIG nach 7-6-6-6-5-4 cm auf beiden Seiten des Markierungsfadens je 1 M. aufnehmen und alle 3-3-2½-2-2-2 cm total 9-10-11-12-13-13 Mal wiederholen = 58-62-66-70-74-78 M. Nach 35-35-34-33-32-31 cm unter dem Ärmel 6 M. abk. und die Arbeit hin und zurück weiterstricken. Weiter beidseitig, am Anfang der R. für die Armkugel abk.: 2 M. 2-2-2-2-3-3 Mal, 1 M. 3-4-5-7-7-8 Mal. Weiter auf beiden Seiten je 2 M. abk. bis die Arbeit ca. 41-42-42-43-44-44 cm misst. Jetzt auf beiden Seiten je 3 M. abk. Nach ca. 43-44-44-45-46-46 cm abk. ZUSAMMENNÄHEN: Die Schulternaht zusammennähen. Die Ärmel einnähen. HALS: Die Arbeit rund stricken. Rund um den Hals mit 2 Fäden dunkel indigo auf Nadelspiel Nr. 4,5, 78-78-82-86-90-90 M. anschlagen und 2 Krausrippen stricken. Danach abk. |
|||||||
Erklärungen zum Diagramm |
|||||||
|
|||||||
 |
|||||||
Haben Sie diese Anleitung nachgearbeitet?Dann taggen Sie Ihre Fotos mit #dropspattern #shipahoysweater oder schicken Sie sie an die #dropsfan Galerie Brauchen Sie Hilfe bei dieser Anleitung?Sie finden 20 Videotutorials, einen Kommentar/Fragen-Bereich und vieles mehr, wenn sie die Anleitung bei garnstudio.com aufrufen. © 1982-2026 DROPS Design A/S. Wir besitzen alle Rechte. Dieses Dokument, einschließlich aller Untersektionen, hat Urheberrechte. Mehr dazu, was Sie mit unseren Anleitungen machen können, finden Sie ganz unten auf der Seite zu jeder Anleitung. |
|||||||


Mit über 40 Jahren Tätigkeit im Entwerfen von Strick- und Häkelmustern bietet Ihnen DROPS Design eine der umfangreichsten Sammlungen von kostenlosen Anleitungen im Internet - in 17 Sprachen übersetzt. Zum jetzigen Zeitpunkt haben wir insgesamt 325 Handarbeitshefte und 12298 Anleitungen auf Deutsch. 12210
Unser Ziel ist es, Ihnen die besten Angebote zum Stricken und Häkeln, Inspirationen und Ratschläge sowie qualitativ hochstehende Garne zu unglaublichen Preisen zu bieten! Möchten Sie unsere Anleitungen nicht nur für den persönlichen Gebrauch nutzen? Unsere Copyright Bedingungen finden Sie bei allen unseren Anleitungen ganz unten auf der jeweiligen Seite. Viel Spaß beim Handarbeiten!
Kommentieren Sie die Anleitung DROPS 120-11
Wir würden gerne Ihre Meinung zu diesem Modell erfahren!
Wenn Sie eine Frage stellen möchten, prüfen Sie bitte, dass Sie die richtige Kategorie im unten stehenden Formular gewählt haben - so bekommen Sie schneller eine Antwort. Die obligatorischen Felder sind mit einem * gekennzeichnet.