
Beliebte Kategorien
Suchen Sie nach einem Garn?


Kommentare / Fragen (113)
![]() Brenda hat geschrieben:
Brenda hat geschrieben:
Any chance of doing a video tutorial on you-tube. I really like this headband, but am confused with the written pattern.
01.12.2022 - 01:02DROPS Design hat geantwortet:
Dear Brenda, you will find videos relative to the techniques used in that pattern at the bottom of the pattern, feel free to ask your question here so that we can help you further in the part of the pattern you don't understand. Happy knitting!
01.12.2022 - 11:46
![]() Kathy hat geschrieben:
Kathy hat geschrieben:
I am on the first increase row to 24 stitches and following the established rib pattern but there are not enough stitches to complete the rib pattern! What do I do?
11.10.2021 - 01:08DROPS Design hat geantwortet:
Hi Kathy, You increase all P1 to P2 (5 stitches increased) which gives you 24 stitches. You now have 1 stitch in garter stitch, 5 x K2, P2 (20 stitches), K2 and 1 stitch in garter stitch = 24 stitches. Happy knitting!
11.10.2021 - 07:04
![]() Iris hat geschrieben:
Iris hat geschrieben:
Hallo! Ich bin ziemliche Anfängerin und komme mit der Anleitung nicht ganz zurecht. Betrifft das Fertigstellen des Stirnbands mit den Maschen auf einem Hilfsfaden. Habe leider auch kein passendes Videotutorial dazu finden können. Wie lange muß der Hilfsfaden sein? und wird er mithineingenäht? Danke im Voraus für die Hilfe!
01.01.2021 - 22:03DROPS Design hat geantwortet:
Liebe Iris, die stillgelegten Maschen werden wie in diesem Video zusammen mit der Anschlagskante - wie in diesem Video zusammen genäht, dh so eine "Mischung" je nach den Maschen. Viel Spaß beim zusammennähen!
04.01.2021 - 14:43
![]() Diana Connolly hat geschrieben:
Diana Connolly hat geschrieben:
This increase is called a make 1 in English. If you’d written it like this many here wouldn’t have had so many problems, make 1 is a term used when you increase by picking up the loop between stitches. Hope this helps.
27.10.2020 - 21:20
![]() Kirsty hat geschrieben:
Kirsty hat geschrieben:
Hi, wow many thanks for your helpful video reply. I really appreciate it. Love your site. Well wishes, Kirsty
28.06.2020 - 20:24
![]() Sherie Rodrigues hat geschrieben:
Sherie Rodrigues hat geschrieben:
To all the knitters who commented and asked questions, and to all the staff who answered the questions, I say THANK YOU. Without your help I may not have worked the pattern out by myself, but I am so glad I did. It is simple, when the light bulb goes off. I would suggest you look at the questions and answers until it makes sense. I do so LOVE this pattern . Thanks again everyone. Regards and happy knitting.
10.06.2020 - 15:30
![]() Karren hat geschrieben:
Karren hat geschrieben:
Thank you so much for the guidance in my pattern. I am almost finished and think I will love it. Karren
18.04.2020 - 01:05
![]() Karren hat geschrieben:
Karren hat geschrieben:
I do not understand what I am supposed to do on the wrong side of the pattern in between the increase rows. The increases occur on the right side. Does the ribbing continue through out the whole pattern?
17.04.2020 - 00:53DROPS Design hat geantwortet:
Dear Karren, you increase in the P-sections seen from RS (these sts are worked K from WS), when working from WS you will K over K and P over P, and the number of K stitches from WS will increase (then decrease on the 2nd half of piece) as the P stitches from WS increases. Happy knitting!
17.04.2020 - 09:01
![]() Judith hat geschrieben:
Judith hat geschrieben:
I was sold a yarn that gets 2 st/inch on an 8 needle and is not too stiff. will the pattern work as written? Do I knit first stitch, then do the edge stitch? hat seem strange to me, so I am asking. I thought the edge stitch would be first. Thank you
16.12.2019 - 04:45DROPS Design hat geantwortet:
Dear Judith, please check your tension - read more here about tension. Pattern is worked in rib with 1 edge stitch in garter stitch on each side. Happy knitting!
16.12.2019 - 09:10
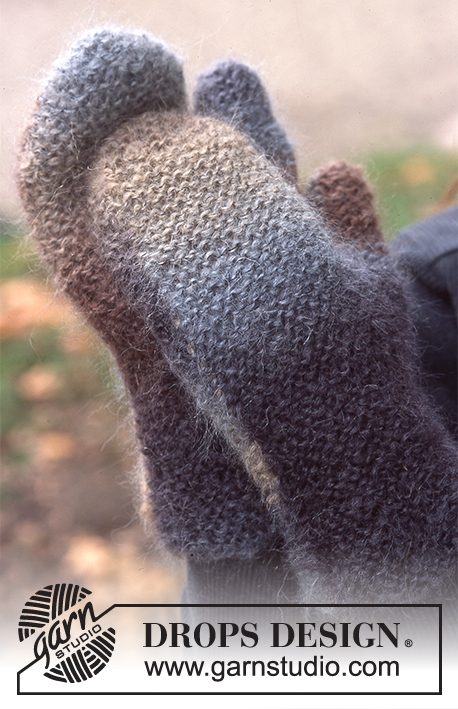
![]() Shannon hat geschrieben:
Shannon hat geschrieben:
What is the multi colored yarn in the second picture?
14.12.2019 - 04:07DROPS Design hat geantwortet:
Dear Shannon, in the second picture, the mittens are made with Vivaldi ( from group C) but this yarn is discontinued. Happy knitting!
15.12.2019 - 18:41
|
|
Saturn Rings |
|
|
|
|
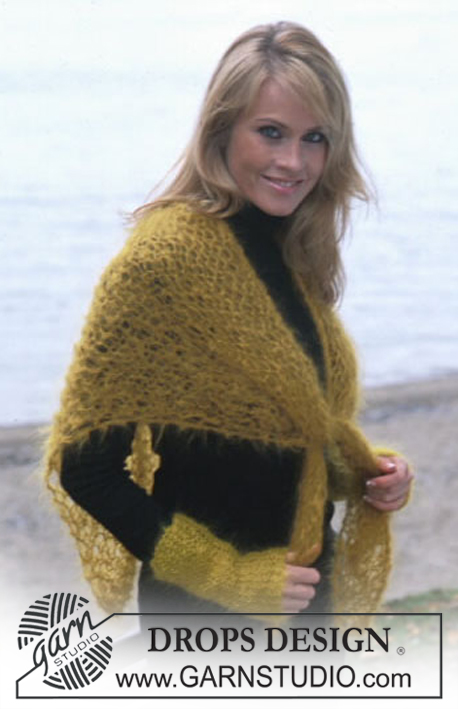
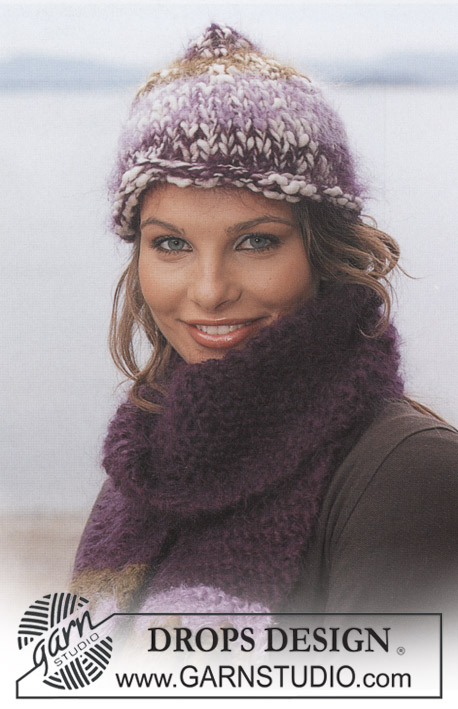
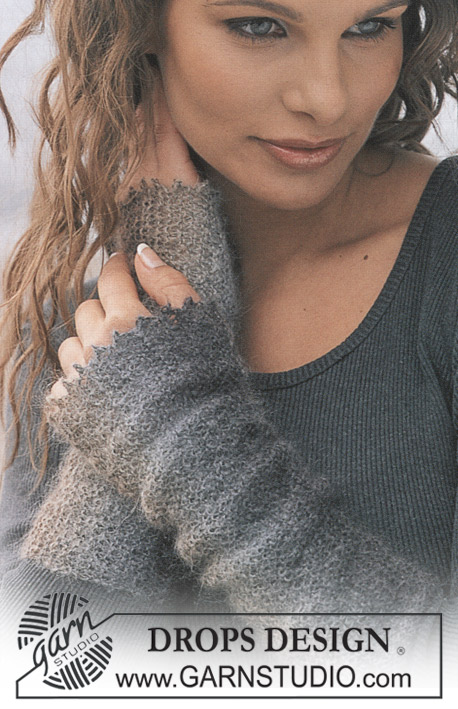
Gestricktes Stirnband in DROPS Alaska
DROPS 86-10 |
|
|
KRAUS RECHTS (in Hin- und Rück-R): Jede R re str. -------------------------------------------------------- STIRNBAND: In der Mitte hinten anfangen und mit Alaska auf Ndl. Nr. 4,5 19 M anschlagen. Die nächste R. in dieser Weise stricken: 1 M KRAUS RECHTS (siehe oben), * 2 M re, 1 M li *, von *-* insgesamt 5 Mal arbeiten und mit 2 M re und 1 M kraus rechts enden. Wenn die Arb. 8 cm misst, bei jeder Linksrippe 1 M zunehmen, sodass aus 1 M li 2 M li werden = 24 M auf der Ndl. Wenn die Arb. 14 cm misst, wieder in jeder Linksrippe 1 M zunehmen, sodass aus 2 M li 3 M li werden = 29 M auf der Ndl. Wenn die Arb.18 cm misst, wieder in jeder Linksrippe 1 M zunehmen, sodass aus 3 M li 4 M li werden = 34 M auf der Ndl. Wenn die Arb. 21 cm misst, wieder in jeder Linksrippe 1 M zunehmen, sodass aus 4 M li 5 M li werden = 39 M auf der Ndl. Wenn die Arb. 24 cm misst, einen Markierungsfaden anbringen = die Mitte oben. Von hier wird die Arb. gegengleich gestrickt - d.h. es werden die M abgenommen, die vorher zugenommen wurden. Dies wird gemacht, bis 19 M auf der Ndl. übrig sind. Wenn die Arb. 48 cm misst, die M auf einen Hilfsfaden legen. Die M vom Hilfsfaden mit dem Anschlagrand zusammennähen, dabei die Naht Masche an Masche arb, damit die Naht elastisch wird. |
|
Haben Sie diese Anleitung nachgearbeitet?Dann taggen Sie Ihre Fotos mit #dropspattern oder schicken Sie sie an die #dropsfan Galerie Brauchen Sie Hilfe bei dieser Anleitung?Sie finden 16 Videotutorials, einen Kommentar/Fragen-Bereich und vieles mehr, wenn sie die Anleitung bei garnstudio.com aufrufen. © 1982-2026 DROPS Design A/S. Wir besitzen alle Rechte. Dieses Dokument, einschließlich aller Untersektionen, hat Urheberrechte. Mehr dazu, was Sie mit unseren Anleitungen machen können, finden Sie ganz unten auf der Seite zu jeder Anleitung. |


Mit über 40 Jahren Tätigkeit im Entwerfen von Strick- und Häkelmustern bietet Ihnen DROPS Design eine der umfangreichsten Sammlungen von kostenlosen Anleitungen im Internet - in 17 Sprachen übersetzt. Zum jetzigen Zeitpunkt haben wir insgesamt 324 Handarbeitshefte und 12285 Anleitungen auf Deutsch. 12197
Unser Ziel ist es, Ihnen die besten Angebote zum Stricken und Häkeln, Inspirationen und Ratschläge sowie qualitativ hochstehende Garne zu unglaublichen Preisen zu bieten! Möchten Sie unsere Anleitungen nicht nur für den persönlichen Gebrauch nutzen? Unsere Copyright Bedingungen finden Sie bei allen unseren Anleitungen ganz unten auf der jeweiligen Seite. Viel Spaß beim Handarbeiten!
Kommentieren Sie die Anleitung DROPS 86-10
Wir würden gerne Ihre Meinung zu diesem Modell erfahren!
Wenn Sie eine Frage stellen möchten, prüfen Sie bitte, dass Sie die richtige Kategorie im unten stehenden Formular gewählt haben - so bekommen Sie schneller eine Antwort. Die obligatorischen Felder sind mit einem * gekennzeichnet.