
Beliebte Kategorien
Suchen Sie nach einem Garn?


Kommentare / Fragen (113)
![]() Lisette hat geschrieben:
Lisette hat geschrieben:
Wat een leuk patroon! Het is al best oud, dus bedankt dat het nog beschikbaar is. Hier ga ik veel mensen blij mee maken en het is zo prettig om te breien. Super!
18.10.2025 - 01:26
![]() Anneli Kokkola hat geschrieben:
Anneli Kokkola hat geschrieben:
This is very nice, and there are my daughters and their friends hoping me to make this for them❣️
30.03.2025 - 12:30
![]() Silvia hat geschrieben:
Silvia hat geschrieben:
Seit Jahren stricke ich dieses Stirnband für mich und Freundinnen in allen möglichen Farben. Gut verständliche Anleitung und das Ergebnis sitzt perfek. Vielen Dank für dieses zeitlose und doch pfiffige Accessoire für kalte Tage.
24.02.2025 - 18:08
![]() Annika hat geschrieben:
Annika hat geschrieben:
Det fattas ju en del av mönstret på svenska! Inte konstigt att det blir fel är jag försöker sticka. Hade varit tacksam om ni rättade till det!
07.02.2025 - 17:14
![]() Janine Luisier hat geschrieben:
Janine Luisier hat geschrieben:
Bonjour votre site est excellent belles laines, beaux modèles, et le 86-10 super comme tant d'autres. Les explications à portée de tous. Mille MERCIS ż
05.12.2024 - 15:08
![]() Stéphanie P hat geschrieben:
Stéphanie P hat geschrieben:
Bonjour, Comment joindre les deux extrémités du tricot sans rabattre les mailles? Je ne trouve aucun tutos ... Merci d'avance Stéphanie
01.11.2024 - 00:33
![]() Lorraine hat geschrieben:
Lorraine hat geschrieben:
Bonjour, pourquoi ne pas rabattre les mailles avant de coudre le bandeau.
11.09.2024 - 17:20DROPS Design hat geantwortet:
Bonjour Lorraine, pour éviter que la couture ne soit trop épaisse, mais vous pouvez tout à fait rabattre avant si vous le préférez. Bon tricot!
12.09.2024 - 09:26
![]() June hat geschrieben:
June hat geschrieben:
Do I do the first two rows actually like they are written after doing the first increase row?
23.03.2024 - 00:43DROPS Design hat geantwortet:
Dear June, in this pattern you have a rib pattern, where you will repeat the rib explained in rows 1 and 2. However, as you increase, the rib will slightly change. For example, in the first increase at 3", you increase from P1 in the rib to P2 from the RS (by purling 2 stitches in 1 purl stitch). Then, on the WS knit over the new purl stitches (so the new rib will look like K2, P2 from the RS and P2, K2 from the WS). As you continue increasing you will add P stitches from the RS, which are knitted from the WS (so K2, P3 from the RS and P2, K3 from the WS; then K2, P4 from the RS and P2, K4 from the WS). Continue increasing like this. Happy knitting!
25.03.2024 - 00:00
![]() June hat geschrieben:
June hat geschrieben:
When the piece messages 3 ins what do I do now?
23.03.2024 - 00:30DROPS Design hat geantwortet:
Dear June, in the first increase at 3", you will work as follows from the RS: K 1 (edge st knit in garter st), * K 2, P 2 (that is, purl 2 stitches in the P1 to increase 1 purl stitch) * repeat a total of 5 times – finish row with K 2 and K 1 (edge st knit in garter st). Due to these increases, in the WS the rib also changes: from P2, K1 to P2, K2 (you don't increase in this row, just work over the increased stitches in the previous row). Happy knitting!
25.03.2024 - 00:00
![]() Carole Saidah hat geschrieben:
Carole Saidah hat geschrieben:
Bonjour, pour le bandeau, est ce que les diminutions se font sur l'endroit du travail comme pour les augmentations ? Merci pour votre réponse
27.12.2022 - 19:55DROPS Design hat geantwortet:
Bonjour Mme Saidah, tout à fait, on doit diminuer le nombre de mailles envers, vu sur l''endroit, on va tricoter ainsi 2 m ens à l'envers sur l'endroit. Bon tricot!
02.01.2023 - 10:33
|
|
Saturn Rings |
|
|
|
|
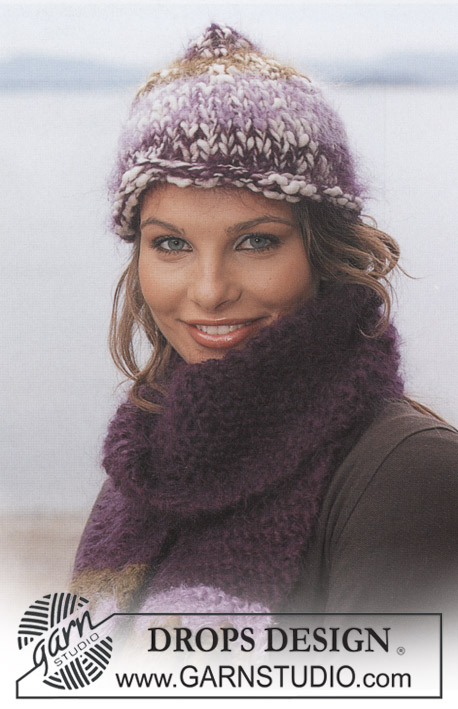
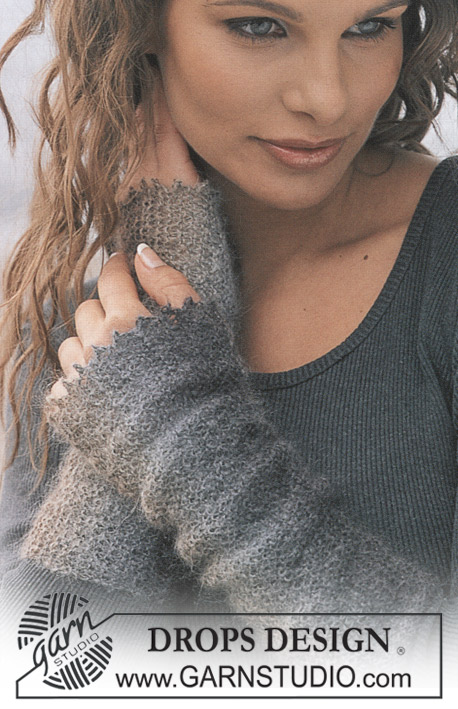
Gestricktes Stirnband in DROPS Alaska
DROPS 86-10 |
|
|
KRAUS RECHTS (in Hin- und Rück-R): Jede R re str. -------------------------------------------------------- STIRNBAND: In der Mitte hinten anfangen und mit Alaska auf Ndl. Nr. 4,5 19 M anschlagen. Die nächste R. in dieser Weise stricken: 1 M KRAUS RECHTS (siehe oben), * 2 M re, 1 M li *, von *-* insgesamt 5 Mal arbeiten und mit 2 M re und 1 M kraus rechts enden. Wenn die Arb. 8 cm misst, bei jeder Linksrippe 1 M zunehmen, sodass aus 1 M li 2 M li werden = 24 M auf der Ndl. Wenn die Arb. 14 cm misst, wieder in jeder Linksrippe 1 M zunehmen, sodass aus 2 M li 3 M li werden = 29 M auf der Ndl. Wenn die Arb.18 cm misst, wieder in jeder Linksrippe 1 M zunehmen, sodass aus 3 M li 4 M li werden = 34 M auf der Ndl. Wenn die Arb. 21 cm misst, wieder in jeder Linksrippe 1 M zunehmen, sodass aus 4 M li 5 M li werden = 39 M auf der Ndl. Wenn die Arb. 24 cm misst, einen Markierungsfaden anbringen = die Mitte oben. Von hier wird die Arb. gegengleich gestrickt - d.h. es werden die M abgenommen, die vorher zugenommen wurden. Dies wird gemacht, bis 19 M auf der Ndl. übrig sind. Wenn die Arb. 48 cm misst, die M auf einen Hilfsfaden legen. Die M vom Hilfsfaden mit dem Anschlagrand zusammennähen, dabei die Naht Masche an Masche arb, damit die Naht elastisch wird. |
|
Haben Sie diese Anleitung nachgearbeitet?Dann taggen Sie Ihre Fotos mit #dropspattern oder schicken Sie sie an die #dropsfan Galerie Brauchen Sie Hilfe bei dieser Anleitung?Sie finden 16 Videotutorials, einen Kommentar/Fragen-Bereich und vieles mehr, wenn sie die Anleitung bei garnstudio.com aufrufen. © 1982-2026 DROPS Design A/S. Wir besitzen alle Rechte. Dieses Dokument, einschließlich aller Untersektionen, hat Urheberrechte. Mehr dazu, was Sie mit unseren Anleitungen machen können, finden Sie ganz unten auf der Seite zu jeder Anleitung. |


Mit über 40 Jahren Tätigkeit im Entwerfen von Strick- und Häkelmustern bietet Ihnen DROPS Design eine der umfangreichsten Sammlungen von kostenlosen Anleitungen im Internet - in 17 Sprachen übersetzt. Zum jetzigen Zeitpunkt haben wir insgesamt 324 Handarbeitshefte und 12290 Anleitungen auf Deutsch. 12202
Unser Ziel ist es, Ihnen die besten Angebote zum Stricken und Häkeln, Inspirationen und Ratschläge sowie qualitativ hochstehende Garne zu unglaublichen Preisen zu bieten! Möchten Sie unsere Anleitungen nicht nur für den persönlichen Gebrauch nutzen? Unsere Copyright Bedingungen finden Sie bei allen unseren Anleitungen ganz unten auf der jeweiligen Seite. Viel Spaß beim Handarbeiten!
Kommentieren Sie die Anleitung DROPS 86-10
Wir würden gerne Ihre Meinung zu diesem Modell erfahren!
Wenn Sie eine Frage stellen möchten, prüfen Sie bitte, dass Sie die richtige Kategorie im unten stehenden Formular gewählt haben - so bekommen Sie schneller eine Antwort. Die obligatorischen Felder sind mit einem * gekennzeichnet.