
Popular categories
Looking for a yarn?


Comments / Questions (5)
![]() Martine CARLUT wrote:
Martine CARLUT wrote:
Dommage que vous ne donniez pas les explications pas à pas avec une vidéo et en le tricotant..Par contre pour le faire en rond, avez vous les explications?? mille mercis et si quelqu'un parmi vous a tricoté ce pull et veut bien m'aider...ce serait adorable
13.03.2022 - 01:43DROPS Design answered:
Bonjour Mme Carlut, comme le point mousse se tricote plus simplement en allers et retours (tout en mailles endroit), on le tricote plus volontiers en rangs et non en rond, d'autant que, si vous le tricoter en rond jusqu'aux emmanchures, vous devrez continuer ensuite en rangs, chaque partie séparément. Retrouvez ici comment faire ensuite les coutures des côtés. Bon tricot!
14.03.2022 - 10:56
![]() Janis Helferich wrote:
Janis Helferich wrote:
Nice thanks
13.08.2020 - 19:25
![]() Nick wrote:
Nick wrote:
Peut on faire ce patron sur des aiguilles circulaires? Je déteste faire les coutures merci
11.07.2019 - 02:53DROPS Design answered:
Bonjour Nick! C'est possible. Il faut prendre moins de mailles (corps), parce que les coutures ne seront pas effectuees. Bon travail!
11.07.2019 - 08:20
![]() Anaïs wrote:
Anaïs wrote:
Merci pour votre réponse rapide à ma question. L'énoncé n'est vraiment pas clair. Si je peux me permettre je suggère les formulations suivantes : "Quand l'ouvrage mesure 5cm et à nouveau quand il mesure 10cm" et "Quand l'ouvrage mesure 15cm et à nouveau quand il mesure 19 cm". En vous remerciant pour votre super travail !
03.07.2019 - 14:25
![]() Anaïs wrote:
Anaïs wrote:
Bonjour, Je ne comprends pas ce que signifie "quand l'ouvrage mesure 5 et 10cm" et "quand l'ouvrage mesure 15 et 19cm". Comment la mesure doit-elle être faite ? En vous remerciant par avance
02.07.2019 - 13:12DROPS Design answered:
Bonjour Anaïs, on va diminuer 1 m de chaque côté dans toutes les tailles quand l'ouvrage mesure 5 cm puis encore 1 fois quand l'ouvrage mesure 10 cm. On va augmenter 1 m de chaque côté dans toutes les tailles quand l'ouvrage mesure 15 cm et encore 1 fois quand il mesure 19 cm. Bon tricot!
02.07.2019 - 14:59
|
|
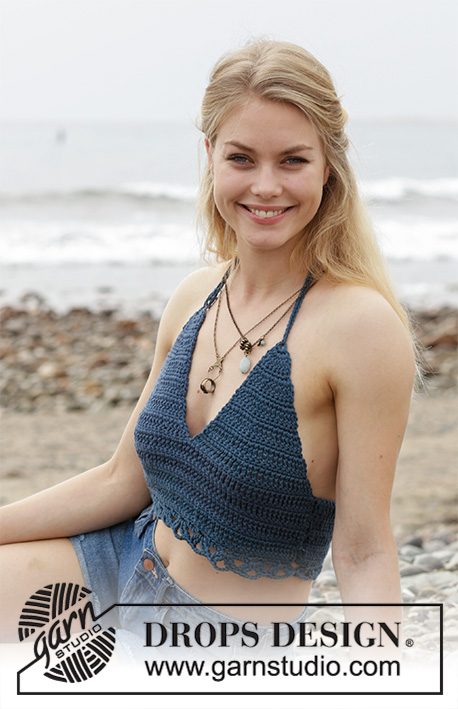
Beach Stripes#beachstripestop |
|
|
|
|
Knitted top with garter stitch and stripes. Sizes XS - XL. The piece is worked in DROPS Paris.
DROPS 190-17 |
|
|
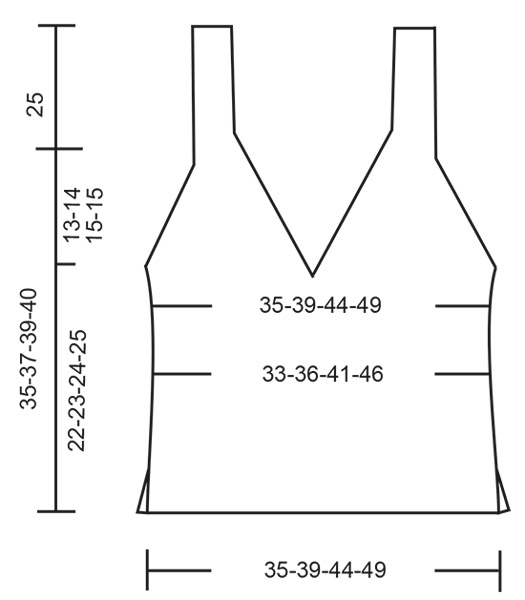
INFORMATION FOR THE PATTERN: RIDGE/GARTER STITCH (worked back and forth): 1 ridge = Knit 2 rows. DECREASE TIP All decreases are worked from the right side: Decrease inside the 1 stitch in the side. Decrease 1 stitch by knitting 2 stitches together. STRIPES: Work 6 ridges with white and 1 ridge with light blue – repeat these stripes upwards. ------------------------------------------------------------ TOP: The front and back pieces are worked back and forth separately and sewn together in the sides to finish. The straps are tied onto the shoulders. FRONT PIECE: Cast on 56-62-70-78 stitches (including 1 edge stitch in each side) with circular needle size 5.5 mm and white. Work GARTER STITCH and STRIPES – see description above. REMEMBER THE KNITTING TENSION! When the piece measures 5 and 10 cm decrease 1 stitch in each side – read DECREASE TIP = 52-58-66-74 stitches. When the piece measures 15 and 19 cm increase 1 stitch in each side = 56-62-70-78 stitches. When the piece measures 22-23-24-25 cm divide the piece mid front and the last 28-31-35-39 stitches are placed on a thread. RIGHT FRONT PIECE: = 28-31-35-39 stitches. Continue with garter stitch and stripes AT THE SAME TIME start to decrease for the armhole and neckline – remember DECREASE TIP! ARMHOLE: Decrease 1 stitch at the beginning of the row as follows (from the right side): Decrease every 2nd row a total of 2-5-10-15 times, then every 4th row a total of 11-10-8-6 times. NECKLINE: Decrease 1 stitch at the end of the row as follows (from the right side): Decrease every 4th row a total of 10-11-12-13 times. After all the decreases there are 5 stitches left on the needle. The piece is now finished with white. Work garter stitch over these 5 stitches until the strap measures approx. 25 cm (from where the decreases finished). Now decrease 1 stitch in each side, work 1 row and then work the last 3 stitches together, cut the strand. LEFT FRONT PIECE: Worked as for the right, but in reverse; i.e. decrease for armhole at the end of rows from the right side and for the neckline at the beginning of rows from the right side. BACK PIECE: Cast on and work as for front piece. ASSEMBLY: The top is assembled with the wrong side out. Sew the side seams in the outermost loop of the outermost stitch; start 4 cm from the bottom edge, the bottom 4 cm = split. |
|
 |
|
Have you finished this pattern?Tag your pictures with #dropspattern #beachstripestop or submit them to the #dropsfan gallery. Do you need help with this pattern?You'll find 13 tutorial videos, a Comments/Questions area and more by visiting the pattern on garnstudio.com. © 1982-2026 DROPS Design A/S. We reserve all rights. This document, including all its sub-sections, has copyrights. Read more about what you can do with our patterns at the bottom of each pattern on our site. |


With over 40 years in knitting and crochet design, DROPS Design offers one of the most extensive collections of free patterns on the internet - translated to 17 languages. As of today we count 324 catalogues and 12245 patterns translated into English (UK/cm). 12245
We work hard to bring you the best knitting and crochet have to offer, inspiration and advice as well as great quality yarns at incredible prices! Would you like to use our patterns for other than personal use? You can read what you are allowed to do in the Copyright text at the bottom of all our patterns. Happy crafting!
Post a comment to pattern DROPS 190-17
We would love to hear what you have to say about this pattern!
If you want to leave a question, please make sure you select the correct category in the form below, to speed up the answering process. Required fields are marked *.