
Popular categories
Looking for a yarn?


Comments / Questions (31)
![]() Justyna Wikłacz wrote:
Justyna Wikłacz wrote:
Czy wymiary podane w tym projekcie uwzględniają to, że ta włóczka bardzo mocno się rozciąga?
21.05.2025 - 16:02DROPS Design answered:
Witaj Justyno, należy przerabiać sweter dosyć ścisło. Ja osobiście wybieram nieco mniejsze druty niż w opisie i to sprawia, że wymiary gotowego swetra nie odbiegają znacząco od schematycznego rysunku na dole wzoru. Koniecznie zapoznaj się z zasadami prania i konserwacji odzieży z tej włóczki, które znajdziesz w jej karcie kolorów TUTAJ. Pozdrawiamy!
22.05.2025 - 12:49
![]() Annette Thron wrote:
Annette Thron wrote:
Vielen Dank für die schnelle Antwort, jetzt ist mein Tag gerettet. Ich wünsche Ihnen noch einen schönen Tag.
14.02.2025 - 12:23
![]() Annette Thron wrote:
Annette Thron wrote:
Ich habe totale Probleme die Strickschrift zu verstehen. A2. 2 Reihe!! WIE STRICKE ICH ????So langsam verzweifel ich,nachdem ich schon 3mal neu angefangen habe!!
13.02.2025 - 19:06DROPS Design answered:
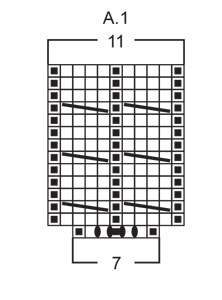
Liebe Frau Thron, in allen Größen sind es 5 M in jedem A.2 bei der 1. Reihe, dann wird man bei der 1. Reihe 2 Maschen in jedem A.2 zunehmen = 7 Maschen, so strickt man die 2. Reihe: (1 M links, 6 Maschen rechts), von (bis) die ganze Runde wiederholen. Viel Spaß beim Stricken!
14.02.2025 - 08:31
![]() Jónína Hrönn wrote:
Jónína Hrönn wrote:
Hvernig get ég séð stærð (sentimetrafjölda) fyrir hverja stærð? Ef ég er t.d. 115 cm. ca yfir brjóst/maga á ég þá að nota stærð l eða xl?
05.02.2025 - 15:50DROPS Design answered:
Blessuð Jónína Hrönn. Á síðunni okkar (ofarlega) er dálkur sem stendur: Skýringar & aðstoð, þú smellir á hann og velur stærðartöflur. Undir þeim dálki er: Sjá hvernig á að lesa úr töflu hér! Þú velur það og þá kemstu að góðum leiðbeiningum varðandi hvernig þú getur lesið út stærðarteikningu til að finna þína stærð. Gangi þér vel.
06.02.2025 - 09:50
![]() Basso wrote:
Basso wrote:
Quand je commence au bas du diagramme A2 on débute avec 5 mailles et sur ce rang vous dites glisser 2 mailles sur l'aiguille à torsades tricoter 2 mailles augmenter 1 maille reprendre les 2 mailles sur l'aiguille à torsades. Je n'ai fait qu'une augmentation alors qu'au rang suivant j'en ai 2 de plus. Merci pour votre réponse.
07.01.2025 - 11:39DROPS Design answered:
Bonjour Mme Basso, vous devez augmenter 2 mailles ainsi: vous glissez 2 m devant, tricotez 2 mailles endroit, et vous augmentez dans la 1ère maille sur l'aiguille droite comme indiqué sous AUGMENTATIONS-1 = autrement dit vous augmentez dans la 2ème des 2 mailles que vous venez de tricoter (= 1 m en plus), puis vous reprenez les 2 mailles en attente: vous augmentez 1 maille dans la 1ère de ces mailles (= 1 m en plus) et vous tricotez la 2ème maille = vous avez augmenté 2 mailles. Bon tricot!
07.01.2025 - 13:44
![]() Dina wrote:
Dina wrote:
Very beautiful. I hope we will see more models like this.
03.01.2025 - 15:59
![]() Illeana wrote:
Illeana wrote:
Hi, I would like to join this yoke with a knit bottom up sweater. It seems to me that I could join these two parts just below the yoke with the invisible "shoulder" seam, is it correct? Then I will add the sleeves. I am autodidactic, so I prefer to ask you, first. Thank you so much for your time!
04.12.2024 - 18:03DROPS Design answered:
Dear Illeana, you could adapt a bottom up sweater pattern and then work your desired yoke. For that, we recommend checking our bottom up sweaters, to guide you in the process of how to assemble the piece. First you should work the body, then cast off for the armholes and work the sleeves before starting the yoke. Then, add the sleeves onto the same needles as the body and work the yoke over all stitches. If you work the sleeves separately you will need to be very careful when calculating the yoke pattern, so that it will transition almost seamlessly from the front piece to the sleeve and to the back piece (and the same in the other sleeve). Happy knitting!
08.12.2024 - 01:15
![]() Lou wrote:
Lou wrote:
Hey there! Since the yarn used in this specific pattern - Merino extra fine - is super slippery, I wonder if there is a preferred way to join a new ball of yarn. I am worried that it may come unraveled after a couple of machine washes, when using a regular joining technique (magic knot, Russian knot, etc.). What techniques could you recommend? Just weaving it in as I go? Reinforcing it with a duplicate stitch afterwards?
04.12.2024 - 16:23DROPS Design answered:
Dear Lou, if you are afraid of the work getting unraveled you could, apart from the regular knot, reinforce the thread with duplicate stitches and leave the ends hanging and weave them after finishing the piece. The threads should be safely secured then. Happy knitting!
08.12.2024 - 01:09
![]() Isabel ROUVIERE wrote:
Isabel ROUVIERE wrote:
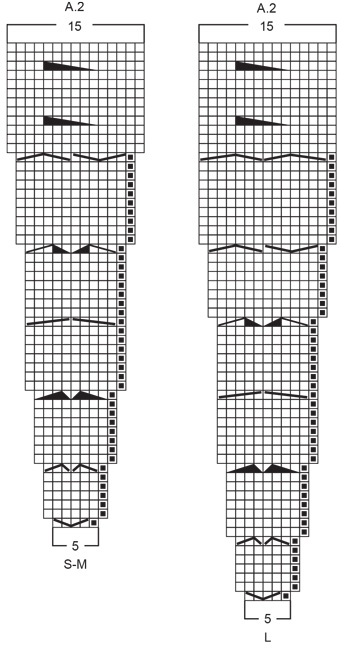
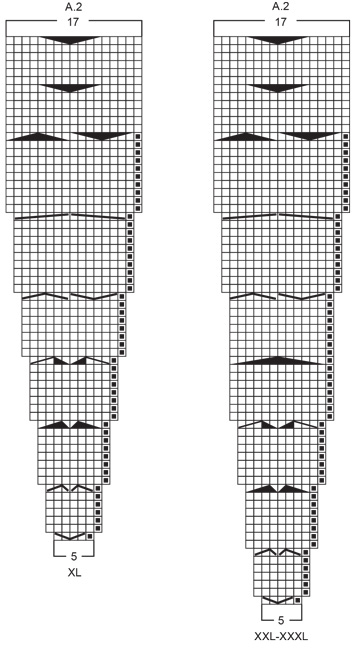
Bonjour, Ma question est sans doute idiote pour des chevronnées du tricot, ce que je ne suis pas mais je ne comprends pas votre diagramme A2 taille L. Commence -t-on par les 5 mailles (en bas du dessin) ou les 15 mailles en haut. Le tricot se faisant de haut en bas je pensais les 15 mailles, mais là plus rien ne va au niveau mailles me semble-t-il. Merci
11.11.2024 - 12:00DROPS Design answered:
Bonjour Mme Rouviere, les diagrammes se lisent de bas en haut, autrement dit, vous commencez A.2 sur 5 mailles et vous allez augmenter à chaque torsade et ainsi obtenir 15 mailles dans chaque A.2 quand les augmentations sont terminées. Bon tricot!
11.11.2024 - 12:49
![]() Rita wrote:
Rita wrote:
Meget flot
30.09.2024 - 10:51
|
||||||||||||||||||||||||||||||||||||||||||||||||||||||||||||||||||||||
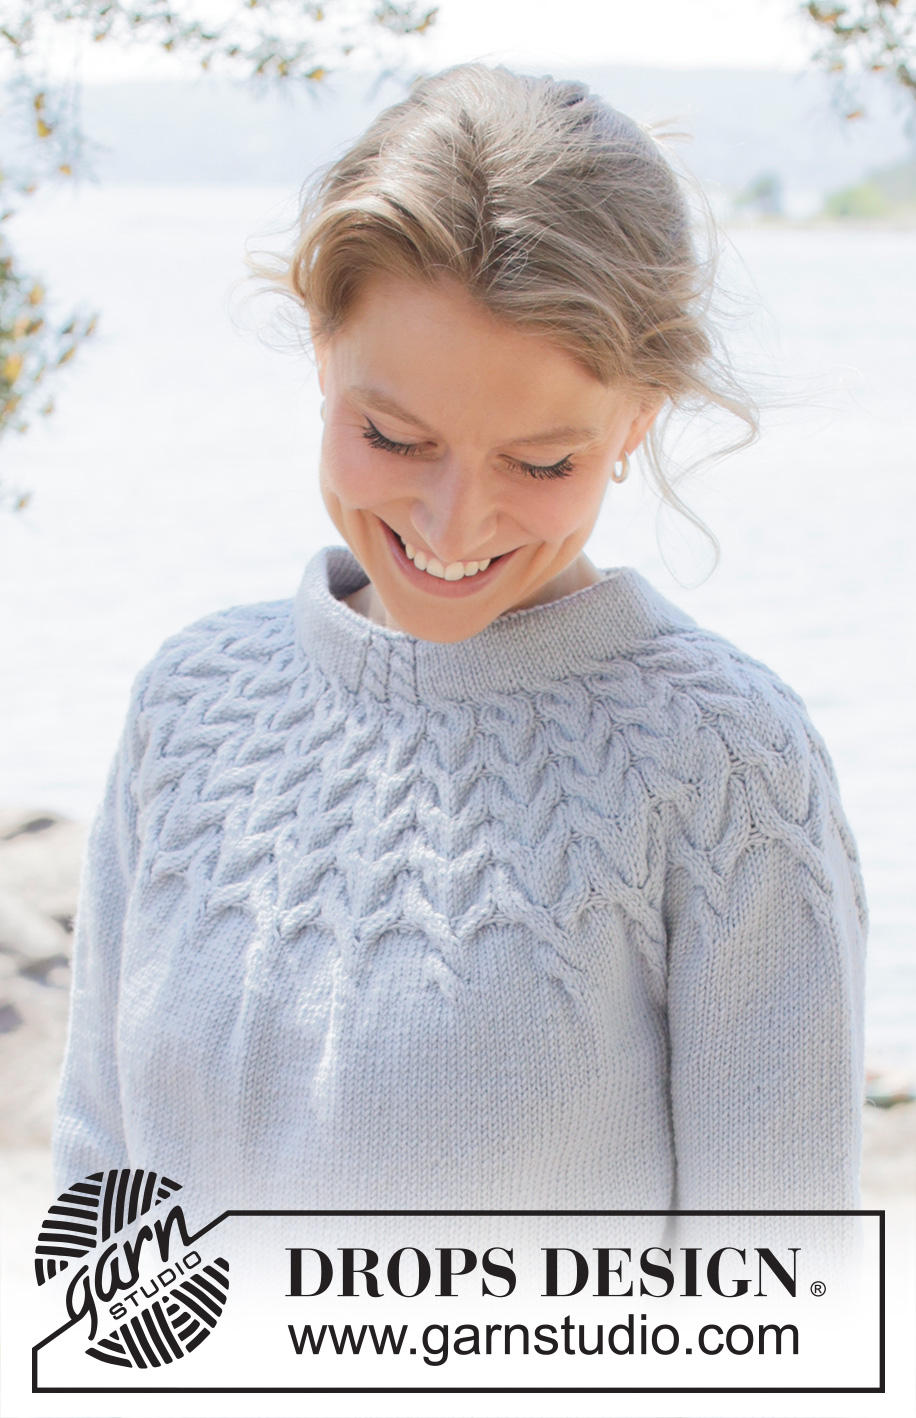
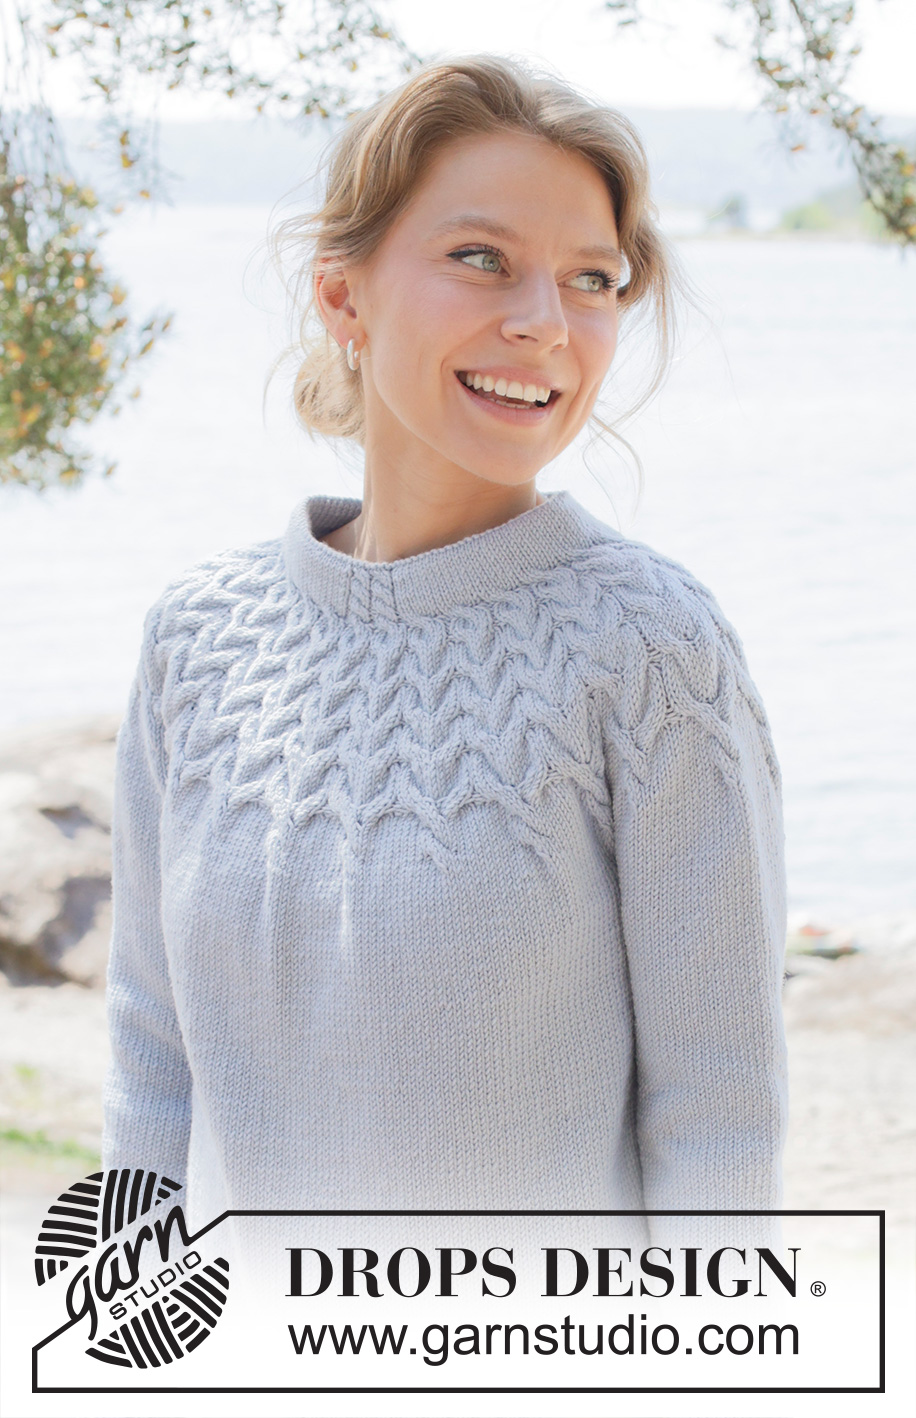
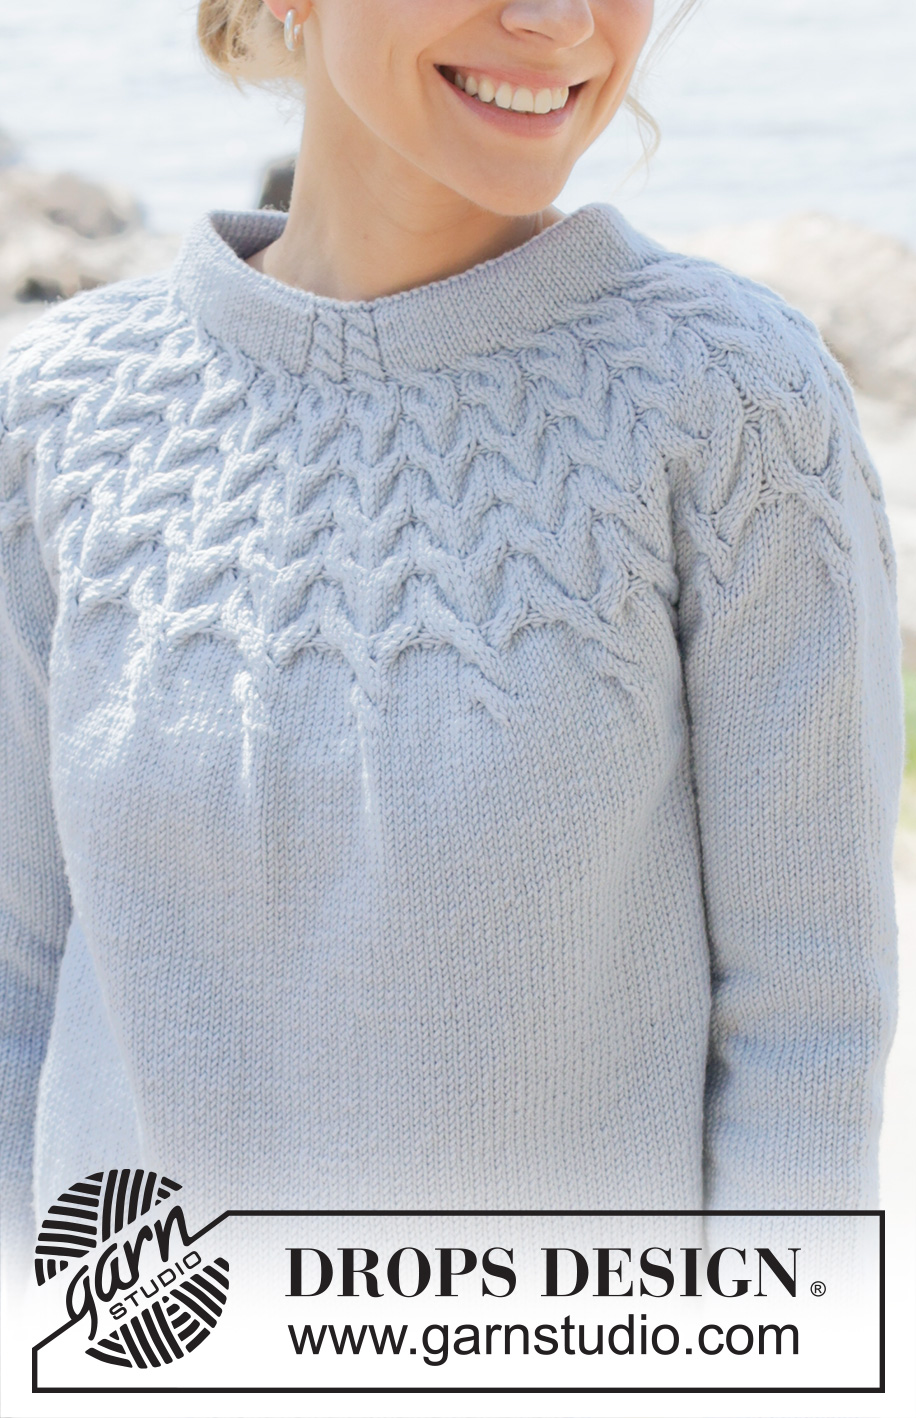
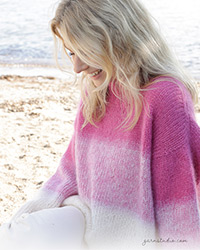
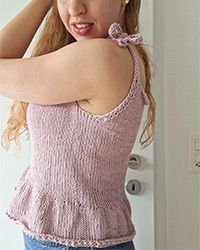
Mermaid Echo#mermaidechosweater |
||||||||||||||||||||||||||||||||||||||||||||||||||||||||||||||||||||||
 |
 |
|||||||||||||||||||||||||||||||||||||||||||||||||||||||||||||||||||||
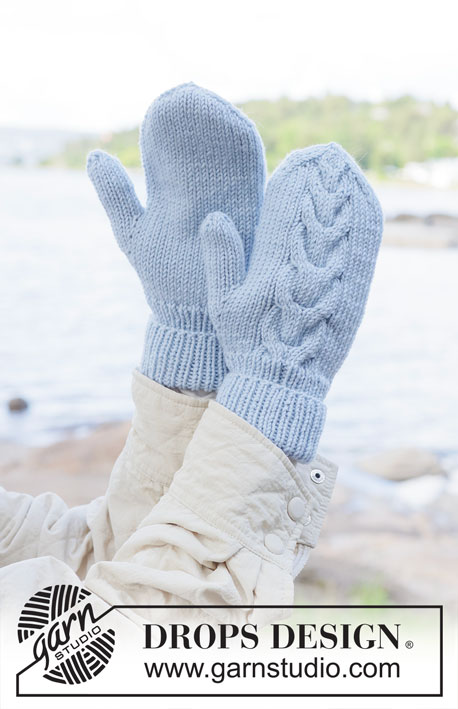
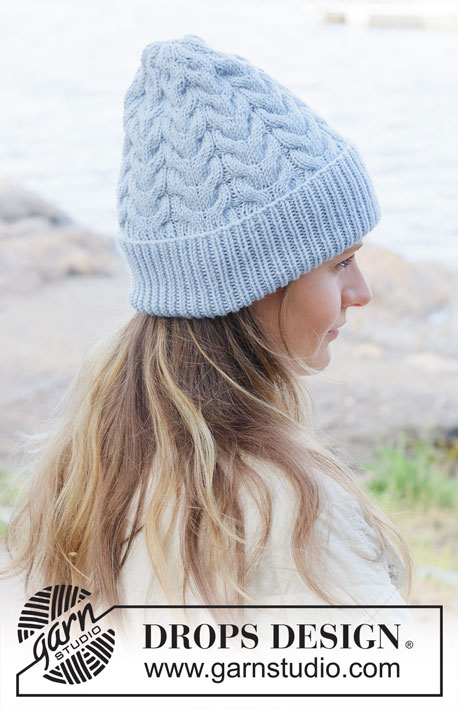
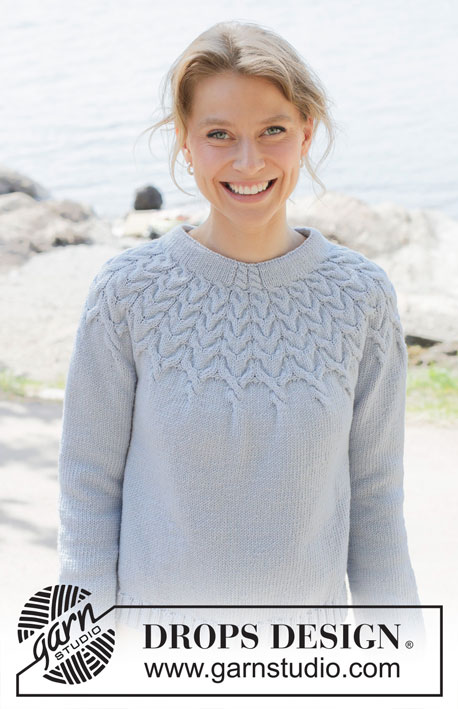
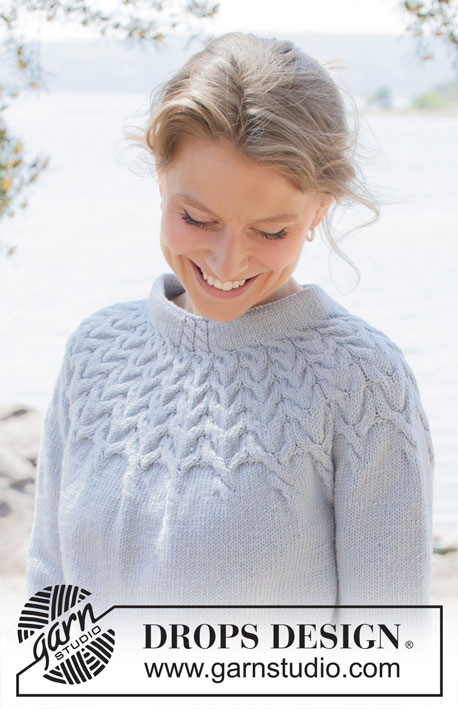
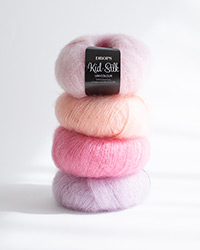
Knitted jumper in DROPS Merino Extra Fine. Piece is knitted top down with round yoke, cables and double neck edge. Size: S - XXXL
DROPS 254-3 |
||||||||||||||||||||||||||||||||||||||||||||||||||||||||||||||||||||||
|
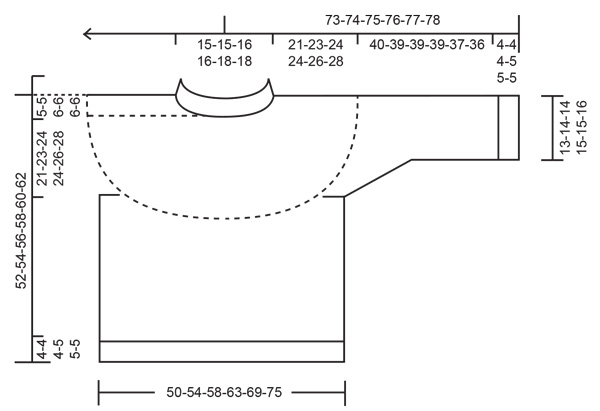
---------------------------------------------------------- EXPLANATION FOR THE PATTERN: ---------------------------------------------------------- PATTERN: See diagrams A.1 and A.2. Choose diagram for correct size. INCREASE TIP-1: Increase 1 stitch by picking up stitch from round below, i.e. pick up stitch that is under outermost stitch on needle and knit this stitch. INCREASE TIP-2: Increase 1 stitch by making 1 yarn over, on next round knit yarn over twisted to avoid holes. DECREASE AND INCREASE TIP (evenly): To calculate how to decrease/increase evenly, use the total number of stitches on row (e.g. 330 stitches) and divide stitches by number of decreases/increases to be done (e.g. 18) = 18.3. In this example decrease by knitting approx. every 17th and 18th stitch together. When increasing make 1 yarn over after approx. every 18th stitch. On next round work yarn overs twisted to avoid holes. DECREASE TIP: Decrease 1 stitch on each side of marker thread as follows: Work until 3 stitches remain before marker thread and knit 2 together, knit 2 (marker thread is in the middle of these 2 stitches), slip 1 stitch knitwise, knit 1, pass slipped stitch over stitch worked (= 2 stitches decreased). ¤¤¤¤¤¤¤¤¤¤¤¤¤¤¤¤¤¤¤¤¤¤¤¤¤¤¤¤¤¤¤¤¤¤¤¤¤¤¤¤¤¤¤¤¤¤¤¤¤¤¤¤¤¤¤¤ ---------------------------------------------------------- START THE PIECE HERE: ---------------------------------------------------------- JUMPER - SHORT OVERVIEW OF THE PIECE: In this pattern needles of different length have been used, begin with fitting length for number of stitches and switch as needed. Work neck edge and yoke in the round on circular needle from mid back, work top down. When yoke is done, divide piece for body and sleeves. Work body down wards in the round on circular needle while putting the sleeves aside. Then work sleeves downwards in the round on needle. Fold the neck edge double against the wrong side and fasten. NECK EDGE: Cast on 106-106-116-116-126-126 stitches on a circular needle size 4 mm with DROPS Merino Extra Fine. Switch to circular needle size 3 mm (cast on on a larger needle to get an elastic cast-on edge). Work in stocking stitch for 4½ cm. Purl 1 round over all stitches (= folding edge). On next round work PATTERN – see explanation above and work as follows: Work 50-50-55-55-60-60 stitches in stocking stitch, A.1, work 49-49-54-54-59-59 stitches in stocking stitch = 110-110-120-120-130-130 stitches. Continue pattern like this until A.1 has been worked has vertically. Neck edge measures approx. 5 cm from folding edge (= approx. 10 cm from cast-on edge). Insert a marker at beginning of round (= mid back), measure piece from this marker. YOKE: Switch to circular needle size 4 mm and work A.2 22-22-24-24-26-26 times in total in the round on yoke. Remember to follow the knitting tension! When A.2 has been worked, there are 330-330-360-408-442-442 stitches on row and piece measures approx. 19-19-22-23-25-25 cm from marker. Then work in stocking stitch in while the AT THE SAME TIME adjusting number of stitches to 312-332-356-392-424-452 on first round - read DECREASE AND INCREASE TIP. When yoke measures 21-23-24-24-26-28 cm from marker mid back divide piece for body and sleeves. DIVIDING FOR BODY AND SLEEVES: AT THE SAME TIME as next round is worked divide yoke for body and sleeves as follows: Work 48-52-55-60-66-72 stitches in stocking stitch (= half back piece), slip the next 60-62-68-76-80-82 stitches on a thread for sleeve, cast on 8-10-12-12-12-14 new stitches on row (= in the side mid under sleeve), work 96-104-110-120-132-144 stitches in stocking stitch (= front piece), slip the next 60-62-68-76-80-82 stitches on a thread for sleeve, 8-10-12-12-12-14 new stitches on row (= in the side mid under sleeve) and work the last 48-52-55-60-66-72 stitches in stocking stitch (= half back piece). Finish body and sleeves separately. BODY: = 208-228-244-264-288-316 stitches. Insert 1 marker in one side of piece (= in the middle of the 8-10-12-12-12-14 stitches that were cast on under sleeve). Work until marker, round begins here and work in the round. Work stocking stitch until piece measures 43-45-46-47-49-51 cm from marker mid back. Switch to circular needles size 3 mm, work rib (= knit 2/purl 2) while AT THE SAME TIME increasing 44-44-48-56-60-64 stitches evenly on 1st round = 252-272-292-320-348-380 stitches. When rib measures 4-4-4-5-5-5 cm cast off. Jumper measures 47-49-50-52-54-56 cm from marker mid back and approx. 52-54-56-58-60-62 cm from the top of shoulder. SLEEVES: Slip 60-62-68-76-80-82 sleeve stitches from one thread on to circular needle size 4 mm and pick in addition up 1 stitch in each of the 8-10-12-12-12-14 stitches cast on under sleeve = 68-72-80-88-92-96 stitches. Insert 1 marker thread in the middle of the 8-10-12-12-12-14 new stitches under sleeve - round begins at the marker thread. Work in stocking stitch in the round on needle - AT THE SAME TIME when sleeve measures 1 cm from division, decrease mid under sleeve – read DECREASE TIP and decrease as follows: Decrease 2 stitches 2-3-3-5-5-7 times in total on every other round, then decrease 2 stitches every 2-2-1½-1½-1½-1½ cm 5-5-8-9-9-8 times in total = 54-56-58-60-64-66 stitches. Work until sleeve measures 40-39-39-39-37-36 cm from division. Switch to double pointed needles size 3 mm and work rib (= knit 2/purl 2) while AT THE SAME TIME increasing 10-12-10-12-12-10 stitches evenly on 1st round = 64-68-68-72-76-76 stitches. When rib measures 4-4-4-5-5-5 cm cast off. Sleeve measures approx. 44-43-43-44-42-41 cm from division. ASSEMBLY: Fold the neck edge down on the inside of garment. Fasten neck edge to get a double neck edge. To avoid a tight neck edge that sticks out it is important to keep the seam elastic. |
||||||||||||||||||||||||||||||||||||||||||||||||||||||||||||||||||||||
Diagram explanations |
||||||||||||||||||||||||||||||||||||||||||||||||||||||||||||||||||||||
|
||||||||||||||||||||||||||||||||||||||||||||||||||||||||||||||||||||||
|
||||||||||||||||||||||||||||||||||||||||||||||||||||||||||||||||||||||
|
||||||||||||||||||||||||||||||||||||||||||||||||||||||||||||||||||||||
|
||||||||||||||||||||||||||||||||||||||||||||||||||||||||||||||||||||||
|
||||||||||||||||||||||||||||||||||||||||||||||||||||||||||||||||||||||
Have you finished this pattern?Tag your pictures with #dropspattern #mermaidechosweater or submit them to the #dropsfan gallery. Do you need help with this pattern?You'll find 26 tutorial videos, a Comments/Questions area and more by visiting the pattern on garnstudio.com. © 1982-2025 DROPS Design A/S. We reserve all rights. This document, including all its sub-sections, has copyrights. Read more about what you can do with our patterns at the bottom of each pattern on our site. |
||||||||||||||||||||||||||||||||||||||||||||||||||||||||||||||||||||||
With over 40 years in knitting and crochet design, DROPS Design offers one of the most extensive collections of free patterns on the internet - translated to 17 languages. As of today we count 314 catalogues and 11831 patterns translated into English (UK/cm). 11831
We work hard to bring you the best knitting and crochet have to offer, inspiration and advice as well as great quality yarns at incredible prices! Would you like to use our patterns for other than personal use? You can read what you are allowed to do in the Copyright text at the bottom of all our patterns. Happy crafting!
Post a comment to pattern DROPS 254-3
We would love to hear what you have to say about this pattern!
If you want to leave a question, please make sure you select the correct category in the form below, to speed up the answering process. Required fields are marked *.