
Popular categories
Looking for a yarn?


Comments / Questions (14)
![]() Holly K Thomas wrote:
Holly K Thomas wrote:
OK, I just submitted a question and now I think that the ribbing is actually worked at the beginning of each row …. Is this correct when it says A.1 I am assuming this is referring to knit one purl one for “next 12 stitches” and then stockinette …. Although I’m still questioning, what exactly the difference between a garter stitch at the beginning of the row is versus a purl stitch. Thank you.
01.05.2025 - 06:14DROPS Design answered:
Hi Holly, Garter stitches are always knitted (from both the right and wrong side).After the first garter stitch at the beginning of the row, you work A.1 (K1, P1) across 12 stitches, then stocking stitch across the row until there are 13 stitches left, A.1 across 12 stitches and the last stitch is worked in garter stitch. Regards, Drops Team.
01.05.2025 - 07:17
![]() Holly K Thomas wrote:
Holly K Thomas wrote:
I would like some help understanding the pattern. This is going to push me just a bit. I have read over the pattern several times and have quite a few questions for instance on the back piece where it states one edge stitch in garter stitch to me that is saying do a purl stitch, however, when I have consulted Google, I am incorrect. I believe this stitch is simply going to be where the ribbing connects to?
01.05.2025 - 06:05DROPS Design answered:
Dear Mrs Thomas, 1 edge stitch in garter stitch means this stitch will be knitted both from the right and the wrong side; for ex in this video we show how to work stockinette with 1 edge stitch on each side, here you work rib with 1 edge stitch on each side. Can this help? Happy knitting!
02.05.2025 - 08:09
![]() LEEN VANDE VELDE wrote:
LEEN VANDE VELDE wrote:
Kan ik de beschrijving krijgen (of ergens zien) met "2naalden" gebreid ! Dank bij voorbaat
13.03.2025 - 16:32DROPS Design answered:
Dag Leen,
Het werk wordt heen en weer gebreid, dus je kunt ook rechte naalden gebruiken.
18.03.2025 - 20:16
![]() Agnieszka wrote:
Agnieszka wrote:
Witam, Pytanie do miejsca : Gdy długość robótki wynosi 25-26-27-28-29-30 cm (ściągacz ma 3 cm), zamknąć 4-4-4-6-8-10 oczek na podkrój rękawa na początku następnego rzędu na lewej stronie robótki – zamykać na prawo - ten początek jest po przerobieniu oczka brzegowego i schematu A1 (tyle razy ile wymaga rozmiar ) plus 1 oczko i teraz zacząć zamykanie oczek na podkrój rękawa - czy tak?
15.09.2024 - 20:44DROPS Design answered:
Witaj Agnieszko, zamykasz oczka od razu, na samym początku rzędu. Pozdrawiamy!
16.09.2024 - 08:09
![]() Kristín Marín Siggeirsdóttir wrote:
Kristín Marín Siggeirsdóttir wrote:
Það væri gott ef myndirnar sýndu flíkina frá öllum hliðum - ég væri mjög til i að sjá hvernig bakið lítur út á þessu vesti.
04.04.2022 - 01:48
![]() Michèle PREVOST wrote:
Michèle PREVOST wrote:
Je propose Châtaigne douce
08.08.2021 - 02:33
![]() Birgitta wrote:
Birgitta wrote:
Snyggt med rund halsringning på en enkel väst
05.08.2021 - 17:02
![]() Janice Walsh wrote:
Janice Walsh wrote:
Name suggestion: Just Right (because it actually fits the model).
04.08.2021 - 16:02
![]() Eliza wrote:
Eliza wrote:
Jest prześliczna chciałabym taką kiedyś wydziergać. Piękny dekold.
04.08.2021 - 15:24
![]() Erika Green wrote:
Erika Green wrote:
I love this pattern and would live to knit it, but cannot find the actual pattern anywhere ! Can you help?
04.08.2021 - 12:59
|
|||||||
Chocolate Moment#chocolatemomentvest |
|||||||
 |
 |
||||||
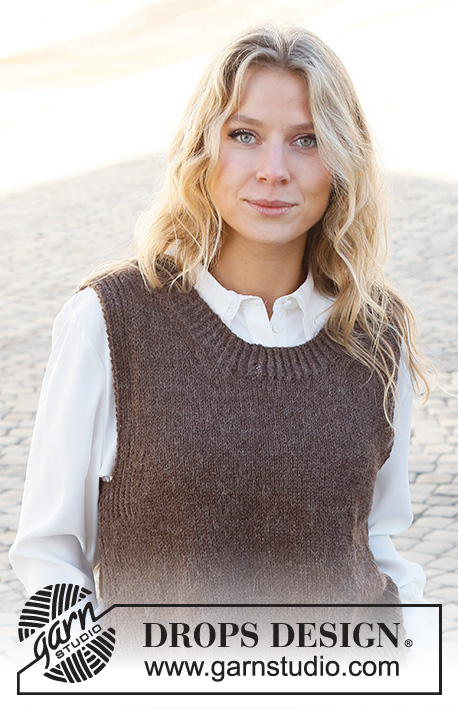
Knitted vest in DROPS Puna. The piece is worked with ribbed edges. Sizes S - XXXL.
DROPS 227-10 |
|||||||
|
------------------------------------------------------- EXPLANATIONS FOR THE PATTERN: ------------------------------------------------------- RIDGE/GARTER STITCH (worked back and forth): Knit all rows. 1 ridge = knit 2 rows. PATTERN: See diagram A.1. The diagram shows all rows in the pattern from the right side. DECREASE TIP (evenly spaced): To work out how to decrease evenly, count the total number of stitches on needle (e.g. 103 stitches) minus the edge stitches (e.g. 2 stitches) and divide the remaining stitches by the number of decreases to be made (e.g. 17) = 5.9. In this example decrease by knitting together approx. each 5th and 6th stitch. Do not decrease the edge stitches. DECREASE TIP-2 (armholes): All decreases are worked from the right side! Decrease at the beginning of row: Work the first 11 stitches as before, slip 1 stitch as if to knit, knit 1 and pass the slipped stitch over the knitted stitch (= 1 stitch decreased). Decrease at the end of row: Work until there are 13 stitches left, knit 2 together and work to end of row (= 1 stitch decreased). DECREASE TIP-3 (neck): All decreases are worked from the right side! After the neck: Work 1 edge stitch in garter stitch, 2 stitches in stocking stitch, slip 1 stitch as if to knit, knit 1 and pass the slipped stitch over the knitted stitch (= 1 stitch decreased). Before the neck: Work until there are 5 stitches left, knit 2 together and work to end of row (= 1 stitch decreased). BUTTONHOLES: Work 4 buttonholes on the right band. The 5th buttonhole is worked on the neck. 1 buttonhole = knit 2 together and 1 yarn over. On the next row work the yarn over into the pattern to leave a hole. The first buttonhole is worked 3-5 cm from the bottom edge, the top buttonhole 5-7 cm from the top of the band. The other 2 buttonholes are worked with approx. 7 to 8 cm between each one. CASTING-OFF TIP: To avoid the cast-off edge being tight you can cast off with a larger size needle. If the edge is still tight, make 1 yarn over after approx. each 4th stitch at the same time as casting off; the yarn overs are cast off as normal stitches. ------------------------------------------------------- START THE PIECE HERE: ------------------------------------------------------- VEST – SHORT OVERVIEW OF THE PIECE: The piece is worked in sections, back and forth on the needle and then sewn together. The bands and neck are worked to finish. BACK PIECE: Cast on 103-113-121-133-149-163 stitches (including 1 edge stitch on each side) with circular needle size 3.5 mm and DROPS Puna. Purl 1 row from the wrong side, then work rib from the right side as follows: 1 edge stitch in GARTER STITCH – read description above, work A.1 until there are 2 stitches left, work the first stitch in A.1 (so the pattern is symmetrical) and 1 edge stitch in garter stitch. Continue this rib back and forth for 5 cm – adjust so the next row is from the right side. Knit 1 row where you decrease 17-19-19-21-25-27 stitches evenly spaced – read DECREASE TIP-1 = 86-94-102-112-124-136 stitches. Change to circular needle size 4.5 mm. Purl 1 row from the wrong side. Continue with stocking stitch and 1 edge stitch in garter stitch on each side. REMEMBER THE KNITTING TENSION! When the piece measures 22-23-24-25-26-27 cm, work pattern as follows from the right side: 1 edge stitch in garter stitch, A.1 over the next 12-12-12-14-16-18 stitches, stocking stitch until there are 13-13-13-15-17-19 stitches left, purl 1, A.1 over the next 11-11-11-13-15-17 stitches and 1 edge stitch in garter stitch. Continue this pattern. When the piece measures 25-26-27-28-29-30 cm (the rib on each side measures 3 cm, adjust so that next row is from the right side) work as follows: Cast off the first 4-4-4-6-8-10 stitches for the armholes at the beginning of the next 2 rows (cast off with knit) = 78-86-94-100-108-116 stitches. The next row from the right side is worked as follows: 1 edge stitch in garter stitch, pattern as before over the next 8 stitches, work stocking stitch until there are 9 stitches left, pattern over the next 8 stitches and 1 edge stitch in garter stitch. Continue this pattern. On the next row from the right side, decrease 1 stitch on each side for the armholes – read DECREASE TIP-2! Decrease like this each row from the right side a total of 1-3-5-6-8-10 times = 76-80-84-88-92-96 stitches. When the piece measures 46-48-50-52-54-56 cm, cast off the middle 36-36-40-40-44-44 stitches for the neck and each shoulder (= 20-22-22-24-24-26 stitches) is finished separately. On the next row from the right side, decrease 1 stitch for the neck – read DECREASE TIP-3! Decrease like this each row from the right side a total of 2 times = 18-20-20-22-22-24 stitches. Continue with pattern and stocking stitch until the piece measures 50-52-54-56-58-60 cm. Cast off with knit over knit and purl over purl. Work the other shoulder in the same way. RIGHT FRONT PIECE: Cast on 53-59-63-69-75-83 stitches (including 1 edge stitch on each side) with circular needle size 3.5 mm and DROPS Puna. Purl 1 row from the wrong side, then work rib from the right side as follows: 1 edge stitch in garter stitch, A.1 until there are 2 stitches left, work the first stitch in A.1 (so the pattern is symmetrical) and 1 edge stitch in garter stitch. Continue this rib back and forth for 5 cm – adjust so the next row is from the right side. Knit 1 row where you decrease 9-11-11-12-12-14 stitches evenly spaced = 44-48-52-57-63-69 stitches. Change to circular needle size 4.5 mm. Purl 1 row from the wrong side. Continue with stocking stitch and 1 edge stitch in garter stitch on each side. When the piece measures 22-23-24-25-26-27 cm, work pattern as follows from the right side: 1 edge stitch in garter stitch, stocking stitch until there are 13-13-13-15-17-19 stitches left, purl 1, A.1 over the next 11-11-11-13-15-17 stitches and 1 edge stitch in garter stitch. Continue this pattern. When the piece measures 25-26-27-28-29-30 cm (the rib measures 3 cm) cast off 4-4-4-6-8-10 stitches for the armhole on the next row from the wrong side – cast off with knit = 40-44-48-51-55-59 stitches. On the next row from the right side decrease 1 stitch at the end of the row for the armhole – remember DECREASE TIP-2! Decrease like this each row from the right side a total of 1-3-5-6-8-10 times = 39-41-43-45-47-49 stitches. When the piece measures 30-32-32-34-34-36 cm, cast off the first 10-10-11-11-13-13 stitches for the neck on the next row from the right side = 29-31-32-34-34-36 stitches. On the next row from the right side decrease 1 stitch for the neck – remember DECREASE TIP-3! Decrease like this each row from the right side a total of 11-11-12-12-12-12 times = 18-20-20-22-22-24 stitches. Continue with pattern and stocking stitch until the piece measures 50-52-54-56-58-60 cm. Cast off with knit over knit and purl over purl. LEFT FRONT PIECE: Cast on and work as the right front piece until the piece measures 22-23-24-25-26-27 cm. Now work pattern as follows (from the right side): 1 edge stitch in garter stitch, work A.1 over the next 12-12-12-14-16-18 stitches, stocking stitch until there is 1 stitch left and 1 edge stitch in garter stitch. Continue this pattern. When the piece measures 25-26-27-28-29-30 cm (the rib measures 3 cm) cast off 4-4-4-6-8-10 stitches on the next row from the right side – cast off with knit = 40-44-48-51-55-59 stitches. On the next row from the right side decrease 1 stitch at the beginning of the row for the armhole – remember DECREASE TIP-2! Decrease like this each row from the right side a total of 1-3-5-6-8-10 times = 39-41-43-45-47-49 stitches. When the piece measures 30-32-32-34-34-36 cm, cast off the first 10-10-11-11-13-13 stitches for the neck on the next row from the wrong side = 29-31-32-34-34-36 stitches. On the next row from the right side decrease 1 stitch for the neck – remember DECREASE TIP-3! Decrease like this each row from the right side a total of 11-11-12-12-12-12 times = 18-20-20-22-22-24 stitches. Continue with pattern and stocking stitch until the piece measures 50-52-54-56-58-60 cm. Cast off with knit over knit and purl over purl. ASSEMBLY: Sew the shoulder seams inside the cast-off edge. Sew the side seams inside the 1 edge stitch. RIGHT BAND: Start from the right side at the bottom of the right front piece and knit up 74 to 90 stitches inside the 1 edge stitch, with circular needle size 3.5 mm and DROPS Puna. The number of stitches must be divisible by 2. Work from the wrong side as follows: 1 edge stitch in garter stitch, * knit 1, purl 1 twisted *, work from *-* until there is 1 stitch left and 1 edge stitch in garter stitch. Then work A.1 with 1 edge stitch in garter stitch on each side. When the band measures 2 cm work BUTTONHOLES – read description above. Continue the pattern until the band measures 4½ cm. Cast off with knit-twisted over knit-twisted and purl over purl – read CASTING-OFF TIP. LEFT BAND: Start from the right side at the top of the left front piece, where stitches were cast off for the neck, and knit up the same number of stitches as on the right front piece with circular needle size 3.5 mm and DROPS Puna. Work from the wrong side as follows: 1 edge stitch in garter stitch, * purl 1 twisted, knit 1 *, work from *-* until there is 1 stitch left and 1 edge stitch in garter stitch. Then work as follows from the right side: 1 edge stitch in garter stitch, purl 1, A.1 until there are 2 stitches left, knit 1 twisted and 1 edge stitch in garter stitch. Continue this pattern until the band measures 4½ cm. Cast off with knit-twisted over knit-twisted and purl over purl. Sew the buttons onto the left band. NECK: Start from the right side, outermost on the right band. Knit up 145 to 181 stitches inside the 1 edge stitch with circular needle size 3.5 mm and DROPS Puna. The number of stitches must be divisible by 2 + 1; make sure the neck is neither too loose nor too tight. Work from the wrong side as follows: 1 edge stitch in garter stitch, * purl 1 twisted, knit 1 *, work from *-* until there are 2 stitches left, purl 1 twisted and 1 edge stitch in garter stitch. Then work from the right side as follows: 1 edge stitch in garter stitch, A.1 until there are 2 stitches left, work the first stitch in A.1 (so the pattern is symmetrical) and 1 edge stitch in garter stitch. Continue this pattern. When the neck measures 2 cm work 1 buttonhole on the next row from the right side by knitting together the 8th and 9th stitch and making 1 yarn over. On the next row work the yarn over into the pattern. Continue the pattern until the band measures 4½ cm. Cast off with knit-twisted over knit-twisted and purl over purl. |
|||||||
Diagram explanations |
|||||||
|
|||||||

|
|||||||
Have you finished this pattern?Tag your pictures with #dropspattern #chocolatemomentvest or submit them to the #dropsfan gallery. Do you need help with this pattern?You'll find 21 tutorial videos, a Comments/Questions area and more by visiting the pattern on garnstudio.com. © 1982-2025 DROPS Design A/S. We reserve all rights. This document, including all its sub-sections, has copyrights. Read more about what you can do with our patterns at the bottom of each pattern on our site. |
|||||||


With over 40 years in knitting and crochet design, DROPS Design offers one of the most extensive collections of free patterns on the internet - translated to 17 languages. As of today we count 314 catalogues and 11820 patterns translated into English (UK/cm). 11820
We work hard to bring you the best knitting and crochet have to offer, inspiration and advice as well as great quality yarns at incredible prices! Would you like to use our patterns for other than personal use? You can read what you are allowed to do in the Copyright text at the bottom of all our patterns. Happy crafting!
Post a comment to pattern DROPS 227-10
We would love to hear what you have to say about this pattern!
If you want to leave a question, please make sure you select the correct category in the form below, to speed up the answering process. Required fields are marked *.