
Categorie popolari
State cercando un filato?































Commenti / Domande (146)
 Cinzia ha scritto:
Ripetere le diminuzioni in modo alternato prima e dopo A.3 ogni 1-1½-1½-2-2 cm per un totale di 12-10-12-10-12 volte = 120-132-140-154-160 m. Continuare a m rasata e A.3 fino a quando il lavoro misura 27-29 come devo farle
07.11.2026 - 11:48
Cinzia ha scritto:
Buongiorno sto lavorando questa vestina ,ho finito A2 devo cominciare le diminuzioni a destra a sinistra, vuole per cortesia spiegarmi come si fanno . Le diminuzioni a dx devo considerare le prime del lavoro e le altre prime del lavoro Dopo A3. Grazie
07.11.2026 - 08:55
Cinzia ha scritto:
Il giro collo devo lasciarlo aperto? Quindi lavoro avanti e dietro?
08.10.2026 - 00:19
 Cheryl ha scritto:
This is still very confusing … Must I decrease only before A3 on one round then do the plain row then on the next round decrease after A3 only ? Or do you mean I must only decrease after A3 one every 1 1/2 cm ????
06.10.2026 - 09:45DROPS Design ha risposto:
Dear Cheryl, the first time you decrease you will decrease before each A.3 all the round (6 or 8 sts decreased, see size); then the next time you decrease, you will decrease after each A.3 all the round (6 or 8 sts decreased, see size), so you will always decrease alternately at the end and at the beginning of a stocking stitch section. Happy knitting!
06.10.2026 - 17:57
Cheryl ha scritto:
1. I’ve just completed diagrams 2 however I read the diagram from left to right ( as I only now see your link to how to read the diagram !! Is my knitting still ok ? 2. The next instructions are not clear as to when to decrease a stitch ….
29.09.2026 - 12:04DROPS Design ha risposto:
Dear Cheryl, diagrams are worked bottom up and from the right towards the left from RS (so every round) - make sure your way reading them before was right. The decreases on each side of A.3 will be worked alternately before and after each A.3. This means first time you will decrease before each A.3 knitting 2 stitches together and 2nd time you will decrease after each A.3 by slipping 1, knitting 1, psso (see DECREASE TIP). Continue like that, next time before ach A.3, then after each A.3 - you will decrease each round the same number of sts as you repeat A.3, if you repeat A.3 6 times you will decrease 6 sts each decrease round for ex. Happy knitting!
30.09.2026 - 07:36
 Anne-Lie ha scritto:
Halskanten stickas upp på rundstickor, det är jag med på men..... Stickas rätstickning fram och tillbaka som på vanliga stickor? Härligt mönster. Rolig att sticka!!
23.03.2026 - 20:42DROPS Design ha risposto:
Hej Anne-Lie. Klänningen stickas nedifrån och upp och du stickar runt ända tills du maskar av för ärmhål. Efter det stickar du varje del för sig, fram och tillbaka. Mvh DROPS Design
24.03.2026 - 10:31
 Claule ha scritto:
Zeichen in A2, welche Bedeutung?
07.03.2026 - 18:37DROPS Design ha risposto:
Liebe frau Claule, meinen Sie am Anfang der 31. Reihe in A.2? Diese 31. Reihe beginnt mit der letzten Masche der vorigen Runde = so wird sich die Runden 1 Masche rechts verschieben. Viel Spaß beim Stricken!
09.03.2026 - 08:47
Susanne ha scritto:
Guten Morgen, ich möchte für meine Enkelin das Kleidchen Wendy Darling stricken in Größe 122/128. Ich bin bei A.2 angekommen und habe das Muster bei 224 Maschen eingeteilt. Leider gehen die Maschen nicht auf. Ich habe am Ende der Reihe immer eine Masche zu wenig. Ich habe alles mehrfach überprüft. Können Sie mir weiter helfen ? Danke für eine Antwort. Herzliche Grüße Susanne
02.02.2026 - 10:07DROPS Design ha risposto:
Liebe Susanne, Muster A.2 hat 32 Maschen, das geht 7 x in 224 Maschen auf. Markieren Sie sich die einzelnen Rapporte mit Markieurngsfäden, also immer nach 32 Maschen 1 Markierungsfaden einziehen, dann behalten Sie besser den Überblick. Achten Sie außerdem darauf, dass sich die Abnahmen und Zunahmen (Umschläge) jeweils ausgleichen und Sie nicht irgendwo eine Masche zu viel abnehmen. Achten Sie dabei besonders auf die Abnahmen, wo 2 Maschen gleichzeitig abgenommen werden, hier müssen auch 2 Umschläge gemacht werden (vor und nach den 3 zusammengestrickten Maschen). Gutes Gelingen!
02.02.2026 - 13:12
 Mae Audit ha scritto:
I finished pattern A.1 What does then work A.2 ( 6 repetitions in width). When A.2 has been worked 1 time vertically,
19.01.2026 - 20:33DROPS Design ha risposto:
Hi Mae, You work the correct number of repeats of A.1 on the round until A.1 is finished in height. Then you work A.2 the correct number of repeats on the round until A.2 is finished in height. When A.2 is finished in height you then continue the next sentence in the text. Regards, Drops Team.
20.01.2026 - 08:15
Mae Audit ha scritto:
I am knitting the Wendy Darling dress. I finished pattern A1. I don’t understand what.“ Then work A.2 ( 6 repetitions in width). When A.2 has been worked 1 time vertically means” please help
19.01.2026 - 20:27DROPS Design ha risposto:
Dear Mrs Audit, work 6 repetitions of A.2 in width means to repeat the diagram A.2 in the round over all stitches; A.2 is worked over 32 sts, so repeat the 32 sts all the round; 1 time vertically means, work whole diagram to the last row. Read more about diagrams here. Happy knitting!
20.01.2026 - 10:30
|
|||||||||||||||||||
Wendy Darling#wendydarlingdress |
|||||||||||||||||||
 |
 |
||||||||||||||||||
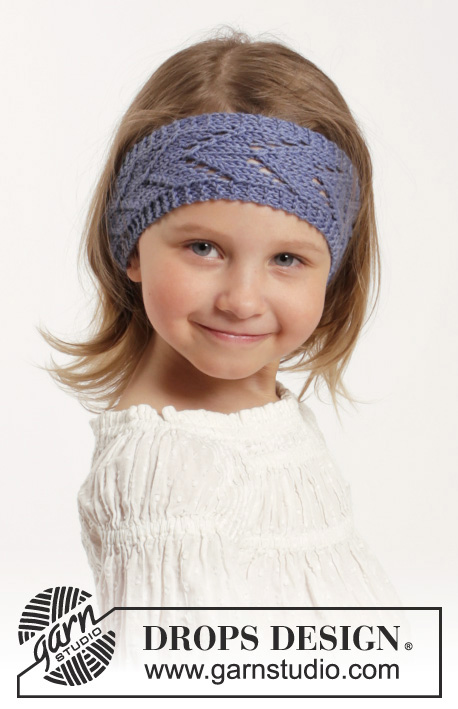
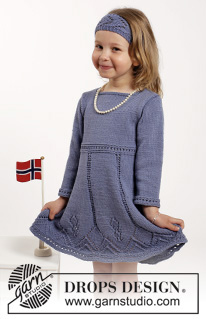
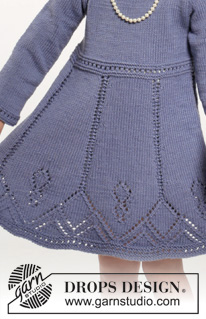
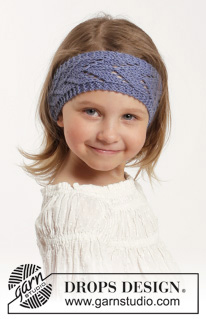
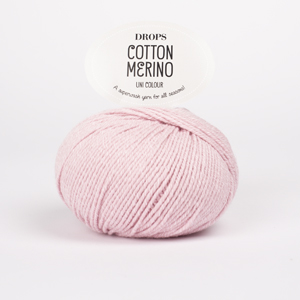
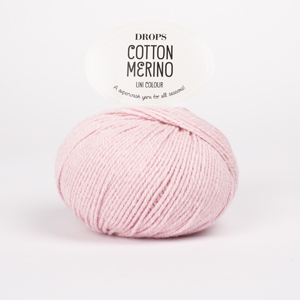
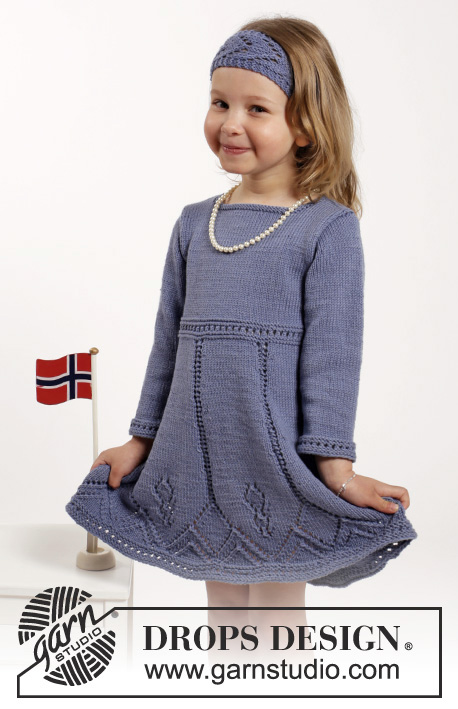
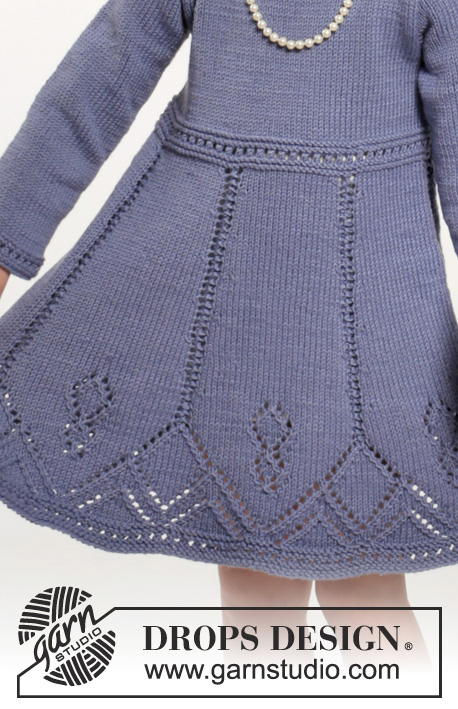
Vestito DROPS lavorato ai ferri e fascia per capelli con motivo traforato in DROPS Cotton Merino. Taglie: 2 - 10 anni.
DROPS Children 26-6 |
|||||||||||||||||||
|
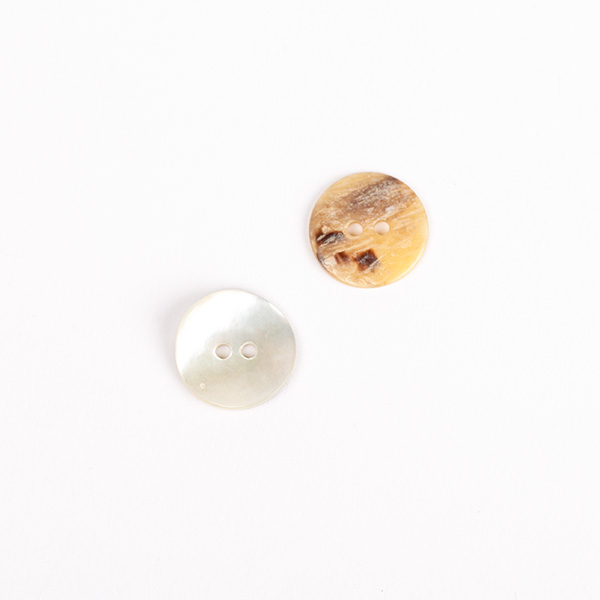
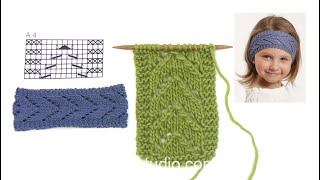
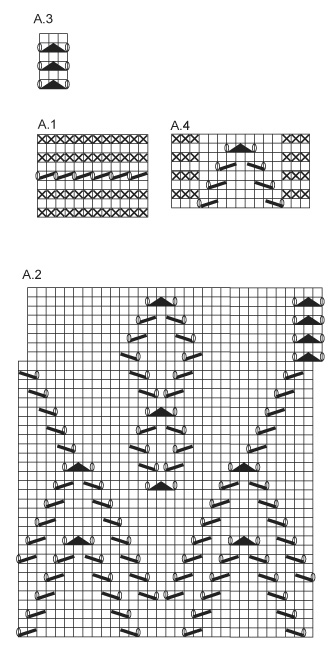
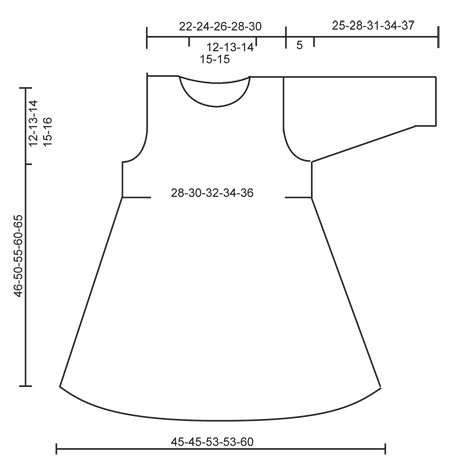
MOTIVO: Vedere i diagrammi A.1-A.4. SUGGERIMENTO PER LE DIMINUZIONI: Diminuire come segue prima di A.3: lavorare 2 m insieme a dir. Diminuire come segue dopo A.3: passare 1 m a dir senza lavorarla, 1 m dir, accavallare la m passata sopra quella appena lavorata. ASOLE: Diminuire per le asole sul dietro sinistro. Diminuire lavorando insieme la 2° e la 3° m dal centro dietro, poi fare un gettato. Diminuire per le asole quando il bordo misura 2 e 4 cm. M LEGACCIO (avanti e indietro): Lavorare tutti i f a dir. 1 “costa” a m legaccio = 2 f dir. ---------------------------------------------------------- VESTITO: Lavorato in tondo con i ferri circolari dal basso verso l’alto. Avviare 192-192-224-224-256 m con i f circolari n° 3,5 mm con Cotton Merino. Lavorare A.1. Poi lavorare A.2 (= 6-6-7-7-8 ripetizioni in larghezza). Quando A.2 è stato lavorato 1 volta in verticale, lavorare come segue – iniziare 1 m prima della 1° m sul giro: * A.3 (= 3 m), 29 m a m rasata *, ripetere *-* 6-6-7-7-8 volte. ALLO STESSO TEMPO quando il lavoro misura 15 cm, diminuire 1 m prima di ogni A.3 – LEGGERE IL SUGGERIMENTO PER LE DIMINUZIONI (= 6-6-7-7-8 diminuzioni). Ripetere le diminuzioni in modo alternato prima e dopo A.3 ogni 1-1½-1½-2-2 cm per un totale di 12-10-12-10-12 volte = 120-132-140-154-160 m. Continuare a m rasata e A.3 fino a quando il lavoro misura 27-29-32-35-37 cm. Ora lavorare A.1 su tutte le m, sul 1° f in A.1 aggiustare il n° di m a 124-132-140-148-160. Inserire 2 segnapunti nel lavoro; uno all’inizio del giro e 1 dopo 62-66-70-74-80 m = lati. Continuare a m rasata su tutte le m. Quando il lavoro misura 34-37-41-45-49 cm, intrecciare 6 m a ogni lato per gli scalfi (cioè 3 m a entrambi i lati di tutti i segnapunti) e finire ogni parte in modo separato. DIETRO: = 56-60-64-68-74 m. Continuare a intrecciare per gli scalfi a ogni lato all’inizio di tutti i f come segue: 2 m 1 volta e 1 m 2-2-1-1-2 volte = 48-52-58-62-66 m. Quando il lavoro misura 38-42-47-52-57 cm, trasferire le prime 22-24-27-29-31 m (dal diritto del lavoro) su un fermamaglie per la spalla destra (lavorarle prima) e finire ogni spalla in modo separato. SPALLA SINISTRA: = 26-28-31-33-35 m. Continuare a m rasata ma lavorare le prime 4 m sul f (verso il centro) a m legaccio (= bordo per i bottoni). Diminuire per le ASOLE – leggere la spiegazione sopra. Quando il lavoro misura 44-48-53-58-63 cm, trasferire le prime 4 m su un fermamaglie (lavorarle prima), poi intrecciare le 10-11-12-13-13 m successive per il collo. Poi intrecciare 1 m sul f successivo verso il collo = 11-12-14-15-17 m rimaste sulla spalla. Intrecciare quando il lavoro misura 46-50-55-60-65 cm. SPALLA DESTRA: Riportare le 22-24-27-29-31 m dal fermamaglie sui f di lavoro e avviare 4 nuove m alla fine del 1° f dal diritto del lavoro = bordo per i bottoni = 26-28-31-33-35 m. Lavorare come per la spalla sinistra ma a specchio, non diminuire per le asole. DAVANTI: = 56-60-64-68-74 m. Intrecciare per lo scalfo ai lati come sul dietro = 48-52-58-62-66 m. Quando il lavoro misura 41-45-50-55-60 cm, trasferire le 18-20-22-24-24 m centrali su un fermamaglie per il collo e finire ogni spalla in modo separato. Poi intrecciare su ogni f verso il collo: 2 m 1 volta e 1 m 2 volte = 11-12-14-15-17 m rimaste sulla spalla. Intrecciare quando il lavoro misura 46-50-55-60-65 cm. MANICA: Lavorata in tondo sui f a doppia punta. Avviare 40-42-44-46-48 m con i f a doppia punta n° 3,5 mm con Cotton Merino. Lavorare A.1 su tutte le m, poi lavorare a m rasata. Inserire 1 segnapunti all’inizio del giro = centro sotto la manica. Quando il lavoro misura 6 cm, aumentare 1 m a ogni lato del segnapunti. Aumentare ogni 6-3½-3-3-3 cm altre 2-4-6-7-8 volte = 46-52-58-62-66 m. Quando il lavoro misura 20-23-26-29-32 cm, intrecciare 6 m al centro sotto la manica per l’arrotondamento della manica. Poi lavorare la manica avanti e indietro e ALLO STESSO TEMPO diminuire per l’arrotondamento della manica a ogni lato come segue: Diminuire 2 m a ogni lato fino a quando il lavoro misura 24-27-30-33-36 cm. Intrecciare 3 m a ogni lato, poi intrecciare le m rimaste. Il lavoro misura circa 25-28-31-34-37 cm. CONFEZIONE: Cucire i margini delle spalle. Attaccare le maniche. Attaccare i bottoni al bordo destro. Poi mettere le 4 m dal dietro destro dietro le 4 m sul dietro sinistro e affrancare con piccoli punti. BORDO DEL COLLO: Riprendere circa 72-88 m (comprese le m sui fermamaglie) attorno al collo con i f circolari n° 3,5 mm. Lavorare 2 coste. Intrecciare. ---------------------------------------------------------- FASCIA PER CAPELLI: Avviare 15 m con i f n° 3,5 mm con Cotton Merino. Lavorare 1 costa a M LEGACCIO – leggere la spiegazione sopra, poi lavorare A.4 su tutte le m. Continuare con A.4 fino a quando il lavoro misura 41-42-43-44 cm (tirare leggermente il lavoro durante la misurazione), lavorare una costa, intrecciare. Cucire il bordo di avvio al bordo di chiusura a punto maglia. |
|||||||||||||||||||
Spiegazioni del diagramma |
|||||||||||||||||||
|
|||||||||||||||||||
 |
|||||||||||||||||||
 |
|||||||||||||||||||
Avete terminato questo modello?Allora taggate le vostre foto con #dropspattern #wendydarlingdress o inviatele alla #dropsfan gallery. Avete bisogno di aiuto con questo modello?Troverete 22 video tutorial, una sezione per i commenti/domande e molto altro guardando il modello su www.garnstudio.com © 1982-2026 DROPS Design A/S. Ci riserviamo tutti i diritti. Questo documento, compreso tutte le sue sotto-sezioni, è protetto dalle leggi sul copyright. Potete leggere quello che potete fare con i nostri modelli alla fine di ogni modello sul nostro sito. |
|||||||||||||||||||



Con oltre 40 anni di esperienza nel design di modelli di maglia e uncinetto, DROPS Design offre la più estesa collezione di modelli gratuiti su internet - tradotti in 17 lingue. Ad oggi vi possiamo fornire 333 cataloghi e 12536 modelli - 9810 dei quali sono tradotti in Italiano.
Ci stiamo impegnando molto per darvi il meglio che vi possiamo offrire in termini di maglia e uncinetto, ispirazioni e consigli così come filati di grande qualità ad un prezzo incredibile! Volete utilizzare i nostri modelli per qualcosa d'altro oltre al vostro uso personale? Potete leggere tutto ciò che è consentito nel testo sul Copyright in basso su tutte le pagine dei nostri modelli. Buon lavoro!
Lasciare un commento sul modello DROPS Children 26-6
Noi saremmo felici di ricevere i tuoi commenti e opinioni su questo modello!
Se vuoi fare una domanda, fai per favore attenzione a selezionare la categoria corretta nella casella qui sotto per velocizzare il processo di risposta. I campi richiesti sono indicati da *.