
Categorie popolari
State cercando un filato?


Commenti / Domande (44)
![]() Randy Komitor ha scritto:
Randy Komitor ha scritto:
Me again! Little Darcy Drops jacket size 1-3months working on BACK and up to ribbing. Have 72 stitches, then says from WS ..1 edge in garter then P2 K2. So does this mean K1 for first stitch in row and then P2K2 until 3 remaining and then its P2 and k1 for last stitch. Please confirm! Thanks!!
08.08.2023 - 17:48DROPS Design ha risposto:
Dar Mrs Komitor, correct, the edge stitches (the first + the last stitch of the row) will be knitted both from right side and from wrong side. Happy knitting!
09.08.2023 - 08:05
![]() Randy Komitor ha scritto:
Randy Komitor ha scritto:
Love this pattern and also the people at Drops who answer my questions when I need help!
31.07.2023 - 19:57
![]() Randy Komitor ha scritto:
Randy Komitor ha scritto:
On back piece Darcy jacket size 1-3. Binding off Beginning off 4 each row in each side. I assume you are binding off at beginning of row only - not begining AND end. Binding of 4 one time beginning only would be 110 minus 8=102. Then bind off 5.. 5times Rs,WS,RS,WS,RS would give me 25 bound off. 102-25 is 77. I am supposed to wind up with 52. So am I supposed to Bind off 5 stitches beginning of row 5 times on RS AND 5 times on WS which would give me 52 ? Thanks! Baby due Aug 13!
31.07.2023 - 16:05DROPS Design ha risposto:
Dear Randy, you cast off 4 stitches once at the beginning of a row from the RS and a row from the WS. So in total you cast off 8 stitches. Next, you cast off 5 stitches 5 times at the beginning of rows from both the RS and WS. Following the previous logic, it's 5 rows from the RS and 5 rows from the WS (so 10 rows in total), so you have cast off 50 stitches and not 25. Happy knitting!
31.07.2023 - 18:52
![]() Randy Komitor ha scritto:
Randy Komitor ha scritto:
Perhaps you can give me specifics? I need it spelled out. Working neck ofl eft front piece. Are 5 stitches for neck that are placed on holder are worked from RS or WS? I know you have to knit them first before placing on holder. If I put on holder from RS do I COMPLETE row , turn around to WS and thena bind off stitches on every WS. Or, if I place the 5 stitches on hold from the WS . Do I immediately start binding off on the WS row before completing the row. Thanks!
19.07.2023 - 01:01DROPS Design ha risposto:
Dear Randy, for the left side of the neck, work the whole row from the right side and then slip the first stitches at the beginning of the row from the WS. Complete the row from the WS, work 1 row from the RS and then start to cast off at the beginning of every row from the WS. Happy knitting!
20.07.2023 - 12:29
![]() Randy Komitor ha scritto:
Randy Komitor ha scritto:
Darcy baby garter stitch jacket. Thanks for response but still not enough for me as new knitter. Can you write exactly what I’m supposed to do starting with P1 from WS. Don’t even understand if I’m still supposed to do that. Or is now RS. Need directions laid out for left as you have done for right. Love pattern. Grandson due in august and as can see I’m slow!
25.06.2023 - 17:11DROPS Design ha risposto:
Dear Mrs Komitor, work the same way, ie purl 1 row from WS just as you done for first front piece, work the rib starting from the side (from RS) with P2 after the edge stitch so that you end with K2 before the edge stitch towards mid front. Happy knitting!
26.06.2023 - 08:59
![]() Randy K ha scritto:
Randy K ha scritto:
Little Darcy knitted baby jacket in garter stitch. 1) For Left Front Piece says work in reverse. Help! On Right Front Piece after casting on it says P1 row from WS. for Left Front Piece do you knit 1row on the RS? Purl 1 row on RS? Do that row exactly same as Right Front piece, P1 row on the WS , because reverse starts with rib? 2) For the ribbing. On Right front piece first row rib I K1 at beginning (edge?), repeated k2p2, k1 at end(edge?) so now I P1( repeat p2k2) and P1 at end of row?
24.06.2023 - 21:16DROPS Design ha risposto:
Dear Randy, to work in reverse means that the sleeve will be on the opposite side of the left front piece, compared to the right front piece. For example, in the right front piece you cast on for the sleeve at the end of the right side rows, while on the left front piece you will cast on stitches at the end of wrong side rows. This is also applied to the neck shaping. So you don't need to reverse the actual rows in principle. For the rib, you will always knit the edge stitches but you can work p2k2 instead so that the rib is symmetrical in the middle of the front piece. Happy knitting!
25.06.2023 - 16:13
![]() Anne-Beate Dokken ha scritto:
Anne-Beate Dokken ha scritto:
Hvordan er det best og sy denne sammen som er strikket i to farger. Takk for fine nettsider.
27.10.2022 - 10:55DROPS Design ha risposto:
Hej Anne-Beate, se videoerne nederst i opskriften, vi har en som hedder "Hvordan sy sammen i rille"
27.10.2022 - 13:25
![]() Kerryn ha scritto:
Kerryn ha scritto:
Hello, I’m confused about where to place the marker “mid shoulder” and if I then knit from the marker to the end of the sleeve or the other direction to the neck line for 1 cm. This is for the right hand front piece. I’m fairly new to knitting and would appreciate your help as I don’t want to mess it up. Thank you so much, Kerryn
11.01.2022 - 21:52DROPS Design ha risposto:
Dear Kerryn, insert this marker in the middle of the row (maybe somewhat more towards shoulder than towards sleeve edge), this marker will be the top of shoulder and will be used to measure back piece matching front piece. Hope it will help, happy knitting!
12.01.2022 - 07:25
![]() Rose-Marie Ohlson ha scritto:
Rose-Marie Ohlson ha scritto:
Little Darcy, randig stickad babykofta Fram och bakstycken på koftan är lika breda innan man stickar till 2,5 cm framkanter. Det blir inte bra när koftan ska knäppas.
26.08.2021 - 17:08
![]() Solvej Larsen ha scritto:
Solvej Larsen ha scritto:
Jeg vil gerne strikke denne lille trøje i den mindste str.Jeg har noget garn som jeg gerne vil bruge som hedder Perfect og er 22m =10.cm på p. 3 *3 1/2.jeg skal være oldemor og er nød til at bruge noget af det garn jeg har. Håber i kan hjælpe mig ? Opskriften .hedder Little Darcy,
10.08.2021 - 23:30
|
|
Little Darcy#littledarcycardigan |
|
 |
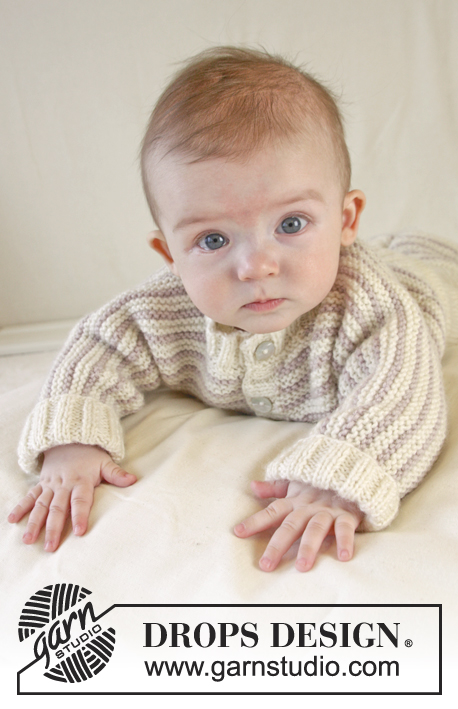 |
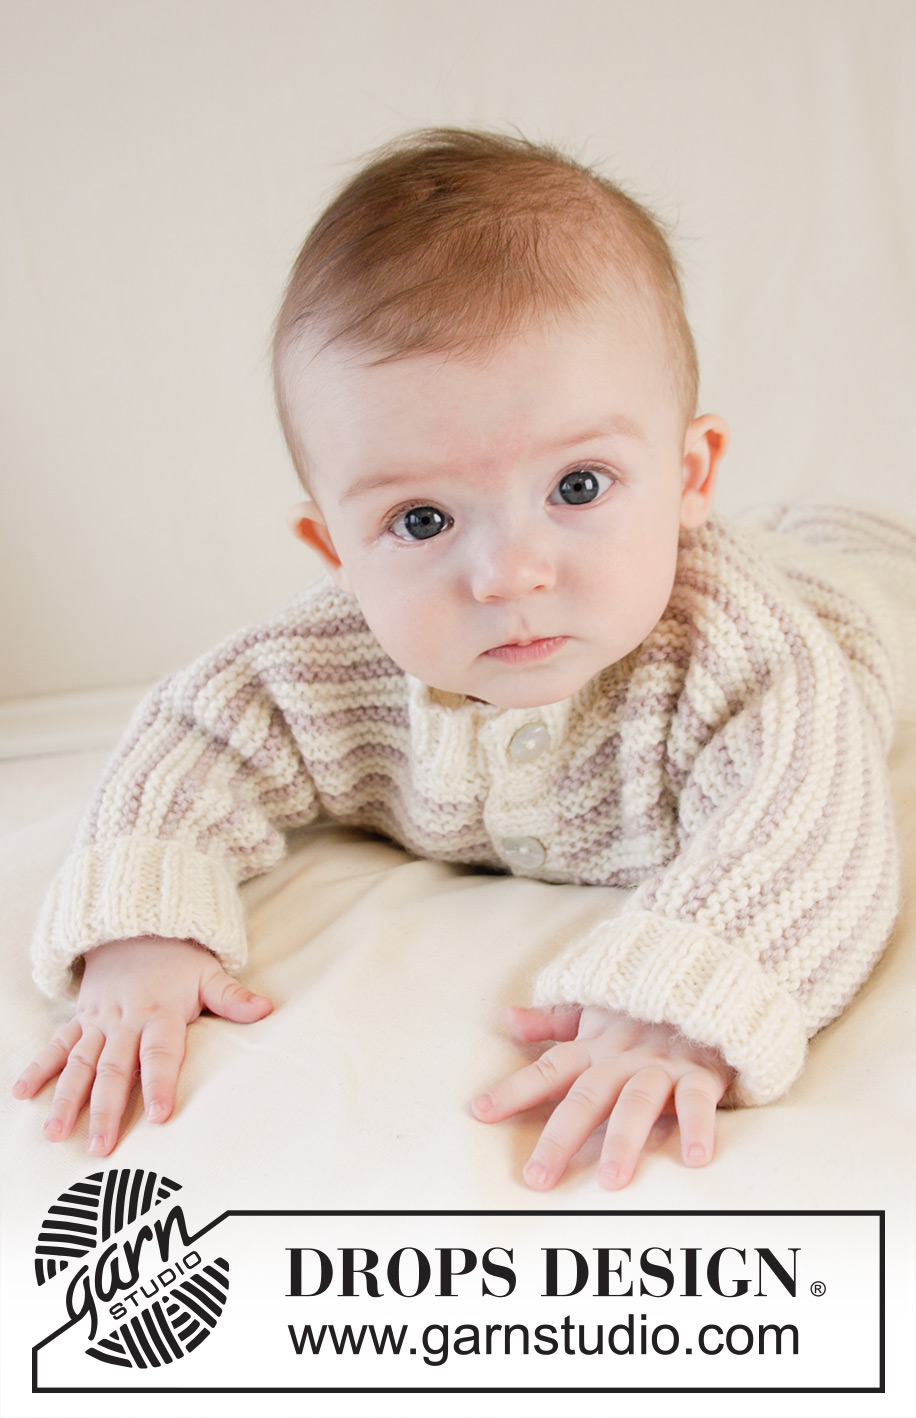
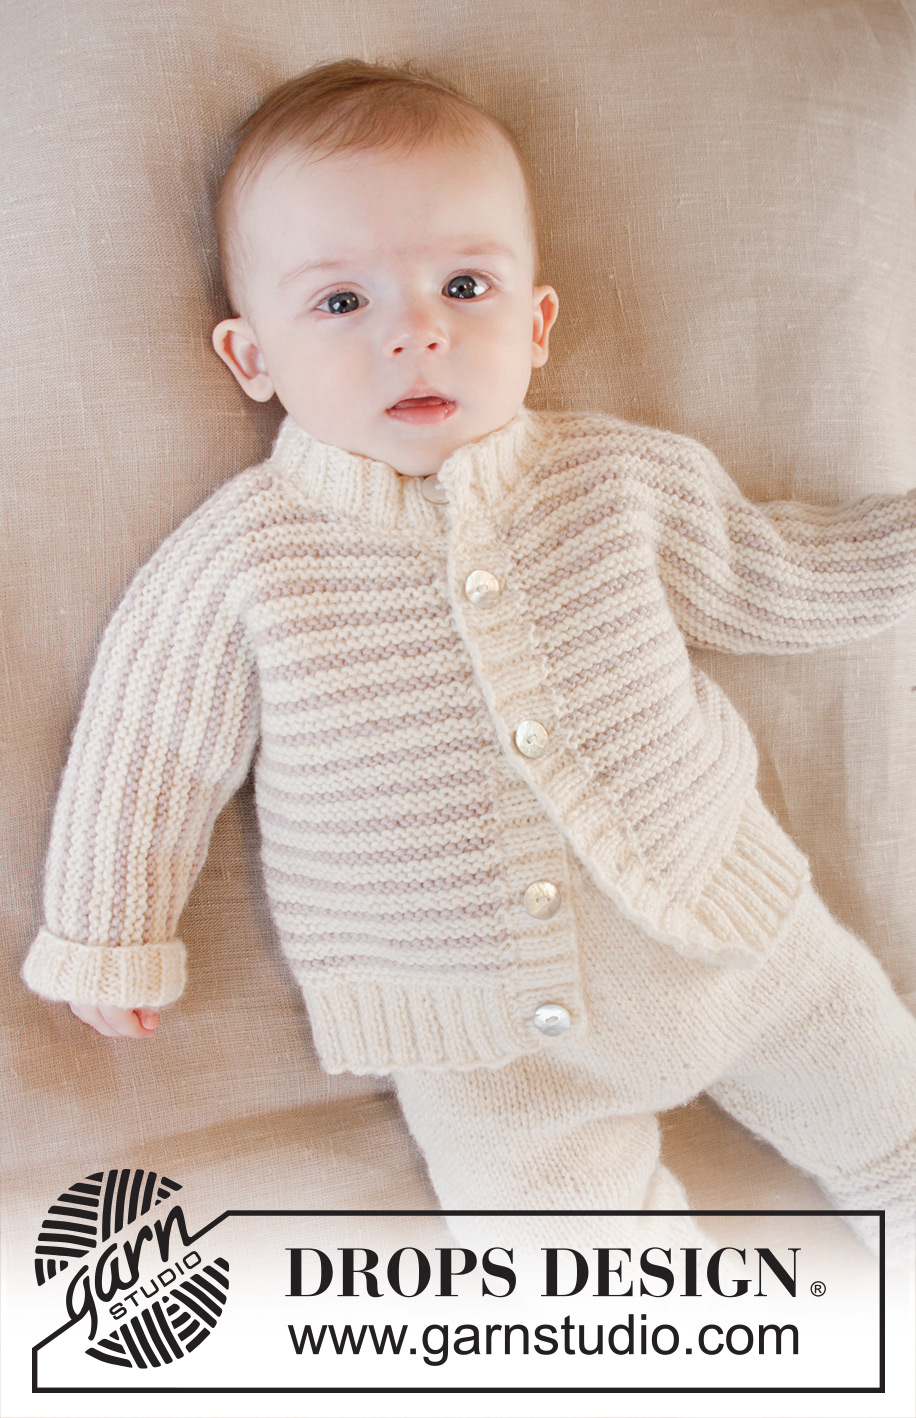
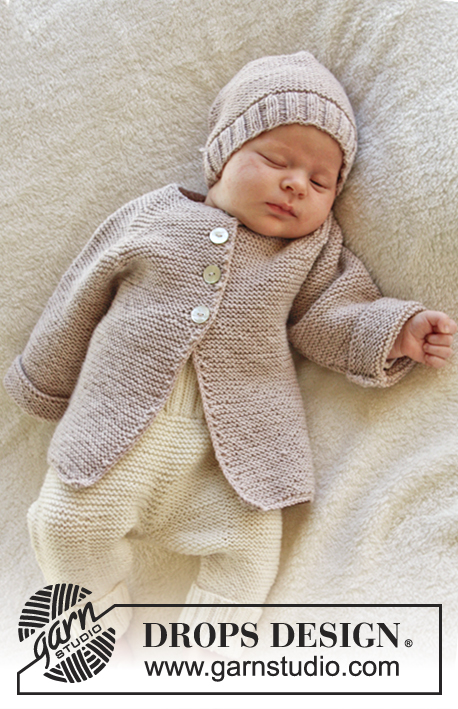
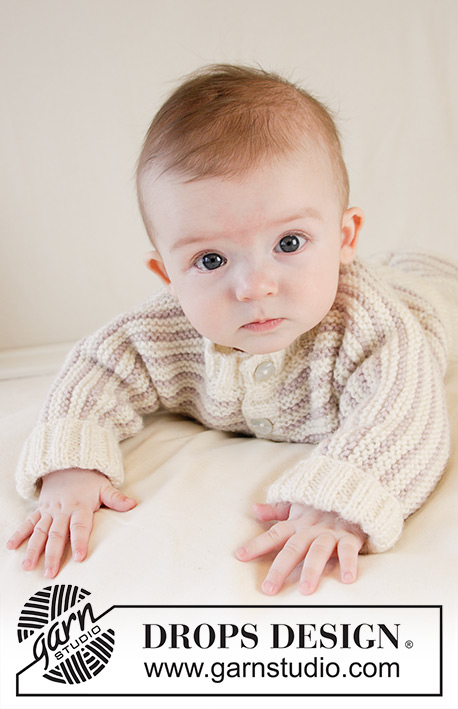
Cardigan DROPS ai ferri per neonati, a punto legaccio, a strisce e bordi a coste, in DROPS Karisma. Taglie: Da 0 a 4 anni.
DROPS Baby 25-18 |
|
|
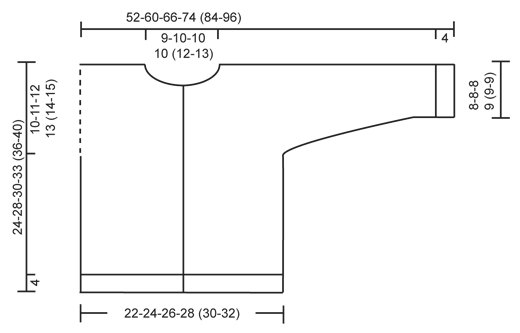
PUNTO LEGACCIO (avanti e indietro sui ferri circolari): Lavorare tutti i ferri a dir. 1 “costa” a legaccio = 2 ferri a dir. STRISCE: * 1 costa a legaccio in panna, 1 costa a legaccio in beige chiaro, 1 costa a legaccio in panna *, ripetere da *-* (quindi, ripetendo le strisce, ci saranno 2 coste a legaccio in panna tra ogni costa a legaccio in beige chiaro). ---------------------------------------------------------- GIACCA: Si lavora avanti e indietro sui ferri circolari. Iniziare con il davanti, avviare nuove m per la manica e lavorare fino alla spalla. Lasciare il lavoro in sospeso e lavorare il secondo davanti. Riportare poi le m dei due davanti sullo stesso ferro e lavorare il dietro dall’alto verso il basso. DAVANTI DESTRO: Avviare 34-38-38-42 (42-46) m (compresa 1 m vivagno da ciascun lato) sui ferri circolari n° 3 con il colore panna. Lavorare 1 ferro a rov sul rovescio del lavoro. Lavorare il ferro successivo come segue, sul diritto del lavoro: 1 m vivagno a PUNTO LEGACCIO - vedere le spiegazioni sopra - * 2 m dir, 2 m rov *, ripetere da *-* finché non rimane 1 m e finire con 1 m vivagno a punto legaccio. Proseguire a coste in questo modo. Quando il lavoro misura 4 cm, lavorare 1 ferro a dir sul diritto del lavoro e, ALLO STESSO TEMPO, diminuire 9-11-9-11 (9-10) m in modo uniforme = 25-27-29-31 (33-36) m. Passare ai ferri circolari n° 4 e lavorare 1 ferro a dir sul rovescio del lavoro. Proseguire a PUNTO LEGACCIO – vedere le spiegazioni sopra e, ALLO STESSO TEMPO, lavorare il motivo a STRISCE – vedere le spiegazioni sopra. RICORDARSI LA TENSIONE DEL LAVORO! Quando il lavoro misura 14-17-18-20 (22-25) cm, avviare nuove m per la manica, alla fine di ogni ferro sul diritto del lavoro, come segue: avviare 5 m 3-5-0-0 (4-5) volte in tutto, 4 m 0-0-7-8 (5-7) volte in tutto e poi 7-4-5-7 (8-4) m 1 volta = 47-56-62-70 (81-93) m. Dopo l’ultimo aumento, proseguire a punto legaccio e a strisce finché il lavoro non misura 20-24-26-28 (31-35) cm. Mettere ora in attesa su un ferma maglie le prime 4-5-6-6 (7-8) m all’inizio del ferro sul diritto del lavoro, per il collo (lavorare le m prima di trasferirle sul ferma maglie per evitare di dover tagliare il filo). Intrecciare ora, all’inizio di ogni ferro sul diritto del lavoro, come segue: Intrecciare 2 m 2 volte e poi 1 m 2-2-2-2 (3-3) volte = 37-45-50-58 (67-78) m. Proseguire finché il lavoro non misura 24-28-30-33 (36-40) cm. Inserire 1 segno (= punto centrale della spalla, in alto) – DA ADESSO IN AVANTI, MISURARE IL LAVORO DA QUESTO PUNTO ! Proseguire a punto legaccio e a strisce come prima per 1 cm dal segno, ma nel corso dell’ultimo ferro sul rovescio del lavoro, avviare 2 nuove m alla fine del ferro a lato dello scollo. Mettere in attesa su un ferma maglie le 39-47-52-60 (69-80) m. DAVANTI SINISTRO: Avviare le m e lavorare come indicato per il davanti destro ma a specchio, quindi le coste iniziano con 2 m rov dopo 1 m vivagno al lato e finiscono con 2 m dir prima di 1 m vivagno verso il centro. Avviare le nuove m per la manica alla fine di ogni ferro sul rovescio del lavoro; diminuire per il collo all’inizio di ogni ferro sul rovescio del lavoro, e avviare 2 nuove m a lato dello scollo alla fine dell’ ultimo ferro sul diritto del lavoro, poi lavorare 1 ferro a dir sul rovescio del lavoro in modo che i 2 davanti finiscano dopo 1 ferro a dir sul rovescio del lavoro. DIETRO: Lavorare le 39-47-52-60 (69-80) m del davanti sinistro (1° ferro = lavorare a dir sul diritto del lavoro e proseguire con le strisce come prima), avviare 14-16-18-18 (22-24) nuove m sui ferri (= scollo sul dietro) e lavorare le 39-47-52-60 (69-80) m del davanti destro sugli stessi ferri circolari = 92-110-122-138 (160-184) m. Proseguire a punto legaccio e con il motivo a strisce. Quando il lavoro misura 8-8-8-9 (9-9) cm dal segno sulla spalla (assicurarsi di aver lavorato lo stesso numero di ferri del davanti rispetto al segno sulla spalla), intrecciare all’inizio di ogni ferro da ciascun lato, come segue: Intrecciare 7-4-5-7 (8-4) m 1 volta, 4 m 0-0-7-8 (5-7) volte in tutto e 5 m 3-5-0-0 (4-5) volte in tutto = per il dietro rimangono 48-52-56-60 (64-70) m. Proseguire finché il lavoro non misura 20-24-26-29 (32-36) cm dal segno sulla spalla – regolare con il davanti e assicurarsi di finire le strisce come sono iniziate sul davanti. Passare ai ferri circolari n° 3 e al colore panna e lavorare 1 ferro a dir sul diritto del lavoro; ALLO STESSO TEMPO, aumentare 20-20-20-20 (20-22) m in modo uniforme = 68-72-76-80 (84-92) m. Lavorare il ferro successivo come segue, sul rovescio del lavoro: 1 m vivagno a punto legaccio, * 2 m rov, 2 m dir *, ripetere da *-* finché non rimangono 3 m e finire con 2 m rov e 1 m vivagno a punto legaccio (sul diritto del lavoro, ai lati, ci sono 2 m a dir prima / dopo la m vivagno). Proseguire a coste in questo modo. Quando le coste misurano 4 cm (il lavoro misura ca.24-28-30-33 (36-40) cm dal segno sulla spalla), lavorare 1 ferro a dir (sul diritto del lavoro) su tutte le m; chiudere ora tutte le m senza stringere troppo il filo. BORDO DESTRO: Con i ferri circolari n° 3 ed il colore panna, riprendere sul diritto del lavoro ca. da 42 a 74 m lungo il davanti destro, a 1 m vivagno a punto legaccio dal bordo. Lavorare 1 ferro a dir sul rovescio del lavoro. Lavorare 1 ferro a dir sul diritto del lavoro e, ALLO STESSO TEMPO, aumentare in modo uniforme così da portare il n° delle m a 53-61-65-73 (81-89) m. Lavorare il ferro successivo come segue, sul rovescio del lavoro: 1 m vivagno a punto legaccio, * 2 m rov, 2 m dir *, ripetere da *-* finché non rimangono 4 m e finire con 2 m rov e 2 m a punto legaccio. Proseguire a coste in questo modo. Quando il bordo davanti misura 1 cm, nel corso del ferro successivo sul diritto del lavoro, intrecciare le m per 4-4-4-5 (5-5) asole a intervalli regolari. 1 asola = lavorare 2 m insieme a rov e fare 1 m gettata (il risultato sarà migliore se si diminuisce in un gruppo di m lavorate a rov viste sul diritto del lavoro). L’asola più in alto si deve trovare a ca. 4 cm dal collo, e l’asola inferiore a ca.2 cm dal bordo inferiore. Continuare a lavorare finché il bordo davanti non misura 2½-2½-2½-3 (3-3) cm; intrecciare le m senza stringere troppo il filo, lavorando a dir le m dir e a rov le m rov. BORDO SINISTRO: Lavorare come il bordo davanti destro, ma senza intrecciare le m per le asole. BORDO DEL COLLO: Con i ferri circolari n°3 ed il colore panna, riprendere sul diritto del lavoro, ca. da 56 a 78 m (comprese le m sui fermamaglie) intorno al collo (riprendere le m anche sui bordi davanti). Lavorare 1 ferro a dir sul rovescio del lavoro. Lavorare 1 ferro a dir sul diritto del lavoro e, ALLO STESSO TEMPO, aumentare in modo uniforme così da portare il n° delle m a 68-72-76-80 (88-92) m. Lavorare il ferro successivo come segue, sul rovescio del lavoro: 1 m vivagno a punto legaccio, * 2 m rov, 2 m dir *, ripetere da *-* finché non rimangono 3 m e finire con 2 m rov e 1 m vivagno a punto legaccio. Proseguire a coste in questo modo. Quando il collo misura 1 cm, intrecciare le m per un’asola in linea con le altre asole sul bordo destro. Proseguire a lavorare finché il collo non misura 2½-2½-2½-3 (3-3) cm; intrecciare poi le m senza stringere troppo il filo, lavorando a dir le m dir e a rov le m rov. CONFEZIONE: Cucire i lati e sotto le maniche all’interno di 1 m vivagno. Attaccare i bottoni. BORDO DELLA MANICA: Con i ferri a doppia punta n° 3 ed il colore panna, riprendere sul diritto del lavoro ca. da 34 a 38 m intorno al bordo inferiore di una manica. Lavorare 1 giro a rov. Lavorare 1 giro a dir e, ALLO STESSO TEMPO, aumentare in modo uniforme così da portare il n° delle m a 40-40-40-44 (48-48) m. Proseguire a coste = 2 m dir / 2 m rov. Quando il bordo della manica misura 4 cm, intrecciare le m senza stringere troppo il filo, lavorando a dir le m dir e a rov le m rov. Ripetere lungo il bordo inferiore dell’altra manica. |
|
 |
|
Avete terminato questo modello?Allora taggate le vostre foto con #dropspattern #littledarcycardigan o inviatele alla #dropsfan gallery. Avete bisogno di aiuto con questo modello?Troverete 24 video tutorial, una sezione per i commenti/domande e molto altro guardando il modello su www.garnstudio.com © 1982-2026 DROPS Design A/S. Ci riserviamo tutti i diritti. Questo documento, compreso tutte le sue sotto-sezioni, è protetto dalle leggi sul copyright. Potete leggere quello che potete fare con i nostri modelli alla fine di ogni modello sul nostro sito. |
|


Con oltre 40 anni di esperienza nel design di modelli di maglia e uncinetto, DROPS Design offre la più estesa collezione di modelli gratuiti su internet - tradotti in 17 lingue. Ad oggi vi possiamo fornire 324 cataloghi e 12290 modelli - 9561 dei quali sono tradotti in Italiano.
Ci stiamo impegnando molto per darvi il meglio che vi possiamo offrire in termini di maglia e uncinetto, ispirazioni e consigli così come filati di grande qualità ad un prezzo incredibile! Volete utilizzare i nostri modelli per qualcosa d'altro oltre al vostro uso personale? Potete leggere tutto ciò che è consentito nel testo sul Copyright in basso su tutte le pagine dei nostri modelli. Buon lavoro!
Lasciare un commento sul modello DROPS Baby 25-18
Noi saremmo felici di ricevere i tuoi commenti e opinioni su questo modello!
Se vuoi fare una domanda, fai per favore attenzione a selezionare la categoria corretta nella casella qui sotto per velocizzare il processo di risposta. I campi richiesti sono indicati da *.