
Categorie popolari
State cercando un filato?


Commenti / Domande (40)
Christel Zondagh ha scritto:
Thanks for the previous answer. I am still battling with the lace edge. Do I have to attach the last stitch of the wrong side row to the edge as well or only the first stitch of the RS row?
15.12.2017 - 10:46DROPS Design ha risposto:
Dear Mrs Zondagh, when working lace edge together with shawl, at the beginning of RS rows worked on lace edge, pick up 1 st from shawl with right needle, work the first st on left needle (= 1st st in A.4 for the lace edge) and pass the picked up st from shawl over the worked stitch, work remaining sts on row, turn and work WS row. Along right side of shawl, from WS: pick up a stitch from shawl, work 1st st on lace edge (= 1st st in A.5) and pass the picked up st over the worked st, work remaining st on row, turn and work next row from RS. Happy knitting!
15.12.2017 - 11:06Christel ha scritto:
Hi, regarding the lace edge: 1.How many "leaves on one side of the shawl? 2. Are there 154 stitches on each side of the shawl? 3. Do you have to attach every row to the edge of the shawl? 4. Is there a tutorial on something similar?
29.10.2017 - 21:01DROPS Design ha risposto:
Dear Christel, according to the pattern, after the last row of the body of the shawl, you should have 301 stitch on the row, that makes 150 stitch on both side and the middle stitch. Yes, you have to attach the edge to the body by knitting the first stitch of every RS row together a stitch from teh body. I hope this helps. Happy knitting!
26.11.2017 - 17:21
![]() Hilde ha scritto:
Hilde ha scritto:
Er staat: Ga verder en brei volgens A.1/A.2/A.3 tot de telpatronen in totaal 4 keer in de hoogte zijn gebreid. houden we nog rekening met de middenste steek? wordt daar nog een omslag gebreid?
29.08.2017 - 09:45DROPS Design ha risposto:
Hallo Hilde, Jazeker, de middensteek brei je daarnaast ook gewoon verder zoals in de tekst staat.
04.11.2017 - 16:07Christel ha scritto:
Hi! 1. I understand that there is an increase of 8 stitches after every A1, A2, A3 repetition. So after 4 times in total, I would have increased it by 32 stitches. And then 8 more before I start the lace edge. But where do the rest come from to get to 301 stitches? 2. When doing A1, A2, A3, must I start every row with 3 sts in garter stitch? Even the pearl rows? Thanks!
25.05.2017 - 21:55DROPS Design ha risposto:
Dear Christel, you are working A.1, A.2 and A.3 on both sides of the middle st, ie you will inc 8 sts in diagrams on each side = 16 sts inc for every repeat in height. You work diagrams 4times in height x 16 sts inc = 64 sts inc + 229 sts + 8 sts inc evenly on last row from WS = 301 sts. Happy knitting!
26.05.2017 - 11:03
![]() Jacqueline Caillot ha scritto:
Jacqueline Caillot ha scritto:
Je comprends que ma question à déjà été posée mais je ne sais pas traduire...mon problème concerne le point fantaisie et le rang 8 car je n' ai pas un nombre pair: 3 mousse + 7m +1 m centrale +7m + 3 mousse Merci pour votre aide
29.05.2016 - 09:31DROPS Design ha risposto:
Bonjour Mme Caillot, vous augmentez 4 m tous les 2 rangs (= tous les rangs sur l'endroit), au rang 8, vous avez augmentez 4 x (rangs 1,3,5 et 7) et vous avez 25 m, tricotez: 3 m end, (*2 m ens à l'end, 1 jeté* répétez de *-* et terminez par 1 m end)), la m centrale, répétez de (à) et 3 m end. Bon tricot!
30.05.2016 - 09:44
![]() Reidun Pettersen ha scritto:
Reidun Pettersen ha scritto:
I sjal nr150-38 skal blonden strikkes sammen meb sjalet. Det står at det skal plukke opp 1m fra høyre og så strikke det sammen med 1 maske fra venstre. Jeg fårstår det, men hva gjør jeg videre??
14.08.2015 - 16:46DROPS Design ha risposto:
Hej, Jo men så vender du bare og strikker tilbage over blonden. Således strikker du frem og tilbage over blonden og strikker den sammen med kanten på andenhver p. God fornøjelse!
01.10.2015 - 16:51
![]() Eva ha scritto:
Eva ha scritto:
Ich komme mit dem Lochmuster nicht klar. Ich habe 3 M kraus rechts als Rand, dann eine ungerade Zahl M, dann 1 Mittelmasche, wieder eine ungerade Zahl M und dann die 3 M Rand. Wie kann ich da Lochmuster *2 M re zusammen, 1 Umschlag* stricken? Dafür brauche ich doch eine gerade Anzahl M.
05.07.2015 - 14:07DROPS Design ha risposto:
Sie stricken die M, die übrig bleibt, einfach re. Auf diese Weise erscheint das Muster dann auch jeweils beidseitig symmetrisch.
06.07.2015 - 11:11
![]() Monique Hannay ha scritto:
Monique Hannay ha scritto:
I am confused about the Lace Edge: are we talking about the left side looking from the top down towards the tip or the other way around? It looks to me like pattern A4 should come down the right side if holding the shawl with the RS facing me and the tip pointing down? (working A4 upside down)
19.05.2015 - 18:15DROPS Design ha risposto:
Dear Mrs Hannay, you work A.4 along the left side of shawl, seen from RS starting on top edge of shawl towards the tip, cast on 8 sts and work A.4 starting from bottom corner on the right side, and every row from RS pick up 1 st from shawl, work 1st st in A.4 and pass the st picked up from shawl over the 1st st in A.4, work remaining sts in A.4. Happy knitting!
20.05.2015 - 09:48
![]() Hilde ha scritto:
Hilde ha scritto:
Sliter med å forstå pinne nr 8. Jeg har nå 25 masker på pinnen etter pinne 7. Hvis jeg leser øketips riktig skal jeg strikke kastene rett. Dermed blir det på pinne 8 (som er fra vrangen) slik: 4 rette, 2 rett sammen, kast, 2 rett sammen, kast, 2 rett sammen, kast, men så har jeg bare en maske før neste kast fra forrige pinne før midtmasken og det virker rart. Det er åpenbart at jeg gjør noe galt, men hva?
17.04.2015 - 21:43DROPS Design ha risposto:
Hej Hilde, Nej men det gør ikke noget, den strikker du bare ret. God fornøjelse!
15.05.2015 - 11:06
![]() Anne Marie Olsen ha scritto:
Anne Marie Olsen ha scritto:
På 8. Pinne med hullmønster skal det strikkes 2 rette sammen + kast , ut pinnen. Skal jeg starte etter de tre rillemasker? Skal midtmaske strikkes rett også på denne pinnen? Altså holdes utenom sammenstrikkinga?
06.04.2015 - 19:40DROPS Design ha risposto:
Hej Anne Marie, Det stemmer, du holder de 3 rillemasker og midtmaskerne udenfor mønsteret. God fornøjelse!
15.05.2015 - 10:18
|
|||||||||||||||||||
Silver Mist#silvermistshawl |
|||||||||||||||||||
 |
 |
||||||||||||||||||
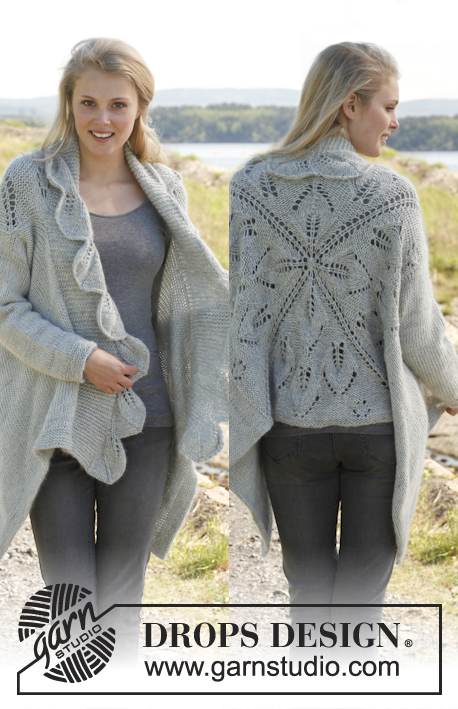
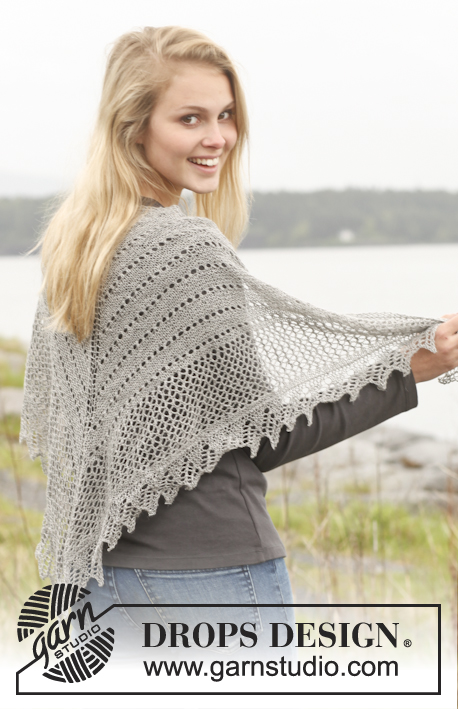
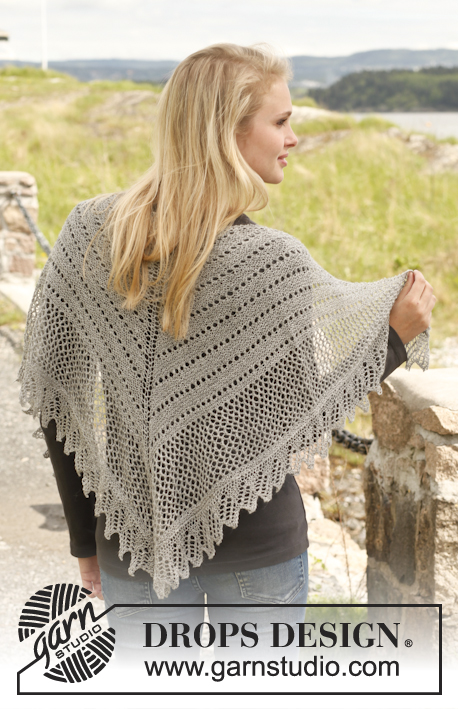
Scialle DROPS a punto legaccio e punto traforato in "Lace".
DROPS 150-38 |
|||||||||||||||||||
|
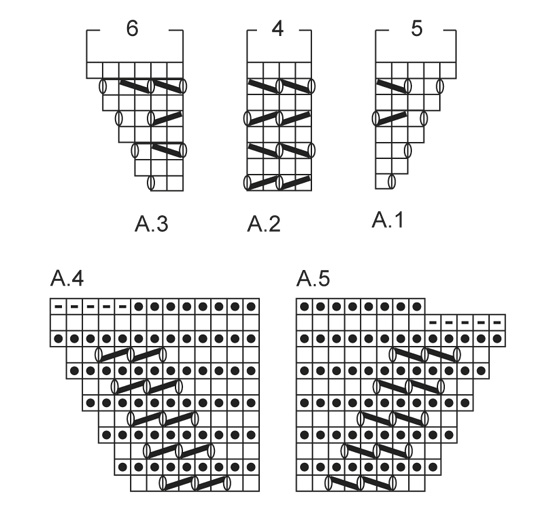
TENSIONE DEL LAVORO: Una volta completato, lo scialle andrà lavato e bloccato per portarlo alle misure finali; la tensione del lavoro non è quindi così importante. Tuttavia, per avere un’indicazione se state lavorando troppo stretto o troppo largo, potete prendere come riferimento un campione di ca. 23 m x 30 ferri a maglia rasata = 10 x 10 cm con i ferri n° 3,5. ---------------------------------------------------------- ---------------------------------------------------------- PUNTO LEGACCIO (avanti e indietro sul f): Lavorare tutti i ferri sul diritto. PUNTO TRAFORATO: Ferri 1-7: Lavorare tutte le m a dir sul diritto e a rov sul rovescio.Ferro 8 (sul rovescio): * 2 m insieme a dir, 1 gettato *, ripetere da *-*. Ferri 9-12: Lavorare tutte le m a dir sul diritto e a rov sul rovescio. Ripetere questi 12 ferri. AUMENTI: Tutti gli aumenti si fanno sul diritto. Aumentare 4 m (1 m ad ogni lato, 2 m in mezzo) ogni ferri sul diritto così: 3 m punto legaccio, 1 gettato, lavorare fino alla m con il segno (= m centrale), 1 gettato, 1 m dir (= m centrale), 1 gettato, lavorare finché non rimangano 3 m sul f, 1 gettato, 3 m punto legaccio. Al ferro seguente (sul rovescio) lavorare tutte le maglie, inclusi i gettati, a dir. ---------------------------------------------------------- SCIALLE: Si lavora avanti e indietro sui ferri circolari per avere sufficientemente spazio per tutte le m. Si lavora dal centro dietro verso il basso. Avviare 7 m sui ferri circolari 3,5 in Lace. Inserire 1 segno nella 4° m (= m centrale) e farlo seguire il lavoro man mano si va avanti. Lavorare il 1° ferro così (= dir): 3 m PUNTO LEGACCIO - vedere le spiegazioni sopra, 1 gettato, 1 m dir (= m centrale con segno), 1 gettato, 3 m punto legaccio = 9 m. Lavorare poi il PUNTO TRAFORATO con 3 m punto legaccio ad ogni lato - ALLO STESSO TEMPO, aumentare 4 m ad ogni ferro sul diritto - VEDERE AUMENTI. Continuare gli aumenti finché non ci siano 229 m sul ferro. Il lavoro misura ca 37 cm misurato nel senso del lavoro dal bordo d’avvio fino al ferro. Continuare così: 3 m punto legaccio, A.1, A.2 sopra le successive 108 m, lavorare finché non rimangano 2 m prima della m centrale, lavorare A.3, 1 m punto legaccio (= m centrale), A.1, A.2 sopra le successive 108 m finché non rimangano 5 m, lavorare A.3 e 3 m punto legaccio. Continuare a lavorare A.1/A.2/A.3 finché il diag non sia lavorato 4 volte in totale in altezza. Per ogni volta che venga lavorato 1 volta in altezza A.1/A.2/A.3, ci sarà lo spazio abbastanza per 2 ripetizioni ancora di A.2 tra A.1 e A.3 ad ogni lato della m centrale - ALLO STESSO TEMPO, all’ultimo ferro dell’ultima ripetizioni (= rovescio) distribuire 8 aumenti in modo uniforme lavorando 2 m in 1 m = 301 m. Lavorare 2 creste di punto legaccio (4 ferri a punto legaccio) su tutte le m (non dimenticare di aumentare come prima prima di ogni lato e in centro), ci sono 109 maglie sul ferro, intrecciare. BORDO DI PIZZO: Avviare 8 m sui ferri circolari 3,5 e Lace. Lavorare avanti e indietro seguendo A.4, ALLO STESSO TEMPO, lavorare il bordo insieme allo scialle – cominciare in altro dello scialle e attaccare il bordo lungo il lato diagonale sinistro fino alla punta in basso. Attaccare il bordo allo scialle così – ogni ferro sul diritto del lavoro: Riprendere il filo della m più all’esterno dello scialle con il ferro destro, lavorare la 1° m del ferro sinistro (1°m del A.4), accavallare la nuova m sopra, lavorare le m rimanenti sul f. Quando il bordo è stato lavorato lungo tutto il lato fino alla punta in basso dello scialle, lavorare a punto legaccio sopra tutte le m, ALLO STESSO TEMPO, intrecciare 1 m all’inizio di ogni ferro sul rovescio, continuare a punto legaccio finché tutte le m non siano intrecciate. Ripetere lungo il lato destro dello scialle, ma seguire ora A.5. Attaccare il bordo allo scialle così – ogni ferro sul rovescio: Riprendere il filo della m più all’esterno dello scialle con il ferro destro, lavorare la 1° m del ferro sinistro (1 m. del A.5), accavallare la nuova m sopra, lavorare le m rimanenti sul f. Cucire i bordi delle maglie intrecciate di A.4 e A.5, in basso della punta. PER BLOCCARE LO SCIALLE: Mettere lo scialle in acqua tiepida in modo che sia impregnato d’acqua. Molto delicatamente fare pressione sullo scialle in modo da far uscire la maggior parte dell’acqua – non torcere lo scialle; avvolgere poi lo scialle in un asciugamano e fare pressione delicatamente in modo da far uscire ulteriore acqua. Lo scialle deve rimanere solo umido. Stendere lo scialle su un tappeto o su un materasso – con molta cautela tirare lo scialle per portarlo alle misure corrette e fissarlo con degli spilli. ATTENZIONE: posizionare uno spillo nella m più esterna da ciascun lato dello scialle, 1 spillo nella m centrale di ogni ripetizione lungo i 2 lati diagonali e 1 spillo nella m centrale (= punta in basso dello scialle). Tirare leggermente ogni spillo in modo che i bordi formino delle piccole punte. Lasciare asciugare lo scialle. Ripetere questo procedimento ogni volta che viene lavato. |
|||||||||||||||||||
Spiegazioni del diagramma |
|||||||||||||||||||
|
|||||||||||||||||||
 |
|||||||||||||||||||
Avete terminato questo modello?Allora taggate le vostre foto con #dropspattern #silvermistshawl o inviatele alla #dropsfan gallery. Avete bisogno di aiuto con questo modello?Troverete 15 video tutorial, una sezione per i commenti/domande e molto altro guardando il modello su www.garnstudio.com © 1982-2026 DROPS Design A/S. Ci riserviamo tutti i diritti. Questo documento, compreso tutte le sue sotto-sezioni, è protetto dalle leggi sul copyright. Potete leggere quello che potete fare con i nostri modelli alla fine di ogni modello sul nostro sito. |
|||||||||||||||||||


Con oltre 40 anni di esperienza nel design di modelli di maglia e uncinetto, DROPS Design offre la più estesa collezione di modelli gratuiti su internet - tradotti in 17 lingue. Ad oggi vi possiamo fornire 325 cataloghi e 12298 modelli - 9569 dei quali sono tradotti in Italiano.
Ci stiamo impegnando molto per darvi il meglio che vi possiamo offrire in termini di maglia e uncinetto, ispirazioni e consigli così come filati di grande qualità ad un prezzo incredibile! Volete utilizzare i nostri modelli per qualcosa d'altro oltre al vostro uso personale? Potete leggere tutto ciò che è consentito nel testo sul Copyright in basso su tutte le pagine dei nostri modelli. Buon lavoro!
Lasciare un commento sul modello DROPS 150-38
Noi saremmo felici di ricevere i tuoi commenti e opinioni su questo modello!
Se vuoi fare una domanda, fai per favore attenzione a selezionare la categoria corretta nella casella qui sotto per velocizzare il processo di risposta. I campi richiesti sono indicati da *.