
Categorie popolari
State cercando un filato?


Commenti / Domande (118)
![]() Margaret Tigchelaar ha scritto:
Margaret Tigchelaar ha scritto:
I understood direction to mean repeat A.1a and A1b for 90 sts. on each right side. and end with A1 c. That worked perfectly, but I got stuck on row 15, not enough sts. to do c, slip 1st, k2tog, psso.Error? or misunderstood the directions? Thank you!
13.08.2025 - 16:10DROPS Design ha risposto:
Dear Mrs Tigchelaar, on 15th row, you will work the last 2 sts A.1A with the first stitch A.1B, the 2nd yarn over is now the first st A.1B; then you will work the last 2 sts each A.1B with the first stitch next A.1B / A.1C at the end of the row; and the 2nd yarn over is now the first stitch next A.1B/A.1C. Happy knitting!
14.08.2025 - 08:35
![]() Margaret Tigchelaar ha scritto:
Margaret Tigchelaar ha scritto:
I received a comment that my question was too long. Does that mean that you did not receive it? If I don't hear,from you, I will resend shorter version.
13.08.2025 - 16:02
![]() Barbara ha scritto:
Barbara ha scritto:
Hallo, werden, wie beschrieben, an den Rändern nur krausrechte Maschen gestrickt und keine Randmaschen? An den Kanten die zusammengenäht werden, wäre doch jeweils eine Randmaschen besser... Danke für eure Hilfe!
24.05.2025 - 10:07DROPS Design ha risposto:
Liebe Barbara, es sind hier nur 3 Maschen krausrechts beidseitig, dann wird die Naht in das äusserte Glied von den äusserten Maschen gemacht, so braucht man keine extra Randmaschen. Viel Spaß beim Stricken!
26.05.2025 - 09:06
![]() Margaret Mc Mullan ha scritto:
Margaret Mc Mullan ha scritto:
Finding it difficult to follow the pattern for bolero thank you margaret
30.05.2024 - 10:06
![]() Gabriele Speck ha scritto:
Gabriele Speck ha scritto:
Muss ich für den Bolero das in der Anleitung vorgegebene Teil 2x stricken? Zbs. Vor- und Rückenteil?
15.12.2023 - 14:03DROPS Design ha risposto:
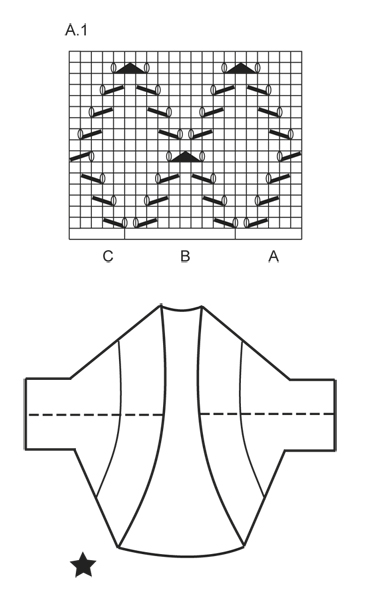
Liebe Frau Speck, es wird nur in einem Stück gestrickt, dann doppel gefaltet und zusammen genäht (die gestrichte Linien oben mit den gestrichten Linien unten zusammennähen und beidseitig (links und rechts) wiederholen. Viel Spaß beim stricken!
15.12.2023 - 15:40
![]() Sadi ha scritto:
Sadi ha scritto:
With assembly, what is meant by 1 Edge St.... what is best stich for the seams
14.07.2023 - 17:41
![]() Sadi ha scritto:
Sadi ha scritto:
I can not seem to get 15 correct, seems to ruin the pattern, loss of a stich Please just write it out I did k4, yo, S1, K2tog, psso Repeat Yo, k7, Yo, s1, K2tog, psso Then looks like Yo k4 needed at the end but I have only 3 stitches for that bit But clearly this not quite right
11.05.2023 - 17:34DROPS Design ha risposto:
Dear Sadi, on the 15th row, work the last 2 sts in A together with the first stitch B, work then the last 2 sts in B together with the first stitch next B / then C. The first yarn over + the stitch remaining after decrease are now the last 2 stitches in the repeat and the 2nd yarn over is now the first stitch next repeat. Happy knitting!
12.05.2023 - 07:41
![]() Sadi ha scritto:
Sadi ha scritto:
Would it possible to get a written version of the pattern rather than the diagram. I find the diagram more difficult to understand. I know all the individual types of stitches, but I don't use patterns and do not want to knit it all wrong
09.05.2023 - 01:49DROPS Design ha risposto:
Dear Sadi, we only have a diagram to this pattern, but this lesson might help you understanding how to read diagram, and in this video shows how to work a similar (but not exactly the same) lace pattern. Hope it can help. Happy knitting!
09.05.2023 - 07:48
![]() Ruth OBrien ha scritto:
Ruth OBrien ha scritto:
I do not understand the NOTE! Continue A.1 so that A.1 fits before the inc for sleeve. It seems to me that A1 is now part of the 10 stitches added for the sleeve. Please clarify what is meant under the NOTE
02.05.2021 - 22:50DROPS Design ha risposto:
Dear Ruth, it means, that for stitches you've knitted with pattern before, continue the pattern, and other stitches should be counted for the the pattern from the stitches already patterned, so it continue the existing pattern without a break. Happy Knitting!
03.05.2021 - 09:31
![]() Lagarde ha scritto:
Lagarde ha scritto:
Bonjour j'ai commencé l'ouvrage vs ecrivez à 11 cm monter 20 m pour les manches mais l'autre manche ? Merci de votre réponse et des modèles si beaux .tricotement votre myriam
26.03.2021 - 07:18DROPS Design ha risposto:
Bonjour Mme Lagarde, à 11 cm, vous montez 10 mailles à la fin des 2 rangs suivants: à la fin du rang suivant sur l'endroit, montez 10 mailles, tournez et tricotez le rang suivant sur l'envers en montant 10 mailles à la fin de ce rang = vous avez bien 10 mailles pour chaque manche. Bon tricot!
26.03.2021 - 08:01
|
|||||||||||||||||||
Cassie#cassiebolero |
|||||||||||||||||||
 |
 |
||||||||||||||||||
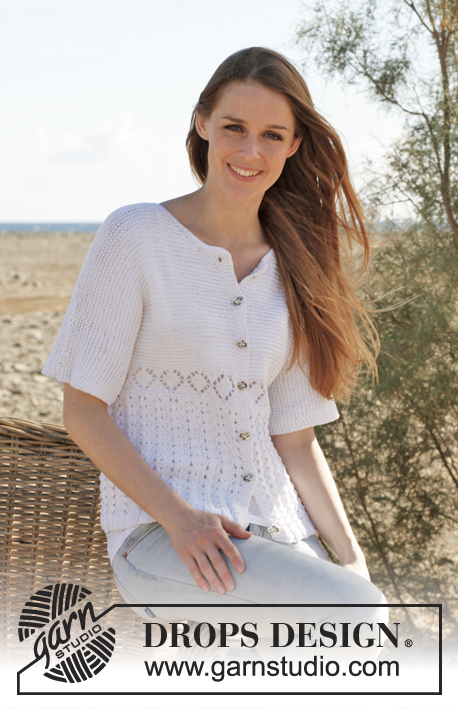
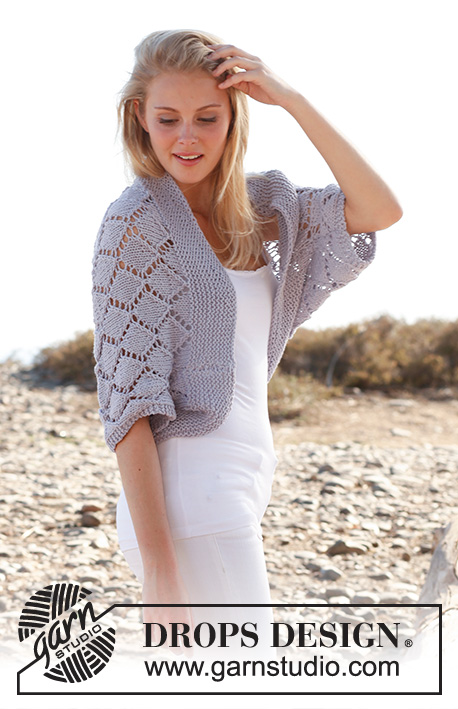
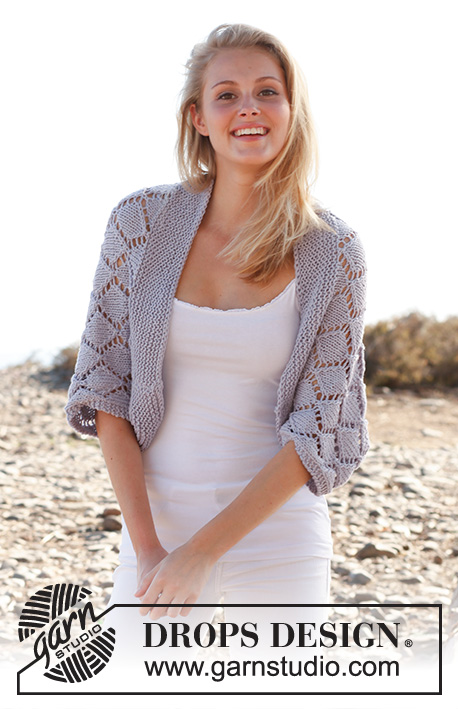
Bolero DROPS ai ferri, con motivo traforato, in "Big Merino". Taglie: Dalla S alla XXXL.
DROPS 146-16 |
|||||||||||||||||||
|
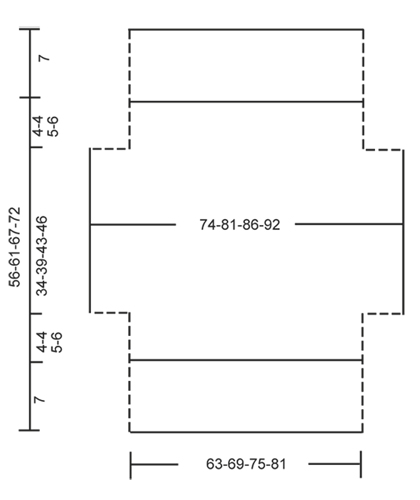
PUNTO LEGACCIO (avanti e indietro sui ferri): Lavorare tutti i ferri a dir. 1 “costa” a legaccio = 2 ferri a dir. MOTIVO: Vedere il diagramma A.1. Il diagramma mostra tutti i ferri del motivo, visti sul diritto del lavoro. --------------------------------------------------------- BOLERO: Si lavora avanti e indietro sui ferri circolari per avere sufficiente spazio per tutte le m. Avviare 107-117-127-137 m sui ferri circolari n° 5 con il filato Big Merino. Lavorare a punto legaccio finché il lavoro non misura 7 cm. Proseguire come segue, sul diritto del lavoro: 3 m a PUNTO LEGACCIO - vedere le spiegazioni sopra, diagramma A.1A (= 6 m), diagramma A.1 B sulle 90-100-110-120 m successive, finire con il diagramma A.1 C (= 5 m) e 3 m a PUNTO LEGACCIO. Proseguire con il diagramma A.1 e 3 m a punto legaccio da ciascun lato. RICORDARSI LA TENSIONE DEL LAVORO! Quando il lavoro misura 11-11-12-13 cm, avviare 10 nuove m alla fine dei 2 ferri successivi per le maniche = 127-137-147-157 m. Lavorare come segue: 3 m a punto legaccio, diagramma A.1A (= 6 m), diagramma A.1 B sulle 110-120-130-140 m successive, finire con il diagramma A.1 C (= 5 m) e 3 m a PUNTO LEGACCIO. ATTENZIONE! Lavorare il diagramma A.1 in modo che prosegua correttamente sulla parte del corpo e proseguirlo sulle maniche. Quando il lavoro misura 45-50-55-59 cm, intrecciare 10 m all’inizio dei 2 ferri successivi = 107-117-127-137 m. Lavorare come segue: 3 m a punto legaccio, diagramma A.1A (= 6 m), diagramma A.1 B sulle 90-100-110-120 m successive, finire con il diagramma A.1 C (= 5 m) e con 3 m a punto legaccio. Quando il lavoro misura 49-54-60-65 cm, lavorare a punto legaccio tutte le m. Intrecciare le m quando il lavoro misura 56-61-67-72 cm. CONFEZIONE: Cucire i lati delle maniche e del corpo all’interno della m vivagno - vedere la linea tratteggiata nel diagramma. |
|||||||||||||||||||
Spiegazioni del diagramma |
|||||||||||||||||||
|
|||||||||||||||||||
 |
|||||||||||||||||||
 |
|||||||||||||||||||
Avete terminato questo modello?Allora taggate le vostre foto con #dropspattern #cassiebolero o inviatele alla #dropsfan gallery. Avete bisogno di aiuto con questo modello?Troverete 15 video tutorial, una sezione per i commenti/domande e molto altro guardando il modello su www.garnstudio.com © 1982-2026 DROPS Design A/S. Ci riserviamo tutti i diritti. Questo documento, compreso tutte le sue sotto-sezioni, è protetto dalle leggi sul copyright. Potete leggere quello che potete fare con i nostri modelli alla fine di ogni modello sul nostro sito. |
|||||||||||||||||||


Con oltre 40 anni di esperienza nel design di modelli di maglia e uncinetto, DROPS Design offre la più estesa collezione di modelli gratuiti su internet - tradotti in 17 lingue. Ad oggi vi possiamo fornire 324 cataloghi e 12190 modelli - 9461 dei quali sono tradotti in Italiano.
Ci stiamo impegnando molto per darvi il meglio che vi possiamo offrire in termini di maglia e uncinetto, ispirazioni e consigli così come filati di grande qualità ad un prezzo incredibile! Volete utilizzare i nostri modelli per qualcosa d'altro oltre al vostro uso personale? Potete leggere tutto ciò che è consentito nel testo sul Copyright in basso su tutte le pagine dei nostri modelli. Buon lavoro!
Lasciare un commento sul modello DROPS 146-16
Noi saremmo felici di ricevere i tuoi commenti e opinioni su questo modello!
Se vuoi fare una domanda, fai per favore attenzione a selezionare la categoria corretta nella casella qui sotto per velocizzare il processo di risposta. I campi richiesti sono indicati da *.