
Categorie popolari
State cercando un filato?


Commenti / Domande (110)
![]() Magali ha scritto:
Magali ha scritto:
Bonjour, quand je mets le dos et le devant sur le même câble d'aiguilles circulaires, je commence par la moitié (les 8 mailles ss le bras du morceau du devant) donc une maille envers et 6 endroits pour le 1er rang du M1, puis jersey, puis 8 mailles du motif M1 à la fin de ce morceau, jonction avec le dos, 8 autres mailles sur cette partie, jersey et 8 mailles restantes du motif avant jonction avant l'avant. MAIS, pour éviter un décalage, dois je passer au rang 2 du motif directement ?
18.11.2024 - 22:57DROPS Design ha risposto:
Bonjour Magali, commencez les tours avant ou après M.1 pour que le motif de M.1 tombe bien au milieu sous la manche, vous pouvez donc tricoter les 8 premières mailles du tour comme dans A.1 (sans les diminutions), puis les mailles suivantes jusqu'à l'autre côté et tricoter M.1, puis tricoter jusqu'aux 8 mailles avant le marqueur de l'autre côté et terminer par M.1. Bon tricot!
19.11.2024 - 08:14
![]() Angèle ha scritto:
Angèle ha scritto:
Merci pour votre réponse, je suis désolée mais je ne comprends pas tout. Vous dites de joindre et de continuer en rond. Ok, mais dans ce cas mon tour démarre sur le 1ère maille. Comment faire pour démarrer mon tour 8 m avant la fin du dos. Ça voudrait dire que je ne tiens pas compte du tour où je raccorde les 2 parties. Merci pour votre réponse. Avec mes excuses, cordialement
19.08.2024 - 08:36DROPS Design ha risposto:
Bonjour Angèle, vous pouvez tricoter toutes les mailles jusqu'aux 8 dernières mailles du devant (presque un tour complet) et commencer ainsi A.1 (8 dernières mailles du devant + 8 premières mailles du dos). Bon tricot!
20.08.2024 - 07:59
![]() Angèle ha scritto:
Angèle ha scritto:
Bonjour, Désolée mais j'ai encore une question. Comment assembler les 2 parties une fois qu'elles sont sur les aiguilles circulaires ? Où dois je fixer mon début de rang ? Merci pour votre réponse. Cordialement.
17.08.2024 - 21:49DROPS Design ha risposto:
Bonjour Angèle, veillez à ce que le dernier rang du devant et du dos soit bien un rang sur l'envers, puis, sur l'endroit, reprenez les mailles du dos et tricotez à suivre les mailles du devant, joignez et continuez en rond. Pour que M.1 soit bien placé au milieu des côtés, commencez vos tours 8 mailles avant la fin du dos et tricotez M.1 ainsi (les 8 dernières mailles du dos + les 8 premières mailles du devant en début de tour). Bon tricot!
19.08.2024 - 08:08
![]() Angèle ha scritto:
Angèle ha scritto:
Bonjour, Je commence ce modèle, mais je bloque au niveau des augmentations autour des mailles avec marqueurs. Après les 1ères augmentations je me retrouve avec 53 m et 31 m sur chaque côté. Pour les augmentations suivantes je garde ma maille marquée au centre des augmentations. Merci pour votre réponse. Cordialement. Angèle
16.08.2024 - 13:07DROPS Design ha risposto:
Bonjour Angèle, vous allez augmenter 1 maille de chaque côté des 2 marqueurs, ainsi le nombre de mailles avant le 1er marqueur et celui après le 2ème marqueur augmente d'1 seule maille et le nombre de mailles entre les 2 marqueurs augmente de 2 mailles = 4 mailles en plus à chaque rang sur l'endroit. En taille S et M, après 8 rangs = 4 fois les augmentations, vous devrez avoir 31 (27+4) - marqueur - 54 (4+46+4) - marqueur - 31 (27+4). Bon tricot!
16.08.2024 - 16:11
![]() Ceci ha scritto:
Ceci ha scritto:
For the diagram M.1, you are starting from the bottom of the diagram not the top right? As from the photos it seems like you should be starting from the bottom of the pattern M1?
02.04.2024 - 19:52DROPS Design ha risposto:
Dear Ceci, the piece is knitted from the TOP and DOWNWARDS, so the pattern will sit right if you start the diagram from the bottom. Happy Knitting!
02.04.2024 - 23:47
![]() Ceci ha scritto:
Ceci ha scritto:
For the Body section, after you've slipped the front and back pieces to the needle, do you continue knitting back and forth on the circular needle or do you knit in the round? Or do you only start knitting in the round on the last 2cm?
02.04.2024 - 19:51DROPS Design ha risposto:
Dear Ceci, after slipping together the pieces for the body, you should knit all the stitches on the round. Happy Knitting!
02.04.2024 - 23:49
![]() Ceci ha scritto:
Ceci ha scritto:
Amazing thanks a lot for the explanation!
19.03.2024 - 18:21
![]() Ceci ha scritto:
Ceci ha scritto:
Thanks for your answers, but with circular needles, you knit one row then Purl the next right for garter stitch right?
19.03.2024 - 08:13DROPS Design ha risposto:
Dear Ceci, you first work back and forth on circular needle, not in the round, this means you will knit all stitches, all rows. Happy knitting!
19.03.2024 - 11:22
![]() Ceci ha scritto:
Ceci ha scritto:
Sorry for so many questions, I think my main confusion is: Front piece K1 row from WS, Continue with K on all rows (=garter st) Does it mean after knitting 1 row from the wrong side, you get on with purling on the next or do you continue knitting 1 row first then change to purl? Kind regards
18.03.2024 - 18:32DROPS Design ha risposto:
Hi Ceci, You knit all rows, from both the right and wrong side, increasing as instructed in the text, then working the armholes. The yoke is continued in garter stitch (knitting all rows), then the body is worked in stocking stitch and pattern, after the front and back pieces have been joined. Happy knitting!
19.03.2024 - 06:48
![]() Ceci ha scritto:
Ceci ha scritto:
May I ask for the front piece, once you've knittied the first row on the WS, then the rests are all RS please? And you increase the stitches when you are purling? (With circular needles) Thanks a lot!
18.03.2024 - 18:26DROPS Design ha risposto:
Dear Ceci, you first knit 1 row which is the wrong side of piece, then knit all rows (back and forth on circular needle) to get garter stitch, and at the same time, on 2nd row (right side) start increasing. As you work garter stitch back and forth you will knit all stitches all rows. Happy knitting!
19.03.2024 - 11:01
|
||||||||||||||||
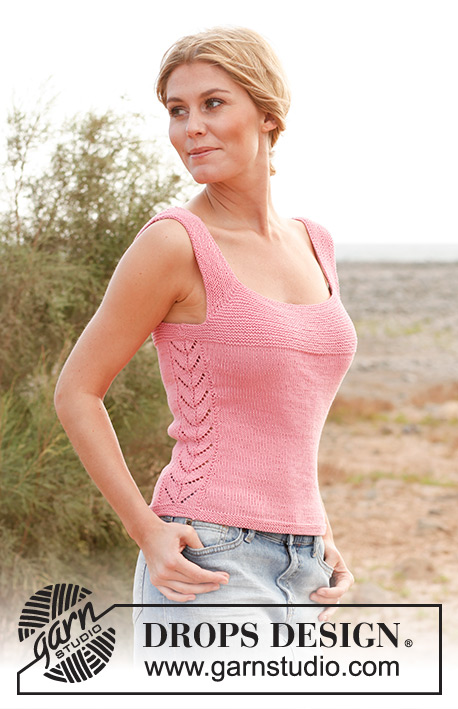
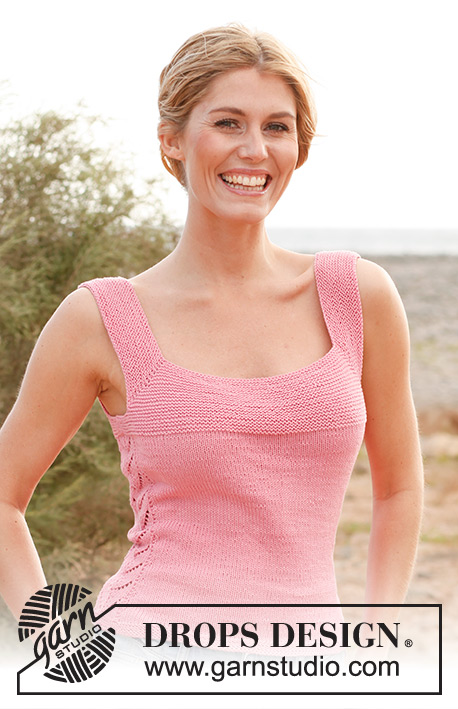
Simply Summer#simplysummertop |
||||||||||||||||
 |
 |
|||||||||||||||
Top DROPS ai ferri a punto legaccio con motivo traforato, lavorato dall’alto verso il basso in "Safran". Taglie: dalla S alla XXXL.
DROPS 137-2 |
||||||||||||||||
|
PUNTO LEGACCIO (avanti e indietro sui ferri): Lavorare tutti i ferri a dir. 1 “costa” a legaccio = lavorare 2 ferri a dir. PUNTO LEGACCIO (in tondo, sui ferri circolari): Lavorare * 1 giro a dir, 1 giro a rov *, ripetere da *-*. MOTIVO: Vedere il diagramma M.1 – il diagramma mostra 1 ripetizione del motivo. SUGGERIMENTO PER LE DIMINUZIONI (si applica ai lati): Diminuire come segue quando rimangono 2 m PRIMA del diagramma M.1: lavorare 2 m insieme a dir. Diminuire come segue DOPO il diagramma M.1: Passare 1 m a dir senza lavorarla, 1 m a dir, accavallare la m passata sulla m lavorata. SUGGERIMENTO PER GLI AUMENTI (si applica ai lati): Lavorare finché non rimane 1 m a maglia rasata prima del diagramma M.1, 1 gettata, 1 m a maglia rasata, seguire il diagramma M.1, 1 m a maglia rasata, 1 gettata. Al ferro successivo, lavorare le m gettate a diritto ritorto (lavorare quindi le m nell’asola posteriore e non in quella anteriore) per evitare che si formi un buco. -------------------------------------------------------- TOP: Si lavora dall’alto verso il basso. Il davanti e il dietro vengono lavorati prima separatamente, poi insieme in tondo. DAVANTI: Si lavora avanti e indietro sui ferri circolari. Avviare 100-100-108-108-115-121 m sui ferri circolari n° 3 con il filato Safran. Proseguire con i ferri circolari n° 2,5. Inserire un segno nella 27°-27°-30°-30°-32°-35° m da ciascun lato (= ci sono 46-46-48-48-51-51 m tra le m con i segni). Lavorare 1 ferro a dir sul rovescio del lavoro. Proseguire a punto legaccio (= lavorare tutti i ferri a dir). ALLO STESSO TEMPO al ferro successivo, aumentare 1 m da ciascun lato delle 2 m con i segni – aumentare inserendo 1 m gettata; al ferro successivo lavorare le m gettate a dir ritorto (quindi lavorare le m nell’asola posteriore e non in quella anteriore) per evitare che si formi un buco. Ripetere questi aumenti ogni 2 ferri per un totale di 14-17-17-19-19-22 volte = 156-168-176-184-191-209 m. Lavorare 1 ferro a dir sul rovescio del lavoro dopo l’ultimo ferro con aumenti. RICORDARSI LA TENSIONE DEL LAVORO! Il lavoro misura ora ca. 6-7-7-8-8-9 cm. Lavorare il ferro successivo come segue (sul diritto del lavoro): chiudere, senza stringere troppo il filo, le prime 40-43-46-48-50-56 m (= spallina), lavorare a dir le 76-82-84-88-91-97 m successive (la prima di queste m si trova già sul ferro di destra), chiudere, senza stringere troppo il filo, le ultime 40-43-46-48-50-56 m (= spallina), tagliare il filo. Lavorare il ferro successivo sul rovescio del lavoro come segue: avviare 7-9-13-16-20-24 nuove m all’inizio del ferro, lavorare le 76-82-84-88-91-97 m sul ferro e avviare 7-9-13-16-20-24 nuove m alla fine del ferro = 90-100-110-120-131-145 m. Lavorare a punto legaccio, avanti e indietro per 3-3-3-4-4-4 cm – ALLO STESSO TEMPO dopo 2-2-2-3-3-3 cm, diminuire 1 m da ciascun lato lavorando insieme a dir le ultime 2 m prima della m del bordo sul diritto del lavoro = 88-98-108-118-129-143 m. Mettere in attesa il lavoro. DIETRO: Avviare le m e lavorare come fatto per il davanti. DAVANTI & DIETRO: Mettere le m del davanti e del dietro sullo stesso ferro circolare n° 3 = 176-196-216-236-258-286 m. DA ADESSO IN AVANTI, MISURARE IL LAVORO DA QUESTO PUNTO! Lavorare il diagramma M.1 sulle 16 m da ciascun lato (quindi 8 m del dietro e 8 m del davanti = centro sotto la maniche). Lavorare le altre m a maglia rasata. ALLO STESSO TEMPO, quando il lavoro misura 2 cm, diminuire 1 m da ciascun lato del diagramma M.1, su entrambi i lati = vedere il SUGGERIMENTO PER LE DIMINUZIONI! Ripetere queste diminuzioni ogni 2½ cm per un totale di 6-6-6-6-5-5 volte = 152-172-192-212-238-266 m. Quando il lavoro misura 18 cm, aumentare 1 m da ciascun lato del diagramma M.1 – vedere il SUGGERIMENTO PER GLI AUMENTI! Ripetere questi aumenti ogni 2 cm per un totale di 6 volte = 176-196-216-236-262-290 m. Quando il lavoro misura ca. 30-31-32-32-33-33 cm (quindi 50-52-54-56-58-60 cm di altezza totale) – assicurarsi di aver completato 1 intera ripetizione del diagramma M.1, proseguire con i ferri circolari n° 2,5. Lavorare a PUNTO LEGACCIO in tondo su tutte le m per 2 cm – vedere le spiegazioni sopra! Chiudere le m a dir senza stringere troppo il filo – per chiudere le m utilizzare i ferri circolari n° 3 (è molto importante che il bordo di chiusura delle m non sia troppo stretto). Il top misura in tutto ca. 52-54-56-58-60-62 cm. CONFEZIONE: Cucire le spalline e i lati, bordo contro bordo nell’asola anteriore della m più esterna per evitare che la cucitura sia troppo spessa e troppo visibile. |
||||||||||||||||
Spiegazioni del diagramma |
||||||||||||||||
|
||||||||||||||||
 |
||||||||||||||||
 |
||||||||||||||||
Avete terminato questo modello?Allora taggate le vostre foto con #dropspattern #simplysummertop o inviatele alla #dropsfan gallery. Avete bisogno di aiuto con questo modello?Troverete 7 video tutorial, una sezione per i commenti/domande e molto altro guardando il modello su www.garnstudio.com © 1982-2026 DROPS Design A/S. Ci riserviamo tutti i diritti. Questo documento, compreso tutte le sue sotto-sezioni, è protetto dalle leggi sul copyright. Potete leggere quello che potete fare con i nostri modelli alla fine di ogni modello sul nostro sito. |
||||||||||||||||


Con oltre 40 anni di esperienza nel design di modelli di maglia e uncinetto, DROPS Design offre la più estesa collezione di modelli gratuiti su internet - tradotti in 17 lingue. Ad oggi vi possiamo fornire 325 cataloghi e 12298 modelli - 9569 dei quali sono tradotti in Italiano.
Ci stiamo impegnando molto per darvi il meglio che vi possiamo offrire in termini di maglia e uncinetto, ispirazioni e consigli così come filati di grande qualità ad un prezzo incredibile! Volete utilizzare i nostri modelli per qualcosa d'altro oltre al vostro uso personale? Potete leggere tutto ciò che è consentito nel testo sul Copyright in basso su tutte le pagine dei nostri modelli. Buon lavoro!
Lasciare un commento sul modello DROPS 137-2
Noi saremmo felici di ricevere i tuoi commenti e opinioni su questo modello!
Se vuoi fare una domanda, fai per favore attenzione a selezionare la categoria corretta nella casella qui sotto per velocizzare il processo di risposta. I campi richiesti sono indicati da *.