
Categorie popolari
State cercando un filato?


Commenti / Domande (206)
![]() Gerda Verheecke ha scritto:
Gerda Verheecke ha scritto:
Heel mooi model Heb de uitleg 2 à 3 keer moeten lezen alvorens ik de volledige breimethode begreep! Maar dan ging het vanzelf! Ik heb het in streepjes gebreid, om de 16 rijen een andere kleur met 5 verschillende kleuren! ( allemaal restjes wol!) Jammer dat ik hier geen foto kan mee sturen! Het is voor mijn kleindochterje, kindje van mijn dochter en haar Rwandeese echtgenoot: dus met een bruin huidje! Daardoor komen de kleuren nog beter tot hun recht! Bedankt voor dit gratis patroon 👍
28.02.2022 - 10:18
![]() Katja ha scritto:
Katja ha scritto:
Tut mir leid, war zu voreilig - Ich hab's "geknackt". Alles in Ordnung mit dem Diagramm ;-)
03.02.2022 - 20:09
![]() Katja ha scritto:
Katja ha scritto:
Irgendwie verstehe ich das Diagramm nicht... 1 M re in Hin-R, 1 M li in Rück-R 1 M li in Rück-R, 1 M re in Hin-R - sind hier möglicherweise Rück-R und Hin-R verwechselt worden?
03.02.2022 - 18:36DROPS Design ha risposto:
Liebe Katja, oops es sieht so aus, daß das 2. Symbol nicht richtig sieht, diese Masche (mit Kreuz) sollten Sie links bei Hin-Reihen und rechts bei Rückreihen stricken - so stricken Sie die 2 Maschen beidseitig krausrecht und die 2 Maschen beidseitig vom Lochmuster glatt links. Danke für den Hinweis. Viel Spaß beim stricken!
04.02.2022 - 08:28
![]() Graf ha scritto:
Graf ha scritto:
Was heisst im Diagram e. auf der Vorderseite? Ich stricke viel, bin aber mit diesem Model wohl überfordert! Zeigt das Diagramm Vorder- und Rückseite?
31.10.2021 - 18:54DROPS Design ha risposto:
Liebe Frau Graf, hier sollte es "rechts" anstatt "e" heissen (danke für den Hinweis, dies wird korrigiert). Das Diagram zeigt alle Reihen, dh die Hin- sowie die Rückreihen, Hinreihen lesen Sie rechts nach links und Rückreihen links nach rechts. Viel Spaß beim stricken!
03.11.2021 - 07:28
![]() Nieves ha scritto:
Nieves ha scritto:
Se puede hacer vueltas cortas en punto jersey derecho, una vuelta del derecho y la siguiente del revés? Saldría de la misma talla que en punto bobo(todas la vueltas del derecho)?
14.04.2021 - 23:23DROPS Design ha risposto:
Hola Nieves. La tensión del tejido en punto musgo y punto jersey son diferentes. Trabajando este modelo en punto jersey las medidas saldrían diferente (sería más grande).
25.04.2021 - 21:03
![]() Menguy Isabelle ha scritto:
Menguy Isabelle ha scritto:
Bonjour, Je ne comprends pas la partie "pour toutes les tailles, on tourne après 5m deM1" Ne serait ce pas plutôt 5rgs ? Merci d'avance pour votre réponse. Cordialement.
07.03.2021 - 15:42DROPS Design ha risposto:
Bonjour Mme Menguy, lorsque vous tricotez ces 46-50-57 (65-70) premières mailles, vous tricotez les 41-45-52 (60-65) premières mailles à l'endroit puis les 5 premières mailles de M.1. Cette vidéo montre comment tricoter le point fantaisie et les rangs raccourcis de ce modèle. Bon tricot!
08.03.2021 - 09:17
![]() Marta ha scritto:
Marta ha scritto:
Hi! Do you have the tutorial + explanation in Spanish? Thanks!
31.01.2021 - 05:39DROPS Design ha risposto:
Dear Marta, please edit the language by clicking on the scroll down menu below the photo to get the pattern in Spanish. Happy knitting!
01.02.2021 - 10:40
![]() Jutta ha scritto:
Jutta ha scritto:
Diese wunderschöne Weste hab ich mit Freude gestrickt. Sie ist phantastisch geworden. Für die tolle Anleitung möchte ich herzlich danken.
07.01.2021 - 19:35
![]() Cathy Rice ha scritto:
Cathy Rice ha scritto:
Just received wool to start this pattern, I thought I was an experienced knitter until I started reading the instructions ! It is a nightmare to understand ! Am I the only one that thinks this? The first short row knit 32st but the first row says knit k45! The chart doesn’t state which row you start with! Perhaps a complete tutorial on how it’s achieved would be helpful.
01.07.2020 - 17:17DROPS Design ha risposto:
Dear Mrs Rice, in 2nd size you will work the 76 sts as follows: 45 sts in garter stitch, M.1 (= 23 sts) and 8 sts in garter stitch - but to get the correct shape, you will work with short rows as explained, ie 2 rows over 32 sts, 2 rows over 50 sts etc... See also the video to this pattern. Happy knitting!
02.07.2020 - 09:00
![]() Bükki Márta ha scritto:
Bükki Márta ha scritto:
A magyar leírásban \"= 1 szemet simán leemelünk, 1 sima, és a leemelt szemet az lekötött szemen áthúzzuk\" ez rossz, helyesen: \"= 1 szemet simán leemelünk, 2 szemet simán összekötünk, és a leemelt szemet az lekötött szemen áthúzzuk\"
15.06.2020 - 16:29
|
||||||||||||||||||||||
Nova#novajacket |
||||||||||||||||||||||
 |
 |
|||||||||||||||||||||
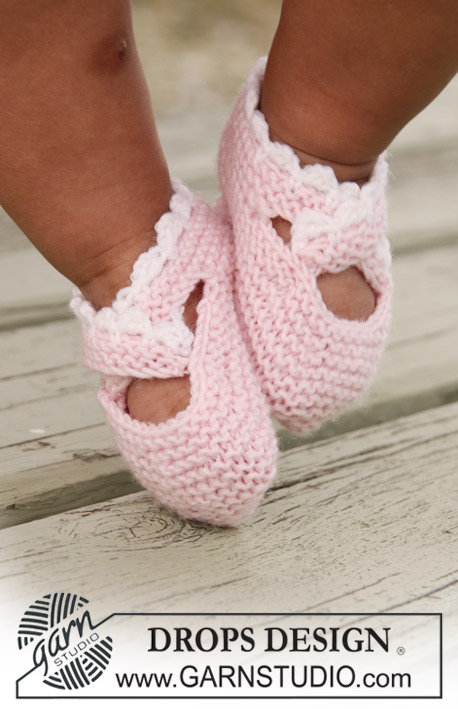
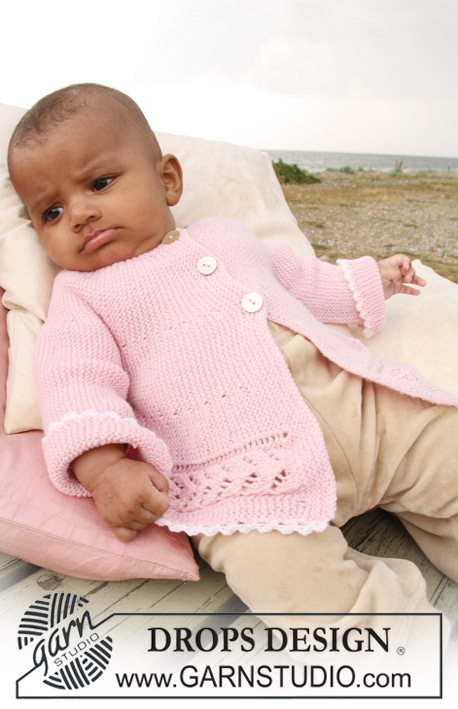
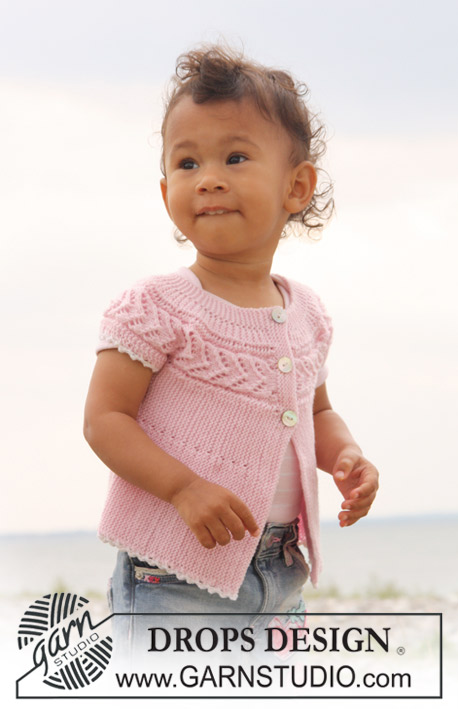
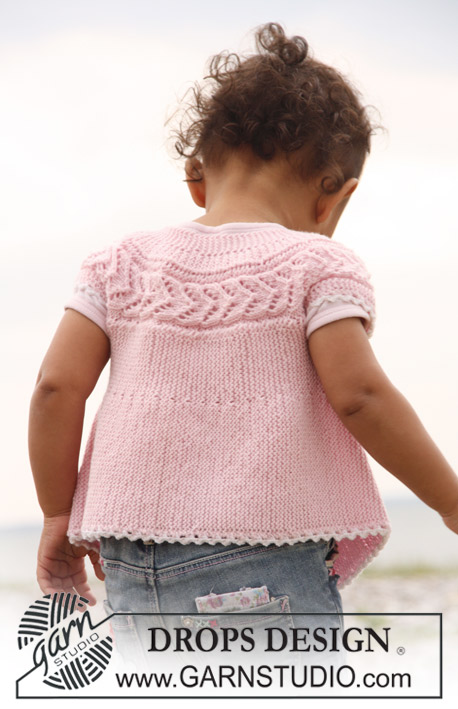
Cardigan per neonati e bambini lavorato a maniche corte lavorato nel senso della lunghezza, a punto legaccio e motivo traforato in DROPS BabyMerino.
DROPS Baby 20-14 |
||||||||||||||||||||||
|
GIACCHINO: MOTIVO: Vedere il diagramma M.1. Il diagramma mostra il motivo sul diritto del lavoro. SUGGERIMENTO: Quando si gira il lavoro nel corso del ferro, passare la 1° m a dir senza lavorarla, stringere il filo e lavorare il ferro di ritorno. In questo modo non si formano dei piccoli buchi quando si lavorano i ferri accorciati -------------------------------------------------------- -------------------------------------------------------- GIACCHINO: Iniziare sul davanti sinistro; lavorare verso lo scalfo, la spalla, il dietro, l’altra spalla e finire con il davanti destro. Avviare 62-68-78 (88-96) m LENTE sui ferri n° 2,5 con il filato rosa pallido e lavorare 8 ferri a dir per il bordo verso il centro (primo ferro = diritto del lavoro). Lavorare il ferro successivo, sul diritto del lavoro, come segue: 41-45-52 (60-65) m dir, lavorare le 15 m successive a dir e ALLO STESSO TEMPO, aumentare 8 m in modo uniforme (aumentare 1 m facendo 1 m gettata), lavorare le ultime 6-8-11 (13-16) m a dir = 70-76-86 (96-104) m. Lavorare 1 ferro a dir su tutte le m (lavorare le m gettate ritorte; lavorarle quindi nell’asola posteriore e non in quella anteriore per evitare che si formi un buco). Proseguire come segue: 41-45-52 (60-65) m dir (lavorare queste m sempre a dir), diagramma M.1 (= 23 m), 6-8-11 (13-16) m dir (lavorare queste m sempre a dir). ALLO STESSO TEMPO lavorare a ferri accorciati come segue – vedere il SUGGERIMENTO: * lavorare le prime 30-32-38 (42-47) m, girare il lavoro e tornare indietro, lavorare le prime 46-50-57 (65-70) m, girare il lavoro (per tutte le taglie si gira il lavoro dopo 5 m del diagramma M.1) e tornare indietro, lavorare le prime 64-70-80 (90-98) m, girare il lavoro e tornare indietro, lavorare su tutte le 70-76-86 (96-104) m, girare il lavoro e tornare indietro *, ripetere da *-* finché il lavoro non misura ca. 16-18-19 (20,5-22) cm dal ferro di avvio. Prendere le misure sul lato più largo (= bordo inferiore). Tagliare il filo. Mettere ora in attesa su un fermamaglie le prime 41-45-52 (60-65) m dal bordo inferiore ( = lato) = sul ferro rimangono 29-31-34 (36-39) m per la spalla. Proseguire a ferri accorciati come segue (primo ferro = diritto del lavoro) : * Lavorare le prime 23-25-28 (30-33) m seguendo il motivo, girare il lavoro e tornare indietro a dir , lavorare tutte le 29-31-34 (36-39) m seguendo il motivo, girare il lavoro e tornare indietro a dir *, ripetere da *-* finché il lavoro non misura 16-17-18 (18-20) cm dal punto in cui le m sono state messe in attesa sul fermamaglie. Tagliare il filo. Riprendere, sui ferri di lavoro, le 41-45-52 (60-65) m del lato messe in attesa sul fermamaglie, per il dietro e inserire un segno. Proseguire dal bordo inferiore del giacchino (primo ferro = diritto del lavoro) seguendo il motivo e a ferri accorciati come descritto per il davanti. Quando il lavoro misura 28-31-35 (37-40) cm dal segno al lato, misurato nel punto più largo (= bordo inferiore), tagliare il filo: Mettere ora in attesa su un fermamaglie le prime 41-45-52 (60-65) m dal bordo inferiore ( = lato). Proseguire sulle m rimaste per la spalla come indicato per la prima spalla, finché le 2 spalle non sono della stessa misura. Tagliare il filo. Riprendere, sui ferri di lavoro, le 41-45-52 (60-65) m del lato messe in attesa sul fermamaglie, e proseguire come indicato per il davanti. Quando il davanti destro é lungo come il davanti sinistro (tranne il bordo verso il centro) lavorare il ferro successivo, sul diritto del lavoro come segue: lavorare 41-45-52 (60-65) m dir, lavorare le 23 m successive a dir e ALLO STESSO TEMPO diminuire 8 m in modo uniforme (diminuire lavorando 2 m insieme a dir), lavorare le ultime 6-8-11 (13-16) m dir = 62-68-78 (88-96) m. Lavorare ora il bordo verso il centro: lavorare 3 ferri a dir su tutte le m. Al ferro successivo, sul diritto del lavoro, realizzare le asole come segue: (lavorare dal bordo inferiore verso l’alto): 41-45-53 (61-65) m dir, 1 m gettata, 2 m insieme a dir, 7-8-9 (10-12) m dir, 1 m gettata, 2 m insieme a dir, 7-8-9 (10-12) m a dir, 1 m gettata, 2 m insieme a dir e finire con 1 m dir. Girare il lavoro e lavorare tutte le m a dir. Lavorare 5 ferri a dir su tutte le m; intrecciare le m senza stringere troppo il filo. BORDO ALL’UNCINETTO: Con l’uncinetto n° 3 e il filato bianco, lavorare un bordo lungo tutto il bordo inferiore del giacchino e lungo i bordi della maniche, come segue: 1 m.b, * 3 cat, 1 m.a nella 1° di queste 3 cat, saltare ca. 1 cm, 1 m.b *, ripetere da *-*. Tagliare il filo e fermarlo. CONFEZIONE: Cucire i bottoni. |
||||||||||||||||||||||
Spiegazioni del diagramma |
||||||||||||||||||||||
|
||||||||||||||||||||||
 |
||||||||||||||||||||||
Avete terminato questo modello?Allora taggate le vostre foto con #dropspattern #novajacket o inviatele alla #dropsfan gallery. Avete bisogno di aiuto con questo modello?Troverete 16 video tutorial, una sezione per i commenti/domande e molto altro guardando il modello su www.garnstudio.com © 1982-2026 DROPS Design A/S. Ci riserviamo tutti i diritti. Questo documento, compreso tutte le sue sotto-sezioni, è protetto dalle leggi sul copyright. Potete leggere quello che potete fare con i nostri modelli alla fine di ogni modello sul nostro sito. |
||||||||||||||||||||||


Con oltre 40 anni di esperienza nel design di modelli di maglia e uncinetto, DROPS Design offre la più estesa collezione di modelli gratuiti su internet - tradotti in 17 lingue. Ad oggi vi possiamo fornire 324 cataloghi e 12290 modelli - 9561 dei quali sono tradotti in Italiano.
Ci stiamo impegnando molto per darvi il meglio che vi possiamo offrire in termini di maglia e uncinetto, ispirazioni e consigli così come filati di grande qualità ad un prezzo incredibile! Volete utilizzare i nostri modelli per qualcosa d'altro oltre al vostro uso personale? Potete leggere tutto ciò che è consentito nel testo sul Copyright in basso su tutte le pagine dei nostri modelli. Buon lavoro!
Lasciare un commento sul modello DROPS Baby 20-14
Noi saremmo felici di ricevere i tuoi commenti e opinioni su questo modello!
Se vuoi fare una domanda, fai per favore attenzione a selezionare la categoria corretta nella casella qui sotto per velocizzare il processo di risposta. I campi richiesti sono indicati da *.