Commenti / Domande (113)
![]() Brenda ha scritto:
Brenda ha scritto:
Any chance of doing a video tutorial on you-tube. I really like this headband, but am confused with the written pattern.
01.12.2022 - 01:02DROPS Design ha risposto:
Dear Brenda, you will find videos relative to the techniques used in that pattern at the bottom of the pattern, feel free to ask your question here so that we can help you further in the part of the pattern you don't understand. Happy knitting!
01.12.2022 - 11:46
![]() Kathy ha scritto:
Kathy ha scritto:
I am on the first increase row to 24 stitches and following the established rib pattern but there are not enough stitches to complete the rib pattern! What do I do?
11.10.2021 - 01:08DROPS Design ha risposto:
Hi Kathy, You increase all P1 to P2 (5 stitches increased) which gives you 24 stitches. You now have 1 stitch in garter stitch, 5 x K2, P2 (20 stitches), K2 and 1 stitch in garter stitch = 24 stitches. Happy knitting!
11.10.2021 - 07:04
![]() Iris ha scritto:
Iris ha scritto:
Hallo! Ich bin ziemliche Anfängerin und komme mit der Anleitung nicht ganz zurecht. Betrifft das Fertigstellen des Stirnbands mit den Maschen auf einem Hilfsfaden. Habe leider auch kein passendes Videotutorial dazu finden können. Wie lange muß der Hilfsfaden sein? und wird er mithineingenäht? Danke im Voraus für die Hilfe!
01.01.2021 - 22:03DROPS Design ha risposto:
Liebe Iris, die stillgelegten Maschen werden wie in diesem Video zusammen mit der Anschlagskante - wie in diesem Video zusammen genäht, dh so eine "Mischung" je nach den Maschen. Viel Spaß beim zusammennähen!
04.01.2021 - 14:43
![]() Diana Connolly ha scritto:
Diana Connolly ha scritto:
This increase is called a make 1 in English. If you’d written it like this many here wouldn’t have had so many problems, make 1 is a term used when you increase by picking up the loop between stitches. Hope this helps.
27.10.2020 - 21:20
![]() Kirsty ha scritto:
Kirsty ha scritto:
Hi, wow many thanks for your helpful video reply. I really appreciate it. Love your site. Well wishes, Kirsty
28.06.2020 - 20:24
![]() Sherie Rodrigues ha scritto:
Sherie Rodrigues ha scritto:
To all the knitters who commented and asked questions, and to all the staff who answered the questions, I say THANK YOU. Without your help I may not have worked the pattern out by myself, but I am so glad I did. It is simple, when the light bulb goes off. I would suggest you look at the questions and answers until it makes sense. I do so LOVE this pattern . Thanks again everyone. Regards and happy knitting.
10.06.2020 - 15:30
![]() Karren ha scritto:
Karren ha scritto:
Thank you so much for the guidance in my pattern. I am almost finished and think I will love it. Karren
18.04.2020 - 01:05
![]() Karren ha scritto:
Karren ha scritto:
I do not understand what I am supposed to do on the wrong side of the pattern in between the increase rows. The increases occur on the right side. Does the ribbing continue through out the whole pattern?
17.04.2020 - 00:53DROPS Design ha risposto:
Dear Karren, you increase in the P-sections seen from RS (these sts are worked K from WS), when working from WS you will K over K and P over P, and the number of K stitches from WS will increase (then decrease on the 2nd half of piece) as the P stitches from WS increases. Happy knitting!
17.04.2020 - 09:01
![]() Judith ha scritto:
Judith ha scritto:
I was sold a yarn that gets 2 st/inch on an 8 needle and is not too stiff. will the pattern work as written? Do I knit first stitch, then do the edge stitch? hat seem strange to me, so I am asking. I thought the edge stitch would be first. Thank you
16.12.2019 - 04:45DROPS Design ha risposto:
Dear Judith, please check your tension - read more here about tension. Pattern is worked in rib with 1 edge stitch in garter stitch on each side. Happy knitting!
16.12.2019 - 09:10
![]() Shannon ha scritto:
Shannon ha scritto:
What is the multi colored yarn in the second picture?
14.12.2019 - 04:07DROPS Design ha risposto:
Dear Shannon, in the second picture, the mittens are made with Vivaldi ( from group C) but this yarn is discontinued. Happy knitting!
15.12.2019 - 18:41
Saturn Rings |
|
|
|
|
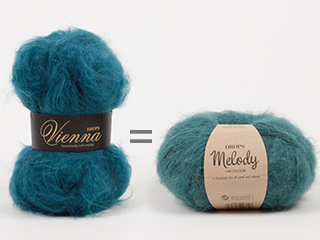
Fascia DROPS in "Alaska" e Scialle in "Vienna"
DROPS 86-10 |
|
|
FASCIA: Si inizia sul dietro, al centro. Avviare 19 m. Lavorare a coste come segue: 1° ferro (diritto del lavoro): 1 m dir (m vivagno lavorata a legaccio), * 2 m dir, 1 m rov *, ripetere per 5 volte – finire il ferro con 2 m dir e 1 m dir (m vivagno lavorata a legaccio). 2° ferro (rovescio del lavoro): 1 m dir (m vivagno lavorata a legaccio), * 2 m rov, 1 m dir *, ripetere per 5 volte – finire il ferro con 2 m rov e 1 m dir (m vivagno lavorata a legaccio). Gli aumenti vanno fatti sul diritto del lavoro. Quando il lavoro misura 8 cm, aumentare 1 m a rov in tutti i gruppi di m lavorate a rov = 24 m. Quando il lavoro misura 14 cm, aumentare 1 m a rov in tutti i gruppi di 2 m lavorate a rov = 29 m. Quando il lavoro misura 18 cm, aumentare 1 m a rov in tutti i gruppi di 3 m lavorate a rov = 34 m. Quando il lavoro misura 21 cm, aumentare 1 m a rov in tutti i gruppi di 4 m lavorate a rov = 39 m. Quando il lavoro misura 24 cm, inserire un segno = è il centro della fascia. Invertire adesso la lavorazione – misurare il lavoro dal segno. Le diminuzioni vanno fatte sul diritto del lavoro. Quando il lavoro misura 3 cm dal segno, diminuire 1 m a rov in tutti i gruppi di 5 m lavorate a rov = 34 m. Quando il lavoro misura 6 cm dal segno, diminuire 1 m a rov in tutti i gruppi di 4 m lavorate a rov = 29 m. Quando il lavoro misura 10 cm dal segno, diminuire 1 m a rov in tutti i gruppi di 3 m lavorate a rov = 24 m. Quando il lavoro misura 16 cm dal segno, diminuire 1 m a rov in tutti i gruppi di 2 m lavorate a rov = 19 m. Quando il lavoro misura 48 cm (lunghezza totale), intrecciare e cucire il bordo di chiusura a quello di avvio. -------------------------------------------------------- SCIALLE: Misure: Lunghezza (al centro, sul dietro): ca. 100 cm Larghezza in alto: ca. 205 cm Materiali: Filato VIENNA di Garnstudio 200 g, colore n° 43 nocciola Ferri DROPS n° 15, o misura necessaria per ottenere il campione. Campione: 5 m x 9 f a punto legaccio = 10 x 10 cm (è un lavoro a maglie molto lente) SCIALLE: Avviare 4 m e lavorare a punto legaccio; aumentare 1 m da 1 solo lato ogni 2 ferri lavorando 2 volte la stessa m. Continuare ad aumentare fino ad ottenere 50 m; il lavoro misura ca. 102 cm. Diminuire ora dallo stesso lato degli aumenti – diminuire ogni 2 ferri lavorando insieme a dir le 2 m più esterne. Continuare le diminuzioni finché non rimangono 4 m ; il lavoro misura ca. 205 cm. Chiudere tutte le m. FRANGIA: Legare le frange lungo i due lati dello scialle, a ca. 4-5 cm l’una dall’altra – cominciare dalla punta. Tagliare 6 fili lunghi 35 cm, piegarli in due, passare l’anello ottenuto nella m sul bordo dello scialle e passare le estremità dei fili attraverso l’anello. |
|
Avete terminato questo modello?Allora taggate le vostre foto con #dropspattern o inviatele alla #dropsfan gallery. Avete bisogno di aiuto con questo modello?Troverete 16 video tutorial, una sezione per i commenti/domande e molto altro guardando il modello su www.garnstudio.com © 1982-2026 DROPS Design A/S. Ci riserviamo tutti i diritti. Questo documento, compreso tutte le sue sotto-sezioni, è protetto dalle leggi sul copyright. Potete leggere quello che potete fare con i nostri modelli alla fine di ogni modello sul nostro sito. |


Lasciare un commento sul modello DROPS 86-10
Noi saremmo felici di ricevere i tuoi commenti e opinioni su questo modello!
Se vuoi fare una domanda, fai per favore attenzione a selezionare la categoria corretta nella casella qui sotto per velocizzare il processo di risposta. I campi richiesti sono indicati da *.