Comments / Questions (24)
![]() FIORENZA wrote:
FIORENZA wrote:
Buonasera. Dopo gli aumenti delle maniche mi trovo con 92+92 maglie x davanti +dietro, 58+58 per le maniche +tot 16 maglie rovescio di A1 ovvero tot. 316 maglie. Non capisco perché agli aumenti x lo sprone si parla di 48 m. da tenere tra i segnapunti delle maniche e sembra che dal conteggio totale restino escluse le 16 maglie rovesce. Dove sbaglio? Molte grazie se mi aiutate!
05.01.2021 - 00:05DROPS Design answered:
Buongiorno Fiorenza, i segnapunti vanno spostati per essere posizionati al limite delle maniche e in modo da avere 48 maglie per le maniche. Se non abbiamo risposto alla sua domanda provi a spiegarcelo in modo più chiaro. Buon lavoro!
05.01.2021 - 11:17
![]() Kimberly Robles wrote:
Kimberly Robles wrote:
Efficiently written information. It will be profitable to anybody who utilizes it, counting me. Keep up the good work. I'm looking forward for more posts. Thanks Workmanship
02.01.2021 - 11:56
![]() Nica Viterbo wrote:
Nica Viterbo wrote:
Buongiorno. Sto avendo difficoltá al punto "aumenti sullo sprone".dopo aver lavorato metà spalla Ho 4 rov 1 dir marker 56 diritti marker 1 dir e 4 rov e seguendo le indicazioni aumento-3 lavorando sulla maglia dir prima del marker , 56 dir, dopo marker su l'altra maglia a dir, il lavoro aumenta verso il centro del maglione e non verso il sotto manica. Ho inteso male le spiegazioni? Grazie
31.10.2020 - 08:48DROPS Design answered:
Buongiorno Nica, seguendo il suggerimento per gli aumenti 3, si aumenta 1 maglia prima e 1 maglia dopo la maglia con il segnapunti, all'altezza di tutti i segnapunti. Buon lavoro!
10.11.2020 - 10:28
![]() Hanna wrote:
Hanna wrote:
Jeg har blitt lut i ryggen med årene og jakker og gensere jeg strikker meg blir korte i ryggen. For å minimere dette har jeg tenkt å strikke ekstra omganger midt bak. Er det mellom skuldrene eller nede ved vrangborden jeg skal gjøre dette?
22.09.2020 - 09:48DROPS Design answered:
Hei Hanna, Det blir nok penest å strikke ekstra omganger nede ved vrangborden. God fornøyelse!
23.09.2020 - 06:58
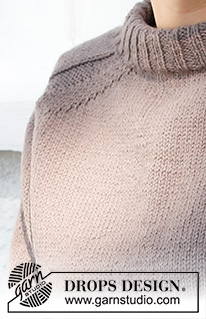
Country Muse#countrymusesweater |
||||||||||||||||||||||
 |
 |
|||||||||||||||||||||
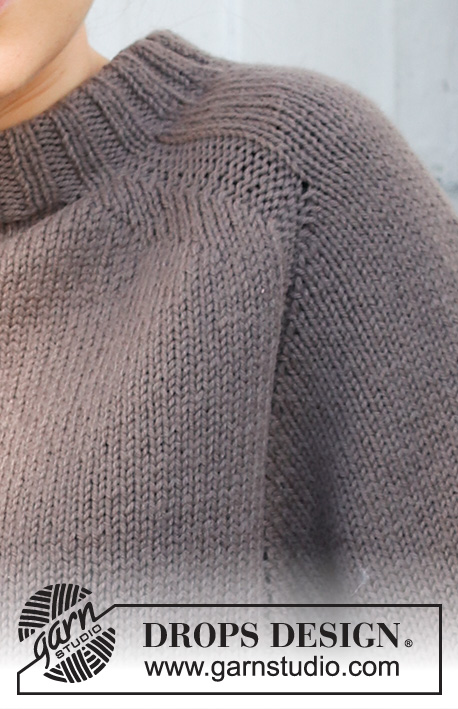
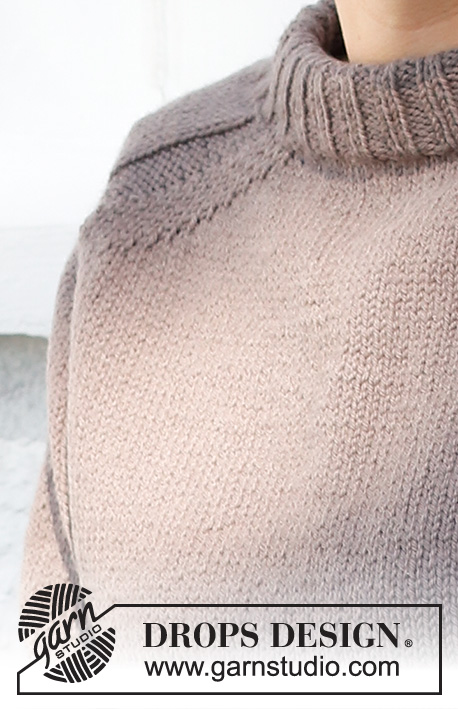
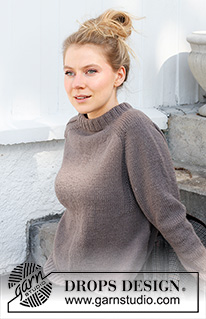
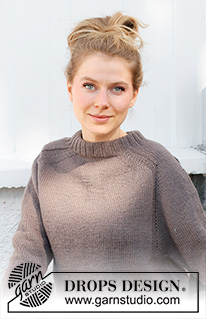
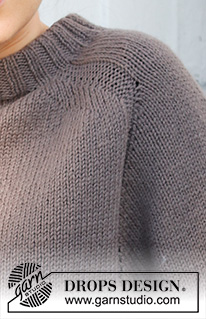
Knitted jumper in DROPS Lima. The piece is worked top down with double neck and saddle shoulders. Sizes S - XXXL.
DROPS 216-40 |
||||||||||||||||||||||
|
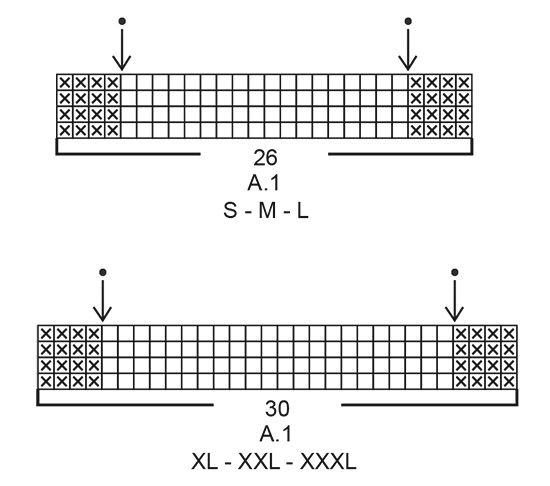
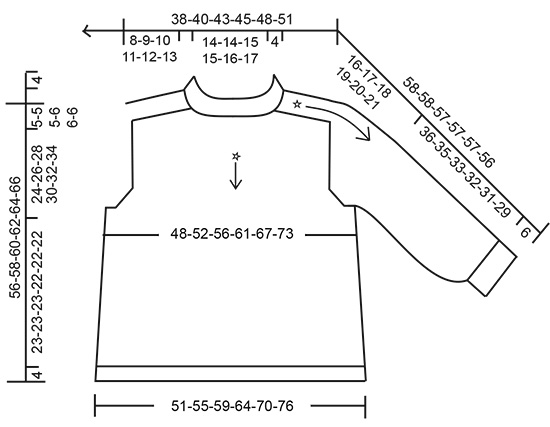
------------------------------------------------------- EXPLANATIONS FOR THE PATTERN: ------------------------------------------------------- PATTERN: See diagram A.1. Choose diagram for your size. INCREASE/DECREASE TIP (evenly spaced): To work out how to increase/decrease evenly, count the total number of stitches on needle (e.g. 92 stitches), and divide by the number of increases/decreases to be made (e.g. 28) = 3.3. In this example, increase by making 1 yarn over after alternately each 3rd and 4th stitch. On the next row work the yarn overs twisted to avoid holes. When decreasing, knit together alternately each 2nd and 3rd stitch and each 3rd and 4th stitch. INCREASE TIP-1 (saddle shoulder increase): Increase 2 stitches on each side of the 26-26-26-30-30-30 shoulder stitches by making 1 yarn over as described below. On the next round knit the yarn overs twisted to avoid holes. Then work the new stitches in stocking stitch. NOTE: The number of shoulder stitches remains the same – the increases are on the front and back pieces. BEFORE MARKER: Start 4 stitches before the marker, make 1 tight yarn over, 4 stitches in stocking stitch, make 1 tight yarn over (= 2 stitches increased). AFTER MARKER: Make 1 tight yarn over, 4 stitches in stocking stitch, make 1 tight yarn over (= 2 stitches increased). INCREASE TIP-2 (sleeve increase): BEFORE MARKER: The new stitch will be twisted, leaning towards the right. Use left needle to pick up strand between 2 stitches from the row below, pick up strand from behind and knit stitch in front loop (= 1 stitch increased). AFTER MARKER: The new stitch will be twisted, leaning towards the left. Use left needle to pick up strand between 2 stitches from the row below, pick up strand from the front and knit stitch in back loop (= 1 stitch increased). INCREASE TIP-3 (yoke increase): Start before the marker-stitch, use left needle to pick up strand between 2 stitches from the row below, pick up strand from behind and knit stitch in front loop, work marker-stitch in stocking stitch as before, use left needle to pick up strand between 2 stitches from the row below, pick up strand from the front and knit stitch in back loop (= 1 stitch increased on each side of the marker-stitch). Work the new stitches in stocking stitch. INCREASE TIP-4 (sides of body): Work until there are 3 stitches left before the stitch with the marker thread, make 1 yarn over, work 6 stitches in stocking stitch (marker thread sits in the middle of these 6 stitches), 1 yarn over (= 2 stitches increased). On the next round knit the yarn overs twisted to avoid holes. Then work the new stitches in stocking stitch. DECREASE TIP (for sleeves): Start 3 stitches before the marker thread, knit 2 together, knit 2 (marker thread sits between these 2 stitches), slip 1 stitch as if to knit, knit 1 and pass the slipped stitch over the knitted stitch (2 stitches decreased). CASTING-OFF TIP: To avoid the cast-off edge being tight you can cast off with a larger size needle. If the edge is still tight, make 1 yarn over after approx. each 8th stitch at the same time as casting off; the yarn overs are cast off as normal stitches. ------------------------------------------------------- START THE PIECE HERE: ------------------------------------------------------- JUMPER – SHORT OVERVIEW OF THE PIECE: The neck and yoke are worked in the round with circular needle, top down from mid back. Stitches are increased for the saddle shoulders, then for the sleeves and then for yoke. The yoke is divided for body and sleeves and the body continued in the round with circular needle. The sleeves are worked in the round with short circular needle/double pointed needles, top down. NECK: Cast on 92-96-100-104-108-112 stitches with short circular needle size 3.5 mm and Lima. Knit 1 round, then work rib in the round (= knit 2, purl 2) for 9 cm. When the rib is finished, knit 1 round where you increase 28-28-32-40-40-44 stitches evenly spaced – read INCREASE/DECREASE TIP = 120-124-132-144-148-156 stitches. Knit 1 round (yarn overs knitted twisted). YOKE: Change to circular needle size 4.5 mm. Insert 1 marker in the middle of the round (= mid-front) - yoke is measured from this marker! Work yoke as follows: In addition insert 4 new markers as described below – these markers are inserted without working the stitches, and each marker is placed between 2 stitches. These markers are used when increasing for saddle shoulders and should have a different colour from the marker mid-front. Start mid back, count 17-18-20-21-22-24 stitches (= ½ back piece), insert marker 1 before the next stitch, count 26-26-26-30-30-30 stitches (= shoulder), insert marker 2 before the next stitch, count 34-36-40-42-44-48 stitches (= front piece), insert marker 3 before the next stitch, count 26-26-26-30-30-30 stitches (= shoulder), insert marker 4 before the next stitch. There are 17-18-20-21-22-24 stitches left after the last marker; allow the markers to follow your work onwards. SADDLE SHOULDER INCREASE: Read the whole section before continuing! The piece is continued with stocking stitch on the front and back pieces and A.1 over the 26-26-26-30-30-30 shoulder stitches (i.e. between markers 1 and 2 and markers 3 and 4). AT THE SAME TIME on the first round increase 8 stitches for the saddle shoulders as follows: Increase 2 stitches BEFORE markers 1 and 3 (i.e. before A.1) and increase 2 stitches AFTER markers 2 and 4 (i.e. after A.1) – read INCREASE TIP-1. Remember there are only increases on front piece and back piece and number of shoulder stitches remains the same. Continue this pattern and increase every 2nd round a total of 10-12-13-14-16-17 times = 200-220-236-256-276-292 stitches. REMEMBER THE KNITTING TENSION! After the last increase, the piece measures approx. 8-9-10-11-12-13 cm from the marker on the neck. Now increase for sleeves as described below. SLEEVE INCREASE: Move the 4 markers from saddle shoulder increase so they are now on each side of the middle 18-18-18-22-22-22 stitches in A.1 on each shoulder – see arrows in A.1. Continue with stocking stitch and A.1 over A.1 as before. AT THE SAME TIME on the next round increase 4 stitches for the sleeves as follows: Increase 1 stitch AFTER markers 1 and 3 and increase 1 stitch BEFORE markers 2 and 4 – read INCREASE TIP-2. Remember there are only increases on sleeves and number of stitches in A.1 is increasing, but number of stitches on front piece and back piece remains the same – the increased stitches are worked in stocking stitch. Increase like this every 2nd round a total of 15-16-16-18-19-19 times = 260-284-300-328-352-368 stitches. After the last increase, the piece measures approx 11-12-12-13-14-14 cm from where the sleeve increases started. Now increase for yoke as described below. YOKE INCREASE: Move the 4 markers so each marker sits in the outermost sleeve stitches on each side. There are 46-48-48-56-58-58 stitches between the marker-stitches on each sleeve. Continue with stocking stitch and 4 purled stitches from A.1 which will continue down the front and back pieces as before. AT THE SAME TIME on the next round increase 8 stitches for yoke as follows: Increase 1 stitch on each side of the 4 marker-stitches – read INCREASE TIP-3. Increase like this every 2nd round a total of 5-5-6-7-7-8 times = 300-324-348-384-408-432 stitches. Continue working without further increases until the piece measures 16-17-18-19-20-21 cm from where the sleeve increase started after saddle shoulder increase. The piece measures approx. 24-26-28-30-32-34 cm from marker by the neck. On the next round divide the yoke for the body and sleeves as follows: Work the first 45-49-52-57-62-67 stitches as before (= ½ back piece), place the next 60-64-70-78-80-82 stitches on 1 thread for the sleeve, cast on 6-6-8-8-10-12 new stitches on the needle (= in side under sleeve), work 90-98-104-114-124-134 stitches as before (= front piece), place the next 60-64-70-78-80-82 stitches on 1 thread for the sleeve, cast on 6-6-8-8-10-12 new stitches on the needle (= in side under sleeve), work the last 45-49-52-57-62-67 stitches as before (= ½ back piece). Cut the strand and remove all markers. Body and sleeves are finished separately. THE PIECE IS NOW MEASURED FROM HERE! BODY: = 192-208-224-244-268-292 stitches. Insert 1 marker thread in the middle of the 6-6-8-8-10-12 stitches cast on under each sleeve. Allow the threads to follow your work onwards – they are used when increasing in the sides. Start the round at one of the marker threads and work stocking stitch in the round over all stitches. When the piece measures 6 cm from the division, increase 1 stitch on each side of both marker threads – read INCREASE TIP-4 (= 4 stitches increased). Increase like this every 6 cm a total of 3 times on each side = 204-220-236-256-280-304 stitches. Continue working until the piece measures 23-23-23-22-22-22 cm from the division. There is approx. 4 cm left to finished length; try the jumper on and work to desired length. Knit 1 round where you increase 48-52-56-64-68-76 stitches evenly spaced – remember INCREASE/DECREASE TIP = 252-272-292-320-348-380 stitches. NOTE: This is done to avoid the rib being tight. Change to circular needle size 3.5 mm and work rib (knit 2, purl 2) for 4 cm. Cast off with knit over knit and purl over purl – read CASTING-OFF TIP! The jumper measures approx. 56-58-60-62-64-66 cm from the shoulder down. SLEEVE: Place the 60-64-70-78-80-82 stitches from the thread on the one side of the piece on double pointed needles/short circular needle size 4.5 mm and knit up 1 stitch in each of the 6-6-8-8-10-12 stitches cast on under the sleeve = 66-70-78-86-90-94 stitches. Insert a marker thread in the middle of the 6-6-8-8-10-12 stitches under the sleeve. Allow the thread to follow your work onwards; it will be used when decreasing under the sleeve. Start at the marker thread and work stocking stitch in the round over all stitches. When the sleeve measures 2 cm from the division in all sizes, decrease 2 stitches under the sleeve – read DECREASE TIP. Decrease like this every 2-2-1½-1-1-1 cm a total of 7-8-11-14-15-16 times = 52-54-56-58-60-62 stitches. Continue working until the sleeve measures 36-35-33-32-31-29 cm from the division. There is approx. 6 cm left to finished length; try the jumper on and work to desired length. NOTE: Shorter measurements in larger sizes due to broader shoulders and longer yoke. Knit 1 round where you decrease 4-6-4-6-4-6 stitches evenly spaced – remember INCREASE/DECREASE TIP = 48-48-52-52-56-56 stitches. Change to double pointed needles size 3.5 mm and work rib (knit 2, purl 2) for 6 cm. Cast off with knit over knit and purl over purl – remember CASTING-OFF TIP! The sleeve measures approx. 42-41-39-38-37-35 cm from the division. Work the other sleeve in the same way. ASSEMBLY: Fold the neck to the inside of the piece and sew down. To avoid the neck being tight and rolling outwards, it is important the seam is elastic. |
||||||||||||||||||||||
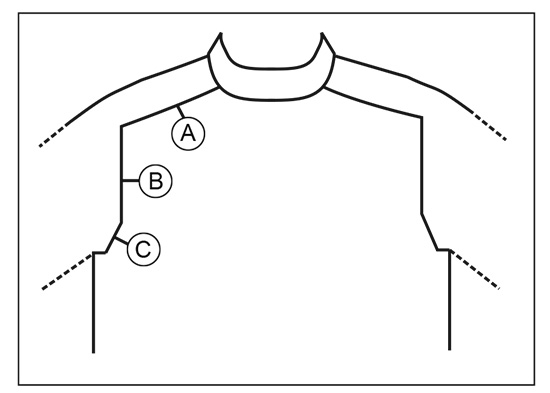
Diagram explanations |
||||||||||||||||||||||
|
||||||||||||||||||||||
 |
||||||||||||||||||||||
 |
||||||||||||||||||||||
 |
||||||||||||||||||||||
Have you finished this pattern?Tag your pictures with #dropspattern #countrymusesweater or submit them to the #dropsfan gallery. Do you need help with this pattern?You'll find 30 tutorial videos, a Comments/Questions area and more by visiting the pattern on garnstudio.com. © 1982-2025 DROPS Design A/S. We reserve all rights. This document, including all its sub-sections, has copyrights. Read more about what you can do with our patterns at the bottom of each pattern on our site. |
||||||||||||||||||||||





Post a comment to pattern DROPS 216-40
We would love to hear what you have to say about this pattern!
If you want to leave a question, please make sure you select the correct category in the form below, to speed up the answering process. Required fields are marked *.