
Popular categories
Looking for a yarn?


Comments / Questions (97)
Danesh wrote:
Should I repeat A2 until the piece measure is ok?
18.08.2015 - 18:30DROPS Design answered:
Dear Mrs Danesh, A.2 is worked while increasing for raglan, when all inc for raglan are done, you should get the stated measurements (remember to check and keep correct tension), then divide piece for body. Happy knitting!
18.08.2015 - 19:02
![]() Frieda G wrote:
Frieda G wrote:
Wellicht duidelijker vermelden om voor en na A2 een rechte steek te breien al vorens de meerderingen te maken. Ik heb flink stuk uit moeten halen omdat ik lelijke ladder kreeg.
31.07.2015 - 15:49
![]() Anne Næss wrote:
Anne Næss wrote:
Hei. Jeg er kommet dit at jeg skal øke på ermene. Skal økningen starte masken før og etter A2? Altså 4 masker pr gang det økes? Når jeg er ferdig med økningen til ermene, er jeg da ferdig med å strikke mønsteret?
11.07.2015 - 10:26DROPS Design answered:
Hej Anne, Ja det stemmer, læs også øketips øverst i opskriften. God fornøjelse!
30.07.2015 - 15:39Sonia Strauss wrote:
Thank you for pattern count! I am now 8 rds into main pattern & my raglan increases do not look right. It says to inc ea side of A.2 but how? i.e. On the 2nd rd after first rd inc, I work YO twisted but do I now make the next inc before twisted YO or after? K18, YO twist, inc, A2, K1, A2, YO twist, inc, K36, etc? 3rd rd: K18, k1, YO twist, inc, A2, etc?
05.07.2015 - 19:51DROPS Design answered:
Dear Mrs Strauss, inc for raglan are made on each side of A.2, ie if you have made a YO after A.2, and need to inc on next round after A.2 again, work A.2, then YO (=inc for raglan), then work YO twisted, to get always the inc for raglan before or/and after A.2. Happy knitting!
06.07.2015 - 10:37
![]() Sonia Strauss wrote:
Sonia Strauss wrote:
Pattern r-676 in med. Not ending w 286 st count after all increases. Starting w 150: 18 [back] + 39 (A2+1+A2) [sleeve] + 36 [front] + 39 (A2+1+A2) [sleeve]+18 [back]. Then starting Raglan increases on 2nd rd I end with 246. then 1 st inc twice each rd at sleeve 4 times and then every 4th rd 6 times [2 sts x 10]=20. I get 266 [246+20]. Where have I gone wrong? I was increasing 1 st at each sleeve in the middle. Should I be increasing 2 sts at each sleeve?
01.07.2015 - 08:26DROPS Design answered:
Dear Mrs Strauss, you inc for body 4 sts 16 times every round + 4 sts 8 times every other round = 96 sts inc for body (2 inc on back piece + 2 inc on front piece) + for sleeves 2 sts per sleeve 4 times every other round + 2 sts per sleeve 6 times every 4th round = 20 sts per sleeve = 40 sts inc in total. You start with 150 sts + 96 + 40 = 286 sts. Happy knitting!
01.07.2015 - 09:47
![]() Claudia Totz wrote:
Claudia Totz wrote:
Hallo liebes Drops-Team, ich möchte die größte Größe des Modells stricken und bin jetzt einigermaßen wegen der Zunahmen verwirrt: Ich fange mit 166 M an. Im Raglan nehme ich insgesamt 39x4 M zu und bei den Ärmeln 18 M pro Seite. Das ergibt bei mir 358 M statt 394 M. Wo ist mein Denkfehler? Vielen Dank, Claudia Totz
29.06.2015 - 15:45DROPS Design answered:
Sie nehmen am Rumpfteil 39 x 4 M zu = 156 M, an den Ärmeln 18 x 4 M zu = 72 M. Mit den 166 M kommen Sie dann auf 394 M. An den Ärmeln nehmen Sie ja auch jeweils beidseitig an jedem Ärmel zu, also pro Ärmel 2 M.
05.07.2015 - 08:29
![]() Shelly wrote:
Shelly wrote:
Thank so much for helping me . I have another question: I whant to make this shirt with long sleeves, do you have a pattern I can follow that shows how to make this shirt or a similar one with long sleeves?
25.06.2015 - 07:49Shelly wrote:
Should I do the A.2 pattern twice or should I stop the yoke and raglan after the last inc (two rounds before finishing the second A.2 pattern.
23.06.2015 - 09:26DROPS Design answered:
Dear Shelly, stop yoke when all inc for raglan are done and piece measure the correct measurement for your size. Happy knitting!
23.06.2015 - 10:36Shelly wrote:
After finishing the yoke the pattern for S size says it should be 17 cm. my work is only 14 cm. what should I do?
21.06.2015 - 08:26DROPS Design answered:
Dear Shelly, remember to check and keep correct tension, ie 21 sts x 28 rows in stocking st = 10 x 10 cm. If your tension in height is too tight, raglan should be too small and armholes too tight, you can work some extra rows without inc evenly between inc row for raglan. Happy knitting!
22.06.2015 - 10:31
![]() Maria Luisa Cevolani wrote:
Maria Luisa Cevolani wrote:
The increase in the front and in the back you say after the beginning of the work, where should it be and how? Please, I didn't understand!
15.06.2015 - 13:49DROPS Design answered:
Dear Maria Luisa, you can increase on the body and on the sleeves wherever you want, for example using kfb increase. Please feel free to write us if you have any further doubt. Happy knitting!
15.06.2015 - 13:56
|
||||||||||||||||||||||
Esther#esthertop |
||||||||||||||||||||||
 |
 |
|||||||||||||||||||||
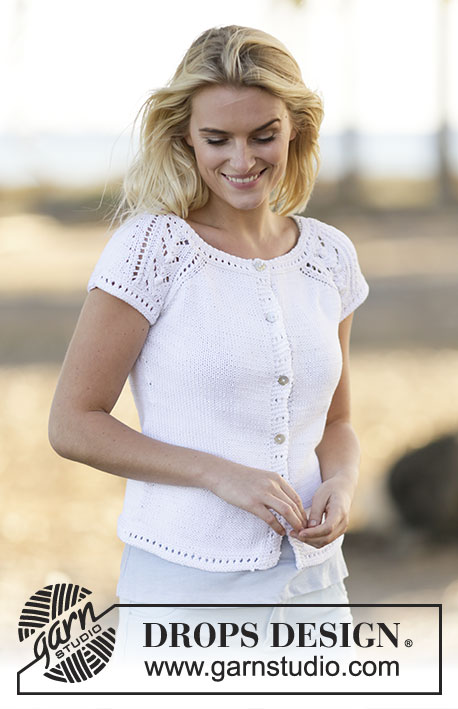
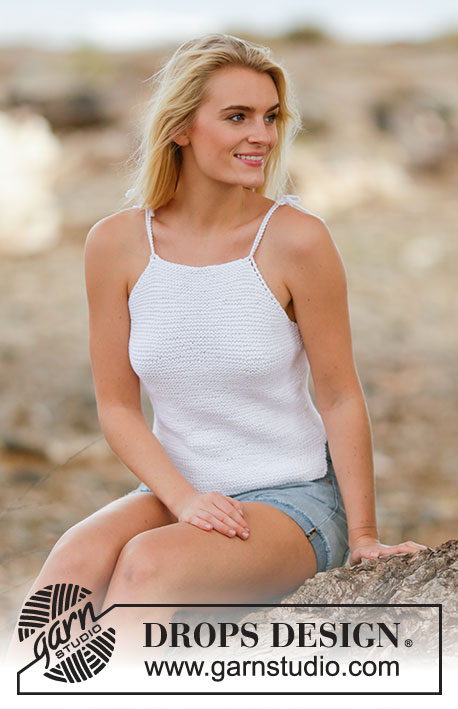
Knitted DROPS top with raglan and lace pattern, worked top down with short sleeves in ”Muskat”. Size: S - XXXL.
DROPS 159-33 |
||||||||||||||||||||||
|
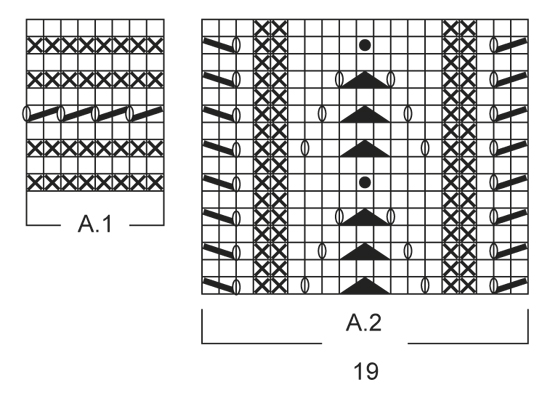
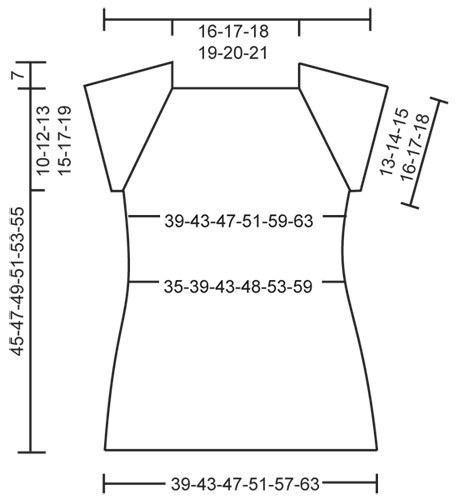
PATTERN: See diagrams A.1-A.2. RAGLAN: Inc for raglan on each side of A.2. Inc with a YO, work YO twisted on next round to avoid holes. The inc on body and sleeves are uneven as explained in pattern. INCREASE TIP: Beg 1 st before marker and inc as follows: 1 YO, K 2 (marker is between these 2 sts), 1 YO. On next round K YOs twisted to avoid holes. DECREASE TIP: Dec as follows before marker: K 2 tog. Dec as follows after marker: Slip 1 st as if to K, K 1, psso. ---------------------------------------------------------- TOP: Worked in the round on circular needle, top down. YOKE: READ ALL OF THE FOLLOWING SECTION BEFORE CONTINUING! Cast on 146-150-154-158-162-166 sts on circular needle size 3 mm with Muskat. Work A.1. When A.1 has been worked, switch to circular needle size 4 mm. Work next round as follows from mid back: Work 17-18-19-20-21-22 sts in stocking st (= back piece), work A.2 (= 19 sts), 1 st in stocking st, A.2 (= 19 sts) (= 39 sts on sleeve), work 34-36-38-40-42-44 sts in stocking st (= front piece), work A.2, 1 st in stocking st and A.2 (= 39 sts on sleeve) and finish with 17-18-19-20-21-22 sts in stocking st (= back piece). Continue pattern like this AT THE SAME TIME inc for RAGLAN beg on next round - see explanation above. Inc on front/back piece: 1 st every round a total of 14-16-18-20-26-30 times, then on every other round 7-8-9-10-9-9 times. Inc on sleeves: 1 st every other round a total of 2-4-6-8-10-12 times and then every 4th round a total of 6 times in all sizes. After all inc there are 262-286-310-334-366-394 sts on row, continue working until the piece measures approx. 17-19-20-22-24-26 cm from shoulder and down. Work next round as follows: K 38-42-46-50-56-61 (= back piece), slip the next 55-59-63-67-71-75 sts on a stitch holder for sleeve, cast on 6-6-6-8-8-10 new sts, insert 1 marker in the middle of the new sts, K 76-84-92-100-112-122 (= front piece), slip the next 55-59-63-67-71-75 sts on 1 stitch holder for sleeve, cast on 6-6-6-8-8-10 new sts, insert 1 marker in the middle of the new sts and K the remaining 38-42-46-50-56-61 (= back piece) = 164-180-196-216-240-264 sts on row - NOW MEASURE PIECE FROM HERE. BODY: Continue in stocking st. When piece measures 4 cm, dec 1 st on each side of markers in the side - READ DECREASE TIP (= 4 sts dec). Repeat dec every 4 cm a total of 4 times = 148-164-180-200-224-248 sts. When piece measures 22 cm in all sizes, inc 1 st on each side of markers in the side - READ INCREASE TIP (= 4 sts inc). Repeat inc every 2 1/2 cm a total of 4 times = 164-180-196-216-240-264 sts. When piece measures 33-33-34-34-34-34 cm, switch to circular needle size 3 mm. Work pattern according to diagram A.1 and then loosely cast off. Top measures approx. 52-54-56-58-60-62 cm from shoulder and down. SLEEVE EDGE: Worked in the round on double pointed needles. Slip the 55-59-63-67-71-75 sts from stitch holder back on double pointed needles size 3 mm and cast on 6-6-6-8-8-10 new sts under sleeve = 61-65-69-75-79-85 sts. Work pattern in the round according to diagram A.1 and then loosely cast off. Work the other sleeve edge the same way. ASSEMBLY: Sew tog under sleeves. |
||||||||||||||||||||||
Diagram explanations |
||||||||||||||||||||||
|
||||||||||||||||||||||
 |
||||||||||||||||||||||
 |
||||||||||||||||||||||
Have you finished this pattern?Tag your pictures with #dropspattern #esthertop or submit them to the #dropsfan gallery. Do you need help with this pattern?You'll find 24 tutorial videos, a Comments/Questions area and more by visiting the pattern on garnstudio.com. © 1982-2026 DROPS Design A/S. We reserve all rights. This document, including all its sub-sections, has copyrights. Read more about what you can do with our patterns at the bottom of each pattern on our site. |
||||||||||||||||||||||


With over 40 years in knitting and crochet design, DROPS Design offers one of the most extensive collections of free patterns on the internet - translated to 17 languages. As of today we count 324 catalogues and 12290 patterns translated into English (UK/cm). 12290
We work hard to bring you the best knitting and crochet have to offer, inspiration and advice as well as great quality yarns at incredible prices! Would you like to use our patterns for other than personal use? You can read what you are allowed to do in the Copyright text at the bottom of all our patterns. Happy crafting!
Post a comment to pattern DROPS 159-33
We would love to hear what you have to say about this pattern!
If you want to leave a question, please make sure you select the correct category in the form below, to speed up the answering process. Required fields are marked *.