
Popular categories
Looking for a yarn?


Comments / Questions (103)
![]() Edith wrote:
Edith wrote:
Ik begrijp iets niet bij het minderen van de mouw. Maat L zegt: na 2 cm minderen, dan iedere 5 1/2 cm minderen. Dit is in totaal 14 steken. Er staat echter 10 = 37 steken. De 37 klopt weer wel. Moet die 10 niet veranderd worden in 14?
20.04.2024 - 14:41DROPS Design answered:
Dag Edith,
Je mindert in totaal 7 keer en inderdaad 14 steken. (Er moot staan 7 keer geminderd in plaats van 7 st geminderd; ik ga het nu aanpassen.)
22.04.2024 - 21:16
![]() Nicole wrote:
Nicole wrote:
Hallo, ich würde den Pulli gerne einfarbig stricken. Dafür benötige ich sicher weniger Wolle als für die mehrfarbige Variante, richtig? Können Sie mir eine Menge nennen für Gr. M?
24.05.2023 - 21:53DROPS Design answered:
Liebe Nicole, leider haben wir dafür keine Erfahrung da der Pullover mehrfarbig gestrickt wurde, und den Pullover haben wir nicht mehr. Zählen Sie alle Farben zusammen, sicher brauchen Sie etwas weniger, gerne kann Ihnen Ihr DROPS Händler damit (auch per Telefon oder per E-Mail) helfen. Viel Spaß beim stricken!
25.05.2023 - 08:56
![]() Jette Pedersen wrote:
Jette Pedersen wrote:
Jeg kan ikke se der er glatstrikning mellem A1 og A2 på billedet. Skulle der have stået retstrikning ? Jeg bliver nød til at lave 3,5 cm for at længden passer. Har strikket glat som er står, og det ser pænt ud. Tak for en skøn sommerbluse.
26.06.2021 - 12:44DROPS Design answered:
Hei Jette. Når du har strikket A.1 2 ganger i høyden måler arbeidet ca 31 cm og du skal da strikke glattstrikk noen ca, avhengig av hvilken str du strikke (genseren på bilde = str. S). Det er et lite område som er glattstrikket som man ser på bildet. Flott at du er blitt fornøyd med det du har strikket. mvh DROPS design
28.06.2021 - 14:03
![]() Barbara Cherner wrote:
Barbara Cherner wrote:
I have reached the neckline on the front and do not understand the following instruction: Then bind off at beg of every row from neck: 2 sts 1 time and 1 st 1 time = 18-21-23-27-30-34 sts remain on shoulder. I have never seen this instruction before. Would you please explain it to me? Thank you so much.
18.09.2019 - 18:50DROPS Design answered:
Hi Barbara, When you start a row from the neck side of the row, you bind off 2 stitches on the first row, then the next 2 times you start a row from the neck you bind off 1 stitch each time. Then you have the number of stitches stated left on the needle for the shoulder. I hope this helps and happy knitting!
19.09.2019 - 07:25
![]() Maria wrote:
Maria wrote:
In der Erklärung des Diagrammes ist das Muster als Hin-und Rückreihe angegeben, also die weissen Kästchen steht für zwei Reihen (Hinreihe rechts, Rückreihe links). Im Diagramm aber werden anhand der Seitenzahlen nur die Hinreihen gezeigt. Ausserdem möchte ich darauf hinweisen, dass die von mir gefertigte Maschenprobe bei 30Grad gewaschen und im Trockner getrocknet wurde. Sie war anschliessend in Länge und Breite 1 cm kleiner.
25.01.2019 - 17:49DROPS Design answered:
Liebe Maria, die Diagramme zeigen alle Reihen dh die Hin sowie die Rückreihen. Beginnen Sie an der unteren Ecke an der rechten Seite und lesen Sie die Hinreihen rechts nach links, die Rückreihen lesen Sie links nach rechts. DROPS Safran soll nicht im Trockner getrocknet werden - siehe Farbkarte/Pflegehinweise und mehr über die Pflegehinweise lesen Sie hier. Viel Spaß beim stricken!
28.01.2019 - 08:44
![]() Malene Schaleck wrote:
Malene Schaleck wrote:
Kan man lave ærmerne lange instedet for 3/4
16.05.2018 - 07:36DROPS Design answered:
Hei Malene. Selvfølgelig kan du det. Du kan legge inn noen omganger glattstrikk med beige og mellomrosa i overgangen mellom A.2 og A.1 – som på bolen. Du kan enten strikke arbeidet lenger til ønsket lengde eller felle noen masker om du ikke vil ha ermet så vidt nederst. God fornøyelse
16.05.2018 - 13:12
![]() Daniela wrote:
Daniela wrote:
Allora adesso ho capito dove sbagliato. Io consideravo ogni riga come due ferri, visto che la legenda dice al quadretto bianco: Diritto sul diritto e rovescio sul rovescio. Poi invece ho letto bene sul descrizione al paragrafo MOTIVO: I diagrammi mostrano tutti i ferri del motivo, visti sul diritto del lavoro. Se posso un consiglio sarebbe meglio correggere la legenda e indicare solo una maglia diritto. Grazie!
02.04.2018 - 12:42
![]() Daniela wrote:
Daniela wrote:
Buongiorno! Seguendo lo schema, se corretto cosa faccio, mi vengono strisce a maglia rasata mentre dalla foto il modello sembra essere perlopiù fatto a maglia legaccio. Inoltre il primo ferro dritto dopo il ferro dei gettati darebbe due giri a legaccio quindi non risulta uguale il decoro sotto e sopra e devo saltare il ferro facendo rasato...spero di essermi spiegata...
02.04.2018 - 10:41DROPS Design answered:
Buongiorno Daniela. Lo schema è prevalentemente a legaccio. Le righe con i quadrati con la stellina, sono i ferri di ritorno e vengono lavorati a diritto. In questo modo il decoro risulta uguale sopra e sotto la riga traforata. Buon lavoro!
02.04.2018 - 11:05
![]() Federica wrote:
Federica wrote:
Io ho provato a fare il campione seguendo lo schema A2 ma nell'eseguire il lavoro secondo me c'è un errore nel 3° o 4°ferro. Qui secondo me è sbagliato lo schema perché per lavorare dritto le maglie dritto su rovescio, dopo aver lavorato il 3° ferro dovrei trovarmi con le maglie a rovescio.. invece non è così... mi trovo con le maglie a dritto. Per favore spiegatemi dove sbaglio.
27.05.2017 - 15:25DROPS Design answered:
Buongiorno Federica. L'indicazione di lavorare la maglia a dir sul rovescio, significa che le maglie vanno lavorate a diritto sui ferri che lavora sul rovescio del lavoro; sono i ferri di ritorno quando si lavora avanti e indietro. Buon lavoro!
27.05.2017 - 16:57
![]() Antonella wrote:
Antonella wrote:
Salve, sto per ordinare il filato necessario per questo modello taglia M. Le quantità dei vari colori sono corrette? Mi preoccupa il commento della sig.ra Anna del 25.03.2013 alle 13:53. Potete controllare? Grazie per la risposta.
13.07.2015 - 16:59DROPS Design answered:
Buonasera Antonella, non ci sono segnalazioni particolari a riguardo, il quantitativo indicato è corretto a patto che il suo campione corrisponda esattamente a quello indicato. Buon lavoro!
13.07.2015 - 19:25
|
||||||||||||||||
Candy#candysweater |
||||||||||||||||
 |
 |
|||||||||||||||
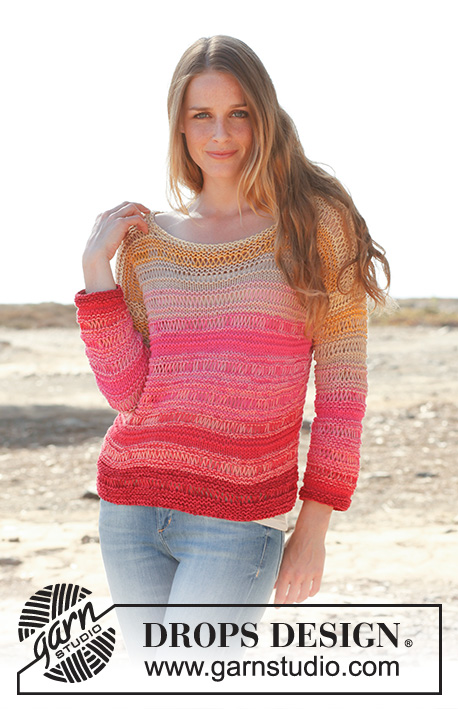
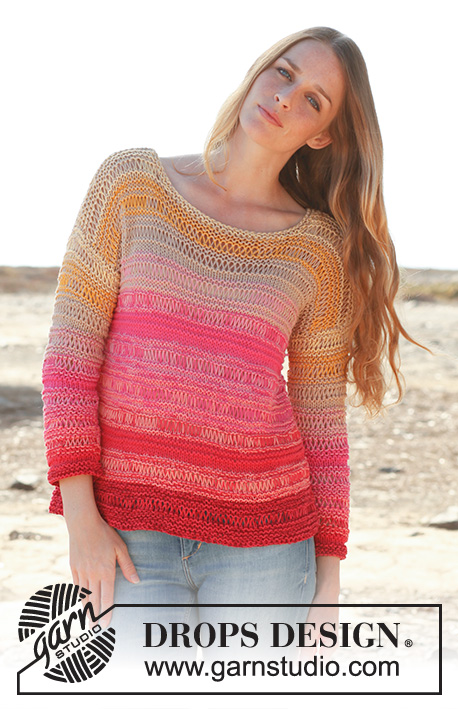
Knitted DROPS jumper in garter st with dropped sts and ¾ sleeves in 2 threads "Safran". Size: S - XXXL.
DROPS 147-8 |
||||||||||||||||
|
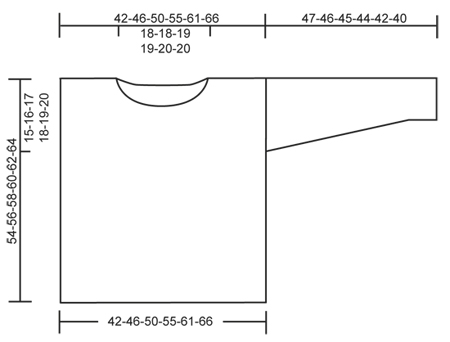
GARTER ST (back and forth on needle): K all rows. 1 ridge = 2 rows K. PATTERN: See diagrams A.1 and A.2. Diagrams show all rows in pattern seen from RS. NOTE: To avoid the piece being to tight in the sides when working pattern, make 2 YOs inside edge st in each side on every row with dropped sts (instead of 1 YO). Slip both YOs off the needle on next row. STRIPES: Change colour on every row marked with arrow in A.1 and A.2. Work the stripes in the following order: A.1: 1 thread rust + 1 thread raspberry 1 thread raspberry + 1 thread peach 2 threads raspberry 1 thread raspberry + 1 thread peach 1 thread peach + 1 thread cerise 1 thread cerise + 1 thread medium pink 2 threads cerise 1 thread cerise + 1 thread medium pink A.2: 1 thread medium pink + 1 thread beige 2 threads beige 1 thread beige + 1 thread strong yellow 1 thread beige + 1 thread yellow MEASURING TIP: Because of the texture on the garment the piece must be held up when measuring otherwise the jumper will be too long when worn. ---------------------------------------------------------- FRONT PIECE: READ ALL OF THE FOLLOWING SECTION BEFORE CONTINUING! Cast on 63-69-75-83-91-99 sts on needle size 6 mm with 1 thread rust + 1 thread raspberry. Work in GARTER ST - see explanation above - for 2-2-3-3-4-4 cm. Then work PATTERN according to diagram A.1 with 1 edge st in garter st in each side (1st row = RS), AT THE SAME TIME work STRIPES - see explanation above. REMEMBER THE KNITTING TENSION! NOTE: Diagram A.1 is repeated 2 times vertically (until stripes in A.1 are done). After A.1 change to 1 thread medium pink + 1 thread beige. Work in stocking st with 1 edge st in garter st in each side until piece measures 34-35-36-37-38-39 cm - READ MEASURING TIP. Then work pattern according to diagram A.2 AT THE SAME TIME continue with STRIPES - see explanation above. When stripes in A.2 are done, continue pattern with the colours in last stripe (1 thread beige + 1 thread yellow) until finished measurements. AT THE SAME TIME when piece measures 39-40-41-42-43-44 cm - remember MEASURING TIP, insert 1 marker in each side (marks depth of armhole). When piece measures 48-50-52-52-54-56 cm, cast off the middle 21-21-23-23-25-25 sts for neck and finish each shoulder separately. Then cast off at beg of every row from neck: 2 sts 1 time and 1 st 1 time = 18-21-23-27-30-34 sts remain on shoulder. Continue to work until piece measures 53-55-57-59-61-63 cm, work 1 ridge and loosely cast off, piece measures approx. 54-56-58-60-62-64 cm. Repeat on the other shoulder. BACK PIECE: Cast on and work as front piece. Mark the depth of armhole as on front piece. Continue to work until piece measures 52-54-56-58-60-62 cm. Now cast off the middle 25-25-27-27-29-29 sts for neck and finish each shoulder separately. Continue to cast off 1 st on next row from neck = 18-21-23-27-30-34 sts remain on the shoulder. When piece measures 53-55-57-59-61-63 cm, work 1 ridge before loosely casting off all sts. Repeat on the other shoulder. ASSEMBLY: Sew the shoulder seams. SLEEVE: Knit up from RS 45-47-51-53-57-59 sts between the 2 markers in one side of jumper on needle size 6 mm with 1 thread yellow + 1 thread beige. NOTE: If more/fewer sts have been knitted up, dec/inc evenly on 1st row to the correct no of sts. READ ALL OF THE FOLLOWING SECTION ON SLEEVE BEFORE CONTINUING! Work PATTERN according to diagram A.2 with 1 edge st in garter st in each side, AT THE SAME TIME work STRIPES – see explanation above but beg at the top of diagram (1st row = WS) and reversed in stripes and work downwards so that you beg with yellow at the top of sleeve and work down towards the rust red. When A.2 has been worked 1 time vertically, change to 1 thread cerise + 1 thread medium pink and continue with A.1 and STRIPES the same way (beg at the top of diagram and reversed in stripes). AT THE SAME TIME when piece measures 2-2-3-3-4-4 cm from markers, dec 1 st in each side. Repeat dec in each side every 9-7-5½-4½-3½-3 cm 4-5-6-7-8-9 more times (= 5-6-7-8-9-10 dec in total) = 35-35-37-37-39-39 sts. Continue to work until sleeve measures 47-46-45-44-42-40 cm from markers - remember MEASURING TIP. Work 2 ridges with 1 thread raspberry + 1 thread rust and cast off. Work the other sleeve the same way. ASSEMBLY: Sew underarm and side seams in one in front loop of outermost st. NECK: Knit up approx. 70 to 85 sts around the neck on circular needle size 5 mm with 1 thread yellow + 1 thread beige. P 1 round and K 1 round, then loosely cast off with P. |
||||||||||||||||
Diagram explanations |
||||||||||||||||
|
||||||||||||||||
 |
||||||||||||||||
 |
||||||||||||||||
Have you finished this pattern?Tag your pictures with #dropspattern #candysweater or submit them to the #dropsfan gallery. Do you need help with this pattern?You'll find 11 tutorial videos, a Comments/Questions area and more by visiting the pattern on garnstudio.com. © 1982-2026 DROPS Design A/S. We reserve all rights. This document, including all its sub-sections, has copyrights. Read more about what you can do with our patterns at the bottom of each pattern on our site. |
||||||||||||||||


With over 40 years in knitting and crochet design, DROPS Design offers one of the most extensive collections of free patterns on the internet - translated to 17 languages. As of today we count 324 catalogues and 12290 patterns translated into English (UK/cm). 12290
We work hard to bring you the best knitting and crochet have to offer, inspiration and advice as well as great quality yarns at incredible prices! Would you like to use our patterns for other than personal use? You can read what you are allowed to do in the Copyright text at the bottom of all our patterns. Happy crafting!
Post a comment to pattern DROPS 147-8
We would love to hear what you have to say about this pattern!
If you want to leave a question, please make sure you select the correct category in the form below, to speed up the answering process. Required fields are marked *.