
Popular categories
Looking for a yarn?


Comments / Questions (33)
![]() Ekaterina wrote:
Ekaterina wrote:
Czy zszywamy boki robótki?
12.01.2024 - 13:54DROPS Design answered:
Witaj, nie zszywamy, zszywany jest tylko fragment pod podkrojem rękawa. Jeżeli chcesz, oczywiście możesz zszyć boki. Pozdrawiamy!
12.01.2024 - 15:08
![]() Rikke Uldahl wrote:
Rikke Uldahl wrote:
Det ville være super smart hvus der var en lille “oversæt” knap ved spørgsmål og svar så man kan få glæde af det. Og ikke skal spørge om det samme igen og igen 😁
06.06.2023 - 13:23
![]() Linda wrote:
Linda wrote:
After splitting for the two front sections there are 20 stitches in pattern on each side. Instructions call for 3 stitches in garter st on each side leaving 17 sts in pattern. Pattern requires an even number of sts. Please explain how to maintain pattern with an odd number of sts.
19.05.2022 - 02:01DROPS Design answered:
Dear Linda, when working the right front piece, repeat lace pattern as before over the first 16 sts and end with K1 (purl this stitch from WS); when working the left front piece, start lace pattern with K1 (purl this stitch from WS)and repeat the lace pattern over the next 16 sts. Happy knitting!
19.05.2022 - 09:15
![]() Isabelle wrote:
Isabelle wrote:
Wordt de riem in het rond gebreid of gewoon heen en weer op de rondbreinaald ? Mvg Isabelle
25.09.2014 - 14:18DROPS Design answered:
Hoi Isabelle. De riem wordt heen en weer gebreid op de rondbreinaald. U kunt ook een rechte naald gebruiken als u dat prettiger vindt.
25.09.2014 - 16:17
![]() Nicole wrote:
Nicole wrote:
Ich bin an der Stelle, wo die Arbeit geteilt wird. Nun bin ich unsicher, wie ich die erste Masche stricken soll, welche ja die Kante bildet. Soll man lt. Muster weiterverfahren, oder eine Randmasche zwecks ansehnlicherem Abschluss arbeiten?
26.07.2014 - 20:33DROPS Design answered:
Liebe Nicole, Sie stricken ja bei den Vorderteilen beidseitig je 3 M kraus rechts, das ist dann der Randabschluss, d.h. auch die vordere Blende. Sie können aber, wenn Ihnen das besser gefällt und Sie keinen Knötchenrand mögen, die Randmasche auch anders arbeiten.
28.07.2014 - 09:43
![]() Brigitte wrote:
Brigitte wrote:
Er staat dat er op 42cm hoogte een markering gezet moet worden voor de arms gaten, (achterpand) maar waar moet ik die zetten? ik heb geen idee waar ik die markeerders moet zetten
15.12.2013 - 15:29DROPS Design answered:
Hoi Brigitte. Je moet de markeerders gewoon aan de zijkanten van het werk zetten om de hoogte van de armsgaten te markeren.
16.12.2013 - 16:21
![]() Elly wrote:
Elly wrote:
Het gaat om de 3 ribbelsteken aan de zijkant (niet de 6 nld aan het begin en het eind). Deze lijken op de foto niet tot onderaan te lopen
24.10.2013 - 20:50DROPS Design answered:
U ziet een stukje van het voorpand naast het achterpand, wellicht schept dat verwarring.
24.10.2013 - 20:58
![]() Elly wrote:
Elly wrote:
Op de foto lijkt het of de ribbelsteek aan de zijkant niet tot onderaan doorloopt en het lijkt of het achterpand langer is dan het voorpand ipv andersom?
24.10.2013 - 13:04DROPS Design answered:
U begint het achterpand en eindigt de voorpanden met ribbelsteek, dus deze komt tot onderaan. Ook de lengte van de panden klopt.
24.10.2013 - 16:53
![]() Elly wrote:
Elly wrote:
In de omschrijving staat er 63 cm lengte voor het achterland en 68 cm lengte voor de voorpanden, waarna er nog 6 nld ribbelsteek gebreid moet worden. Het voorpand wordt zo 5 cm en 6 nld ribbelsteek langer dan het achterpand?
14.10.2013 - 21:12DROPS Design answered:
Hoi Elly. Ja, dat klopt. Zie ook de maattekening onderaan het patroon. Veel breiplezier verder.
15.10.2013 - 13:24
![]() Corinne Van Balen wrote:
Corinne Van Balen wrote:
Tijdens het breien van dit patroon blijkt helaas de beschrijving al zijn veranderd m.b.t. voorpand... Na het goed bekijken van de foto blijkt dat de riem in patroonsteek is en niet tricosteek.
01.10.2013 - 08:58DROPS Design answered:
Hoi Corinne. Ik heb het originele Noorse patroon bekeken en je hebt gelijk dat de riem in patroonsteek gebreid moet worden en niet in ribbelst. Ik heb het aangepast en wijzigingen worden vermeld op het patroon.
01.10.2013 - 13:39
|
||||
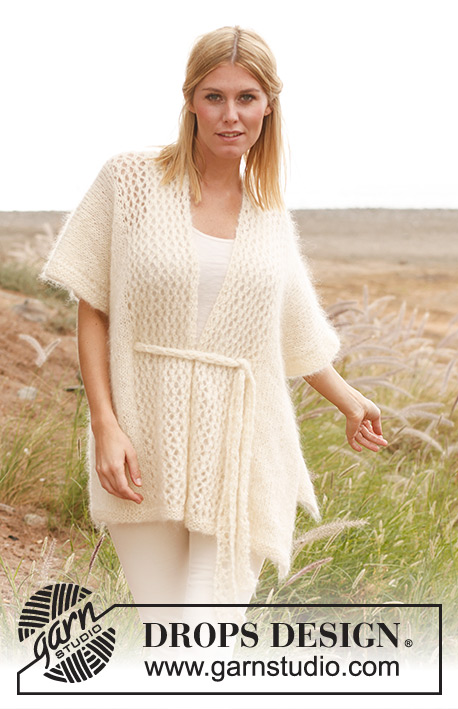
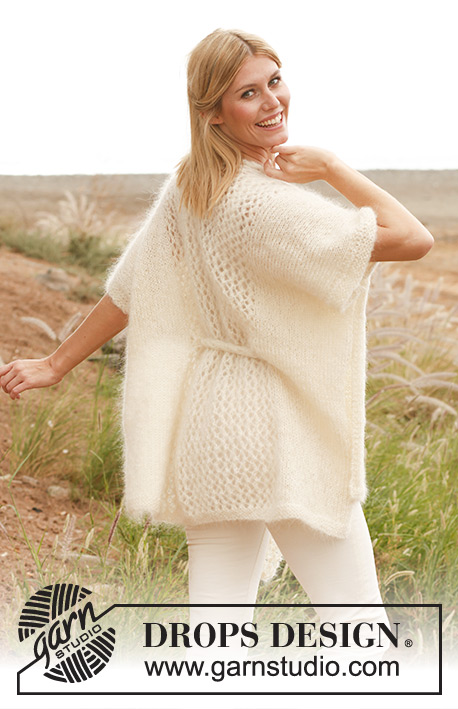
Milky Way#milkywaycardigan |
||||
 |
 |
|||
Knitted DROPS poncho in "Vienna" or "Melody".
DROPS 138-19 |
||||
|
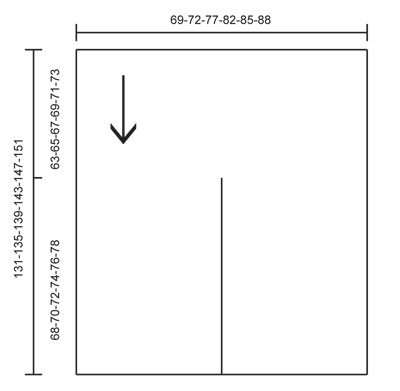
GARTER ST (back and forth on needle): K all rows. PATTERN: Row 1: * 1 YO, K 2 tog *, repeat from *-*. Row 2: P all sts. Row 3: * K 2 tog, 1 YO *, repeat from *-*. Row 4: P all sts. --------------------------------------------------------- PONCHO: Back piece is worked first, then the piece is divided and left and right front piece are finished separately (i.e. no shoulder seams). Worked back and forth on circular needle to make room for all the sts. BACK PIECE: Cast on 90-94-100-106-110-114 sts on circular needle size 7 mm with Vienna or Melody and work 6 rows in GARTER ST - see explanation above. Continue in stocking st with 3 sts in garter st in each side while AT THE SAME TIME working PATTERN - see explanation above - over the middle 40-40-40-46-46-46 sts. When piece measures 42 cm for all sizes, insert a marker in each side for armholes. Continue to work until piece measures 63-65-67-69-71-73 cm. Now divide the piece into right and left front piece. RIGHT FRONT PIECE: = 45-47-50-53-55-57 sts. Insert a marker, now measure piece from here! Continue in stocking st and pattern with 3 sts in garter st in each side. When piece measures 21-23-25-27-29-31 cm, insert a marker in the side for armhole. Continue to work until piece measures 68-70-72-74-76-78 cm. Work 6 rows in garter st and cast off. LEFT FRONT PIECE: Work as right front piece but reversed. SLEEVE EDGE: Knit up approx. 55-60-65-70-75-80 sts between the 2 markers in the one side of piece for sleeve edge. Work 8 rows in garter st back and forth on needle. Cast off. Work another sleeve edge the same way in the other side of piece. BELT: Cast on 6 sts on circular needle size 7 mm with Vienna or Melody. Work 4 rows in garter st. Continue in stocking st with 1 st in garter st in each side. Work until piece measures approx. 140 cm or desired length. Work 4 rows in garter st and cast off. Fold the poncho double at the shoulder with RS out and thread the belt through the garment as follows: Thread the belt through the right front piece and then through back piece, approx. 36-38-40-42-44-46 cm from shoulder and down, and approx. 16-16-16-15-14-13 cm from the side and in (try the garment for desired placement), then thread the belt the same way through back piece in the other side of piece and then through the left front piece (the same length from the shoulder and in as in the opposite side). Tie at the front. ASSEMBLY: Sew the seam on the edge in garter st under the sleeves. |
||||
Diagram explanations |
||||
|
||||
 |
||||
Have you finished this pattern?Tag your pictures with #dropspattern #milkywaycardigan or submit them to the #dropsfan gallery. Do you need help with this pattern?You'll find 6 tutorial videos, a Comments/Questions area and more by visiting the pattern on garnstudio.com. © 1982-2026 DROPS Design A/S. We reserve all rights. This document, including all its sub-sections, has copyrights. Read more about what you can do with our patterns at the bottom of each pattern on our site. |
||||


With over 40 years in knitting and crochet design, DROPS Design offers one of the most extensive collections of free patterns on the internet - translated to 17 languages. As of today we count 324 catalogues and 12290 patterns translated into English (UK/cm). 12290
We work hard to bring you the best knitting and crochet have to offer, inspiration and advice as well as great quality yarns at incredible prices! Would you like to use our patterns for other than personal use? You can read what you are allowed to do in the Copyright text at the bottom of all our patterns. Happy crafting!
Post a comment to pattern DROPS 138-19
We would love to hear what you have to say about this pattern!
If you want to leave a question, please make sure you select the correct category in the form below, to speed up the answering process. Required fields are marked *.