
Popular categories
Looking for a yarn?


Comments / Questions (87)
Michele wrote:
I have cast off both Parts 1 and Parts 2 but am totally confused about how to put it together, and where exactly to sew it (the diagram makes it even more confusing :( , Do we actuallly sew together ALL of the cast off stitches? (138 from part one with 138 from part 2)
14.10.2016 - 00:50DROPS Design answered:
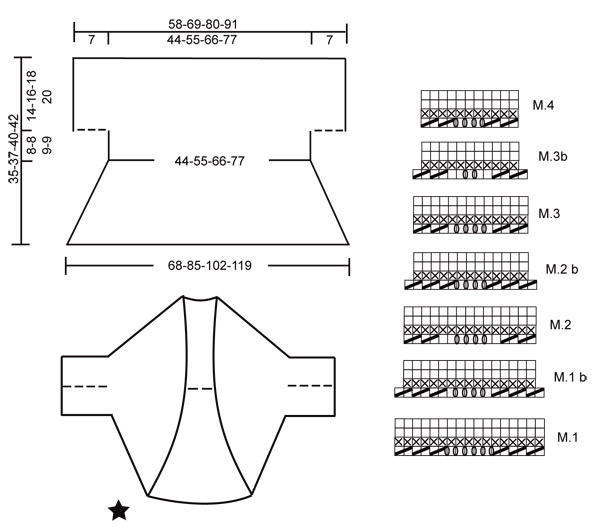
Dear Michelle, yes correct, you have to sew the 138 cast off sts from one part to the 138 cast off sts from 2nd part, so that you will have a total of 4 ridges in garter st there (see picture of back piece). Then sew seam under sleeves on each side (the 14 sts cast on on each side as you started to work back and forth). Happy assembly!
14.10.2016 - 09:25
![]() Michelle wrote:
Michelle wrote:
I really like the look of the finished product; but I can just not figure out how the diagram with the measurements becomes the second diagram (final product), and I don't find the instructions clear. I've even cut out the diagram twice to see how it would fit together and am no further ahead. I'm not even sure if you start the sweater from the bottom, the top? Lastly, I don't understand the references to Part 1 and Part 2? Thanks for any help
23.06.2016 - 05:58DROPS Design answered:
Dear Michelle, piece is first worked in the round, ie from outer edge - then divide work into 2 pieces (= 2 parts) that will be worked separately back and forth for sleeves (casting on new sts on each side). When both parts have been worked, sew them tog (garter st section you see on 2nd picture from back of work). You then just have to sew tog new sts cast on for sleeve on each side (dotted line). Happy knitting!
23.06.2016 - 09:02
![]() Ulla Hansen wrote:
Ulla Hansen wrote:
Kan se garnet er udgået og at der så bliver henvist til hvad det kan erstattes med .. det er godt nok, men jeg er ikke dreven nok til at finde ud af om der skal bruges mere eller mindre antal nøgler garn. hvordan finder jeg ud af det ?
11.04.2015 - 11:49DROPS Design answered:
Hej Ulla. Du kan se formlen her hvordan du beregner hvor meget garn du skal have. God fornöjelse!
13.04.2015 - 13:05
![]() Gun Malmkvist wrote:
Gun Malmkvist wrote:
Har stickat efter beskrivningen men kan inte förstå hur den skall monteras. Har köpt 450 gr men endast använt 75 gr.Skall det stickas två lika delar? Min garnleverantör ligger 150 mil från min hemort så jag hoppas verkligen att ni kan hjälpa mig snarast.
16.07.2014 - 20:05
![]() Rajka Stirjan wrote:
Rajka Stirjan wrote:
Leider weiß ich gar nicht wie das mit dem Diagramm gemeint ist. Ich habe keine Idee wie man das zusammen näht. Könnten Sie mir das erklären? Hinten am Rücken sehe ich eine Naht aber. Am besten wäre es wenn man 2 Diagramme 1x2 seperat zeichnen würde. Bitte helfen Sie mir, ich bin am verzweifeln! Grüße
06.09.2013 - 15:40DROPS Design answered:
Liebe Rajka, bei diesen Modellen ist es manchmal etwas schwierig sich die Montge vorzustellen, aber wenn Sie genau nach der Anleitung stricken, sehen Sie dann, wie es montiert wird, wenn das fertige Stück vor Ihnen liegt. Wichtig ist, dass Sie wie beschrieben im Kreis beginnen, die angegebenen Mustersätze stricken und dann die Arb teilen und M für die Ärmel anschlagen.
07.09.2013 - 14:10
![]() Jette Stæhr Nielsen wrote:
Jette Stæhr Nielsen wrote:
Jeg er igang med denne skønne sjælevarmer, men når jeg ser den fra ryggen af er der ligesom en bred "bord" tværs over ryggen og ud over ærmerne, men min ser ikke sådan ud, når jeg følger mønsteret? og er den fx. kun 37 cm fra nakken og ned? den ser længere ud på billedet. På forhånd tak MVH Jette
27.09.2012 - 12:41DROPS Design answered:
Jo men sådan kommer den til at se ud når du syr den sammen til sidst! Bare følg opskriften!
04.10.2012 - 10:30
![]() Kathy wrote:
Kathy wrote:
Would love to make this, but cannot make out heads or tails of what I am looking at in the diagram. which end is up? Where are we starting exactly?
20.05.2011 - 15:38
![]() Drops Design wrote:
Drops Design wrote:
Hi Janice, you do measure where longest i.e from lower edge, but also adjust to a full vertical pattern repeat.
26.04.2010 - 19:32
![]() Janice wrote:
Janice wrote:
I hate to be pedantic but this pattern has a wavy edge. When you measure from the edge, are measuring from the lower edge or the upper edge? It makes a lot of difference.
26.04.2010 - 19:23
![]() Drops Design wrote:
Drops Design wrote:
Strikkefastheden står lige under størrelse og materiale: DROPS Rundp nr 4,5 (80 cm) 2 stk – eller den p du skal bruge for at få 20 m x 22 p Bølgemønster på 10 x 10 cm.
28.09.2009 - 08:48
|
||||||||||||||||
Summer Waves |
||||||||||||||||
 |
 |
|||||||||||||||
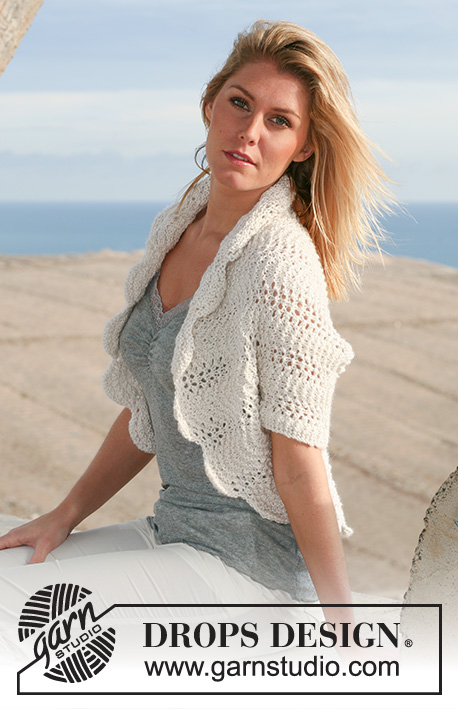
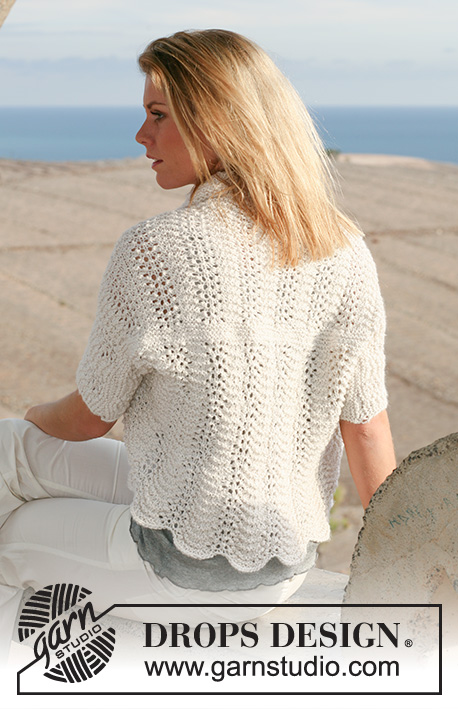
DROPS bolero in wavy pattern in “Silke Alpaca”. Size XS – XXXL
DROPS 105-4 |
||||||||||||||||
|
Pattern: See diagram M.1 to M.4. The diagram shows the pattern from the RS. Garter st, back and forth on needle: K all rows. Garter st, in the round: K 1 round, P 1 round. Bolero: Knitted in the round on circular needle. Cast on 272-340-408-476 sts on 2 circular needles size 4.5 mm (to make the edge elastic). Remove 1 needle and work 2 rounds garter st - see above. Work M.1 (= 17 sts) = 16-20-24-28 pattern repeats on round. When piece measures approx 5 cm (adjust to a full vertical pattern repeat) work 1 vertical repeat of M.1b = 240-300-360-420 sts. Continue in M.2 (= 15 sts per horizontal pattern repeat). When piece measures approx 9 cm (adjust to a full vertical repeat) work 1 vertical repeat M.2b = 208-260-312-364 sts. Now continue in M.3 (= 13 sts per horizontal pattern repeat). When piece measures approx 13 cm (adjust to a full vertical repeat) work 1 vertical repeat of M.3b = 176-220-264-308 sts. Continue in M.4 (= 11 sts per horizontal pattern repeat) until piece measures 21-21-22-22 cm. Now keep the first 88-110-132-154 sts (= 8-10-12-14 repeats) on needle and slip the last 88-110-132-154 sts on a thread. Part 1: Work back and forth on needle. Continue in M.4 back and forth on needle. At the same time cast on 14 new sts each side for sleeve = 116-138-160-182 sts. Continue on all sts in M.4 with 3 garter sts – see above - each side. When piece measures 34-36-39-41 cm continue in garter st on all sts. Cast off loosely after 4 rows. Piece measures approx 35-37-40-42 cm. Part 2: Slip sts from thread back on needle and work back and forth on needle like Part 1. Assembly: Sew tog cast off rows from Part 1 and Part 2 with neat sts. Sew seams under sleeves. |
||||||||||||||||
Diagram explanations |
||||||||||||||||
|
||||||||||||||||
 |
||||||||||||||||
Have you finished this pattern?Tag your pictures with #dropspattern or submit them to the #dropsfan gallery. Do you need help with this pattern?You'll find 18 tutorial videos, a Comments/Questions area and more by visiting the pattern on garnstudio.com. © 1982-2026 DROPS Design A/S. We reserve all rights. This document, including all its sub-sections, has copyrights. Read more about what you can do with our patterns at the bottom of each pattern on our site. |
||||||||||||||||


With over 40 years in knitting and crochet design, DROPS Design offers one of the most extensive collections of free patterns on the internet - translated to 17 languages. As of today we count 324 catalogues and 12290 patterns translated into English (UK/cm). 12290
We work hard to bring you the best knitting and crochet have to offer, inspiration and advice as well as great quality yarns at incredible prices! Would you like to use our patterns for other than personal use? You can read what you are allowed to do in the Copyright text at the bottom of all our patterns. Happy crafting!
Post a comment to pattern DROPS 105-4
We would love to hear what you have to say about this pattern!
If you want to leave a question, please make sure you select the correct category in the form below, to speed up the answering process. Required fields are marked *.