
Popular categories
Looking for a yarn?


























Comments / Questions (40)
 Claudette wrote:
Ça fait 14 jours que je recommence avez vous un vidéo complet ? Ma feuille imprimer n' est pas la même explication que la vidéo J' aimerais vraiment réussir. Merci Claudette
22.10.2026 - 17:03DROPS Design answered:
Bonjour Claudette, nous n'avons pas de vidéo complète pour ce type de modèle, suivez bien attentivement les explications des diagrammes et en même temps celles du châle, mettez bien un marqueur avant A.1 pour mieux repérer ces mailles et savoir comment les tricoter. n'hésitez pas à contacter votre magasin pour toute assistance individuelle personnalisée et complémentaire. Bon tricot!
23.10.2026 - 06:49
Dolores wrote:
Chale no 229-7 modèleks-196 je ne comprend pas le rang no 3j,ai 6 mailles je fais A.1 l'augmentation se fait ou ,Merci de me répondre.
18.10.2026 - 17:32DROPS Design answered:
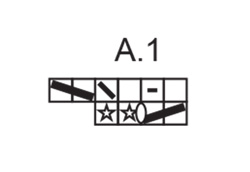
Bonjour Dolores, les augmentations figurent dans le diagramme A.1, vous allez tricoter les 4 dernières mailles ainsi: 2 m ens à l'endroit, 1 jeté, puis vous tricotez 2 fois les 2 dernières mailles alternativement dans le brin avant et le brin arrière (= cf 3ème symbole) = vous avez augmenté 2 mailles. Bon tricot!
19.10.2026 - 11:38
Claudette wrote:
Avez vous un tutoriel ? Merci
14.10.2026 - 02:04DROPS Design answered:
Bonjour Claudette, vous trouverez les explications de ce modèle ici, en français, consultez les onglets Vidéos et Leçons (à droite de l'onglet Explications) si besoin; et si vous avez des questions, n'hésitez pas à utiliser cet espace. Bon tricot!
14.10.2026 - 07:37
 Christelle wrote:
Comment faire pour la diminution où il faut tricoter 2 mailles ensembles alors que le marqueur est au milieu des 2 mailles? Le marqueur doit il se mettre sur le rang de montage ou sur le rang 1?
27.09.2026 - 14:21DROPS Design answered:
Bonjour Christelle, vous pensez aux 2 mailles ensemble à l'endroit au 1er rang de A.1? Le marqueur doit être juste avant les 4 dernières mailles = avant A.1, et il doit rester en place tout du long, quelque soit le nombre de mailles dans A.1. Bon tricot!
28.09.2026 - 09:45
 Mona wrote:
Takk for svar. Når jeg skjønte at diagrammet skal leses fra høyre mot venstre på pinne 3 og motsatt, fra venstre til høyre på pinne 4 gikk alt så mye bedre ;-)
25.08.2026 - 07:58
Mona Iren wrote:
Hvordan teller du et dobbelt kast som 1 maske? Jeg skjønner det fortsatt ikke. For på pinne 4 skal jeg begynne med 1 rett maske og så strikke 1.kastet rett og slippe 2.kastet av pinnen. Men jeg har jo 4 masker fra pinne 3 som er strikka som 2 masker i samme maske - er ikke kommet til kastet ennå da.
21.08.2026 - 15:54DROPS Design answered:
Hei Mona. Pinne 4 strikkes fra vrangen, så du strikker da diagrammet fra venstre til høyre. Mvh DROPS Design
24.08.2026 - 07:41
Mona wrote:
Jeg forsøker å komme i gang med oppskrift 229-7 - picotkant men får ikke dette til å stemme. Hva er det jeg ikke forstår? Hvordan kan jeg ende med +2 masker etter pinne 3? Jeg mener diagrammet deres sier følgende ang. picotkant: Strikk 2 sammen (-1 maske), 2 kast (+2), strikk 2 masker i samme maske 2 ganger. (+2). Totalt mener jeg da dette blir -1+2+2 = 3 masker økt. Men det står 2.
21.08.2026 - 14:03DROPS Design answered:
Hei Mona. Det doble kastet teller som 1 maske, ikke 2. (På neste omgang slipper du ett av kastene slik at det bare blir 1 maske.) Lykke til! Mvh DROPS Design
21.08.2026 - 14:43
Joane wrote:
Vous dites faire aug tous les 6 rangs..donc je fais des fois des aug au rang3 et 4 ,,donc quand cà arrive sur ces rangs je fais donc mes aug après le marqueur ,,,est ce bien ca Mercî Et ce qu il y a un video qui pourrais m aider merci
08.06.2026 - 04:45DROPS Design answered:
Bonjour Joane, pour augmenter tous les 6 rangs ,procédez ainsi: *tricotez 1 rang en augmentant pour le châle, tricotez 5 rangs comme avant*, répétez de *-* et, en même temps, tricotez la bordure picot (vous augmenterez 2 m à chaque rang 3 de la bordure picot et vous diminuerez 2 m à chaque rang 4 de la bordure picot - ces augmentations/diminution se font séparément des augmentations tous les 6 rangs. Bon tricot!
08.06.2026 - 11:30
 Diana wrote:
The phrase in the pattern explanation "between 2 stitches make 2 yarn overs" confused me. And there is no text explanation! First I thought it must be like "1 stitch, double yo, 1 stitch". Video doesn't help. But when I look at the model photo, there are clearly 2 holes before the edge, so it must be read like "1 stitch, 1 yo, 1 stitch, 1 yo".
24.05.2026 - 13:02DROPS Design answered:
Dear Diana, the first row in A.1 will be worked like this: knit 2 together, 1 double yarn over (= 2 yarn overs), knit the next 2 stitches into front and back loop. On next row, you will knit the double yarn over and drop the 2nd yarn over (so that the hole is larger). Happy knitting!
26.05.2026 - 11:15
 Leontine wrote:
De meerdering snap ik nu, maar in die 9de tour is dat dan weer de 1ste van die vier van het patroon. Als dat zo is kom ik iedere keer met de 6de raar uit dat ik niet kan meerderen
05.05.2026 - 11:59DROPS Design answered:
Dag Leontine,
Je meerdert steeds vlak naast A.1 door een omslag te maken welke je op de volgende naald gedraaid breit. Je maakt de meerdering dus als je nog 4 steken op de naald hebt.
06.05.2026 - 10:47
|
||||||||||||||||||||||
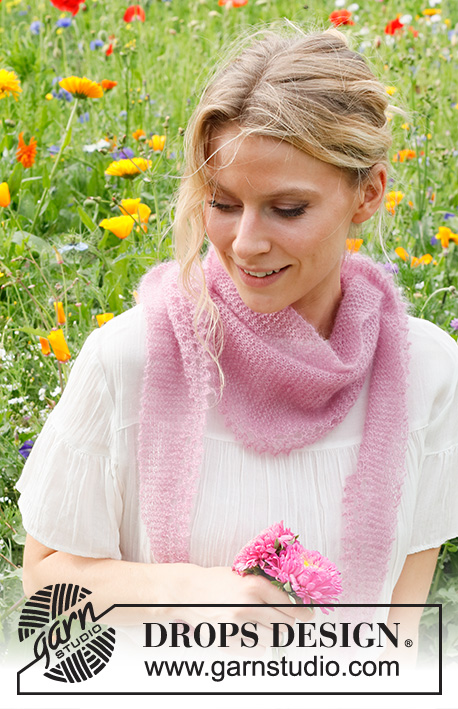
Pink Soda Shawl#pinksodashawl |
||||||||||||||||||||||
 |
 |
|||||||||||||||||||||
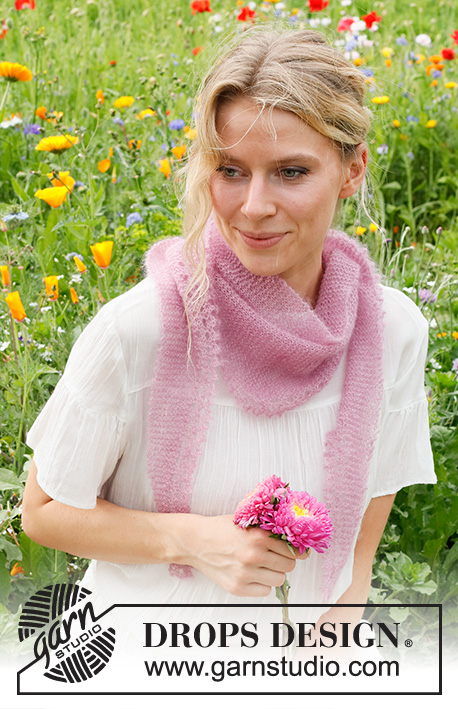
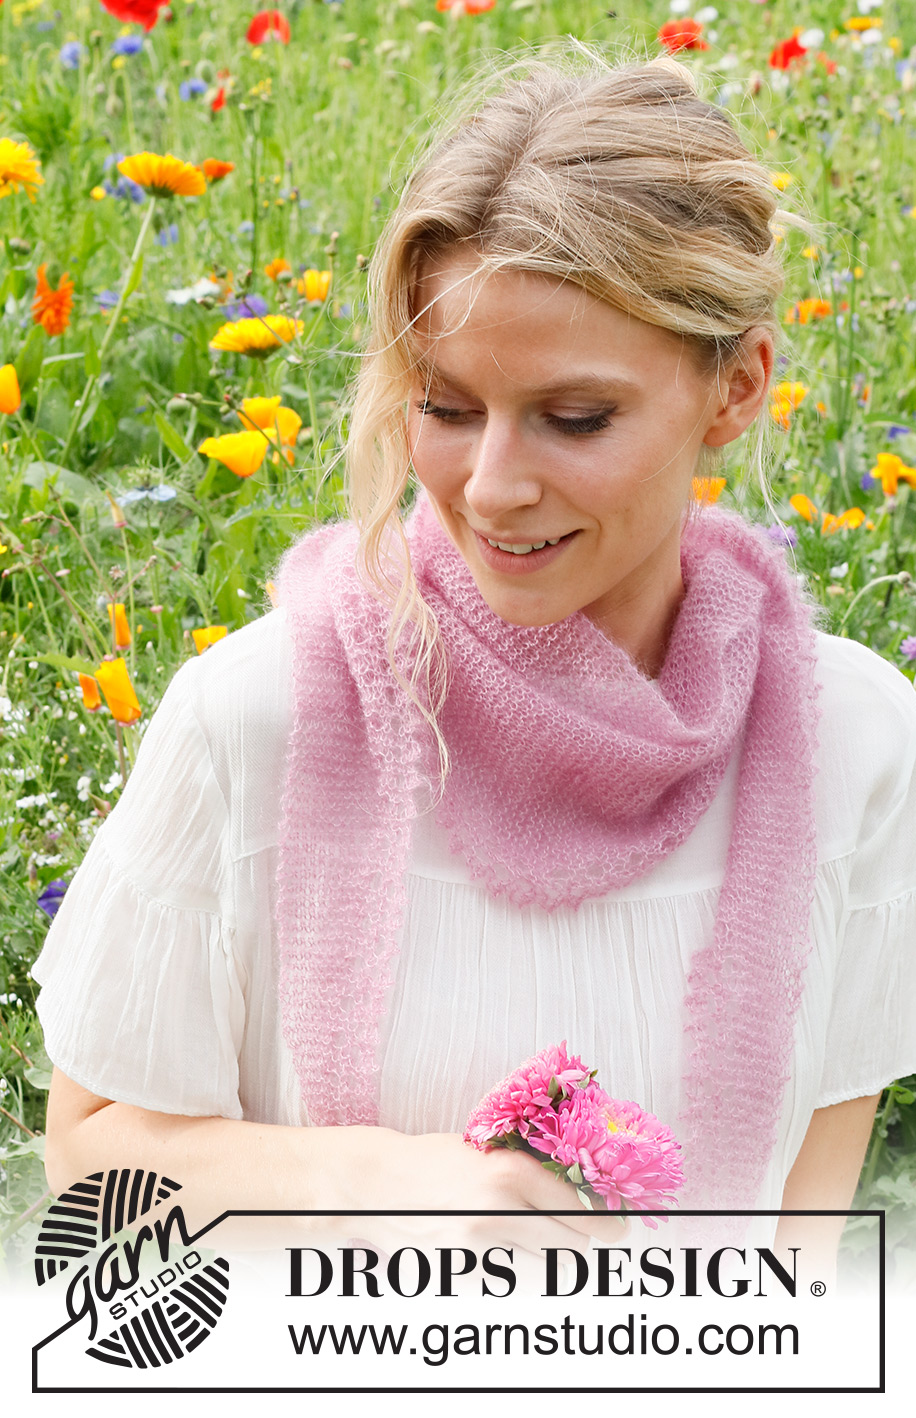
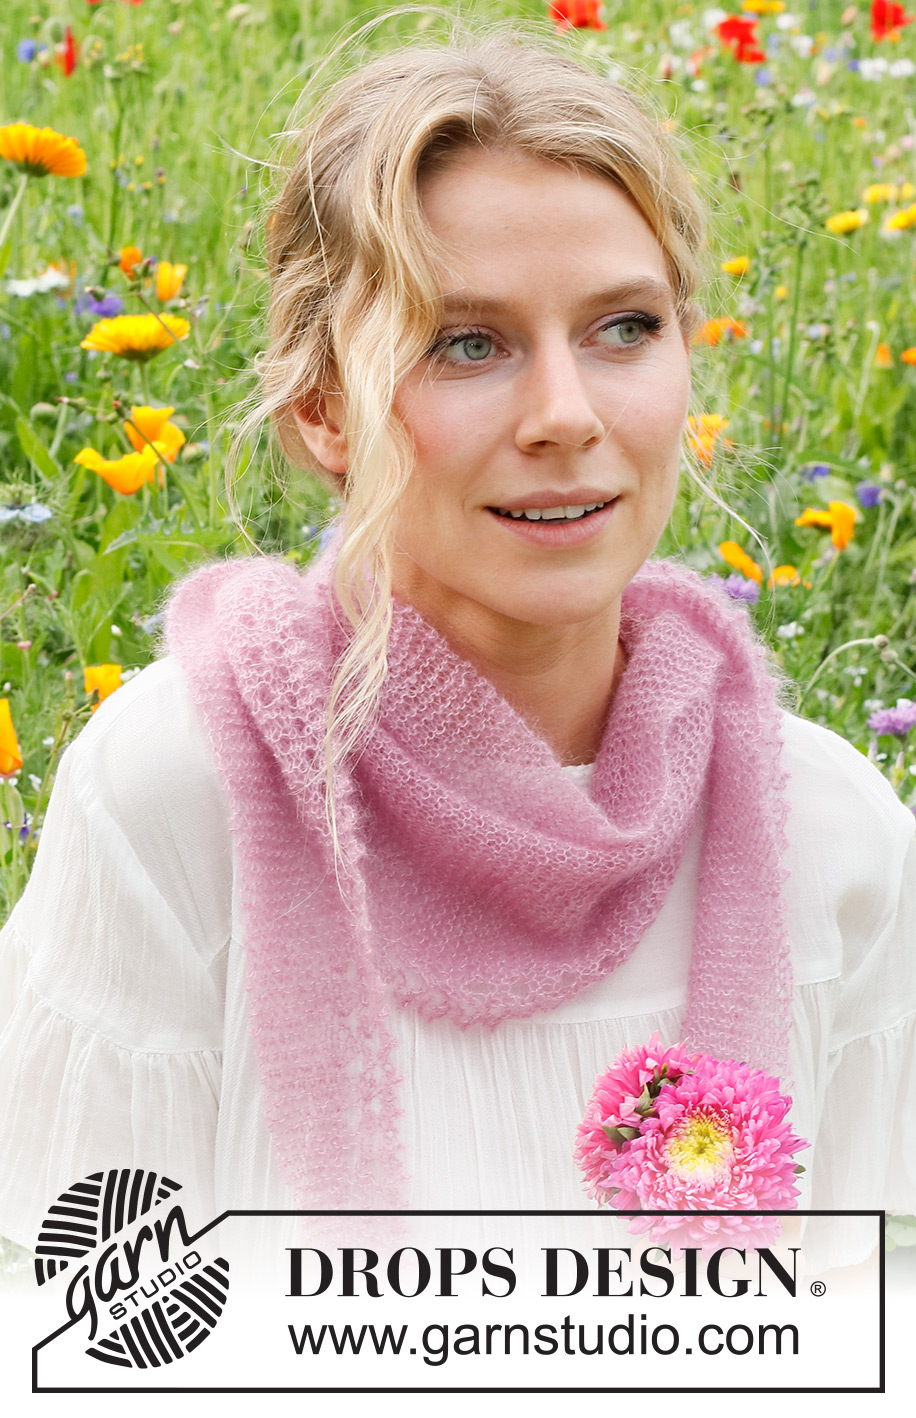
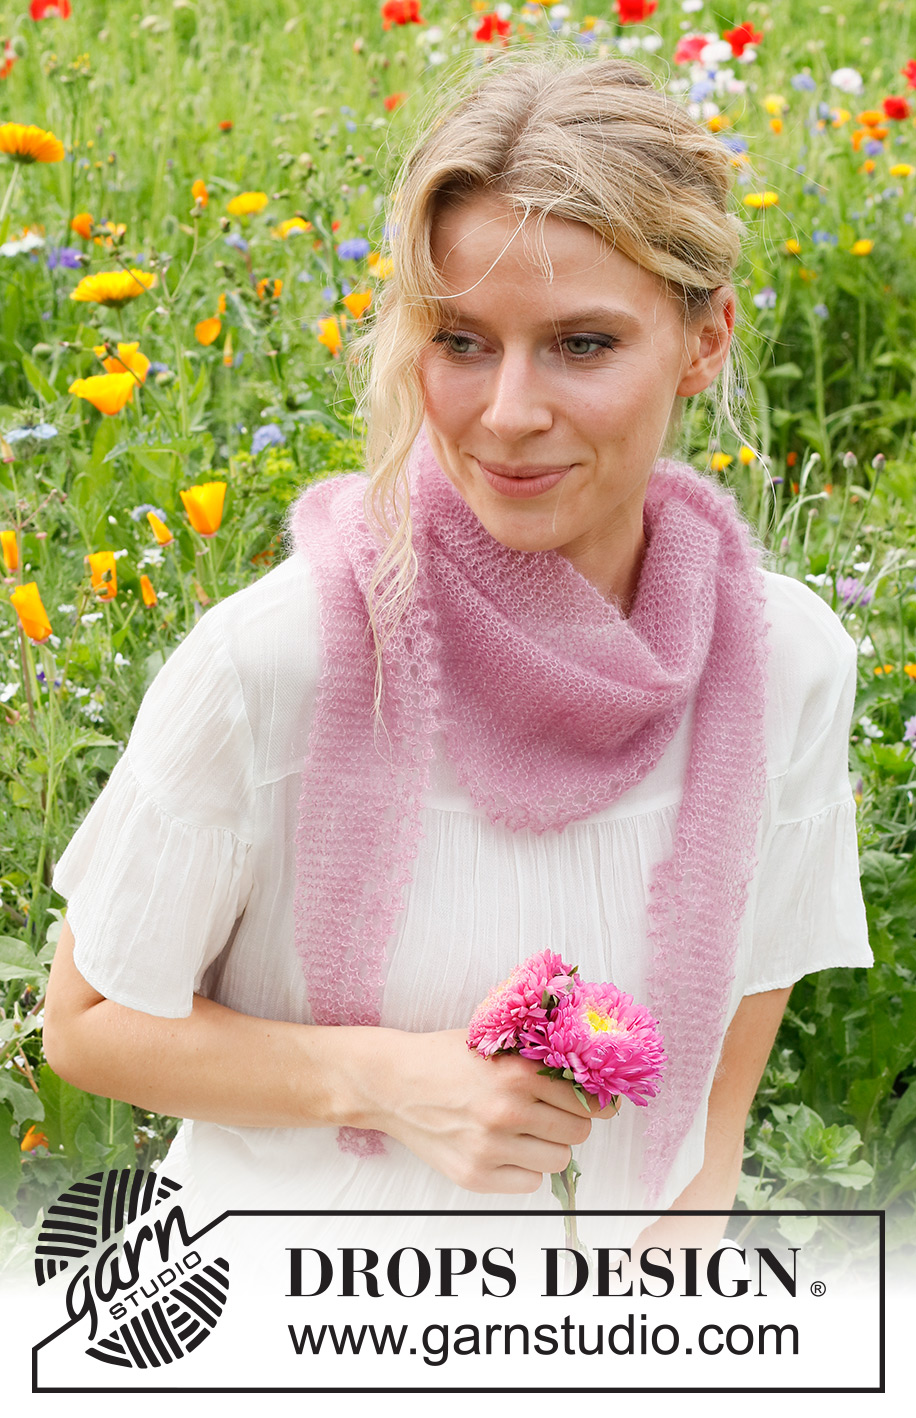
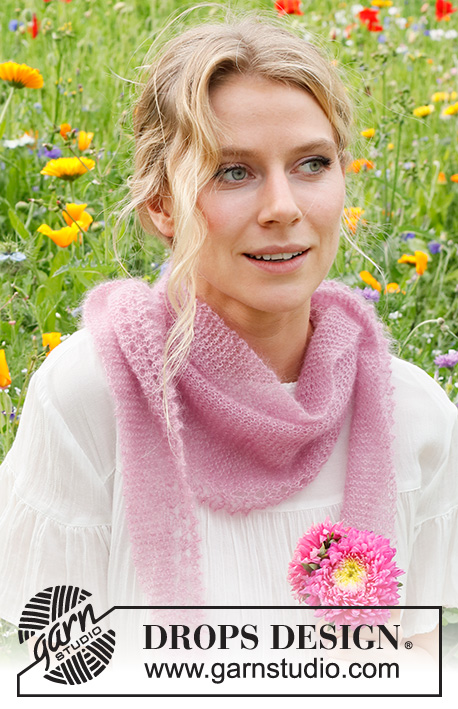
Knitted shawl in DROPS Kid-Silk. The piece is worked sideways, with garter stitch and picot-edge.
DROPS 229-7 |
||||||||||||||||||||||
|
------------------------------------------------------- EXPLANATIONS FOR THE PATTERN: ------------------------------------------------------- RIDGE/GARTER STITCH (worked back and forth): Knit all rows. 1 ridge = knit 2 rows. PATTERN: See diagram A.1. The diagram shows all rows in the pattern from the right side. ------------------------------------------------------- START THE PIECE HERE: ------------------------------------------------------- SHAWL – SHORT OVERVIEW OF THE PIECE: The piece is worked back and forth, sideways in GARTER STITCH – read description above, with a picot-edge along the one side. SHAWL: Cast on 6 stitches with needle size 4.5 mm and DROPS Kid-Silk. Insert 1 marker after the first 2 stitches (from the right side) and allow the marker to follow the picot-edge as follows: ROW 1 (= right side): Knit. ROW 2 (= wrong side): Knit. ROW 3 (= right side): Knit until there are 4 stitches left, work A.1 (= picot-edge). 2 stitches increased. ROW 4 (= wrong side): Work A.1 (= picot-edge), knit to end of row. 2 stitches decreased. Repeat rows 1 to 4, AT THE SAME TIME on row 9, increase 1 stitch by making 1 yarn over before the marker. On the next row knit the yarn over to leave a hole. Repeat the increase every 6th row – increase each time before the marker so there are more and more garter stitches to the right of the marker (seen from the right side). REMEMBER THE KNITTING TENSION! Continue until you have increased 46 stitches before the marker, the piece measures approx. 25 cm in width and 68 cm along the straight edge. Work 4 rows of pattern as before, but without increasing. The next row is worked from the right side: Work until there are 2 stitches left before the marker, knit 2 together and make 1 yarn over; this allows the row of holes to continue without further increases. Work 3 rows of pattern as before, but without increasing. On the next row decrease before the marker as follows: Start 3 stitches before the marker, knit 3 together, make 1 yarn over. Repeat this decrease every 6th row until there are only 2 stitches left before the marker (seen from the right side). Work 8 rows as before, but without decreasing. Cast off. The shawl measures approx. 139 cm from side to side. |
||||||||||||||||||||||
Diagram explanations |
||||||||||||||||||||||
|
||||||||||||||||||||||
 |
||||||||||||||||||||||
Have you finished this pattern?Tag your pictures with #dropspattern #pinksodashawl or submit them to the #dropsfan gallery. Do you need help with this pattern?You'll find 10 tutorial videos, a Comments/Questions area and more by visiting the pattern on garnstudio.com. © 1982-2026 DROPS Design A/S. We reserve all rights. This document, including all its sub-sections, has copyrights. Read more about what you can do with our patterns at the bottom of each pattern on our site. |
||||||||||||||||||||||






With over 40 years in knitting and crochet design, DROPS Design offers one of the most extensive collections of free patterns on the internet - translated to 17 languages. As of today we count 333 catalogues and 12525 patterns translated into English (UK/cm). 12525
We work hard to bring you the best knitting and crochet have to offer, inspiration and advice as well as great quality yarns at incredible prices! Would you like to use our patterns for other than personal use? You can read what you are allowed to do in the Copyright text at the bottom of all our patterns. Happy crafting!
Post a comment to pattern DROPS 229-7
We would love to hear what you have to say about this pattern!
If you want to leave a question, please make sure you select the correct category in the form below, to speed up the answering process. Required fields are marked *.