
Popular categories
Looking for a yarn?


Comments / Questions (22)
![]() Karin Lykke wrote:
Karin Lykke wrote:
Hej. Jeg kan ikke få 5. omg. i næbet til at stemme; man starter med 6 fm og skal ende med 4 fm. Men der er kun anvisninger til at lave tre fm.
11.03.2013 - 22:12DROPS Design answered:
Den förste lm erstatter 1 fm. Dvs du har i alt 4 fm.
14.05.2013 - 11:08
![]() Agnes wrote:
Agnes wrote:
Ik ben bezig met de snavel, maar in toer 5 kom ik niet uit. "Haak 1 l, sla de 1e v over, 1 v in de volgende 2 v, sla de volgende v over, 1 v in laatste v, keer het werk = 4 v. Na 1 v. in de volgende 2 v. heb ik nog 2 vasten over en daarna pas 1 v. in de laatste. Dus eigenlijk maar 5 vasten ipv. 6 vasten.
01.04.2012 - 16:59DROPS Design answered:
Na toer 4 heb je 6 v (de eerste l van de toer = 1 v). Bij toer 5 haak je dan 1 l (= 1 v)sla 1 v over, 1 v in de volgende 2 v, sla 1 v over en eindig met 1 v in de laatste v (de 1e l van toer 4).
02.04.2012 - 12:29
|
|
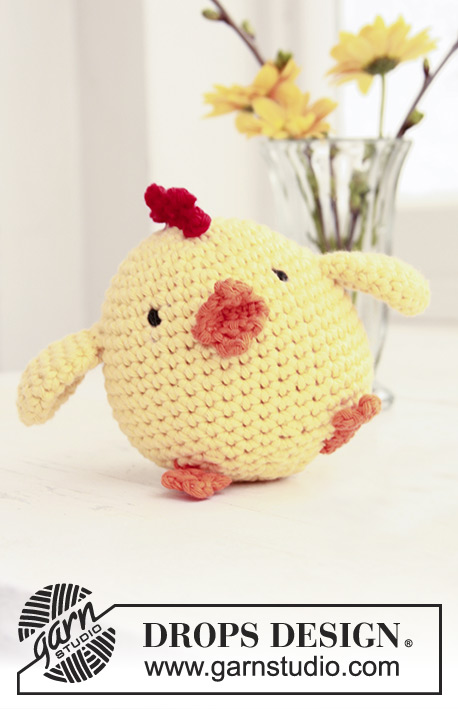
Chicken Little#dropschickenlittle |
|
 |
 |
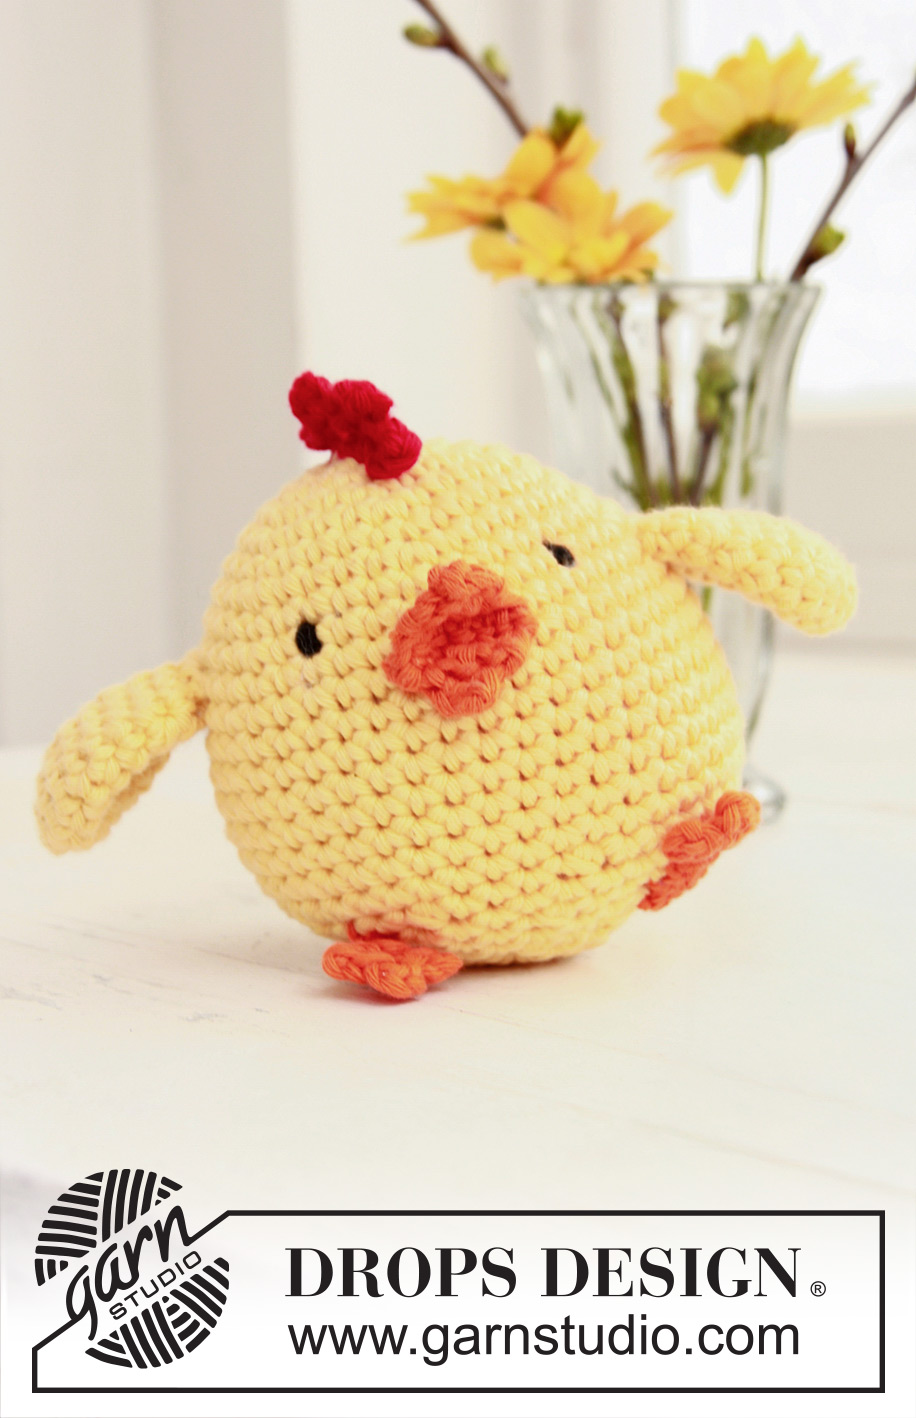
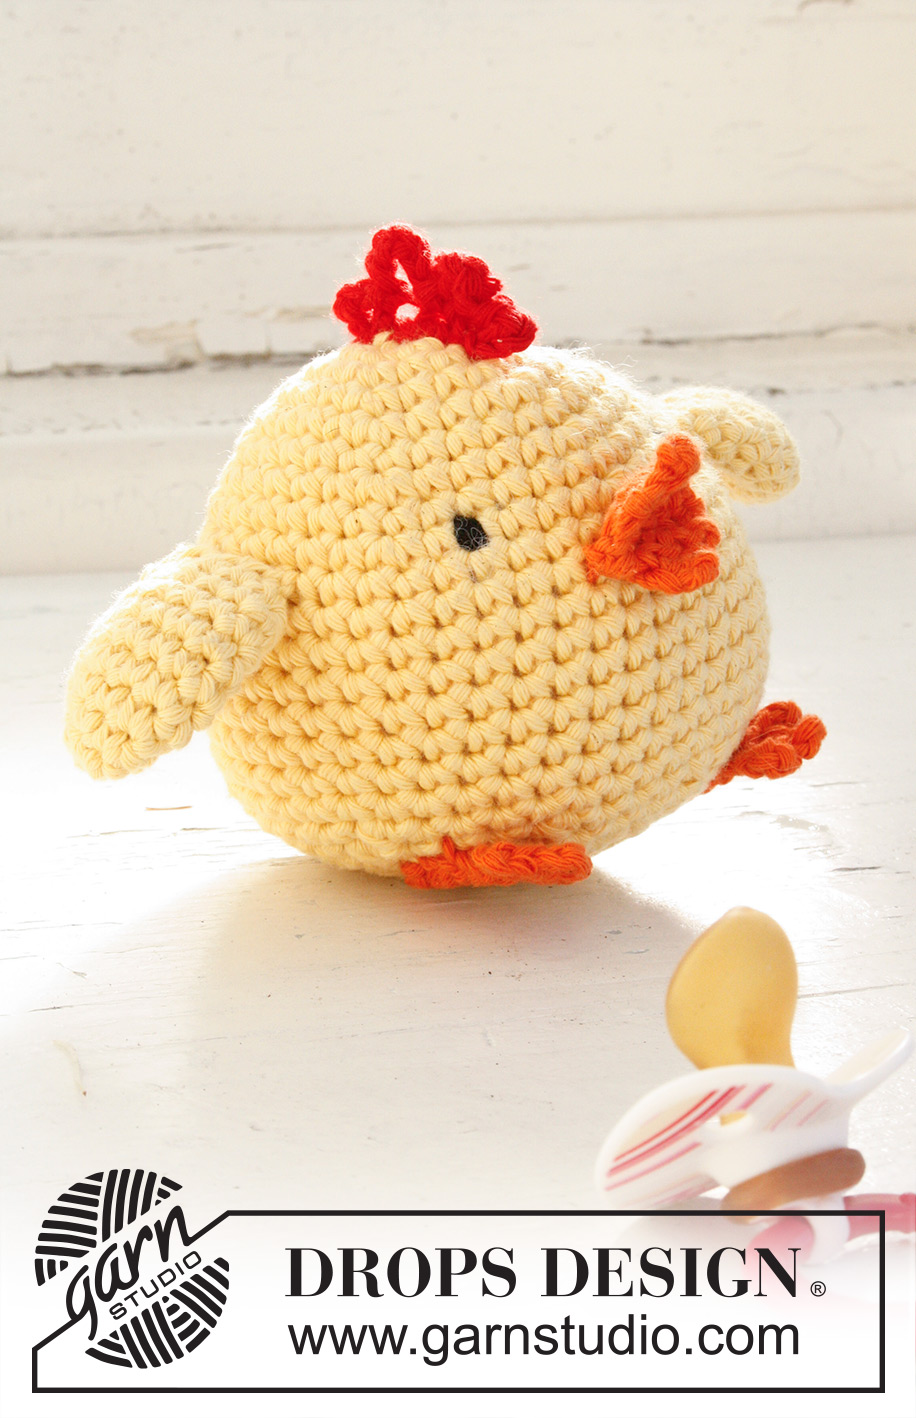
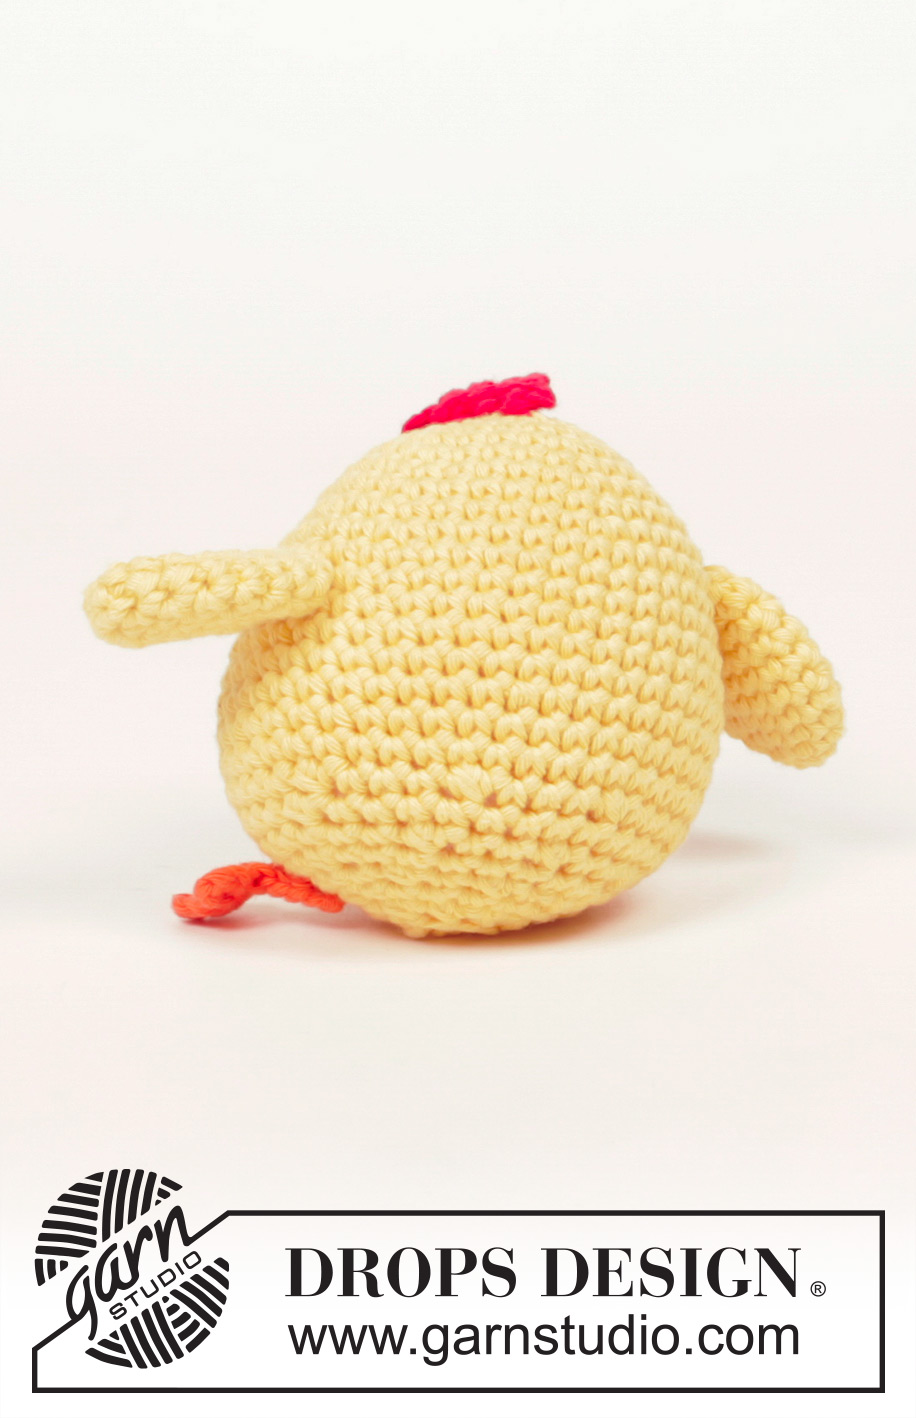
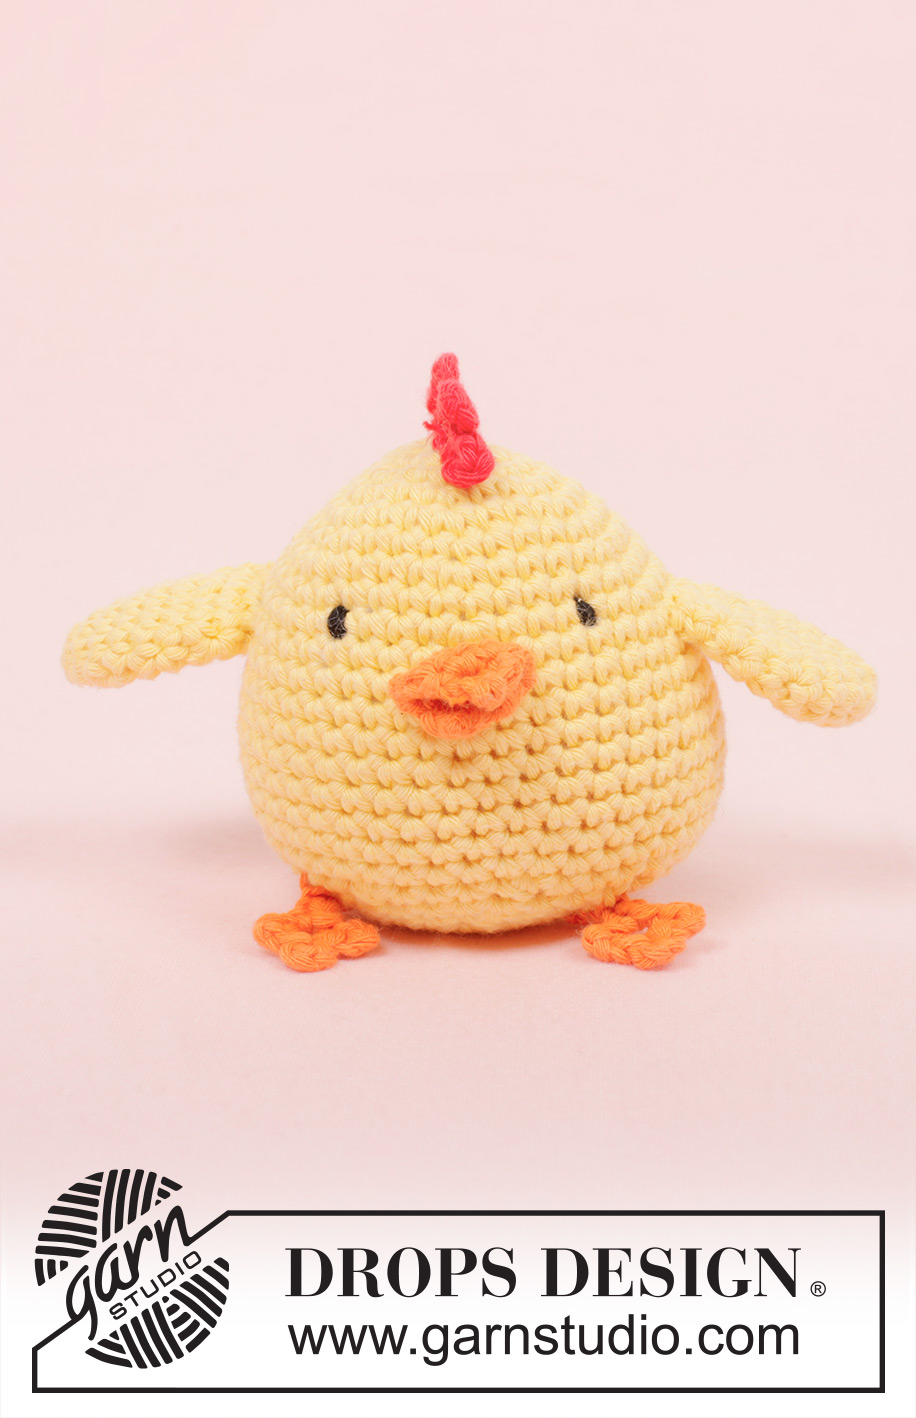
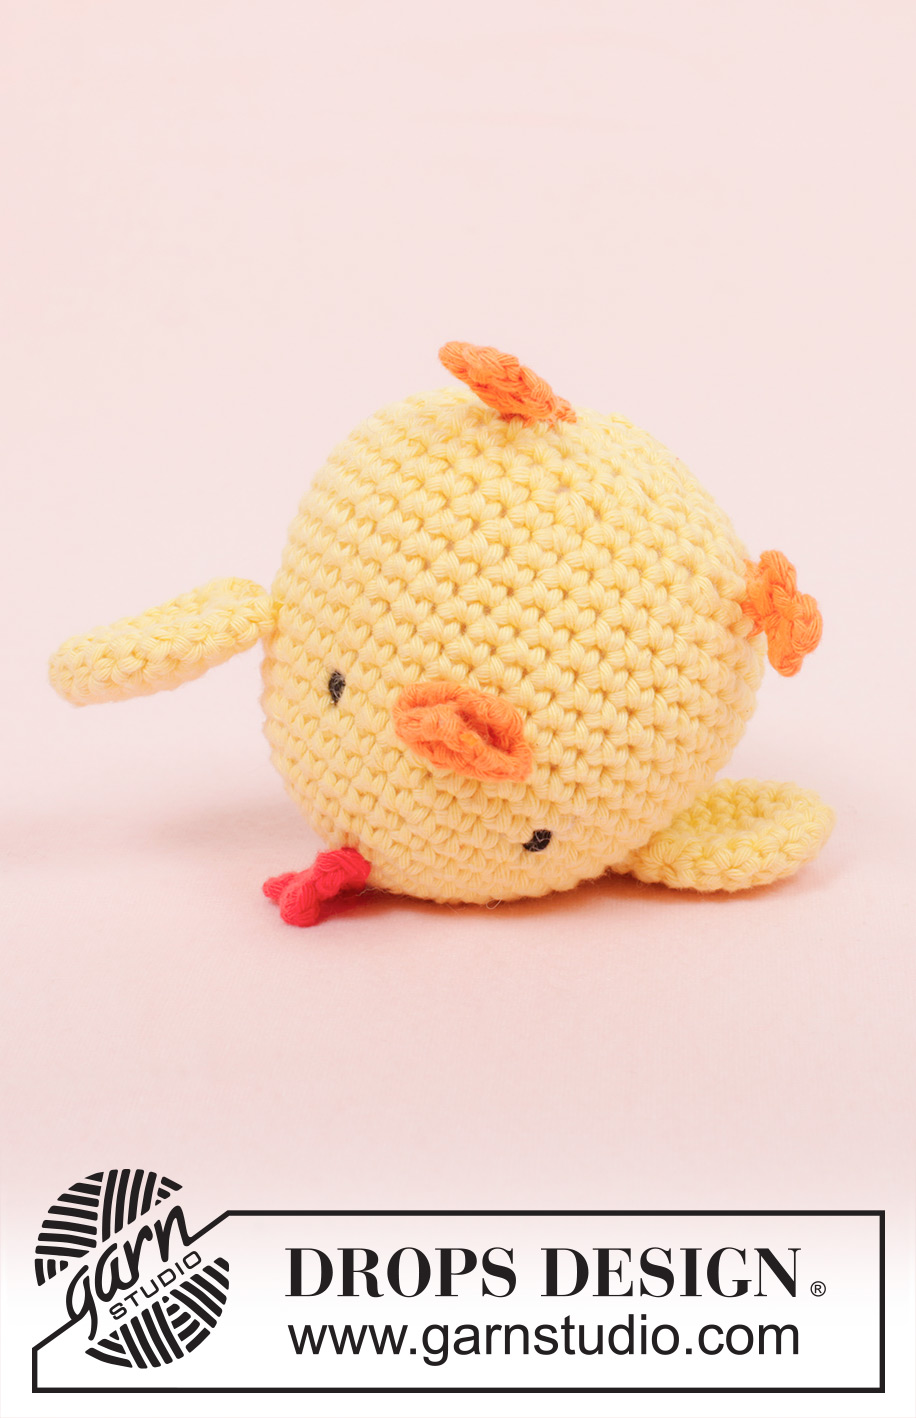
Crochet DROPS Easter chicken in "Paris".
DROPS Extra 0-769 |
|
|
CROCHET INFO: MAGIC CIRCLE: When piece is worked in the round, start with this technique to avoid holes in the middle (instead of ch-ring): Hold the yarn end and wind the yarn one time around the index finger to make a loop. Hold the loop with left thumb and middle finger, place the thread over left index finger. Insert hook through the loop, make a YO and pull thread through loop, work 1 ch, then work dc around the loop. When the desired no of dc have been reached, pull the yarn end to tighten the loop. Fasten the yarn end on the back side. Continue to work in the round in a circle. WORK IN THE ROUND IN A CIRCLE: After last dc on the round, continue to next round with 1 dc in next dc (= first dc on next round). NOTE: Insert a marker at the beg of round between last dc and first dc on the round, move the marker upwards. WORKING 2 DC TOG: * Insert hook in next st, get thread *, repeat from *-* one more time, make a YO and pull thread through all 3 sts on hook. -------------------------------------------------------- CHICKEN: Start at the top of the head by making a Magic circle - READ EXPLANATION ABOVE - on hook size 4 mm with Paris vanilla. ROUND 1: Work 6 dc in circle - READ WORK IN THE ROUND IN A CIRCLE. ROUND 2: 2 dc in every dc = 12 dc. ROUND 3: * 1 dc in next dc, 2 dc in next dc *, repeat from *-* the rest of the round = 18 dc. ROUND 4: * 1 dc in the next 2 dc, 2 dc in next dc *, repeat from *-* the rest of the round = 24 dc. ROUND 5: * 1 dc in the next 3 dc, 2 dc in next dc *, repeat from *-* the rest of the round = 30 dc. ROUND 6: Work 1 dc in every dc = 30 dc. ROUND 7: * 1 dc in the next 4 dc, 2 dc in next dc *, repeat from *-* the rest of the round = 36 dc. ROUND 8: Work 1 dc in every dc = 36 dc. ROUND 9: * 1 dc in the next 5 dc, 2 dc in next dc *, repeat from *-* the rest of the round = 42 dc. ROUND 10-17: Work 1 dc in every dc = 42 dc. ROUND 18: * 1 dc in the next 19 dc, then crochet the next 2 dc tog * - See explanation above, repeat from *-* one more time = 40 dc. ROUND 19: * 1 dc in the next 3 dc, then crochet the next 2 dc tog *, repeat from *-* the rest of the round = 32 dc. ROUND 20: Work 1 dc in every dc = 32 dc. ROUND 21: * 1 dc in the next 2 dc, then crochet the next 2 dc tog *, repeat from *-* the rest of the round = 24 dc. ROUND 22: Work 1 dc in every dc = 24 dc. ROUND 23: * 1 dc in the next 1 dc, then crochet the next 2 dc tog *, repeat from *-* the rest of the round = 16 dc. ROUND 24: Work 1 dc in every dc = 16 dc. Fill the chicken with some cotton wool. ROUND 25: Work all dc tog 2 by 2 = 8 dc, finish with 1 sl st in next dc. Cut the thread and pull it through the remaining sts and tighten tog, fasten tightly. WING: Start by making a magic circle with vanilla on hook size 4 mm. ROUND 1: Work 4 dc in the circle. ROUND 2: Work 2 dc in every dc = 8 dc. ROUND 3: * 1 dc in next dc, 2 dc in next dc *, repeat from *-* the rest of the round = 12 dc. ROUND 4: * 1 dc in the next 2 dc, 2 dc in next dc *, repeat from *-* the rest of the round = 16 dc. ROUND 5-7: Work 1 dc in every dc = 16 dc on the round. ROUND 8: * 1 dc in the next 2 dc, then crochet the next 2 dc tog *, repeat from *-* the rest of the round = 12 dc. ROUND 9: Work 1 dc in every dc, finish with 1 sl st in next dc = 12 dc. Cut the thread and keep 20 cm for assembly. Knit another wing the same way. BEAK: Work on hook size 3 mm with orange as follows: ROW 1: Work 2 ch, work 1 dc in 2nd ch from hook, turn piece = 1 dc. ROW 2: Work 1 ch, 2 dc in dc, turn piece = 2 dc. ROW 3: Work 1 ch, 2 dc in every dc, turn piece = 4 dc. ROW 4: Work 1 ch, 2 dc in 1st dc, 1 dc in next 2 dc, 2 dc in last dc, turn piece = 6 dc. ROW 5: Work 1 ch, skip 1st dc, 1 dc in next 4 dc, turn piece = 4 dc. ROW 6: Work 1 ch, skip 1st dc, 1 dc in next 2 dc, turn piece = 2 dc. ROW 7: Work 1 ch, skip 1st dc, 1 dc in last dc = 1 dc. Cut the thread and keep 20 cm for assembly. LEG: Work on hook size 3 mm with orange as follows: Work 10 ch, work 1 sl st in 5th ch from hook, * 4 ch, 1 sl st in same ch *, repeat from *-* one more time. Then work 1 sl st in every ch remaining on ch-row (= work back to beg). Cut the thread and keep 20 cm for assembly. Work another leg the same way. COCKSCOMB: Work on hook size 3 mm with red as follows: Work 10 ch, work 1 sl st in 7th ch from hook, * 5 ch, 1 sl st in next ch *, repeat from *-* one more time, finish with 6 ch, 1 sl st in last ch. Cut the thread and keep 20 cm for assembly. ASSEMBLY: Place the wings flat and sew them to each side with neat little stitches. Sew the cockscomb at the top of head. Fold the beak on the middle and sew it to the front of the head. Sew on eyes with some left-over black yarn. Sew the legs under the chicken. |
|
Have you finished this pattern?Tag your pictures with #dropspattern #dropschickenlittle or submit them to the #dropsfan gallery. Do you need help with this pattern?You'll find 7 tutorial videos, a Comments/Questions area and more by visiting the pattern on garnstudio.com. © 1982-2025 DROPS Design A/S. We reserve all rights. This document, including all its sub-sections, has copyrights. Read more about what you can do with our patterns at the bottom of each pattern on our site. |
|

With over 40 years in knitting and crochet design, DROPS Design offers one of the most extensive collections of free patterns on the internet - translated to 17 languages. As of today we count 319 catalogues and 11886 patterns translated into English (UK/cm). 11886
We work hard to bring you the best knitting and crochet have to offer, inspiration and advice as well as great quality yarns at incredible prices! Would you like to use our patterns for other than personal use? You can read what you are allowed to do in the Copyright text at the bottom of all our patterns. Happy crafting!
Post a comment to pattern DROPS Extra 0-769
We would love to hear what you have to say about this pattern!
If you want to leave a question, please make sure you select the correct category in the form below, to speed up the answering process. Required fields are marked *.