
Popular categories
Looking for a yarn?


Comments / Questions (23)
![]() Guðbjörg wrote:
Guðbjörg wrote:
Hvernig er best að gera kaðalinn?
09.03.2026 - 20:40DROPS Design answered:
Blessuð Guðbjörg. Til þess að gera snúninginn fyrir miðju framan á eyrnabandinu þá setur þú fyrstu 15-15-18-18 lykkjur á sokkaprjóninum á kaðlaprjón (helmingur af lykkjunum), kaðlaprjóninn verður fyrir framan stykkið, prjónar síðan þær lykkjur sem eftir eru á sokkaprjóninum (hinn helmingurinn af lykkjunum), síðan prjónar þú lykkjurnar af kaðlaprjóninum yfir á sokkaprjóninn. Nú hefur myndast snúningur og þú heldur svo áfram að prjóna eins og áður. Efst í mynstrinu er dálkur þar sem stendur MYNDBÖND og þar getur þú séð hvernig kaðall er gerður með kaðlaprjóni. Gangi þér vel.
10.03.2026 - 21:22
![]() Gunbritt Andesson wrote:
Gunbritt Andesson wrote:
Jag vill ha hjälp hur jag stickar flästickan på stickan igen har gjort precis som de står satt dom första 18 maskorna på flätstickan sedan stickan 18maskor hur skall jag göra sedan ?????
23.02.2026 - 15:39DROPS Design answered:
Hei Gunbritt. Da sticka du de 18 maskorna från flätstickan og fortsätt med mönster A.1 som förut. mvh DROPS Design
03.03.2026 - 10:44
![]() Sarah wrote:
Sarah wrote:
Hallo, werden hier keine Randmaschen hinzugefügt? Weil sonst geht das Muster nach dem Zopf nicht mehr auf.
25.11.2025 - 12:18DROPS Design answered:
Liebe Sara, es sind hier keine zusätzliche Maschen gestrickt, dh die 30-36 Maschen je nach der Größe werden gestrickt, wie im Diagram gezeihnet. Viel Spaß beim Stricken!
26.11.2025 - 08:03
![]() Gabriele Kleinert wrote:
Gabriele Kleinert wrote:
Ich bekomme es nicht hin, das Strickstück in der Mitte zu verzopfen. Es sind zu viele Maschen zum verzapfen. Es ist zu kurz um die Nadeln von der Zopfnadel aufzunehmen. Was kann ich tun?
06.03.2025 - 11:08DROPS Design answered:
Liebe Frau Kleinert, in diesem Video zeigen wir (für ein anderes Modell), wie man so ein Stirnband verzöpfen kann; wenn es immer noch zu tricky ist, dann können Sie die Arbeit in 2 teilen, und ein paar cm über beide Hälfte stricken, und dann erst die beide Hälfte vezöpfen, wie wir das in diesem Video (für ein anderes Modell) stricken. Kann das helfen? Viel Spaß beim Stricken!
06.03.2025 - 13:45
![]() Lena Hellquist wrote:
Lena Hellquist wrote:
Finns det film på hur man gör flätan mitt fram på pannbandet? Eller en tydligare förklaring
27.01.2025 - 11:33DROPS Design answered:
Hej Lena. I denna video ser du hur man kan göra ett pannband med fläta. I mönster DROPS Children 40-28 stickas det dock inte några extra varv som i videon utan maskorna flyttas direkt. Mvh DROPS Design
28.01.2025 - 08:50
![]() Mathy wrote:
Mathy wrote:
Hei, bildet er jo ikke samme som oppskriften. Man får jo ikke de små flettene som er på bildet. Hvorfor ikke?
30.10.2024 - 23:16DROPS Design answered:
Hej Mathy, jo det gør du, du starter nederst til højre i diagrammet, vi kan forklare de første masker i de største størrelser: 1rett, 1vrang, ta 1 maske løs av pinnen som om den skulle strikkes rett, strikk 2 rett , løft den løse masken over de 2 maskerne som blev strikket rett (nu har du 4 masker på højre pind), 1 vrang, 3 rett, 1vrang osv... På næste pind strikker du vrang over vrangmaskerne og rett over rettmaskerne og imellem de 2 masker hvor du tog en ind, laver du et omslag. På 3 pind strikker du igen fra højre side i diagrammet: 1 ret, 1vrang, 1ret, 1ret(=omslaget), 1ret, 1 vrang 3 rett osv :)
31.10.2024 - 10:05
![]() Nicole wrote:
Nicole wrote:
Vielen Dank. Jetzt hat es geklappt, aber das Muster ist irgendwie verdreht. Habe die zopfmaschen in einer hinreihe abgehoben, die letzten 15 gestrickt und dann die ersten 15. jetzt ist aber quasi die Rückseite oben (vor dem Zopf die Hinreihe). Was muss ich beachten? Vielen Dank schonmal!!
15.10.2024 - 12:39DROPS Design answered:
Liebe Nicole, beachten Sie daß die letzten Maschen auch bei einer Hin-Reihe (wie die ersten Maschen) gestrickt werden, so sind Sie sicher daß die Arbeit nicht gedreht wird. Viel Spaß beim Stricken!
15.10.2024 - 16:48
![]() Nicole wrote:
Nicole wrote:
Ich habe eine Frage. Wenn ich den Zopf Stricken will komme ich dabei überhaupt nicht zurecht, weil die Maschen viel zu eng sind. Gibt es einen Tipp? Danke!
15.10.2024 - 08:49DROPS Design answered:
Liebe Nicole, wir haben keinen besonderen Tipp, versuchen Sie die Maschen genauso wie zuvor zu stricken, dh nicht zu eng aber auch nicht zu locker. Nach einpaar Reihen wird es wieder einfacher. Vielleicht können Sie mit einer Rundnadel stricken, so sind Sie veilleicht bequemer? Viel Spaß beim Stricken!
15.10.2024 - 10:35
![]() Tony Dixon wrote:
Tony Dixon wrote:
Brilliant, thank you for the explanation makes sense now. Did not help that I was working the graph the wrong way around. Just hoping I can stretch the knitting across to get the 18 stitches off the cable needle later xxxx
18.09.2024 - 15:35
![]() Tony Dixon wrote:
Tony Dixon wrote:
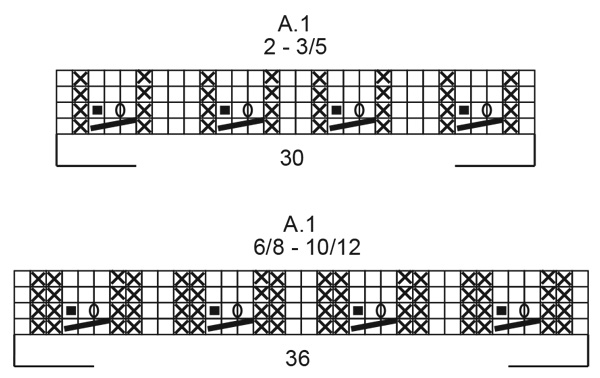
DROPS children 40-28 Hi. Sorry I do not understand graph. For groups of 3 stitches. Row 3 I think means … knit 2 together, yarn over needle then knit 3rd stitch ( makes 3 stitches on needle). Row 4 then says …slip 1, knit 2 (therefore using the 3 stitches) then pass the slipped stitch over which just leaves 2 stitches from the 3 on the needle. I know I am misunderstanding something but cannot figure out where I am going wrong. Please help. Thank you.
17.09.2024 - 18:04DROPS Design answered:
Hi Tony, You read the diagrams bottom up and from right to left from the right side or left to right on the wrong side. If it is the first row you are struggling on, this is: K1, P2, slip 1 stitch knit-wise, knit 2 and pass the slipped stitch over the 2 knitted stitches (1 stitch decreased which is replaced by the yarn over on row 2). Hope this helps and happy knitting!
18.09.2024 - 06:48
|
||||||||||||||||
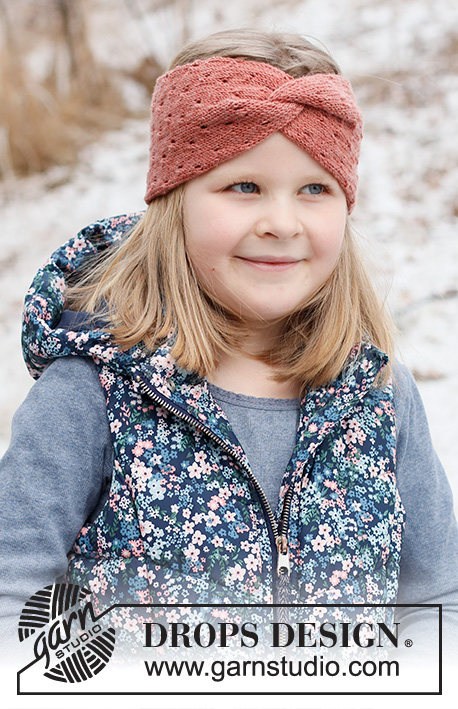
Lavender Laces#lavenderlacesheadband |
||||||||||||||||
 |
 |
|||||||||||||||
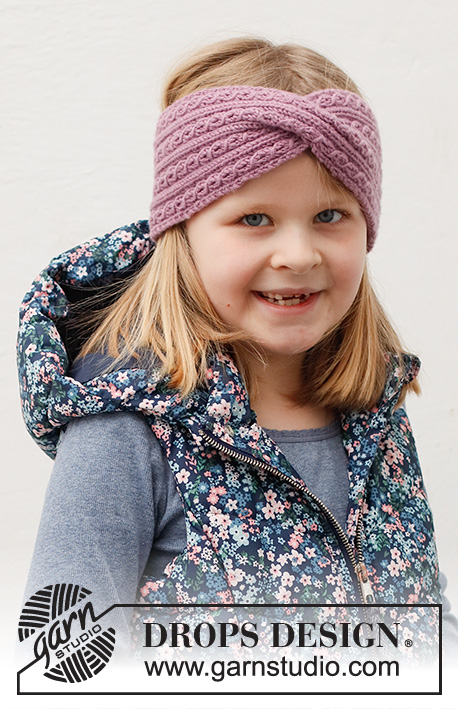
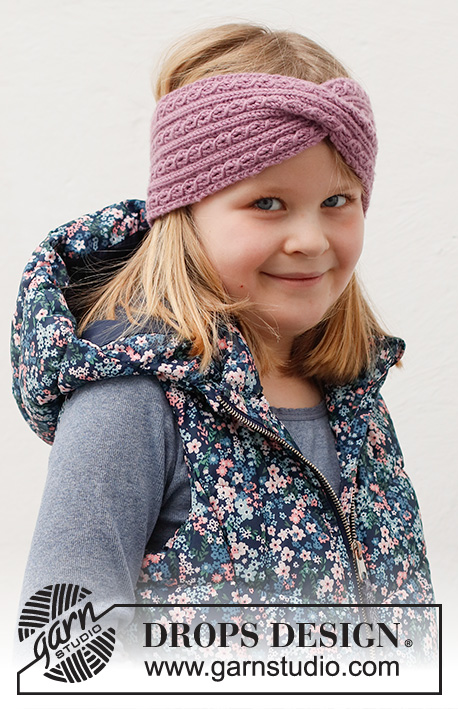
Knitted head-band for children, with cable, in DROPS Merino Extra Fine. Sizes 2 – 12 years.
DROPS Children 40-28 |
||||||||||||||||
|
------------------------------------------------------- EXPLANATIONS FOR THE PATTERN: ------------------------------------------------------- RIDGE/GARTER STITCH (worked back and forth): Knit all rows. 1 ridge = knit 2 rows. PATTERN: See diagram A.1. Choose diagram for your size. ------------------------------------------------------- START THE PIECE HERE: ------------------------------------------------------- HEAD-BAND – SHORT OVERVIEW OF THE PIECE: The piece is worked back and forth from mid-back and sewn together to finish. HEAD-BAND: Cast on 30-30-36-36 stitches with needle size 4 mm and DROPS Merino Extra Fine. Work 1 RIDGE back and forth – read description above. Work diagram A.1 – choose diagram for your size. Continue pattern A.1 until the piece measures 22½-23½-24-24½ cm. REMEMBER THE KNITTING TENSION! (You have worked half the length; try the head-band on and work to desired length). Now a cable is worked mid-front as follows: Place the first 15-15-18-18 stitches on the cable needle, work the remaining 15-15-18-18 stitches. Then work the 15-15-18-18 stitches from the cable needle. Continue back and forth with A.1 as before until the piece measures 45-47-48-49 cm – the piece should be of equal length either side of the cable. Work 1 ridge over all stitches. Cast off. Sew the band together mid-back, inside the cast-on and cast-off edges. Fasten the strand. |
||||||||||||||||
Diagram explanations |
||||||||||||||||
|
||||||||||||||||
 |
||||||||||||||||
Have you finished this pattern?Tag your pictures with #dropspattern #lavenderlacesheadband or submit them to the #dropsfan gallery. Do you need help with this pattern?You'll find 14 tutorial videos, a Comments/Questions area and more by visiting the pattern on garnstudio.com. © 1982-2026 DROPS Design A/S. We reserve all rights. This document, including all its sub-sections, has copyrights. Read more about what you can do with our patterns at the bottom of each pattern on our site. |
||||||||||||||||


With over 40 years in knitting and crochet design, DROPS Design offers one of the most extensive collections of free patterns on the internet - translated to 17 languages. As of today we count 324 catalogues and 12290 patterns translated into English (UK/cm). 12290
We work hard to bring you the best knitting and crochet have to offer, inspiration and advice as well as great quality yarns at incredible prices! Would you like to use our patterns for other than personal use? You can read what you are allowed to do in the Copyright text at the bottom of all our patterns. Happy crafting!
Post a comment to pattern DROPS Children 40-28
We would love to hear what you have to say about this pattern!
If you want to leave a question, please make sure you select the correct category in the form below, to speed up the answering process. Required fields are marked *.