
Popular categories
Looking for a yarn?


Comments / Questions (82)
![]() Myriam wrote:
Myriam wrote:
Bonjour, c’est un très beau model, j’adore mais je ne comprends pas les augmentations avec jetés, ça fait des trous. Un jete avant le marqueur un autre après le marqueur, comment faut-il procéder, pouvez vous m’expliquer avec précisions s’il vous plaît ? Merci d’avance.
27.02.2023 - 17:59DROPS Design answered:
Bonjour Myriam, pour augmenter sur les côtés, vous pouvez tricoter 2 mailles entre chacun des jetés, par ex ainsi: tricotez 1 m après le marqueur du début du tour, 1 jeté, tricotez jusqu'à ce qu'il reste 1 m avant le 2ème marqueur, faites 1 jeté, tricotez 2 m (le marqueur est entre ces 2 m), faites 1 jeté, tricotez jusqu'à ce qu'il reste 1 m avant la fin du tour, faites 1 jeté et tricotez la dernière maille. Tricotez les jetés torse (dans le brin arrière) au tour suivant. Bon tricot!
28.02.2023 - 10:34
![]() Jane wrote:
Jane wrote:
Hei jeg ønsker å bruke Viking garn pinne 31/2 hvor mange masker må til i str M da? Mvh Jane H.
17.11.2022 - 12:35DROPS Design answered:
Hej Jane, DROPS Genseren er strikket i DROPS Snow, du kan også bruge DROPS Wish :)
17.11.2022 - 13:29
![]() Lucia Milti wrote:
Lucia Milti wrote:
Buongiorno vorrei fare questo modello ma per problemi di pelle vorrei usare la big Merino, come posso fare con gli schemi? Grazie
10.11.2022 - 08:34DROPS Design answered:
Buonasera Lucia, potrebbe provare a fare un campione utilizzando 2 capi di Big Merino e vedere se corrisponde a quello indicato e poi seguire le istruzioni riportate. Buon lavoro!
10.11.2022 - 21:52
![]() Monique wrote:
Monique wrote:
Hallo, is er ook een uitleg filmpje voor het breien van de noppen op de Rudolphtrui. Ik kom er maar niet uit met die omslag 🥴. Dank u wel!
23.04.2022 - 20:24DROPS Design answered:
Dag Monique.
Er is wel video voor een vergelijkbare bobbel alleen zijn het aantal steken anders; in het patroon brei je over 5 steken, in de video over 7 steken. Hier is de link.
28.04.2022 - 08:57
![]() Monique wrote:
Monique wrote:
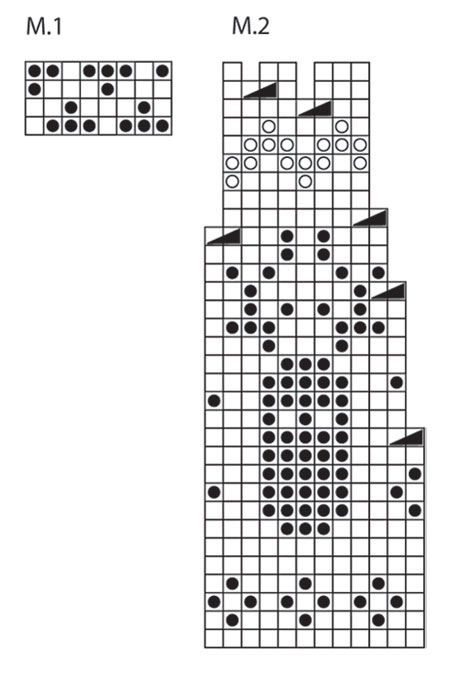
Hallo, ik bij de laatste 2 pennen het telpatroon van Rudolph by DROPS Design DROPS trui / kersttrui met raglan en rendier patroon op de pas van ”Snow”. Dat zijn de 2 pennen voorafgaand aan het halsboord, maar ik begrijp de open vakjes niet tussen de steken op het telpatroon M2. Heeft u voor mij simpele uitleg? Mijn trui is bijna klaar en kom niet verder aan het laatste stukje😅, bedankt!
31.03.2022 - 13:02DROPS Design answered:
Dag Monique,
Deze open vakjes zijn de steken die op de vorige naald zijn geminderd. Hier ziet dus geen steek. (Als je het telpatroon uit zou knippen met een schaar, dan zou je die open vakjes weg moeten knippen en de andere steken tegen zeg maar elkaar aan moeten schuiven.)
04.04.2022 - 13:57
![]() Sonca wrote:
Sonca wrote:
This pattern seems to be using the bottom up technique however the child version of this pattern uses the top down method. Can you use the top down method with the adult pattern and if so, iare there instructions ?
27.01.2022 - 13:32DROPS Design answered:
Dear Sonca, probably, but remember that the stitches would be then "top down" if you work the jumper top down instead of bottom up. Happy knitting!
28.01.2022 - 10:18
![]() Sonca Lengoc wrote:
Sonca Lengoc wrote:
Which DROPS yarn can you use other than SNOW for this pattern?
26.01.2022 - 20:59DROPS Design answered:
Dear Sonca, you can use DROPS Wish or DROPS Andes. See our Yarn Groups and more detailed information on yarn substitution here. Happy knitting!
26.01.2022 - 23:40
![]() Marianne wrote:
Marianne wrote:
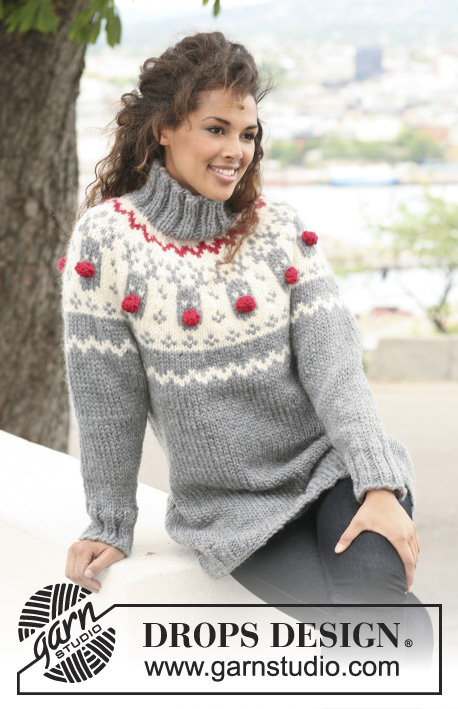
Hei. Hvor mange nøster totalt går det i denne oppskriften i en L/XL størrelse? Tenker å bruke oppskriften til å strikke med ensfarget og ikke følge mønsteret.
21.01.2022 - 13:51DROPS Design answered:
Hei Marianne. Ettersom denne ikke er strikket kun i 1 farge og vi ikke har noen utregning til en str midt mellom 2 str, kan vi ikke gi noen 100% riktig svar. Men tipper et sted mellom 850-950 gram. Mvh DROPS Design
25.01.2022 - 09:50
![]() Iveta Veselá wrote:
Iveta Veselá wrote:
Prosím jaká je spotřeba šedivé a bílé příze pouze na sedlo. Dekuji
13.11.2021 - 23:23DROPS Design answered:
Dobrý den, Iveto! Neuvádíte velikost, ale na sedlo by měla stačit 2-3 klubka šedé a všechna smetanová příze, uvedená v záhlaví návodu pro požadovanou velikost. Ať se vám hezky plete! Hana
14.11.2021 - 13:23
![]() Shirley wrote:
Shirley wrote:
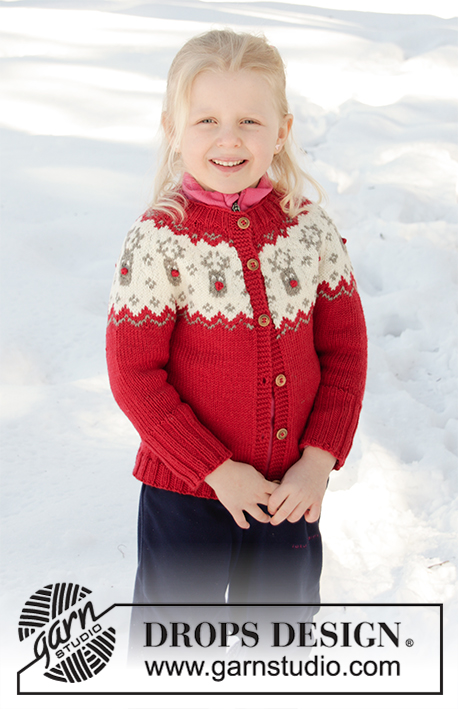
How can I turn this into a cardigan without messing up the yoke design?
12.10.2021 - 23:28DROPS Design answered:
Dear Shirley, please understand that we cannot modify our patterns for each individual request. Having said that I would suggest moving the deer pattern so, that not a deear, but the line between two deers would be the middle front. Happy Stitching!
13.10.2021 - 00:26
|
|||||||||||||
Rudolph#rudolphsweater |
|||||||||||||
 |
 |
||||||||||||
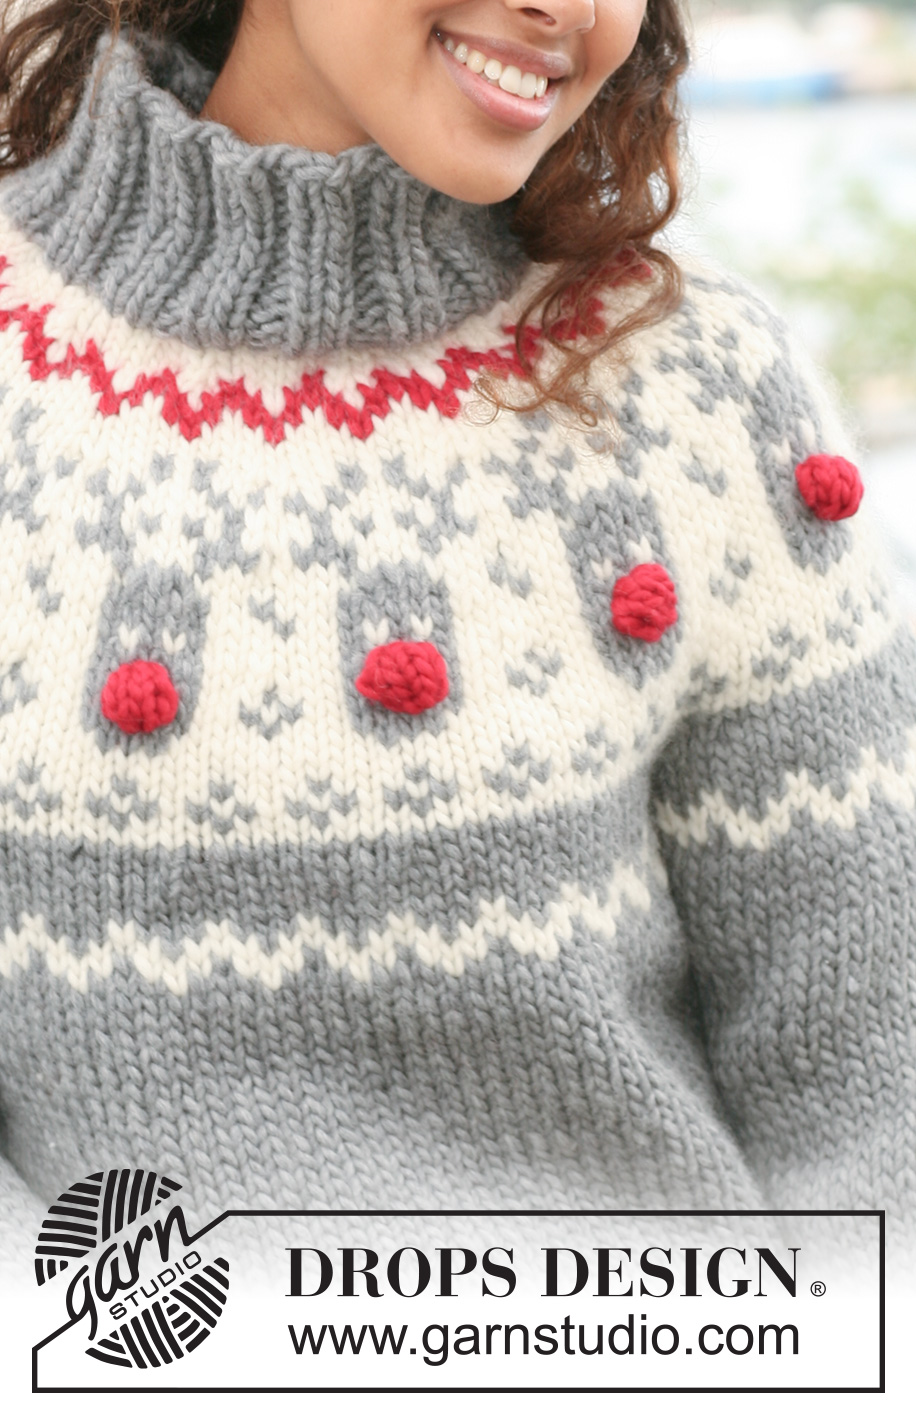
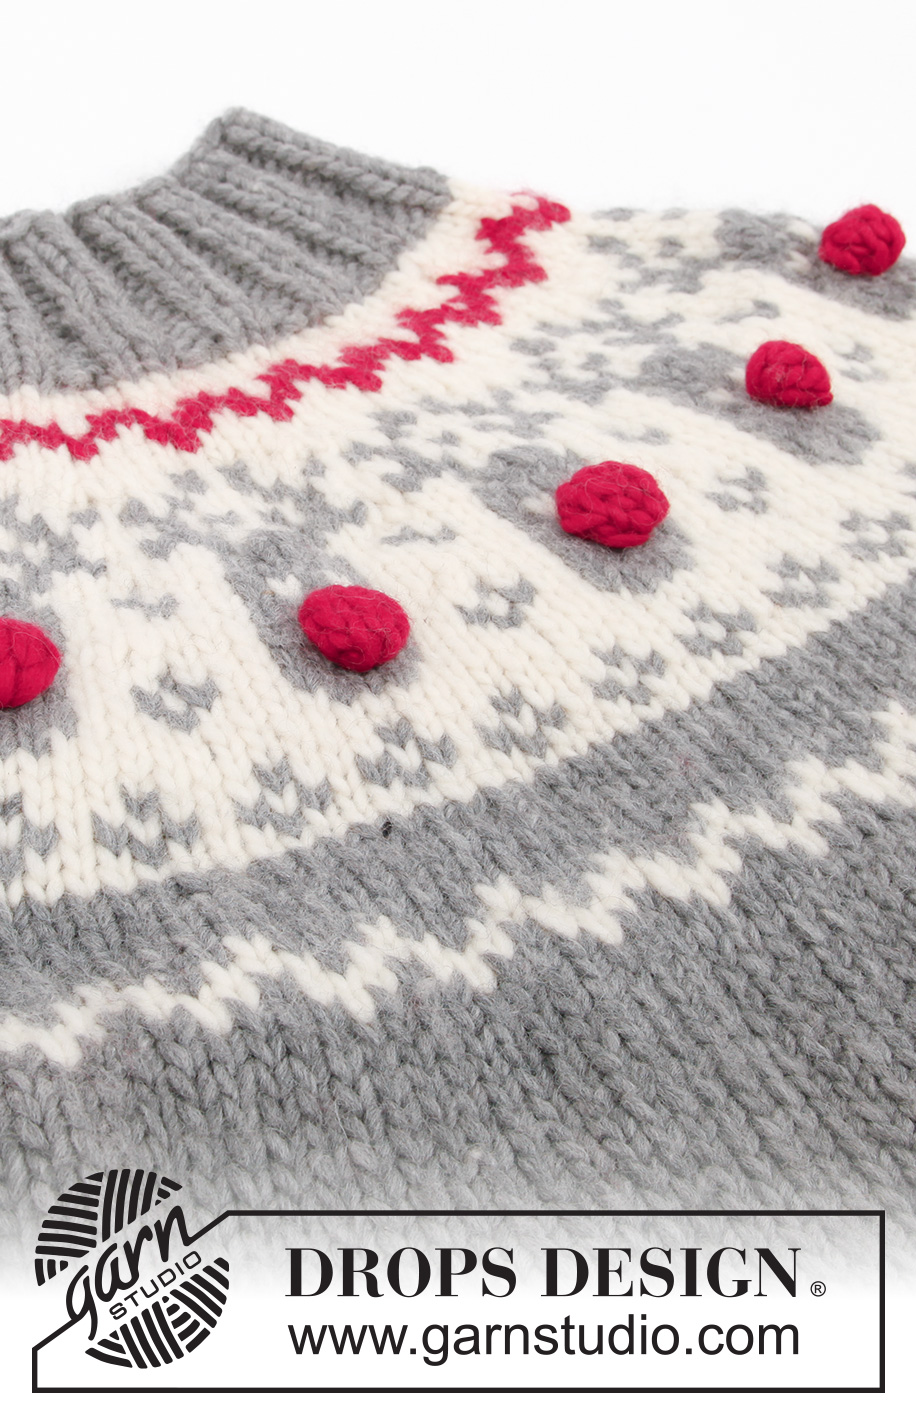
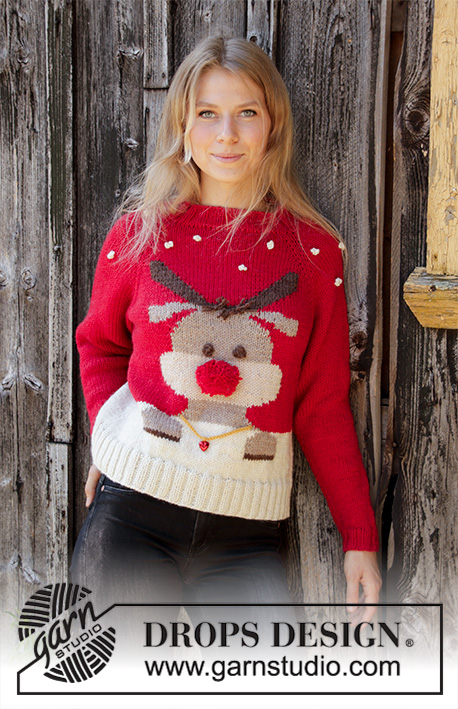
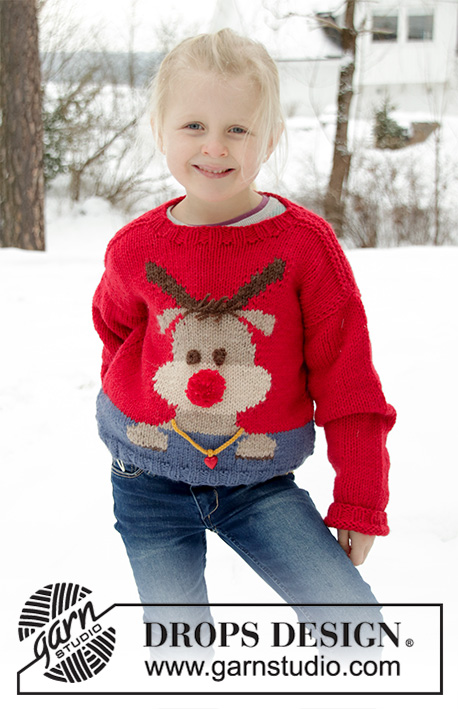
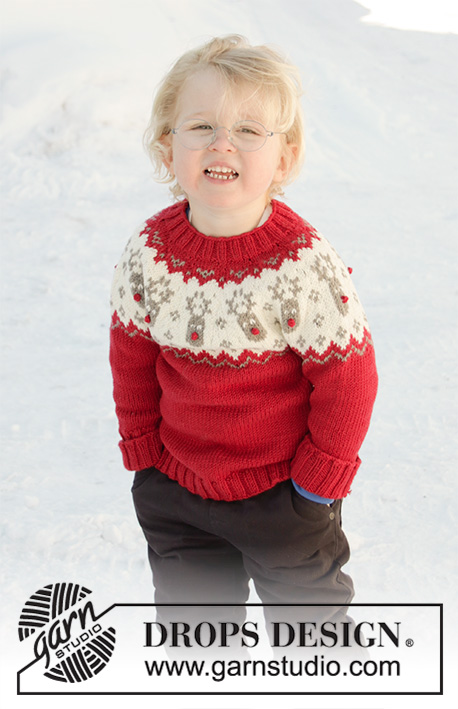
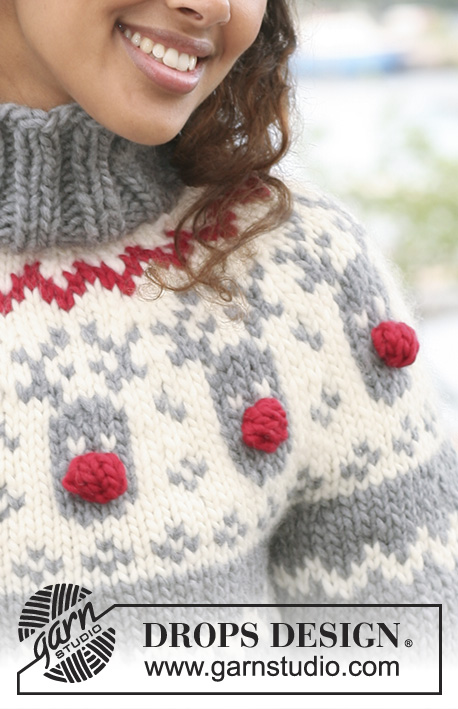
DROPS Christmas jumper with raglan and reindeer pattern on yoke in ”Snow”.
DROPS 122-1 |
|||||||||||||
|
PATTERN: See diagram M.1 and M.2. Diagram shows the pattern from RS. DECREASING TIP: Dec as follows before marker: Beg 2 sts before marker. Slip 1 st as if to K, K1, psso. Dec as follows after marker: K2 tog. INCREASING TIP: Inc by making 1 YO. On next row work YO into back of loop to avoid a hole. -------------------------------------------------------- BODY PIECE: Worked in the round. Cast on 96-112-132-148 sts on circular needle size 8 mm with medium grey. K 1 round and continue in rib K2/P2 until rib measures approx 6 cm. Now K 1 round, AT THE SAME TIME dec 8 sts evenly = 88-104-124-140 sts. Insert a marker at beg of round and 1 marker after 44-52-62-70 sts (= the sides). Change to circular needle size 9 mm. Continue in stocking st. When piece measures approx 10 cm dec 2 sts each side (i.e. 1 st each side of marker) - See DECREASING TIP! Repeat the dec on every 7-8-13-13 cm a total of 4-4-3-3 times = 72-88-112-128 sts. Continue until piece measures 40-42-44-45 cm. Now inc 2 sts each side (i.e. 1 st each side of marker) - See INCREASING TIP! SIZE XS/S and M/L: repeat the inc on every 2 cm a total of 3-3 times = 84-100-116-132 sts. When piece measures 44-46-48-49 cm (all inc are now complete) work M.1 on all sts (= 10.5-12.5-14.5-16.5 repeats). After M.1 work 1 round with medium grey on all sts and work next round with medium grey as follows: cast off 3 sts, work 36-44-52-60 sts, cast off 6 sts, work 36-44-52-60 sts and cast off the last 3 sts on round. Cut the thread and put piece aside. SLEEVE: Worked in the round. Cast on 32-32-36-36 sts on double pointed needles size 8 mm with medium grey. K 1 round and continue in rib K2/P2 until rib measures approx 8 cm. Now K 1 round, AT THE SAME TIME dec 6-4-8-6 sts evenly = 26-28-28-30 sts. Insert a marker at beg of round (= mid under sleeve). Change to double pointed needles size 9 mm and continue in stocking st. When piece measures 10 cm inc 2 sts under sleeve (i.e. 1 st each side of marker) and repeat the inc on every 14-9-5.5-4.5 cm a total of 3-4-6-7 times = 32-36-40-44 sts. When piece measures 40-40-39-39 cm (all inc are now complete) work M.1 on all sts (= 4-4.5-5-5.5 repeats). After M.1 work 1 round with medium grey on all sts and work next round with medium grey as follows: cast off 3 sts, work 26-30-34-38 sts, cast off 3 sts. Cut the thread. Put piece aside and knit the other sleeve. YOKE: Slip sleeves on the same circular needle as body piece where cast off for armhole = 124-148-172-196 sts. Beg mid back on back piece (= after 18-22-26-30 sts). Work 1 round with medium grey on all sts, AT THE SAME TIME dec 4 sts evenly = 120-144-168-192 sts. Work 0-1-1-2 rounds with medium grey on all sts and then continue in M.2 on all sts (= 10-12-14-16 repeats). After M.2 there are 60-72-84-96 sts on needle. Now work 1 round with medium grey on all sts, AT THE SAME TIME dec 12-16-28-32 sts evenly = 48-56-56-64 sts. Continue with shortened rows mid back as follows, back and forth on needle (row 1 = RS): work 6 sts, turn and work 12 sts. Turn and work 18 sts, turn and work 24 sts. Turn and work 30 sts, turn and work 36 sts. Turn and work 1 row on all sts to mid back. Change to circular needle size 8 mm. Continue in the round in rib K2/P2 until rib measures approx 10 cm. Cast off with K over K and P over P. BOBBLES: Work 10-12-14-16 bobbles on needle size 8 mm with red as follows: Cast on 1 st. Work K1, 1 YO, K1, 1 YO, K1 in the same st (= 5 sts), turn piece. Work 4 rows stocking st back and forth on these 5 sts. Then pass 2nd st over first st, 3rd st over first st, 4th st over first st and 5th st over first st (= 1 st left). Pull thread through the last st, leave approx 15 cm and use this when sewing on the bobble. ASSEMBLY: Sew openings under sleeves. Sew on bobbles. |
|||||||||||||
Diagram explanations |
|||||||||||||
|
|||||||||||||
 |
|||||||||||||
 |
|||||||||||||
Have you finished this pattern?Tag your pictures with #dropspattern #rudolphsweater or submit them to the #dropsfan gallery. Do you need help with this pattern?You'll find 21 tutorial videos, a Comments/Questions area and more by visiting the pattern on garnstudio.com. © 1982-2026 DROPS Design A/S. We reserve all rights. This document, including all its sub-sections, has copyrights. Read more about what you can do with our patterns at the bottom of each pattern on our site. |
|||||||||||||


With over 40 years in knitting and crochet design, DROPS Design offers one of the most extensive collections of free patterns on the internet - translated to 17 languages. As of today we count 324 catalogues and 12290 patterns translated into English (UK/cm). 12290
We work hard to bring you the best knitting and crochet have to offer, inspiration and advice as well as great quality yarns at incredible prices! Would you like to use our patterns for other than personal use? You can read what you are allowed to do in the Copyright text at the bottom of all our patterns. Happy crafting!
Post a comment to pattern DROPS 122-1
We would love to hear what you have to say about this pattern!
If you want to leave a question, please make sure you select the correct category in the form below, to speed up the answering process. Required fields are marked *.