
Popular categories
Looking for a yarn?

































Comments / Questions (11)
 Ingrid wrote:
Hallo, meine frage bei mir rollt sich der ausschnitt und unten am saum , rollt sich hoch. soll das so sein ? was mache ich dagegen? das störrt mich, ich bin anfänger und unerfahren . ansonsten gefällt mit das top, das muster ist schön. würde mich über eine antwort freuen gruß ingrid elias
04.10.2026 - 13:51DROPS Design answered:
Liebe Ingrid, Sie können das Topp mit Stecknadeln auf einer geeigneten Unterlage spannen, anfeuchten (z.B. mit einer Sprühflasche für Blumen) und trocknen lassen, danach entfernen Sie die Stecknadeln, dann sollte sich der Rand nicht mehr rollen.
05.10.2026 - 08:31
 Karin wrote:
Hej! Detta: storlek XXXL startar ökningen till ärmhål samtidigt som ökning till hals). Och detta: SAMTIDIGT när arbetet mäter 9-9-8-12-11-9½-8 cm, ökas det till ärmhål från rätsidan så här: Jag stickar stl M o där ska d också ökas på en gång samtidigt med hals.. men står inget.. Sen detta med att d inte stårhur många masker man ska ha efter dom olika momenten,brukar väl stå? Mvh Karin
27.08.2026 - 11:16DROPS Design answered:
Hej Karin, ja det stemmer du starter udtagningerne når arbejdet måler 8 cm. Du starter med 17m tager 5 masker ud til hals + 17 masker ud til ærmegab = 39 + 39 (den anden side) + 36 = 114 masker (det finder du også i opskriften ) :)
08.09.2026 - 11:06
 Justina wrote:
I believe Drops patterns are being sold on Etsy by this seller’s shop EthosKnot.
05.08.2026 - 14:39
 Elena wrote:
Buongiorno, non mi ritrovo paragonando la spiegazione con il disegno del modello: dopo la serie di aumenti sul corpo ai lati dei segnapunti, quando inizia il motivo non si dovrebbe più aumentare, mentre dal disegno sembra che il corpo scenda svasato, quindi con altri aumenti costanti, fino al bordo finale. Vorrei un chiarimento su questo. Grazie!
26.07.2026 - 19:07DROPS Design answered:
Buonasera Elena, è corretto, quando inizia il motivo non ci sono più aumenti. Buon lavoro!
30.07.2026 - 23:39
Helen Galley wrote:
Are the back and front the same? I have read through the pattern but can’t find any difference. There are no photos of the back and the diagram shows one side only. Thanks.
19.07.2026 - 14:11DROPS Design answered:
Dear Mrs Galley, they are both worked the same way but the straps on back piece are shorter than on front piece, this means you will start increasing for neck earlier on back pieces than on front pieces. Happy knitting!
11.08.2026 - 10:47
Helga wrote:
Danke für die schnelle Antwort. Ist es richtig, in der Rückreihe den I Cord Rand wie in der Hinreihe zu stricken? MfG Helga
06.07.2026 - 12:03DROPS Design answered:
Liebe Helga, ja, die werden genauso gestrickt; schauen Sie mal dieses Video - im Video sind es dann Krausrechte Masche, hier wird man aber nur glattrechts stricken (Hinreihen rechts, Rückreihen links). Viel Spaß beim Stricken!
06.07.2026 - 16:01
Helga wrote:
Ich kann in der Anleitung nicht klar herauslesen ob das Top obenauf glatt rechts gestrickt wird.
06.07.2026 - 06:17DROPS Design answered:
Liebe Helga, man wird das obere Teil glattrechts stricken, mit 2 I-Cord beidseitig. Viel Spaß beim Stricken!
06.07.2026 - 08:01
 Colleen wrote:
This pattern would be better written bottom up because it is very confusing to do the increases and start the front and back body pieces.
25.06.2026 - 17:00DROPS Design answered:
Dear Colleen, if you need any help understanding how to do, please feel free to ask your question here, we'll do our best to help you. Happy knitting!
26.06.2026 - 07:11
Yildirim wrote:
Hallo liebes DROPS-Team, das Top gefällt mir sehr gut und ich werde es nachstricken. Schade finde ich jedoch, dass es nur Fotos von vorne gibt und keines von der Rückseite. Eine Rückansicht wäre für viele Strickerinnen und Stricker sehr hilfreich, um sich ein besseres Bild vom Modell zu machen. Dieser Wunsch wurde meines Wissens bereits mehrfach geäußert. Vielleicht können Sie das bei zukünftigen Anleitungen berücksichtigen. Mit freundlichen Grüßen Ö. Yildirim
21.06.2026 - 12:17DROPS Design answered:
Liebe Yildirim, danke für Ihr Feedback, Fotos von der Rückseite zeigen wir nur, wenn es nötig ist, dh wenn es etwas besonders unterschiedlich ist, ich leite aber Ihre Anfage weiter. Sollten Sie irgendeine Frage über Rückenteil oder irgendetwas anderes, stellen Sie sie gerne hier. Viel Spaß beim Stricken!
22.06.2026 - 15:00
Mariana wrote:
Synd att ni inte visar en bild även på ryggen, flera i stort sett lika bilder framifrån men ingen på ryggen så det är omöjligt att se om den är hög eller djup bak.
18.05.2026 - 10:46
|
||||||||||||||||
Sunflower Slip Top#sunflowersliptop |
||||||||||||||||
 |
 |
|||||||||||||||
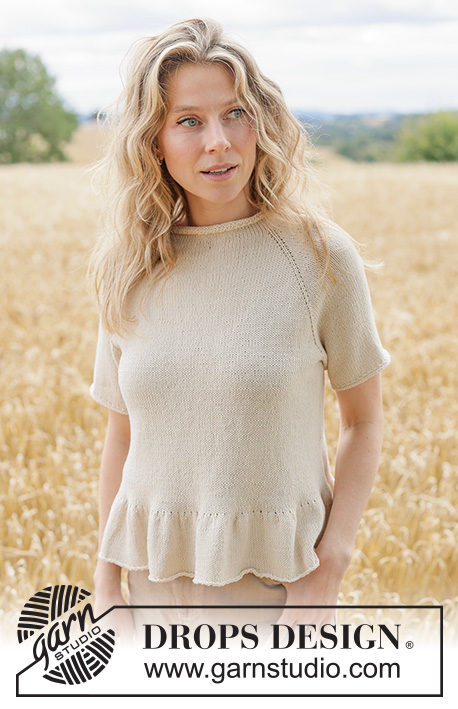
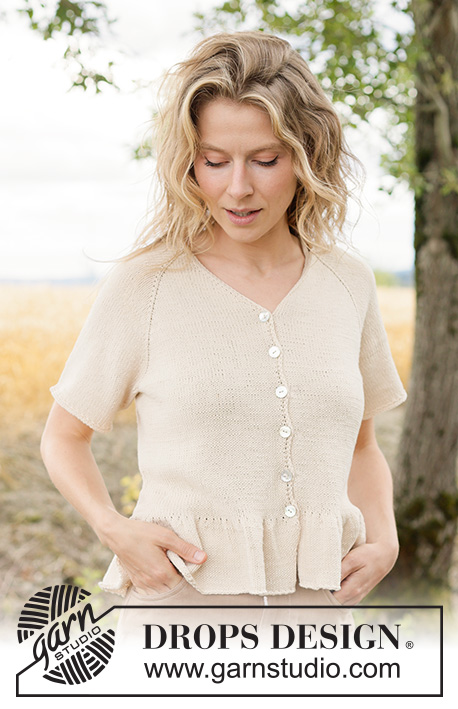
Knitted top/singlet in DROPS Safran. The piece is worked top down with lace pattern and I-cord. Sizes XS - XXXL.
DROPS 268-14 |
||||||||||||||||
|
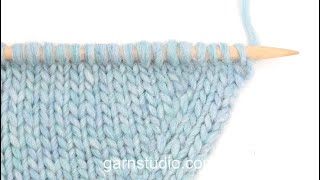
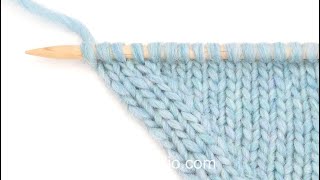
------------------------------------------------------- EXPLANATIONS FOR THE PATTERN: ------------------------------------------------------- GARTER STITCH: Alternately 1 knitted round and 1 purled round. 1 ridge vertically = 2 rounds. PATTERN: See diagram A.1. 2 EDGE STITCHES I-CORD: Work in the same way from both the right and wrong side. BEGINNING OF ROW: Slip 1 stitch purl-wise with the strand in front, knit 1. END OF ROW: Work until there are 2 stitches left on the row, slip 1 stitch purl-wise with the strand in front, knit 1. INCREASE TIP-1: INCREASE 1 STITCH TOWARDS LEFT – from RIGHT SIDE: Use the left needle to pick up the strand between 2 stitches from the row below, pick up the strand from the front and knit through the stitch-loop that lies on the back of the needle. INCREASE 1 STITCH TOWARDS THE RIGHT- from RIGHT SIDE: Use the left needle to pick up the strand between 2 stitches from the row below, pick up the strand from the back and knit through the stitch-loop that lies on the front of the needle. INCREASE TIP-2: Work until there are 2 stitches left before the marker-thread, INCREASE 1 STITCH TOWARDS THE RIGHT, work 4 stitches (marker-thread sits in the middle of these stitches), INCREASE 1 STITCH TOWARDS LEFT. Repeat at each marker-thread (4 increased stitches). ------------------------------------------------------- START THE PIECE HERE: ------------------------------------------------------- TOP - SHORT OVERVIEW OF THE PIECE: The front and back pieces are worked separately, back and forth as far as the armholes. Start by casting on for the left front piece, increasing for the neckline and armhole, then lay the piece to one side and work the right front piece. The 2 pieces are joined and the front piece is continued as far as the armholes. The back piece is worked. The front and back pieces are joined and the body is finished in the round. The shoulder seams are sewn to finish. LEFT FRONT PIECE: Cast on 14-17-17-18-19-20-21 stitches with circular needle size 3 mm and DROPS Safran. Work 2 EDGE STITCHES WITH I-CORD – read explanation above, 10-13-13-13-15-16-17 stocking stitches and 2 edge stitches with I-cord. Continue this pattern back and forth for 8-8-8-7-9-7-8 cm, with the next row from the right side. Now increase for the neckline and armholes. Read the next 2 sections before continuing (in size XXXL, begin increasing for the armholes at the same time as increasing for the neckline). INCREASE FOR NECKLINE: From the right side: Continue the pattern and increase 1 stitch towards the left after the first 3 stitches – read INCREASE TIP-1. Increase like this every 2nd row (each row from the right side) a total of 5-5-5-8-7-9-8 times. After the final increase, lay the piece to one side and work the right front piece. INCREASE FOR ARMHOLE: AT THE SAME TIME, when the piece measures 9-9-8-12-11-9½-8 cm, on a row from the right side, increase 1 stitch towards the right before the last 3 stitches on the row – read INCREASE TIP-1. Increase like this every 2nd row (each row from the right side) a total of 14-15-17-13-16-20-24 times. RIGHT FRONT PIECE: Cast on 14-17-17-18-19-20-21 stitches with circular needle size 3 mm. Work 2 edge stitches with I-cord, 10-13-13-14-15-16-17 stocking stitches and 2 edge stitches with I-cord. Continue this pattern back and forth for 8-8-8-7-9-7-8 cm, with the next row from the right side. Now increase for the neckline and armholes. Read the next 2 sections before continuing (in size XXXL, begin increasing for the armholes at the same time as for the neckline). INCREASE FOR NECKLINE: From the right side: Continue the pattern and increase 1 stitch towards the right before the last 3 stitches – remember INCREASE TIP-1. Increase like this every 2nd row (each row from the right side) a total of 5-5-5-8-7-9-8 times. After the final increase for the neckline, the 2 front pieces are joined for the FRONT PIECE (see below). Remember to maintain the knitting tension. INCREASE FOR ARMHOLE: AT THE SAME TIME, when the piece measures 9-9-8-12-11-9½-8 cm and on a row from the right side, increase 1 stitch towards the left after the first 3 stitches on the row – remember INCREASE TIP-1. Increase like this every 2nd row (each row from the right side) a total of 14-15-17-13-16-20-24 times. FRONT PIECE: When the increases for the neckline are finished, join the 2 front pieces as follows (remember to continue increasing for the armholes): Start from the right side, work the right front piece as before (the 2 edge stitches by the neck are now worked in stocking stitch), cast on 32-32-36-36-38-38-42 stitches for the neckline, work the left front piece (the 2 edge stitches by the neck are now worked in stocking stitch). Work back from the wrong side as before but across the 32-32-36-36-38-38-42 cast-on stitches, knit from the wrong side on the first row then continue these stitches in stocking stitch. Continue with stocking stitch and 2 edge stitches in I-cord on each side. When the increases for the armholes are finished, there are 98-106-114-114-122-136-148 stitches. Finish after a row from the wrong side. The piece measures approx. 18-18-19-20-21-22-23 cm. Cut the strand and lay the piece to one side. Work the back piece. RIGHT BACK PIECE: Cast on 14-17-17-18-19-20-21 stitches with circular needle size 3 mm. Work 2 edge stitches with I-cord, 10-13-13-14-15-16-17 stocking stitches and 2 edge stitches with I -cord. Work this pattern back and forth for 3-3-3-2-4-2-2 cm, with the next row from the right side. Now increase for the neckline: Continue the pattern and increase 1 stitch towards the left after the first 3 stitches – remember INCREASE TIP-1. Increase like this every 2nd row (each row from the right side) a total of 5-5-5-8-7-9-8 times = 19-22-22-26-26-29-29 stitches. The piece measures approx. 6-6-6-7-8-8-8 cm, with the last row from the wrong side. Lay the piece to one side and work the left back piece. LEFT BACK PIECE: Cast on 14-17-17-18-19-20-21 stitches with circular needle size 3 mm. Work 2 edge stitches with I-cord, 10-13-13-14-15-16-17 stocking stitches and 2 edge stitches with I -cord. Work this pattern back and forth for 3-3-3-2-4-2-2 cm, with the next row from the right side. Now increase for the neckline: Continue the pattern and increase 1 stitch towards the right before the last 3 stitches – remember INCREASE TIP-1. Increase like this every 2nd row (each row from the right side) a total of 5-5-5-8-7-9-8 times = 19-22-22-26-26-29-29 stitches. The piece measures approx. 6-6-6-7-8-8-8 cm, with the last row from the wrong side. The 2 back pieces are now joined. BACK PIECE: In size XXXL the increases for the armholes begin at the same time as the 2 pieces are joined. Read the next section before continuing. Start from the right side and work the left back piece as before (the 2 edge stitches by the neck are now worked in stocking stitch), cast on 32-32-36-36-38-38-42 stitches for the neckline, work the right back piece (the 2 edge stitches by the neck are now worked in stocking stitch). Work back from the wrong side as before, but across the 32-32-36-36-38-38-42 cast-on stitches, knit from the wrong side on the first row then continue these stitches in stocking stitch. Continue with stocking stitch and 2 edge stitches in I-cord on each side. When the piece measures 9-9-8-12-11-9½-8 cm, increase for the armholes as follows: Increase 1 stitch towards the left after the first 3 stitches on the row and increase 1 stitch towards the right before the last 3 stitches – remember INCREASE TIP-1. Increase like this every 2nd row (each row from the right side) a total of 14-15-17-13-16-20-24 times. When all the increases for the armholes are finished, there are 98-106-114-114-122-136-148 stitches. Finish after a row from the wrong side. The piece measures approx. 18-18-19-20-21-22-23 cm. Do not cut the strand. The back and front pieces are now joined for the body. BODY: From the right side: Knit the 98-106-114-114-122-136-148 stitches on the back piece, cast on 6-8-10-16-20-22-26 stitches (mid-under the sleeve), knit the 98-106-114-114-122-136-148 stitches on the front piece, cast on 6-8-10-16-20-22-26 stitches (mid-under the sleeve) = 208-228-248-260-284-316-348 stitches. Insert 1 marker-thread in the middle of the 6-8-10-16-20-22-26 cast-on stitches under the armholes, they are used when increasing. Work stocking stitch in the round with GARTER STITCH across the new stitches under each armhole – read explanation above. Work 2 ridges. Then continue stocking stitch across all stitches. When the piece measures 24-26-28-29-30-31-32 cm from the shoulder (approx. 6-8-9-9-9-9-9 cm from the armhole), increase 1 stitch on each side of both marker-threads – read INCREASE TIP-2 (4 increased stitches). Repeat this increase every 2-1½-1-2-2-2½-2½ cm a total of 4-5-6-5-5-5-5 times each side = 224-248-272-280-304-336-368 stitches. Work until the piece measures 30-33-35-37-39-41-43 cm from the shoulder (approx. 12-15-16-17-18-19-20 cm from the armhole). Now work lace pattern as follows: Work to one marker-thread; the round now begins here. Work diagram A.1 in the round (28-31-34-35-38-42-46 repeats in width). Work like this until the piece measures 45-48-50-52-54-56-58 cm from the shoulder (approx. 27-30-31-32-33-34-35 cm from the armhole), finishing after a whole or half repeat of the pattern in height. Cast off slightly loosely with knit, so the edge is not tight. ASSEMBLY: Sew the shoulder seams neatly, e.g., with grafting stitch. |
||||||||||||||||
Diagram explanations |
||||||||||||||||
|
||||||||||||||||
 |
||||||||||||||||
 |
||||||||||||||||
Have you finished this pattern?Tag your pictures with #dropspattern #sunflowersliptop or submit them to the #dropsfan gallery. Do you need help with this pattern?You'll find 15 tutorial videos, a Comments/Questions area and more by visiting the pattern on garnstudio.com. © 1982-2026 DROPS Design A/S. We reserve all rights. This document, including all its sub-sections, has copyrights. Read more about what you can do with our patterns at the bottom of each pattern on our site. |
||||||||||||||||






With over 40 years in knitting and crochet design, DROPS Design offers one of the most extensive collections of free patterns on the internet - translated to 17 languages. As of today we count 333 catalogues and 12532 patterns translated into English (UK/cm). 12532
We work hard to bring you the best knitting and crochet have to offer, inspiration and advice as well as great quality yarns at incredible prices! Would you like to use our patterns for other than personal use? You can read what you are allowed to do in the Copyright text at the bottom of all our patterns. Happy crafting!
Post a comment to pattern DROPS 268-14
We would love to hear what you have to say about this pattern!
If you want to leave a question, please make sure you select the correct category in the form below, to speed up the answering process. Required fields are marked *.