
Popular categories
Looking for a yarn?


Comments / Questions (18)
![]() Kate wrote:
Kate wrote:
Adorable looking pattern. I've figured the repeat part of the pattern ie #1-4. After reading the comments and responses about the increases I'm still perplexed about when they occur. The bottom line? Increase on right side consistently? Does it matter if it's on row #1 or row #3 (the right side rows)? Thank you!
04.04.2026 - 04:07DROPS Design answered:
Dear Kate, the increases will be worked from right side on every 10th row, so work 1 row from RS increasing 1 stitch then work 9 rows (WS, RS, WS, RS, WS, RS, WS, RS, WS) => the next increase will be worked from RS. At the same time work the picot edge increasing/decreasing stitches repeating rows 1-4 for pattern. The number of sts before marker thread (seen from RS) will increase. Happy knitting!
08.04.2026 - 09:06
![]() Marta wrote:
Marta wrote:
Czy w tym wzorze dwa oczka brzegowe przerabiamy jak l-cord?
25.02.2026 - 23:33DROPS Design answered:
Witaj Marto, tak, brzeg jest takim wąskim I-cordem. Zobacz jak to zrobić w części OCZKA BRZEGOWE. Pozdrawiamy!
26.02.2026 - 12:06
![]() Rocío wrote:
Rocío wrote:
Por favor pueden explicar o indicarme un vídeo en el que se vea como tejer la fila 3 y 4. No entiendo en la fila 3 que hacer después del hilo marcador . Podrían grabar estás dos filas para ver lo indicado en el patrón? Gracias
19.02.2026 - 19:57DROPS Design answered:
Hola Rocío, después del marcapuntos tienes 4 pts. Trabajar 2 pts juntos de derecho. Haces 2 hebras en la aguja, como se explica en este video y terminas la fila con 1 pt en el bucle posterior y anterior de los últimos 2 pts ( como en este video. En la Fila 4 haces una disminución simple sobre los primeros 2 pts y trabajas y pasas el 3º pt sobre el 4º, hacer 1 derecho y dejas caer la primera de las 2 hebras, mientras trabajas la otra de derecho. Finalmente, trabajas el último pt antes del marcapuntos de derecho.
23.02.2026 - 00:02
![]() Kari wrote:
Kari wrote:
I'm confusing on the increase every 10 rows. If I do an increase, in R1, row 10 will be the wrong side. Am I then increasing on row 11 (Starting as 1 again)?
11.12.2025 - 09:12DROPS Design answered:
HI Kari, the next increase will be on row 11. Happy knitting!
11.12.2025 - 09:22
![]() Juani wrote:
Juani wrote:
Buenas tardes Me podría decir cómo se hace el chal desde cuando se echan los crecidos. Gracias.
14.11.2025 - 12:33
![]() Scotti wrote:
Scotti wrote:
Non mi e chiaro come lavorare i ferri 3 e 4. Potete aiutarmi? grazie
15.10.2025 - 22:59DROPS Design answered:
Buonasera Scotti, quale parte della spiegazione dei ferri non le è chiara? Buon lavoro!
17.10.2025 - 23:41
![]() Glynnis wrote:
Glynnis wrote:
Hi gorgeous pattern! Do you have it in English?? Thank you Glynnis
05.06.2025 - 00:14DROPS Design answered:
Dear Glynnis, sure we do, you can click on the scroll down menu to edit language, or here to get it in English. Happy knitting!
05.06.2025 - 09:05
![]() Linda H wrote:
Linda H wrote:
Are the increases on ever 1st row AND 10th row? I’m. Confused about the increases. Thank you
22.04.2025 - 01:03
![]() Linda H wrote:
Linda H wrote:
I don’t understand the increases. Is it every 1st row or 10th row?
21.04.2025 - 21:52DROPS Design answered:
Hi Linda, increases is every 10th row. Happy knitting!
22.04.2025 - 07:18
![]() Dorota wrote:
Dorota wrote:
Dzień dobry, Po zrobieniu 3 rzędu za markerem zostaje 5 oczek, w 4 rzędzie zgodnie z opisem najpierw powinny być do przerobienia 4 oczka prawe (nie liczę zamykania), a potem dopiero narzuty. Dużo wcześniej mam na drucie do przerobienia oczka narzutów. Czy na pewno w projekcie jest to dobrze opisane?
18.04.2025 - 21:12
|
|
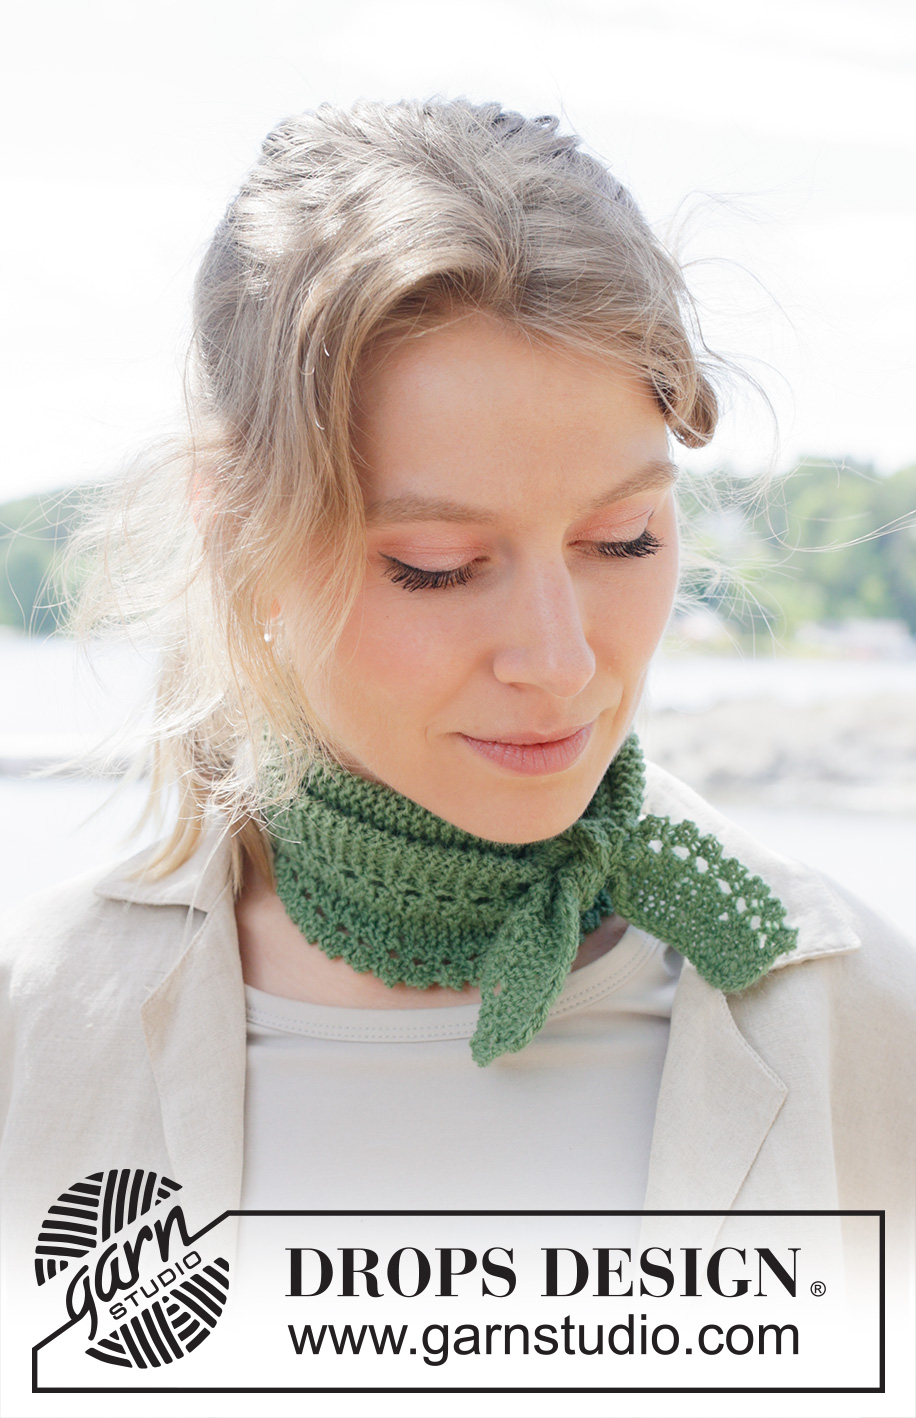
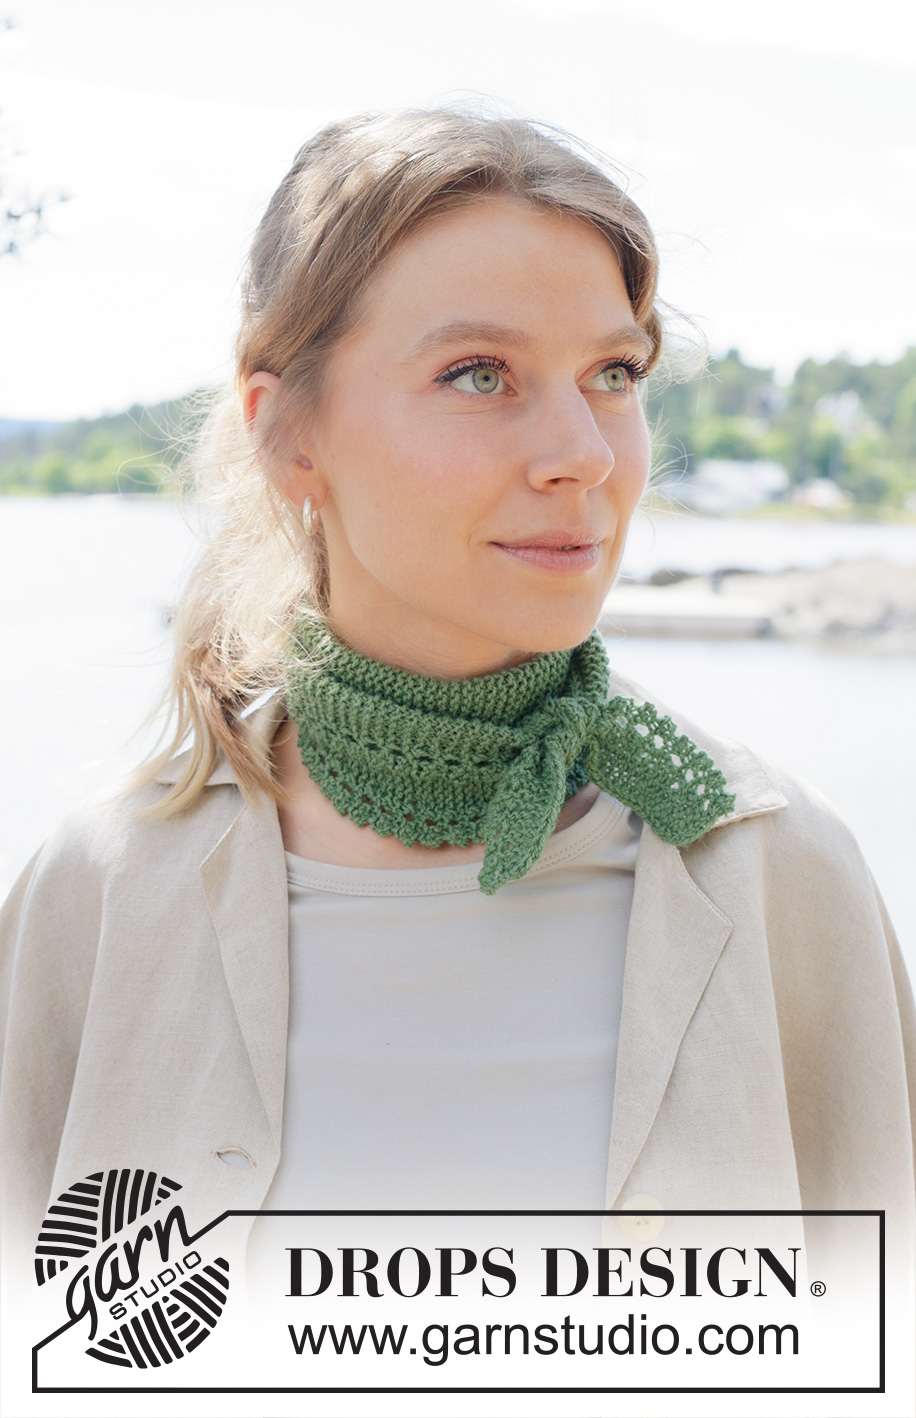
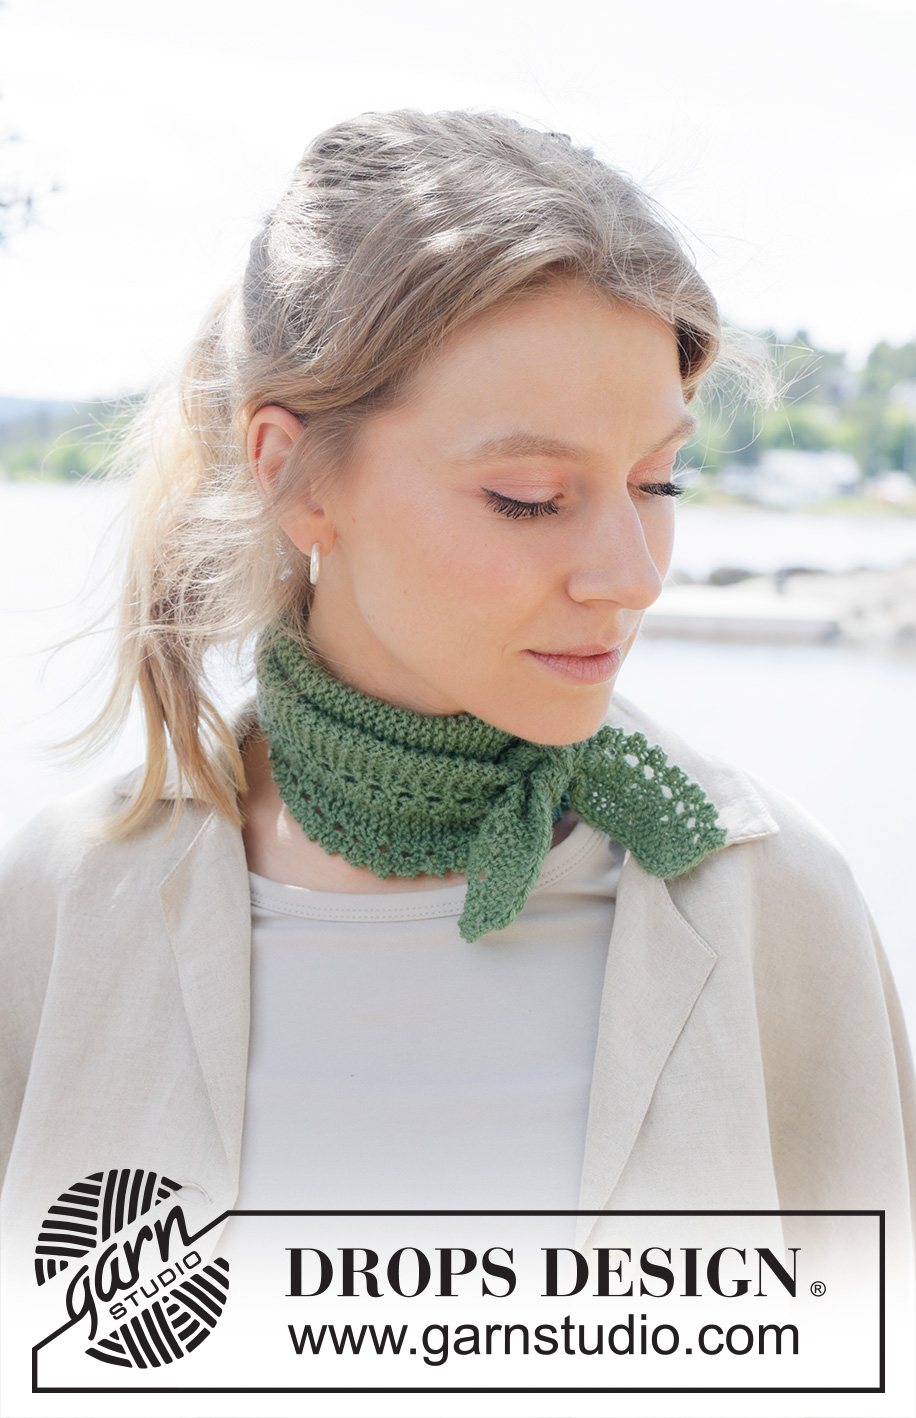
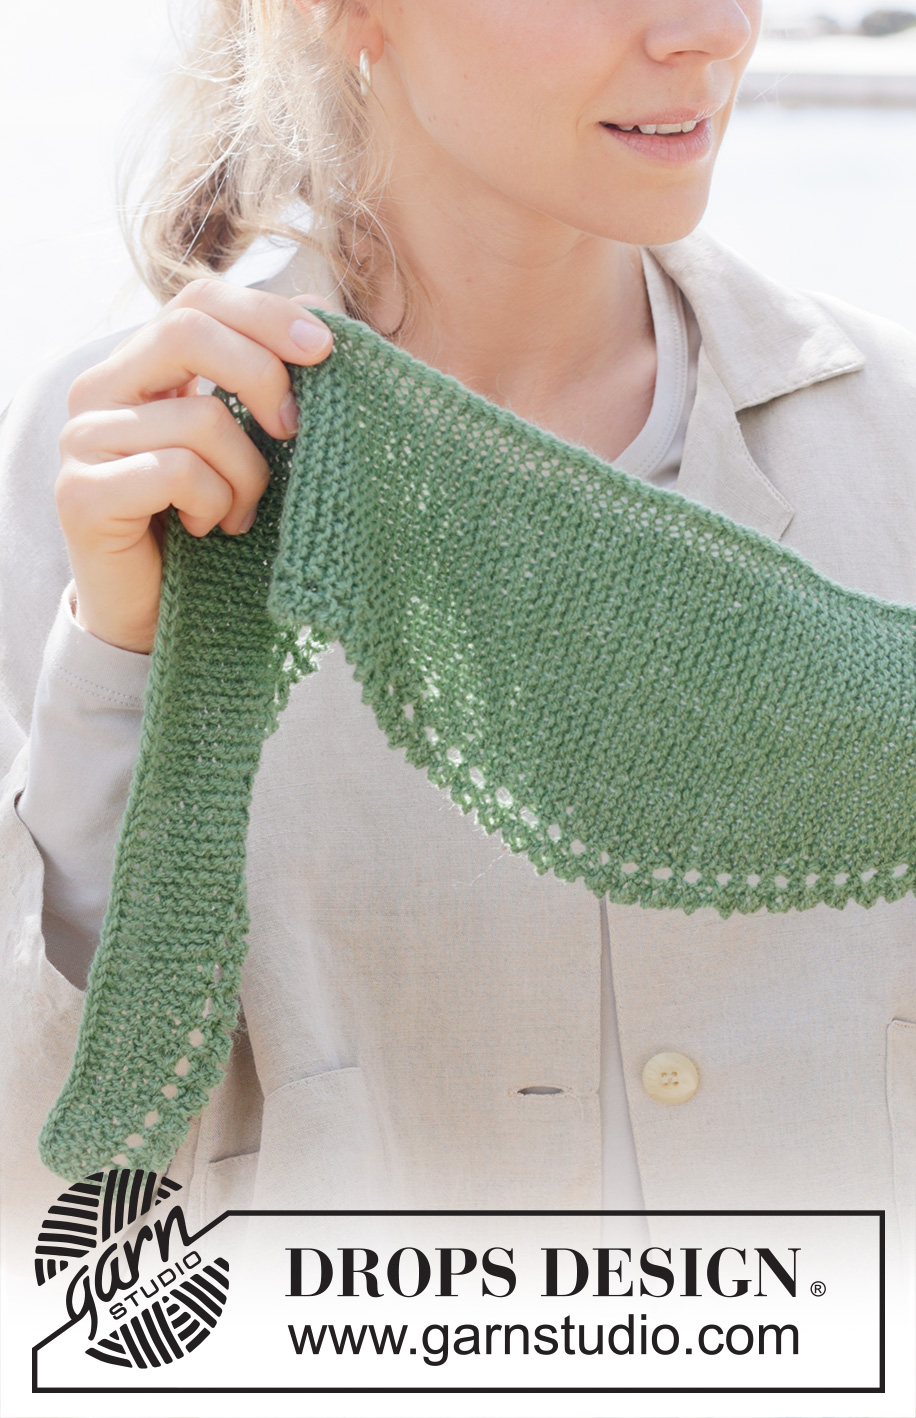
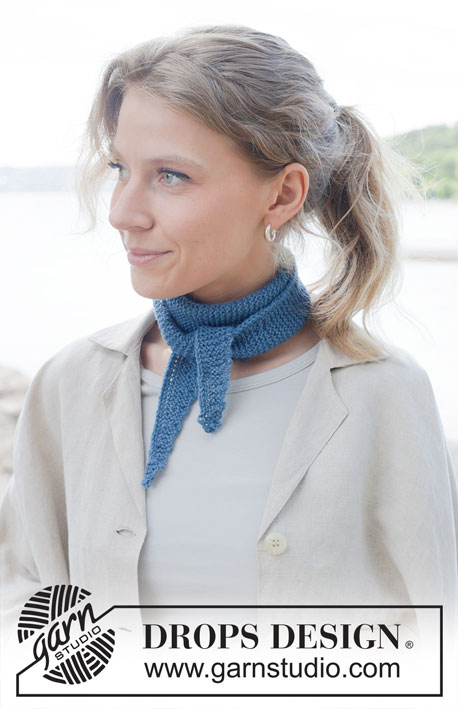
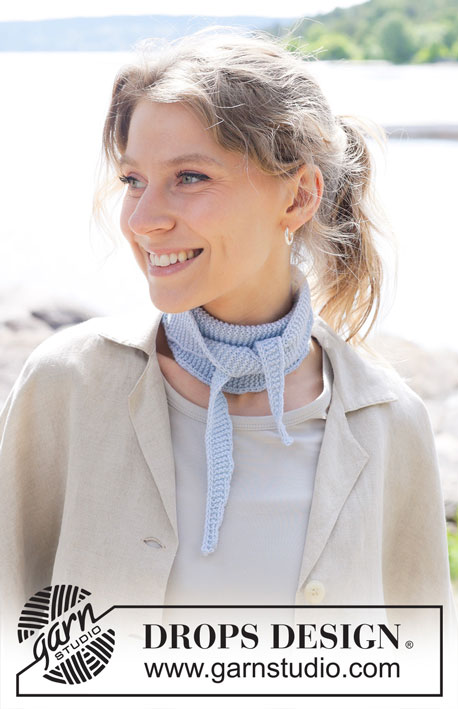
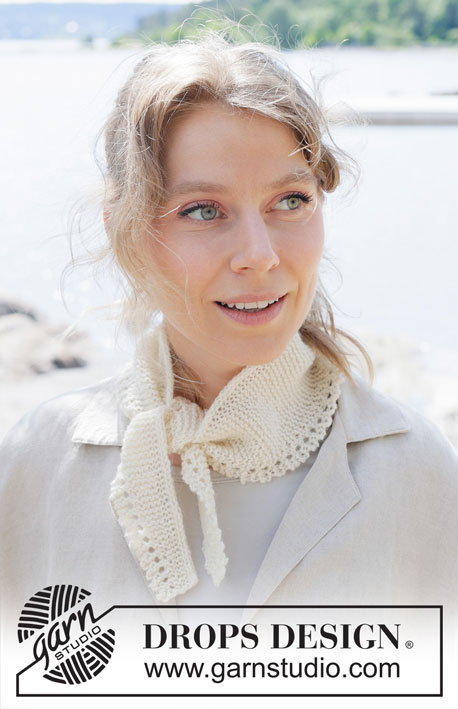
Fern Valley Scarf#fernvalleyscarf |
|
 |
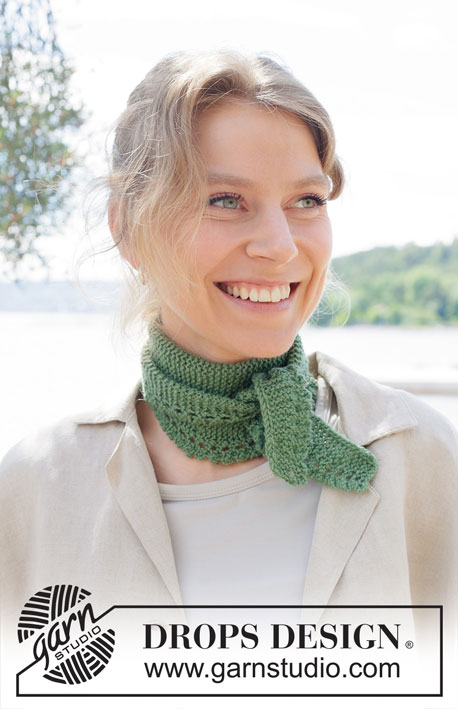 |
Knitted shawl in DROPS Flora. Piece is knitted sideways in garter stitch with picot edge.
DROPS 253-33 |
|
|
---------------------------------------------------------- EXPLANATION FOR THE PATTERN: ---------------------------------------------------------- GARTER STITCH (back and forth): Knit all rows. 1 ridge vertically = knit 2 rows. EDGE STITCHES: At the beginning of row from right side work 2 edge stitches as follows: Slip 1 stitch purlwise with strand in front of piece, knit 1. At the end of row from wrong side work 2 edge stitches as follows: Work until 2 stitches remain on needle, slip 1 stitch purlwise with strand in front of piece, knit 1. ---------------------------------------------------------- START THE PIECE HERE: ---------------------------------------------------------- SHAWL: Piece is worked back and forth, from side to side in garter stitch with lace pattern along the edge. SHAWL: Cast on 8 stitches on circular needle size 3,5 mm with DROPS Flora. Read EDGE STITCHES and GARTER STITCH in explanation above then work as follows: ROW 1 (= right side): Work 2 edge stitches, knit until 4 stitches remain, insert a marker thread here (move the marker thread upwards inside the outermost 4 stitches in the left side seen from right side), and knit the rest of row. ROW 2 (= wrong side): Knit until 2 stitches remain on needle and work 2 edge stitches. ROW 3 (= right side): Work 2 edge stitches, knit until marker thread, knit 2 together, make 2 yarn overs and work 2 stitches in each of the 2 last stitches on needle (work in front and back loop of stitches). There are 5 stitches and 2 yarn overs after marker thread. ROW 4 (= wrong side): Slip first stitch knitwise, knit 1, pass slipped stitch over, knit 1, pass back loop on right needle over the front stitch (2 stitches cast off), knit 1, drop one yarn over off, knit the other yarn over, knit 1 (marker thread is here), and knit until 2 stitches remain and work 2 edge stitches. Work as 1st to 4th row one more time. Remember to follow the knitting tension! Continue to work as 1st to 4th row while at the same time on first row increasing 1 stitch by making 1 yarn over before marker thread. On next row knit yarn over twisted to avoid holes. Repeat increase every 10th row, increase before marker thread so that there are more and more stitches in garter stitch. Work and increase like this until piece measures 50 cm in length, there are approx. 31 stitches on needle and piece measures approx. 13 cm in width. Work 16 rows pattern as before without increases. Continue to work as 1st to 4th row while at the same time on first row decreasing 1 stitch, decrease by knitting 2 together before marker thread from right side. Repeat decrease every 10th row until 8 stitches remain on needle. Work 8 rows pattern as before without decrease and cast off by knitting. Piece measures approx. 103 cm. Cut and fasten the yarn. |
|
Have you finished this pattern?Tag your pictures with #dropspattern #fernvalleyscarf or submit them to the #dropsfan gallery. Do you need help with this pattern?You'll find 13 tutorial videos, a Comments/Questions area and more by visiting the pattern on garnstudio.com. © 1982-2026 DROPS Design A/S. We reserve all rights. This document, including all its sub-sections, has copyrights. Read more about what you can do with our patterns at the bottom of each pattern on our site. |
|


With over 40 years in knitting and crochet design, DROPS Design offers one of the most extensive collections of free patterns on the internet - translated to 17 languages. As of today we count 324 catalogues and 12290 patterns translated into English (UK/cm). 12290
We work hard to bring you the best knitting and crochet have to offer, inspiration and advice as well as great quality yarns at incredible prices! Would you like to use our patterns for other than personal use? You can read what you are allowed to do in the Copyright text at the bottom of all our patterns. Happy crafting!
Post a comment to pattern DROPS 253-33
We would love to hear what you have to say about this pattern!
If you want to leave a question, please make sure you select the correct category in the form below, to speed up the answering process. Required fields are marked *.