
Categorías populares
¿Buscas un hilo?




























Comentarios / Preguntas (18)
 Katherine escribió:
Apologies - the chart is correct. I had a difficult time understanding the concept of knitting right to left. The pattern is beautiful 💐
03.11.2026 - 10:41
Katherine escribió:
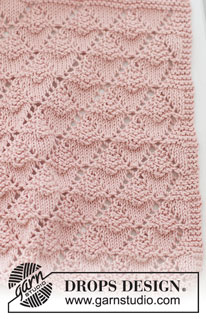
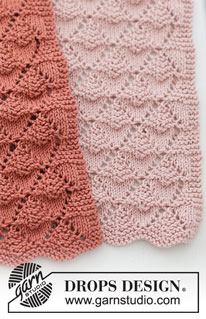
I deciphered the chart and the finished item although quite pretty doesn’t reflect the photos. What probably gives it away is the k1, sl1, psso - there is no loop to reflect the psso. That said though , the pattern is free so not complaining 🌸 i would love the chart that matches the image.
24.10.2026 - 07:29DROPS Design respondió:
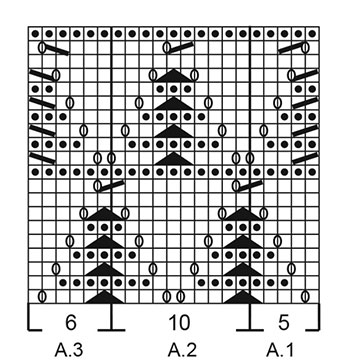
Dear Katherine, the diagram should match the pattern, pattern starts from RS with diagram A.1 then you repeat A2 and you finish with A.3. Follow diagram text for each symbol - should you have any further question please do not hesitate to use this section so that we can help. Happy knitting!
26.10.2026 - 08:43
Christine escribió:
Is there a text version of this pattern available please, I am struggling to follow the chart. Thanks
20.07.2025 - 12:49DROPS Design respondió:
Dear Christine, unfortunately we do not have a written out pattern for this, not only because these patterns are available in many languages, but also, because we believe, that instead of seeing only the very next step, with diagrams you can see the "big picture" as how stitches and rows relate to each other. However, we do have a tutorial on how to read a diagram, here: https://www.garnstudio.com/lesson.php?id=68&cid=19 , and also, don't forget, yo can always ask for help (either in person or in e-mail) from the store you bought your DROPS yarn from. Happy Knitting!
20.07.2025 - 13:00
 Brenda escribió:
Cómo se tejen las lazadas en la siguiente vuelta? Retorcidas?
30.06.2025 - 23:30
 Renate Bjørndal escribió:
Når man strikker vrangsiden av diagrammet, skal man begynne på A3?
02.02.2025 - 15:49DROPS Design respondió:
Hei Renate. Ja, det stemmer. Les gjerne mer under: Tips & Hjelp - DROPS Leksjoner - Les en oppskrift - Hvordan lese strikkediagrammer. mvh DROPS Design
10.02.2025 - 12:28
 Margaret Tabar escribió:
Thank you for the response. I'll give a try and see if it works for me.
17.04.2024 - 21:18
Margaret Tabar escribió:
Addendum: No matter where I take stitches from for A2, I come up with 11 stitches: 1 stitch for the Slip 1, K2tog, PSSO. Then 3 knit stitches. YO. Knit 1, YO, K3 , then the second Slip 1, K2tog, PSSO. That's 11 stitches the way I count. Call me Baffled.
17.04.2024 - 01:37DROPS Design respondió:
Dear Mrs Tabar, the last stitch of A.1 will be worked together with the first stitch in A.2, then work the last 2 sts of each A.2 together with the first stitch next A.2/A.3 at the end of the row. This way you should always get the correct number of sts in each diagram, as every decrease is compensated with a yarn over. If needed, add markers between each diagram and on next row from WS, just make sure you get the correct number of sts for each diagram. Happy knitting!
17.04.2024 - 08:45
Margaret Tabar escribió:
When I knit the 5 stitches (plus the YO) of A1, then do A2, I have too many stitches. Should the "Slip 1" be taken from A1? That's I did I have 11 stitches in A2 (for the first repeat). Your chart helps don't cover Slip 1, K2tog, PSSO. And those are very confusing. HELP.
17.04.2024 - 01:26
 Birgit Eklund Pedersen escribió:
“Strik 4 pinde ret. Derefter fortsættes der efter diagram fra retsiden”. Hvordan kan 5.pind være retsiden? Vh Birgit
31.03.2024 - 13:21DROPS Design respondió:
Hej Birgit, hvis du lader 1.pind være en retpind, så vil 5.pind ogås være en retpind. Hvis du vil have retten på den anden side, må du strikke en pind mere eller mindre :)
05.04.2024 - 11:36
Leti Vazquez Metcalfe escribió:
Hi. Do you have a video of how to make this pattern. As a beginner I'm having a hard time trying to figure this out. I don't knowcwhat is meant by A.1 and A.2 and 3. Where is it on the pattern. Thank you for any help.
14.11.2023 - 15:15DROPS Design respondió:
Dear Mrs Vazquez Metcalfe, read more about diagrams here; from right side you will work 3 sts in garter stitch, then the 5 sts in A.1 (see diagram), then you will repeat the 10 sts in A.2 until 9 sts remain, and finish with the 6 sts in A.3 and 3 sts in garter stitch. You can insert markers between each diagram to make sure you will always have the correct number of sts in each diagram.
15.11.2023 - 07:51
|
|||||||||||||||||||
Bright Diamonds#dropsbrightdiamonds |
|||||||||||||||||||
 |
 |
||||||||||||||||||
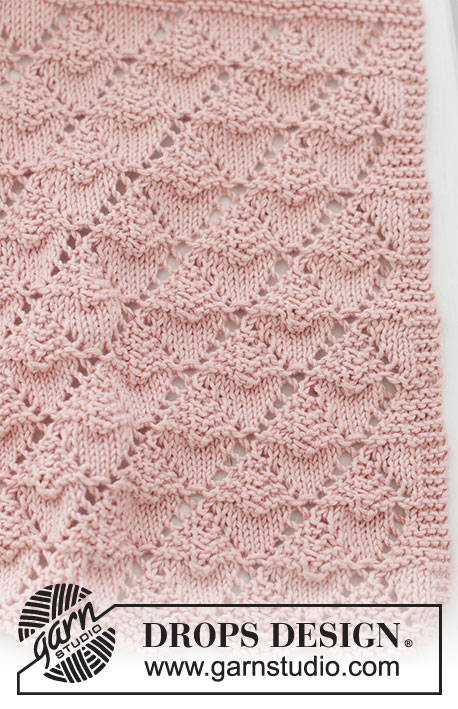
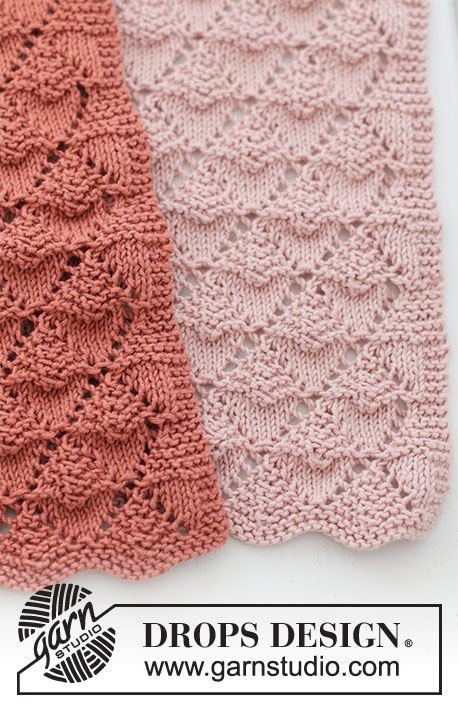
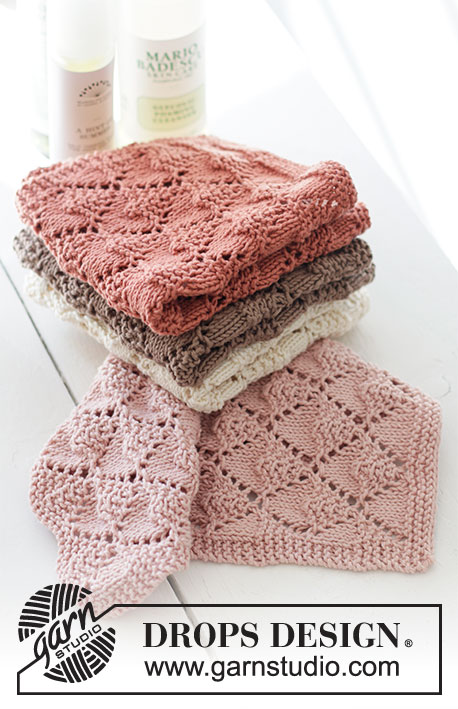
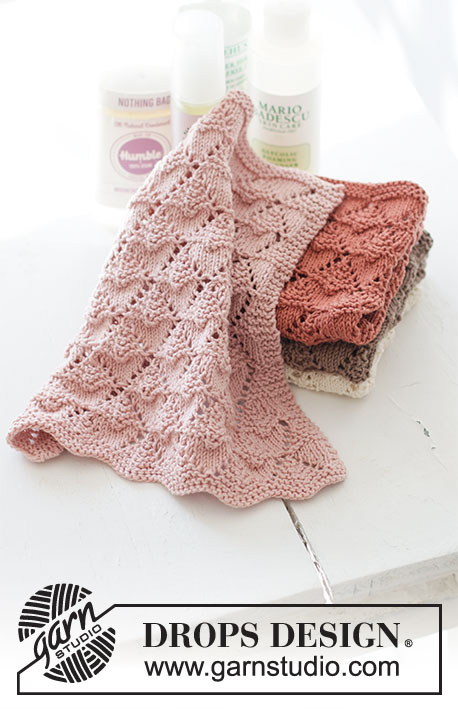
Paños de punto con patrón de calados en DROPS Safran. La pieza está tejida de ida y vuelta.
DROPS Extra 0-1491 |
|||||||||||||||||||
|
EXPLICACIONES PARA REALIZAR EL PATRÓN: ------------------------------------------------ SURCO/PUNTO MUSGO (tejido de ida y vuelta): Tejer todas las hileras de derecho. 1 surco en altura = tejer 2 hileras de derecho. PATRÓN: Ver diagrama A.1, A.2 y A.3. ------------------------------------------------ COMENZAR LA PIEZA AQUÍ: ------------------------------------------------ PAÑOS – RESUMEN DE LA PIEZA: Los paños se tejen de ida y vuelta en la aguja. PAÑO: Montar 67 puntos con aguja tamaño 2.5 mm y Safran. Tejer 2 SURCOS sobre todos los puntos – leer descripción arriba. Después continuar tejiendo de acuerdo a los diagramas, de la manera siguiente por el lado derecho: Tejer 3 puntos en PUNTO MUSGO – ver descripción arriba, A.1 (= 5 puntos), A.2 sobre 50 puntos (= 5 veces a lo ancho), A.3 sobre 6 puntos y 3 puntos en punto musgo. ¡RECORDAR MANTENER LA MISMA TENSIÓN DE TEJIDO DE LA MUESTRA! Continuar a tejer así, de acuerdo a los diagramas, hasta que la pieza mida aprox. 25 cm; terminar después de la hilera 10 o de la hilera 20 de los diagramas. Tejer 2 surcos, después rematar de derecho en la hilera siguiente. Cortar y rematar el hilo. Tejer 1 paño en cada color. |
|||||||||||||||||||
Explicaciones del diagrama |
|||||||||||||||||||
|
|||||||||||||||||||
 |
|||||||||||||||||||
¿Terminaste este patrón?Entonces, etiqueta tus fotos con #dropspattern #dropsbrightdiamonds o envíalas a la galería #dropsfan. ¿Necesitas ayuda con este patrón?Encontrarás 8 videos tutoriales, un espacio para comentarios/preguntas y más visitando la página del patrón en garnstudio.com © 1982-2026 DROPS Design A/S. Todos los derechos reservados. Este documento, incluyendo todas sus sub-secciones, está protegido por los derechos de autor (copyright). Lee más acerca de lo que puedes hacer con nuestros patrones en la parte de abajo de cada patrón de nuestro sitio. |
|||||||||||||||||||



Con más de 40 años en el diseño de modelos de punto y de ganchillo, DROPS Design ofrece una de las más vastas colecciones de patrones gratuitos en el internet - traducidos en 17 idiomas. Al día de hoy, contamos con 333 catálogos y 12536 patrones - de los cuales 12030 están traducidos en español.
Nosotros trabajamos con mucho esmero para brindarte lo mejor que las labores de punto y ganchillo tienen para ofrecer,inspiración y consejos, así como hilos de magnífica calidad a precios increíbles! Te gustaría usar nuestros patrones para otro fin además del uso personal? Puedes leer acerca de lo que estás permitida a hacer en el texto de Copyright en la parte de abajo de todos nuestros patrones. Felices labores!
Escribe un comentario sobre DROPS Extra 0-1491
¡Nos encantaría saber qué piensas acerca de este patrón!
Si quieres escribir una pregunta referente al patrón, por favor asegúrate de elegir la categoría correcta en el formulario debajo, para acelerar el proceso de respuesta. Los campos obligatorios están marcados con un *.