
Categorías populares
¿Buscas un hilo?


Comentarios / Preguntas (9)
![]() Jenny Douglas escribió:
Jenny Douglas escribió:
On the neck warmer, after the ridge of garter stitch is the first row of A3 and A 4 the right side or the wrong side? And on the subsequent rows of A3/4, is it always a KNIT stitch between the sections? Thank you
23.12.2022 - 15:17DROPS Design respondió:
Dear Jenny, since the ridge is worked over 2 rows, the third row (which start A.3 and A.4) is on the right side. Since the stitch between the sections always has to be a knit stitch on the right side, when working the wrong side you will purl this stitch. Happy knitting!
26.12.2022 - 00:04
![]() Isabel Gillissie escribió:
Isabel Gillissie escribió:
I received 10- 50g balls of Mohair by SINDAR. It's a lovely amathyst colour. Do you have any suggestions as to what I can do with it. I am an experienced enough knitter, 83 years old and I would like to knit something for myself. I would appreciate your help Thank you. Isabel
04.01.2022 - 19:44DROPS Design respondió:
Dear Isabel, please understand that these patterns are made for, and made avalaible to support DROPS yarns, therefore we cannot help you with yarns from other brands. Thank you for understanding. Happy Knitting!
05.01.2022 - 02:16
![]() Denise Enright escribió:
Denise Enright escribió:
Northern Breeze is worked charts A 3 and A4 over 47 stitches.. Beginning with one knit garter ridge row… Knit the first stitch( or I my case I slip it)..The right side row is worked fine…Row 2 ..WS is my dilemma.. A4 across to A3 ..I end up with more stitches… Please advise thank you… This pattern should’ve been written out for even experienced knitters like me
24.12.2021 - 16:47DROPS Design respondió:
Dear Denise, you work A.3 over A.3 and A.4 over A.4, according to the diagram, which shows all rows in the pattern as seen from the RS. Happy knitting!
31.12.2021 - 20:43
![]() Nicola escribió:
Nicola escribió:
Thank you for the prompt reply! I had already started another project on the big knitting needles and will try this pattern again when I am done (and let you know).
30.11.2019 - 21:36
![]() Nicola escribió:
Nicola escribió:
Hi, I really love the look of this pattern but cannot get it right. Twentyfive times over I have started (good thing it's 21 stitches for the headband). Either I end up with a 1x1 rib, or a moss stitch. Can't figure out what I am doing wrong. Instruction for 1st row of pattern has a knit 1 in the middle. Should that be a purl 1 on the wrong side? (I see a vertical line of knits on the headband.) Do you knit 1 after the garter stitch at beginning/end on the wrong side too?
28.11.2019 - 17:02DROPS Design respondió:
Dear Nicola, you should always have from RS: 1 edge st in garter st, K1, A.1 = 8 sts (= P2 tog, P1, K1, P1, K1, P1, K1, YO), K1 (= middle stitch), A.2 = 8 sts (= YO, K1, P1, K1, P1, K1, P1, P2 tog), K1, 1 edge st in garter st = 21 sts. Work then 2nd row from WS: 1 edge st in garter st, P1, A.2 (= K2, P1, K1, P1, K1, P1, K1), P1 (= middle st), A.1 (= K1, P1, K1, P1, K1, P1, K2), P1, 1 edge st in garter st. Hope that helps you to continue diagram. Happy knitting!
29.11.2019 - 08:19
![]() Nancy escribió:
Nancy escribió:
You write all your patterns in chart form. I am one of those people who prefer my patterns written out. I can write out the chart but was wondering if you have the patterns already written out.
02.08.2019 - 03:50DROPS Design respondió:
Dear Nancy, unfortunately we can't write out every chart. Please note that diagrams have to be read from bottom to top, right to left, and every square is equal to a stitch. Happy knitting!
02.08.2019 - 19:04
![]() Birgit Berglund escribió:
Birgit Berglund escribió:
Jag undrar om jag ska sticka med dubbelt garn? (2 trådar?)
17.04.2019 - 19:57DROPS Design respondió:
Hej. Ja du ska sticka med dubbelt garn (2 trådar). Lycka till!
23.04.2019 - 10:15
![]() Marga Vitale escribió:
Marga Vitale escribió:
Ich finde ihre Erklärung sehr gut aber ich suche Anleitungen für hauspuschen gr. 35 können Sie mir da auch weiter helfen in deutsch. Vielen Dank marga vitale.
16.02.2019 - 18:46DROPS Design respondió:
Liebe Frau Vitale, hier finden Sie unsere Anleitungen für Hausschuhe. Viel Spaß beim stricken!
18.02.2019 - 11:11
![]() Ghada Gamil escribió:
Ghada Gamil escribió:
How to assembly the neck warmer please show us a draw or a video to do that thank you
09.02.2019 - 21:16DROPS Design respondió:
Dar Mrs Gamil, you sew together the first half of cast on edge (seen from RS) to the 2nd half of cast off edge (from middle of cast off edge to the left side, seen from RS). Happy knitting!
11.02.2019 - 09:24
|
|||||||||||||
Northern Breeze#northernbreezeset |
|||||||||||||
 |
 |
||||||||||||
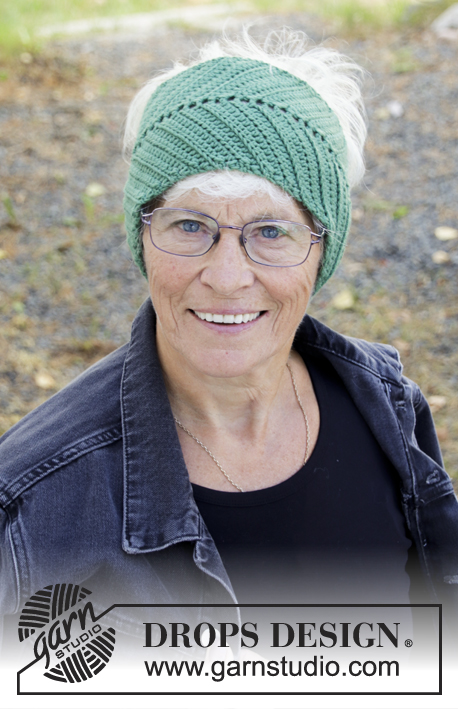
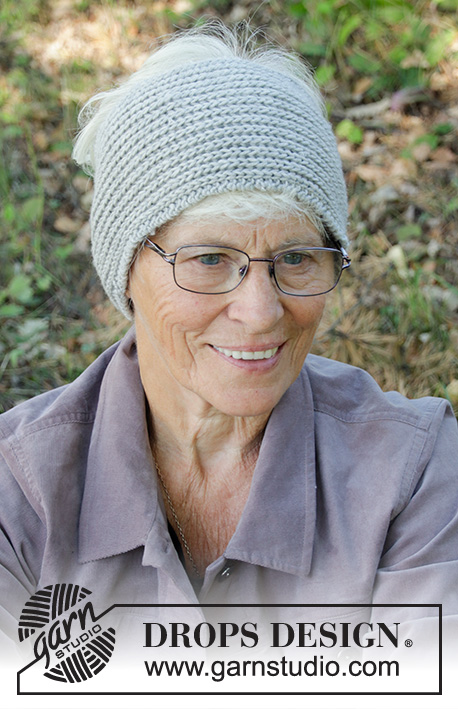
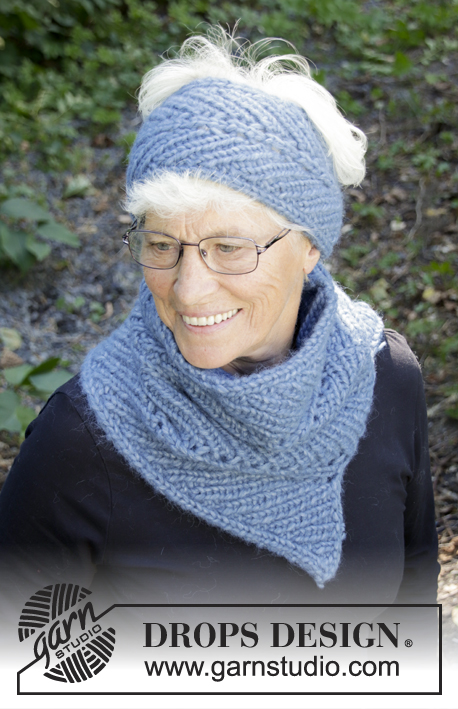
Banda para la cabeza de punto en 2 hilos DROPS Air. La pieza está tejida de lado a lado en resorte con inclinación. Cuello de punto en 2 hilos DROPS Air. La pieza está tejida de lado a lado en resorte con inclinación.
DROPS 192-53 |
|||||||||||||
|
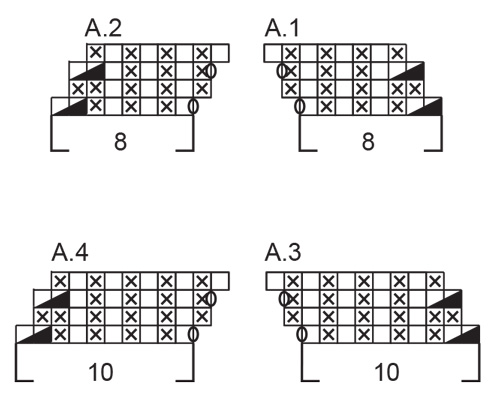
EXPLICACIÓN PARA REALIZAR EL PATRÓN: ----------------------------------------------------- PUNTO MUSGO (de ida y vuelta): 1 surco = tejer 2 hileras de derecho. PATRÓN: Banda para la cabeza: Ver diagramas A.1 y A.2. Cuello: Ver diagramas A.3 y A.4. Los diagramas muestran todas las hileras del patrón vistas por el lado derecho. ----------------------------------------------------- COMENZAR LA PIEZA AQUÍ ----------------------------------------------------- BANDA PARA LA CABEZA – RESUMEN CORTO DE LA PIEZA: Tejer la pieza de ida y vuelta en agujas de doble punta, de lado a lado. Unir la pieza con una costura en el centro de la parte de atrás cuando esté terminada. BANDA PARA LA CABEZA: Montar 21 puntos en agujas tamaño 7 mm con 2 hilos Air. Tejer 1 surco en PUNTO MUSGO – leer explicación arriba. Ahora tejer el patrón de la manera siguiente: 1 punto de orillo en punto musgo, 1 derecho, A.1 (= 8 puntos), 1 derecho, A.2 (= 8 puntos), 1 derecho, 1 punto de orillo en punto musgo. ¡RECORDARSE DE MANTENER LA MISMA TENSIÓN DE TEJIDO DE LA MUESTRA! Continuar de ida y vuelta así hasta que la pieza mida 48-52 cm. Tejer 1 surco sobre todos los puntos. Rematar. ENSAMBLAJE: Coser la orilla de remate a la orilla de montaje. Coser un punto con el otro para evitar que quede una costura abultada. ----------------------------------------------------- CUELLO – RESUMEN CORTO DE LA PIEZA: Tejer la pieza de ida y vuelta en aguja circular, de lado a lado. Unir la pieza con una costura en el lado cuando esté terminada. CUELLO: Montar 47 puntos en aguja circular tamaño 8 mm con 2 hilos Air en las dos tallas. Tejer 1 surco en PUNTO MUSGO – leer explicación arriba. Ahora tejer el patrón de la manera siguiente: 1 punto de orillo en punto musgo, 1 derecho, * A.3 (= 10 puntos), 1 derecho, A.4 (= 10 puntos), 1 derecho *, tejer de *a* 2 veces en total, 1 punto de orillo en punto musgo. ¡RECORDARSE DE MANTENER LA MISMA TENSIÓN DE TEJIDO DE LA MUESTRA! Continuar de ida y vuelta así hasta que la pieza mida 58-63 cm. Tejer 1 surco. Rematar. ENSAMBLAJE: Coser la mitad de la orilla de remate a la mitad de la orilla de montaje, para formar una abertura en la parte de abajo del cuello. Coser un punto con el otro para evitar que quede una costura abultada. Cortar y rematar el hilo. |
|||||||||||||
Explicaciones del diagrama |
|||||||||||||
|
|||||||||||||
 |
|||||||||||||
¿Terminaste este patrón?Entonces, etiqueta tus fotos con #dropspattern #northernbreezeset o envíalas a la galería #dropsfan. ¿Necesitas ayuda con este patrón?Encontrarás 14 videos tutoriales, un espacio para comentarios/preguntas y más visitando la página del patrón en garnstudio.com © 1982-2026 DROPS Design A/S. Todos los derechos reservados. Este documento, incluyendo todas sus sub-secciones, está protegido por los derechos de autor (copyright). Lee más acerca de lo que puedes hacer con nuestros patrones en la parte de abajo de cada patrón de nuestro sitio. |
|||||||||||||


Con más de 40 años en el diseño de modelos de punto y de ganchillo, DROPS Design ofrece una de las más vastas colecciones de patrones gratuitos en el internet - traducidos en 17 idiomas. Al día de hoy, contamos con 324 catálogos y 12290 patrones - de los cuales 11675 están traducidos en español.
Nosotros trabajamos con mucho esmero para brindarte lo mejor que las labores de punto y ganchillo tienen para ofrecer,inspiración y consejos, así como hilos de magnífica calidad a precios increíbles! Te gustaría usar nuestros patrones para otro fin además del uso personal? Puedes leer acerca de lo que estás permitida a hacer en el texto de Copyright en la parte de abajo de todos nuestros patrones. Felices labores!
Escribe un comentario sobre DROPS 192-53
¡Nos encantaría saber qué piensas acerca de este patrón!
Si quieres escribir una pregunta referente al patrón, por favor asegúrate de elegir la categoría correcta en el formulario debajo, para acelerar el proceso de respuesta. Los campos obligatorios están marcados con un *.