Comentarios / Preguntas (57)
Theresa J escribió:
Do you work dc in back loops on all sts or just round 2?
30.12.2016 - 10:06
![]() Anna Smith escribió:
Anna Smith escribió:
Thank you so much for your quick response. I just love this hat. Thank you for sharing. 😊
15.12.2016 - 14:23
![]() Anna Smith escribió:
Anna Smith escribió:
I am making the s/m size hat. I just want to clarify that after I complete round 12 I continue with sc until hat measures 5-6" then I decrease every 7th/8th st. How many rows do I do this decreasing? And then what do I do for the remainder of the hat? Thank you
15.12.2016 - 03:04DROPS Design respondió:
Dear Mrs Smith, after last inc round work sc until hat measures 5-6", then work stripes without dec: 2 rounds black, 3 rounds brown, then work next round with black dec 12 sc evenly, then work without dec: 4 rounds black and 2 rounds brown. Happy crocheting!
15.12.2016 - 09:39
![]() Ylva escribió:
Ylva escribió:
Hei, er på første fargebytte, og man kan jo se fargebytte siden man bare hekler rundt og rundt og ikke med kjm i slutten av runden. Er det meningen?
10.12.2015 - 21:48DROPS Design respondió:
Hej Ylva, Ja sådan er denne hue hæklet, men vil du hellere afslutte omgangen med en kjm, så gør du bare det. God fornøjelse!
11.12.2015 - 11:16Maria Jenica escribió:
Hi! do you have a video for this beanie? hope you can post one, thanks!
05.12.2015 - 03:44DROPS Design respondió:
Dear Maria, there is no specific video to that pattern but you will find a video for each technique used in that pattern under the tab "videos". Happy crocheting!
07.12.2015 - 09:44Lori escribió:
So I am on row ten, have a very loose tension and have counted stitches very carefully but the shape of my hat is a cone. Any idea what i am doing wrong? I've redone it several times and still get the same results. What am i missing?
28.11.2015 - 06:58DROPS Design respondió:
Dear Lori, check and keep the correct tension (17 dc (UK-English) = 10 cm in width) and increase as stated in the pattern - you should get a rounded hat. Happy crocheting!
30.11.2015 - 10:22
![]() Rowin Bakker escribió:
Rowin Bakker escribió:
Ik ben nu bij het stuk aangekomen dat ik moet minderen, in de beschrijving staat niet hoe je de muts moet afwerken. Hoe krijg ik de laatste toer recht? Aangezien je niet de toer afsluit maar gelijk doorgaat.
26.11.2015 - 13:21DROPS Design respondió:
Hoi Rowin. Ik zou gewoon afsluiten met een hv in de eerste v op de toer en draad afhechten.
26.11.2015 - 14:23Lori escribió:
I have done the first 6 rounds several times, recounted the stitches and everything else I can think of and it's not staying flat. Is it supposed to create a cap shape already?
25.11.2015 - 06:49DROPS Design respondió:
Dear Lori, working the round 5 will create a small shape, continue as stated to get the final result. Happy crocheting!
25.11.2015 - 10:10Cindy escribió:
Thank you for your answer. I went ahead and made two hats doing using both loops on the stripe. They turned out great and now going to make one using the BLO. thx again.
09.11.2015 - 17:37Cindy escribió:
I can't find the videos. I am confused about your comment to work BLO before a stripe pattern. Does that mean the stripe pattern is then worked through BOTH loops? thx.
03.11.2015 - 18:48DROPS Design respondió:
Dear Cindy, the hat is worked in the round while all sts are worked in the back loop of sts all the round, including when you are working the stripes. Happy crocheting!
04.11.2015 - 09:07
Carmel |
|
 |
 |
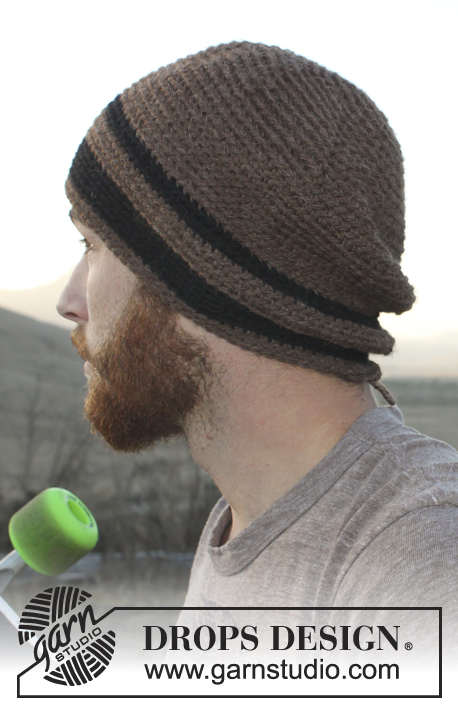
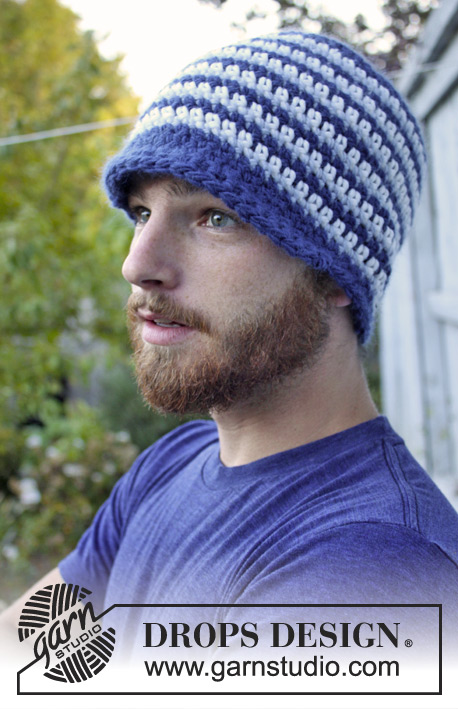
Gorro DROPS para hombres, a ganchillo, en “Nepal”. Talla: S – XL.
DROPS Extra 0-980 |
|
|
INFORMACIÓN PARA LA ELABORACIÓN DEL TRABAJO: Después del último p.b. de la vta, continuar hacia la vta sig con 1 p.b. en el p.b. sig (= primer p.b. de la vta anterior). NOTA: Insertar un marcapuntos al inicio de la vta entre el último p.b. y el primer p.b. de la vta, mover el marcapuntos hacia arriba. Trabajar los p.b. insertando la ag en las hebras posteriores de los pts para crear una textura con franjas. CÍRCULO MÁGICO: Empezar con esta técnica para evitar que se forme un agujero en el centro (en vez del anillo de cadenas): Sostener la punta del hilo y enrollarlo una vez alrededor del dedo índice para formar un bucle. Sostener el bucle con el pulgar izquierdo y el dedo medio, colocar el hilo sobre el dedo índice izquierdo. Insertar la ag a través del bucle, hacer una lazada y extraer el hilo a través del bucle, hacer 1 cad, después hacer p.b. alrededor del bucle. Cuando se ha alcanzado el número de p.b. deseado, tirar de la punta del hilo para apretar el bucle. Asegurar la punta del hilo por el lado de atrás. Continuar trabajando en redondo, en espiral. TIP PARA DISMINUCIÓN: Trabajar juntos aprox cada 7º/8º p.b. – 6º/7º p.b. de la vta. Trabajar 2 p.b. juntos de la manera sig: Insertar la ag en el primer p.b. y extraer el hilo, insertar la ag en el p.b. sig y extraer el hilo, hacer una lazada y extraer el hilo a través de todos los pts en la ag. ------------------------------------------------------ GORRO: Con ag de ganchillo tamaño 5 mm y café hacer un CÍRCULO MÁGICO – ver arriba, o mon 4 cad y formar un anillo con 1 p.bjs en la 1ª cad. LEER INFORMACIÓN PARA LA ELABORACIÓN DEL TRABAJO! VUELTA 1: Hacer 8 p.b. en el círculo mágico/anillo de cad. Ahora hacer p.b. insertando la ag en las hebras posteriores de los pts. VUELTA 2: Hacer 2 p.b. en cada p.b. = 16 p.b. VUELTA 3: * 1 p.b. en el primer p.b., 2 p.b. en el p.b. sig *, repetir de *a* = 24 p.b. VUELTA 4: * 1 p.b. en los 2 p.b. sig, 2 p.b. en el p.b. sig *, repetir de *a* = 32 p.b. VUELTA 5: Hacer 1 p.b. en cada p.b. = 32 p.b. RECUERDE MANTENER LA MISMA TENSIÓN DE LA MUESTRA! VUELTA 6: * 1 p.b. en los 3 p.b. sig, 2 p.b. en el p.b. sig *, repetir de *a* = 40 p.b. VUELTA 7: * 1 p.b. en los 4 p.b. sig, 2 p.b. en el p.b. sig *, repetir de *a* = 48 p.b. VUELTA 8: * 1 p.b. en los 5 p.b. sig, 2 p.b. en el p.b. sig *, repetir de *a* = 56 p.b. VUELTA 9: * 1 p.b. en los 6 p.b. sig, 2 p.b. en el p.b. sig *, repetir de *a* = 64 p.b. VUELTA 10: * 1 p.b. en los 7 p.b. sig, 2 p.b. en el p.b. sig *, repetir de *a* = 72 p.b. VUELTA 11: * 1 p.b. en los 8 p.b. sig, 2 p.b. en el p.b. sig *, repetir de *a* = 80 p.b. VUELTA 12: * 1 p.b. en los 9 p.b. sig, 2 p.b. en el p.b. sig * repetir de *a* = 88 p.b. Terminar los aum en la talla S/M aquí, continuar haciendo p.b. en redondo. VUELTA 13: * 1 p.b. en los 10 p.b. sig, 2 p.b. en el p.b. sig *, repetir de *a* = 96 p.b. Terminar los aum en la talla L/XL aquí, continuar haciendo p.b. en redondo. Cuando la pieza mida 12-15 cm, hacer p.b. como antes y cambiar la combinación de colores de la manera sig: 2 vtas negro, 3 vtas café, 1 vta negro y, en esta vta, dism 12-14 p.b. distribuidos equitativamente – LEER TIP PARA DISMINUCIÓN (= 76-82 p.b. restantes), 4 vtas negro, 2 vtas café. El gorro mide aprox 20-23 cm a partir de la parte de arriba. Asegurar los hilos. |
|
¿Terminaste este patrón?Entonces, etiqueta tus fotos con #dropspattern o envíalas a la galería #dropsfan. ¿Necesitas ayuda con este patrón?Encontrarás 7 videos tutoriales, un espacio para comentarios/preguntas y más visitando la página del patrón en garnstudio.com © 1982-2025 DROPS Design A/S. Todos los derechos reservados. Este documento, incluyendo todas sus sub-secciones, está protegido por los derechos de autor (copyright). Lee más acerca de lo que puedes hacer con nuestros patrones en la parte de abajo de cada patrón de nuestro sitio. |
|


Escribe un comentario sobre DROPS Extra 0-980
¡Nos encantaría saber qué piensas acerca de este patrón!
Si quieres escribir una pregunta referente al patrón, por favor asegúrate de elegir la categoría correcta en el formulario debajo, para acelerar el proceso de respuesta. Los campos obligatorios están marcados con un *.