
Categorías populares
¿Buscas un hilo?
























Comentarios / Preguntas (24)
 Heather escribió:
It knits up quite small. I've had to pull mine out and will look for another pattern. It's a pity that there is a seam across the back. When I put it on the back did not fall lower in the back as shown in the picture. The concept is good, but it needs a few tweaks. Disappointing.
15.07.2026 - 17:58
 Heather Liberman escribió:
I understand that the pattern says that, But how does one then join the pieces for the back if the sections are on both sides of the sleeve?
09.07.2026 - 17:20
 Heather Liberman escribió:
The instructions for dividing the stitches onto stitch holders are puzzling. Surely the sleeves should be on each side and the pieces for the back should be alongside each other?
08.07.2026 - 18:15DROPS Design respondió:
Dear Mrs Liberman, piece is worked first in the round from the opening of piece (front pieces-like), so when coming to sleeve you will slip on a thread the first 80-104 sts for first sleeve, slip the next 86-122 sts for back piece on another thread, slip the next 80-104 ts on another thread for 2nd sleeve and slip the last 86-122 sts for back piece. You will then work each sleeve separately and sew the stiches of back piece on both threads for the seam mid back. Hope it can help. Happy knititng!
09.07.2026 - 09:12
 Viktoria escribió:
Mönstret är helt fel och stämmer inte överens med vad modellen har på sig. De måtten som är skrivna är inte vad som är på modellen. Ryggen ska mäta 34 cm max, på modellen är ryggen hela vägen ner till svanken, vilket är långt mer över vad som dtår i beskrivningen
20.06.2024 - 14:38
 Amanda Nissen escribió:
Resultatet stemmer på ingen måde overens med den bolero, der er vist på modellen. Opskriften er fulgt til punkt og prikke - korrekt garn og strikkefasthed. Ærmerne sidder tæt rundt om armen og armhulen og ryggen er markant kortere. Billedet burde skiftes ud med en bolero, der ligner det virkelige resultat. Jeg kan se, at jeg ikke er den første, som påpeger dette - jeg så desværre kommentarene for sent. Smadderærgeligt at have spildt alt den tid på et ubrugeligt produkt :(
09.08.2023 - 15:40
 Barbara Loeb escribió:
Bonjour, après avoir fini mon tricot je me trouve avec une large bande assez étroite pour un gilet et deux manches au milieu. Donc je n’ai rien compris au partage des mailles et de la suite. En tricotant en rond on ne peut même pas voir ce qu’on fait, impossible de poser le tricot à plat. Sur le schéma je me demande à quoi correspondent les 2 côtés droits. Merci!
22.10.2020 - 07:57DROPS Design respondió:
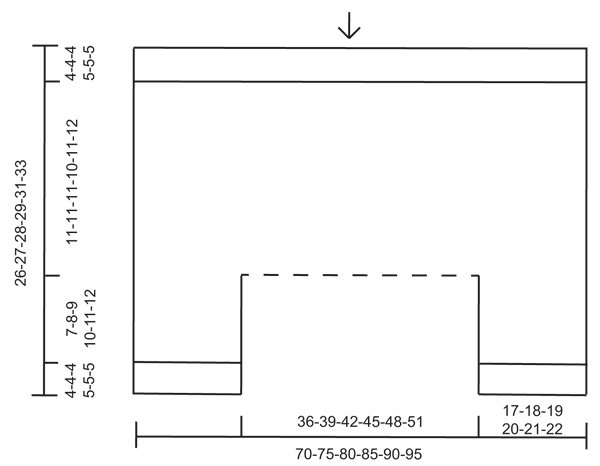
Bonjour Mme Loeb, regardez bien le schéma, la flèche indique le sens du tricot: vous commencez par tricoter en rond (la bordure au point de riz qui fait le tour = ouverture du gilet = devants, dos et encolure), puis vous allez tricoter les manches séparément (en rond toujours) = les 2 "branches" du bas du schéma - et mettre en attente les mailles au milieu des 2 côtés, entre les manches = la ligne pointillé. Quand les manches sont terminées (les 4-5 cm + 7-12 cm selon la taille), vous assemblez entre elles les mailles en attente (entre les manches) = approx. milieu du gilet, entre les manches donc. Bonne continuation!
22.10.2020 - 10:48
Danielle Jetté escribió:
Je ne comprend pas comment assembler le gilet. Pouvez vous m’eclairer?
21.05.2019 - 19:21DROPS Design respondió:
Bonjour Mme Jetté, posez votre ouvrage à plat comme le montre le schéma (= avec la bordure point de riz /ouverture du gilet en haut et les manches en bas de chaque côté. Vous avez au milieu, entre les manches 2 fils ou arrêts de mailles avec chacun 86-93-100-108-115-122 m , assemblez ces mailles ensemble en grafting (ligne pointillé en bas du schéma, entre les manches). Bon assemblage!
22.05.2019 - 08:36
Sonja Jonasson escribió:
På mönstret 129-27 fattas det något i beskrivningen. Det stämmer inte med ryggen. Med vänlig hälsning
12.12.2017 - 10:50DROPS Design respondió:
Hej Sonja, vad är det som inte stämmer? Kom ihåg att när du syr ihop mitt på ryggen blir den 30-32-34 cm från nacken och ned. Lycka till!
12.12.2017 - 11:37
 Jane Cox escribió:
A previous commenter asked a question in English but the answer was in another language w/o translation. Before I begin this bolero, I must understand whether the answers to my potential questions will be in English?
30.06.2016 - 14:07DROPS Design respondió:
Dear Mrs Cox, you are welcome to ask your question here in English, previous question in EN had the German flag and was then answered in German. Happy knitting!
30.06.2016 - 19:09
 Tina escribió:
Hallo, Ich habe eine Frage zu den Ärmeln, werden sie, nach der Teilung, in Hin- und Rückreihen gestrickt und dann zusammen genäht oder wie werden sie gestrickt? Liebe Grüße
03.01.2016 - 21:03DROPS Design respondió:
Nein, die Ärmel werden in Runden weitergestrickt.
10.01.2016 - 23:11
|
||||
Agapanthe#agapanthecardigan |
||||
 |
 |
|||
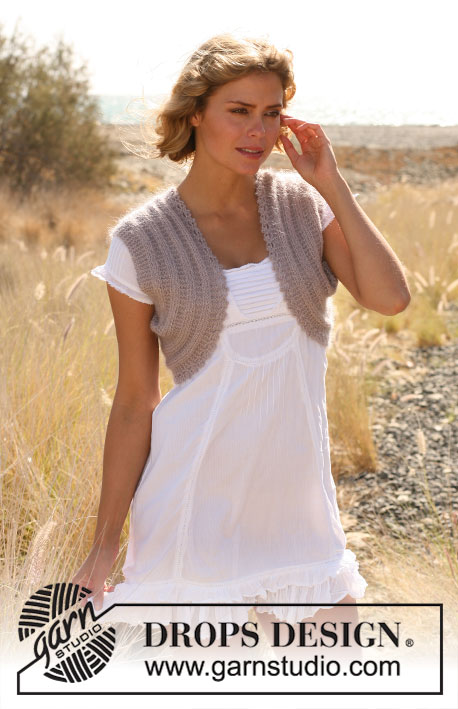
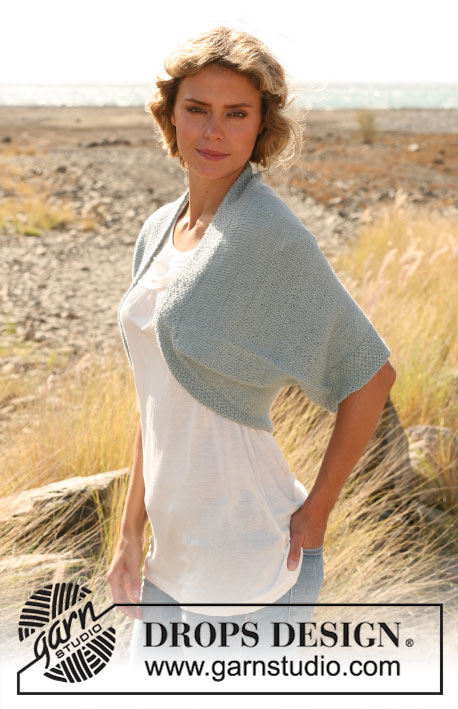
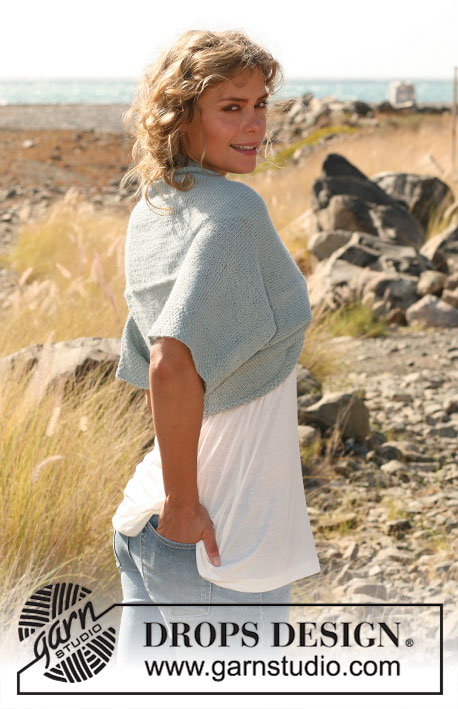
Bolero de punto DROPS en ”Alpaca”. Talla: S - XXXL.
DROPS 129-27 |
||||
|
TIP PARA LA ELABORACIÓN DEL TRABAJO: Antes de comenzar ver el diagrama para la dirección del tejido. PT ARROZ (doble en vertical): VUELTA 1: * 1 d., 1 r.*, repetir de *a *. VUELTA 2: derecho sobre derecho y revés sobre revés. VUELTA 3: revés sobre derecho y derecho sobre revés. Repetir vtas 2 y 3 hacia arriba. ------------------------------------------------------------------------ BOLERO: Leer arriba el TIP PARA LA ELABORACIÓN DEL TRABAJO. Se trabaja en redondo en ag circular. Mont 337-361-385-409-433-457 pts en ag circular tamaño 3 mm con Alpaca. Trabajar en PT ARROZ - ver explicaciones arriba. Cuando la labor mida 4-4-4-5-5-5 cm, continuar en pt jersey. AL MISMO TIEMPO en la 1ª vta, dism 5-3-5-1-3-5 pts repartidos = 332-358-380-408-430-452 pts. Continuar trabajando hasta que la labor mida 15-15-15-15-16-17 cm. Ahora dividir como sigue: Desl los primeros 80-86-90-96-100-104 pts a una ag circular tamaño 3 mm (= manga), desl los sig 86-93-100-108-115-122 pts a un gancho aux (= espalda), desl los sig 80-86-90-96-100-104 pts a otro gancho aux (= manga) y desl los sig 86-93-100-108-115-122 pts a otro gancho aux (=espalda). MANGA: = 80-86-90-96-100-104 pts. Insertar un marcapuntos (MP) y medir la labor desde aquí. Trabajar en pt jersey en redondo hasta que la labor mida 7-8-9-10-11-12 cm, ahora dism 5 pts repartidos = 75-81-85-91-95-99 pts. Trabajar en PT ARROZ hasta que la labor mida 11-12-13-15-16-17 cm. Rem flojo. Trabajar la otra manga. TERMINACIÓN: Hacer la costura horizontal en el centro de la espalda cosiendo los pts de los últimos 2 ganchos aux (= 86-93-100-108-115-122 pts en cada lado). |
||||
Explicaciones del diagrama |
||||
|
||||
 |
||||
¿Terminaste este patrón?Entonces, etiqueta tus fotos con #dropspattern #agapanthecardigan o envíalas a la galería #dropsfan. ¿Necesitas ayuda con este patrón?Encontrarás 7 videos tutoriales, un espacio para comentarios/preguntas y más visitando la página del patrón en garnstudio.com © 1982-2026 DROPS Design A/S. Todos los derechos reservados. Este documento, incluyendo todas sus sub-secciones, está protegido por los derechos de autor (copyright). Lee más acerca de lo que puedes hacer con nuestros patrones en la parte de abajo de cada patrón de nuestro sitio. |
||||






Con más de 40 años en el diseño de modelos de punto y de ganchillo, DROPS Design ofrece una de las más vastas colecciones de patrones gratuitos en el internet - traducidos en 17 idiomas. Al día de hoy, contamos con 333 catálogos y 12525 patrones - de los cuales 12019 están traducidos en español.
Nosotros trabajamos con mucho esmero para brindarte lo mejor que las labores de punto y ganchillo tienen para ofrecer,inspiración y consejos, así como hilos de magnífica calidad a precios increíbles! Te gustaría usar nuestros patrones para otro fin además del uso personal? Puedes leer acerca de lo que estás permitida a hacer en el texto de Copyright en la parte de abajo de todos nuestros patrones. Felices labores!
Escribe un comentario sobre DROPS 129-27
¡Nos encantaría saber qué piensas acerca de este patrón!
Si quieres escribir una pregunta referente al patrón, por favor asegúrate de elegir la categoría correcta en el formulario debajo, para acelerar el proceso de respuesta. Los campos obligatorios están marcados con un *.