
Categorías populares
¿Buscas un hilo?


Comentarios / Preguntas (16)
![]() Nicky escribió:
Nicky escribió:
A bit confused. I started with left front. It says to refer to back while decreasing in 2 different ways. Every 3cm and every 1.5cm later. Really difficult to follow.
26.05.2025 - 23:37DROPS Design respondió:
Dear Nicky, when front piece measures 16 cm decrease on one side only (towards side and not opening) as explained for the decreases on each side = 10 times every 3rd cm; and then increase for shoulder just as explained under back piece (3 increases started when piece measures 64-66-68-70-72-74-76 cm). Happy knitting!
27.05.2025 - 09:18
![]() Carmen Garrido García escribió:
Carmen Garrido García escribió:
Este patrón no se puede hacer con agujas circulares??
24.02.2025 - 14:35DROPS Design respondió:
Hola Carmen, sí, puedes trabajar este patrón con agujas circulares, de ida y vuelta.
02.03.2025 - 18:28
![]() Marcy Stein escribió:
Marcy Stein escribió:
I'm about to start the left front and the pattern says work like the right front but mirrored. I don't quite understand. How does one do that? In addition, does one reverse the ribbing, starting with P5/K3 with the four garter stitches at the end of the row (rather than at the beginning)? Thanks.
23.02.2025 - 04:27DROPS Design respondió:
Dear Marcy, mirrored means that the shaping will be in reverse. For example, in the right front piece (seen as worn), the edge st at side is on the left edge and 4 front band sts towards mid front are on the right edge. However, in the left front piece the edge st at side is on the right edge and 4 front band sts towards mid front are on the left edge. Therefore, the decreases for the V-neck will be on the opposite side than the right front piece (left edge, instead of right edge) while the armhole decreases are on the right edge (instead of the left edge, as in the right front piece). The rib is also in reverse, so instead of P5/k3, you work K5,p3. Happy knitting!
24.02.2025 - 01:03
![]() Bernadette Lehouillier escribió:
Bernadette Lehouillier escribió:
Regarding the inc tip I’m confused. Are the increases done in the four garter stitches then why does it say work increase stitches in stock in stitch?
16.02.2025 - 19:47DROPS Design respondió:
Hi Bernadette, You increase after/before the 4 garter stitches (so the garter stitches remain the same). That is why the new stitches are worked in stocking stitch. Happy knitting!
17.02.2025 - 07:08
![]() Marcy Stein escribió:
Marcy Stein escribió:
I'm confused about the "edge stitch" .... do you slip it or knit it?
25.12.2024 - 21:36DROPS Design respondió:
Dear Marcy, the knit stitch is usually worked in garter stitch back and forth, so it's always knitted. Happy knitting!
29.12.2024 - 20:44
![]() Åsa Lindgren escribió:
Åsa Lindgren escribió:
Hej! Det står i listan att jag kan ersätta 450 gram Drops bomull- Lin med 479 Gram Drops Safran , 2 trådar. Förstår inte riktigt. Är det totalt 479 gram Safran eller dubblar man till 958gram ? När det står 2 trådar?
14.08.2024 - 12:59DROPS Design respondió:
Hej Åsa. Det stämmer att du kan ersätta 450 gram DROPS Bomull-Lin med totalt 479 gram DROPS Safran (du ska inte dubbla mängden som uppges). Du stickar då med 2 trådar DROPS Safran. Mvh DROPS Design
16.08.2024 - 07:51
![]() Ute escribió:
Ute escribió:
Hallo! Ich stricke die Weste in M. Beim Rückenteil soll nach dem Bündchen glatt rechts gestrickt werden und dann sollen nach 16 cm die Abnahmen begonnen werden. Zählt bei den 16cm das Bündchen mit oder messe ich ab dem glatt rechts gestrickten Teil? Viele Grüße!
01.05.2023 - 14:57DROPS Design respondió:
Liebe Ute, die 16 cm messen Sie ab ganz unten, dh mit Bündchen und 2 cm nach Bündchen. Viel Spaß beim stricken!
02.05.2023 - 09:31
![]() Anja escribió:
Anja escribió:
\"Tipp zum Aufnehmen (gilt für das Aufnehmen an der Schulter): Innerhalb von 4 M. Krausrippe aufnehmen:\" Die aufgenommene Masche soll glatt weitergestrickt werden, wenn das innerhalb der 4 Krausrippenmaschen geschieht, wird das Maschenbild doch verkehrt (z.B. 2 Krausrippen, 1 M. glatt, 2 Krausrippen)? Das ist doch falsch, oder?
27.12.2021 - 20:49DROPS Design respondió:
Liebe Anja, es wird nach den ersten 4 KrausrippenMaschen am Anfang der Hinreihe (= rechte Schulter/Rückenteil) zugenommen und nach den letzten 4 KrausrippenMaschen am Ende der Hinreihe (= linke Schulter/Rückenteil) zugenommen - dh Sie stricken immer Glatt rechts mit 4 Maschen in Krausrippe gegen Ärmelloch. Viel Spaß beim stricken!
03.01.2022 - 09:15
![]() Anja escribió:
Anja escribió:
Ich möchte Bomull-Lin durch Cotton Light ersetzen, finde aber keinen Umrechnungsfaktor für diese 2 Garne. Habe Sie eine Idee?
21.11.2021 - 14:28DROPS Design respondió:
Liebe Anja, also Bomull-Lin gehört der Garngruppe C und Cotton Light der Garngruppe B, am besten benutzen Sie dann Paris oder DROPS Loves You 8 z.B. Hier lesen Sie mehr. Viel Spaß beim stricken!
22.11.2021 - 08:25Ina escribió:
Good day, on the back section, after the rib is done, the pattern says decrease stitches . According to my size I need to decrease 18 stitches. Do I do that all at once on one side or ??? Pattern is a bit unclear . Thanks
25.08.2017 - 18:00DROPS Design respondió:
Dear Ina, after the rib section, you've to decrease all the sections with 5 purl stitches to 4 purl stitches. Happy knitting!
25.08.2017 - 22:05
|
|
DROPS 105-25 |
|
|
|
|
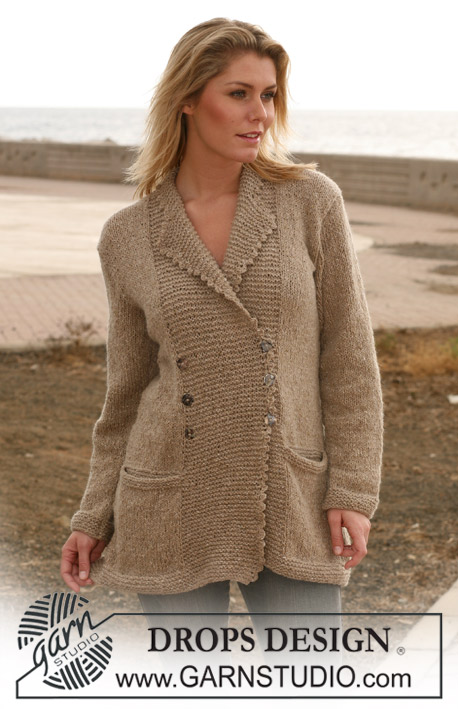
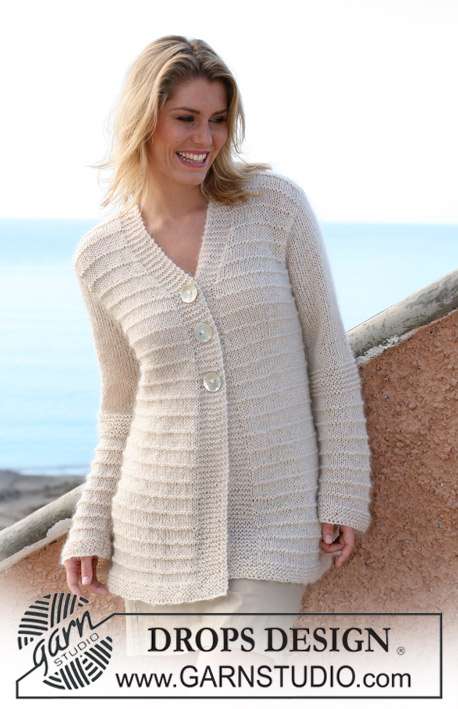
Saco de punto DROPS en “Bomull-Lin”. Talla S – XXXL.
DROPS 105-25 |
|
|
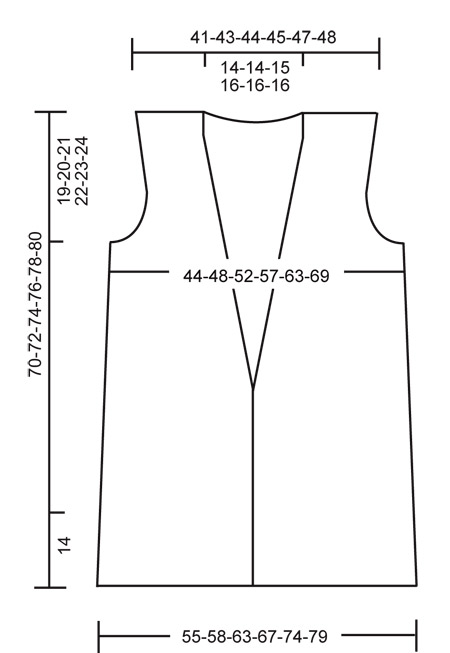
Punto musgo, de ida y vuelta en ag: todas las vtas al derecho. Tip para disminución (aplica al cuello y sisa): Hacer todas las dism por el lado derecho (LD) dentro de 4 pts musgo. Dism como sigue después de 4 pts: desl 1 pt al derecho, 1d, pasar pt desl por encima. Dism como sigue antes de 4 pts: 2 pjd. Tip para aumento (aplica a hombros): Aum dentro de 4 pts musgo como sigue: Hacer 1 heb (lazada), tejer la lazada por la hebra posterior del pt en la vta de retorno. Tejer los pts aum en pt jersey. ESPALDA: Mon 141-149-157-173-189-197 pts (incluye 1 pt d orillo a cada lado) en ag tamaño 4 mm. Tejer la primera vta por el LD como sigue: 1 pt de orillo, *3d/5r*, repetir de *a* y terminar la vta con 3d y 1 pt de orillo. Cont hasta que el resorte mida 5 cm y a cont dism todos los 5r a 4r = 124-131-138-152-166-173 pts. Cont con 3d/4r con 1 pt de orillo a cada lado hasta que el resorte mida 14 cm – ajustar de manera que la sig vta = LR. Cambiar a ag tamaño 4.5 mm, tejer 1 vta al derecho por el LR, al mismo tiempo ajustar el número de pts a 106-113-121-130-142-153. Cont en pt jersey. Recuerde mantener la misma tensión de tejido de la muestra! A 16 cm dism 1 pt a cada lado cada 3 cm un total de 10 veces = 86-93-101-110-122-133 pts. A 49-50-51-52-53-54 cm tejer 4 vtas pt musgo en los 8-8-10-10-12-12 pts más externos a cada lado y a cont rem 4-4-6-6-8-8 pts a cada lado para la sisa = 78-85-89-98-106-117 pts. Cont en pt jersey con 4 pts musgo a cada lado, al mismo tiempo dism – ver Tip para disminución – 1 pt a cada lado en vtas alternas un total de 2-4-5-8-10-15 veces = 74-77-79-82-86-87 pts. A 64-66-68-70-72-74 cm aum 1 pt a cada lado – ver Tip para aumento – y repetir el aum cuando la pieza mida 66-68-70-72-74-76 cm. Al mismo tiempo a 66-68-70-72-74-76 cm tejer 4 vtas pt musgo en los 34-35-37-38-38-39 pts centrales, tejer los pts restantes en pt jersey. Luego rem los 24-25-27-28-28-29 pts centrales para el cuello. En la sig vta dism 1 pt en la línea del escote = 26-27-27-28-30-30 pts restantes en cada hombro. Cont en pt jersey con 4 pts musgo en la línea del escote. Rem pts a 70-72-74-76-78-80 cm. DELANTERO DERECHO: Mon 85-85-93-93-109-117 pts (incluye 1 pt de orillo a un lado y 4 pts para el borde delantero hacia el delantero central) en ag tamaño 4 mm. Tejer la primera vta desde el delantero central como sigue: 4 pts del borde delantero en pt musgo, *3d/5r*, repetir de *a* y terminar la vta con 1 pt de orillo. Cont hasta que el resorte mida 5 cm y a cont dism todos los 5r a 4r = 75-75-82-82-96-103 pts. Cont con 3d/4r con 4 pts musgo hacia el delantero central y 1 pt de orillo a un lado hasta que el resorte mida 14 cm – ajustar de manera que la sig vta = LR. Cambiar a ag tamaño 4.5 mm, tejer 1 vta al derecho por el LR, al mismo tiempo ajustar el número de pts a 61-64-68-72-79-84. Cont en pt jesey. Recuerde mantener la misma tensión de tejido. A 16 cm dism a un lado como se describe para la pieza de la espalda. Linea del escote: Al mismo tiempo cuando la pieza mida 35 cm dism para el cuello-V hacia el delantero central – ver Tip para disminución: 1 pt cada 1.5 cm un total de 21-21-22-22-23-23 veces. Sisa: Al mismo tiempo cuando la pieza mida 49-50-51-52-53-54 cm tejer 4 vtas pt musgo en los 8-8-10-10-12-12 pts más externos a un lado y dism para dar forma a la sisa como se describe para la pieza de la espalda. Aum para el hombro como se describe para la pieza de la espalda. Después que todas las dism y aum han sido completados = 26-27-27-28-30-30 pts restantes en el hombro. Rem pts a 70-72-74-76-78-80 cm. DELANTERO IZQUIERDO: Mon pts y tejer como el delantero derecho, pero a la inversa. TERMINACION: Coser hombros y costados dentro de 1 pt de orillo. ORILLA DE GANCHILLO/OJAL: Hacer una orilla en ganchillo alrededor de la abertura (no a lo largo de la orilla inferior) con aguja tamaño 4 mm como sigue: 1 p.b. en cada pt. Después de aprox 35 cm (en el inicio del cuello-V), en el delantero derecho hacer 8 cad y saltar aprox 1 cm para el ojal. Coser el botón a aprox 9 pts a partir del centro del frente en el inicio del cuello-V en el delantero izquierdo. |
|
 |
|
¿Terminaste este patrón?Entonces, etiqueta tus fotos con #dropspattern o envíalas a la galería #dropsfan. ¿Necesitas ayuda con este patrón?Encontrarás 17 videos tutoriales, un espacio para comentarios/preguntas y más visitando la página del patrón en garnstudio.com © 1982-2026 DROPS Design A/S. Todos los derechos reservados. Este documento, incluyendo todas sus sub-secciones, está protegido por los derechos de autor (copyright). Lee más acerca de lo que puedes hacer con nuestros patrones en la parte de abajo de cada patrón de nuestro sitio. |


Con más de 40 años en el diseño de modelos de punto y de ganchillo, DROPS Design ofrece una de las más vastas colecciones de patrones gratuitos en el internet - traducidos en 17 idiomas. Al día de hoy, contamos con 324 catálogos y 12290 patrones - de los cuales 11675 están traducidos en español.
Nosotros trabajamos con mucho esmero para brindarte lo mejor que las labores de punto y ganchillo tienen para ofrecer,inspiración y consejos, así como hilos de magnífica calidad a precios increíbles! Te gustaría usar nuestros patrones para otro fin además del uso personal? Puedes leer acerca de lo que estás permitida a hacer en el texto de Copyright en la parte de abajo de todos nuestros patrones. Felices labores!
Escribe un comentario sobre DROPS 105-25
¡Nos encantaría saber qué piensas acerca de este patrón!
Si quieres escribir una pregunta referente al patrón, por favor asegúrate de elegir la categoría correcta en el formulario debajo, para acelerar el proceso de respuesta. Los campos obligatorios están marcados con un *.