
Categorías populares
¿Buscas un hilo?


Comentarios / Preguntas (6)
![]() Michelle escribió:
Michelle escribió:
Thanks for the reply about the neckline. But if you look at the photo of the finished garment on the model, the neckline starts only a few cms before the shoulder seam. The way the instructions read, the neckline starts much further down - only 10cm after the start of the armholes. The way the instructions read and the way the garment looks on the model are completely different.
13.01.2022 - 13:47DROPS Design respondió:
Dear Michelle, correct, you start neck 15 cm before shoulder, ie 10 cm after armhole (= armhole is a total of 25 cm). Feel free to make it shorter. Happy knitting!
13.01.2022 - 16:15
![]() Michelle escribió:
Michelle escribió:
Two problems: 1. I have left 8 stitches on a holder after 55cm but this leaves the front of the sweater looking more like a V neck than what is shown on the model photo. My tension is correct yet 55cm brings me to nowhere near where the pattern is showing as being at the neckline in the photo. Is there a typo?? 2. Pattern says only one ball of each shade other than brown & cream but I have run out of the olive half way up the 2nd sleeve and now it's out of stock!
11.01.2022 - 14:37DROPS Design respondió:
Dear Michelle, the neck on front piece started when piece measures 55 cm - see also measurement chart for the V-neck. You then continue back and forth decreasing for neck on each side, and cast off stitches for neck on back piece when piece measures 68 cm. The height of the neck is now shown on the chart, only its shape. You then will work M.1 around (picking sts around + 8 sts on thread). Sorry for the missing yarn, this info will be forwarded to our design team. Happy knitting!
12.01.2022 - 06:32
![]() Michelle escribió:
Michelle escribió:
What a good job I decided to watch some of the explanatory videos BEFORE buying all my yarn etc. There is nothing in the pattern itself that mentions that you need A SEWING MACHINE!!!! Is it possible to complete this sweater by splitting the front and the back at the beginning of the armholes and working from two lots of yarn? I really don't want to have to go out an buy a sewing machine - that makes it a very expensive sweater indeed.
18.11.2021 - 12:09DROPS Design respondió:
Dear Michelle, sure you can adjust the pattern to divide piece for armholes instead of casting on steek stitches - just cast on 1 extra st on each side for seam allowance and adapt pattern if necessary - or find with this video other way to work and cut steek stitches without sewing machine, but with a crochet hook. Happy knitting!
18.11.2021 - 17:18
![]() Rita escribió:
Rita escribió:
Grazie per la risposta, ma intrecciando solo sul diritto (ferri alterni), significa che lo scollo a V viene modellato sempre e solo da una parte delle 8 maglie messe in attesa sul ferro ausiliario. Cosa non capisco? Grazie Rita
07.05.2018 - 23:17DROPS Design respondió:
Buongiorno Rita, si, quando mette le maglie centrali in sospeso lavora le parti laterali in modo separato, come indicato, prima una spalla poi l'altra. Buon lavoro!
08.05.2018 - 09:23
![]() Rita escribió:
Rita escribió:
“Quando il lavoro misura 55 cm trasferire le 8 m centrali per il collo davanti su un fermamaglie e finire il lavoro avanti e indietro sui f. Continuare a intrecciare per modellare la scollatura a f alterni: 1 m 15 volte. “ significa che intreccio una maglia sul diritto vicino alle 8 maglie in attesa, poi giro il lavoro e intreccio una maglia sul rovescio vicino alle maglie in attesa. Faccio un avanti e un indietro senza intrecciare (ferri alterni) e poi ripeto per altre 14 volte? Grazie Rita
06.05.2018 - 23:26DROPS Design respondió:
Buongiorno Rita. Deve chiudere la maglia un ferro sì e un ferro no, quindi se intreccia la prima volta sul diritto del lavoro, lavora il ferro successivo (sul rovescio) senza intrecciare, poi intreccia nuovamente sul diritto. Buon lavoro!
07.05.2018 - 08:49
![]() Sophie Serot escribió:
Sophie Serot escribió:
Ce modèle est superbe j'ai promis de le réaliser pour ma fille le problème c'est qu'elle fait une taille xs/S comment adapter ce pull à sa taille (en réduisant d'un motif soit 14 mailles la réduction sera -t' elle suffisante et comment du coup adapter les manches? merci de votre aide je n'ai pas l'habitude des jacquards mais plutôt des torsades ou des points ajourés.
30.11.2016 - 16:29DROPS Design respondió:
Bonjour Mme Serot, vous pouvez vous aider du schéma des mesures et d'un modèle analogue qui lui irait pour ajuster comme vous le souhaitez. Pour toute assistance personnalisée, contactez votre magasin, il pourra vous aider et vous renseigner. Bon tricot!
01.12.2016 - 08:53
|
||||||||||||||||||||||||||||||||||
DROPS 43-10 |
||||||||||||||||||||||||||||||||||
|
|
||||||||||||||||||||||||||||||||||
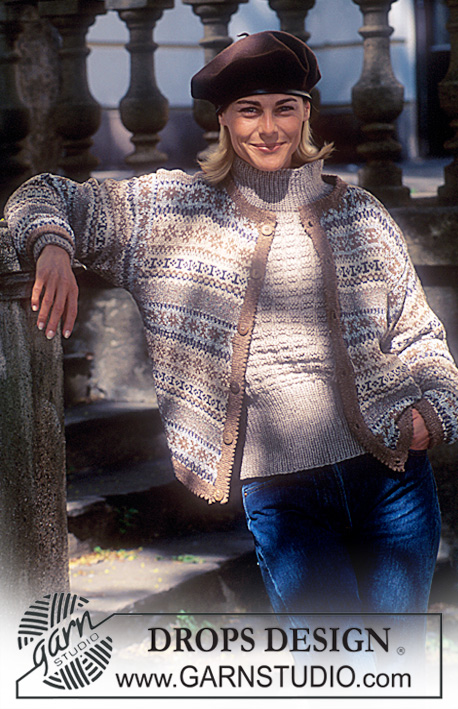
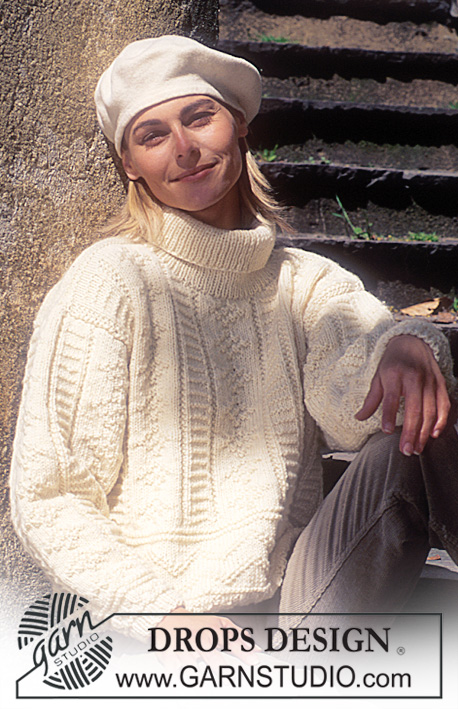
Jersey en Alaska con cenefa
DROPS 43-10 |
||||||||||||||||||||||||||||||||||
|
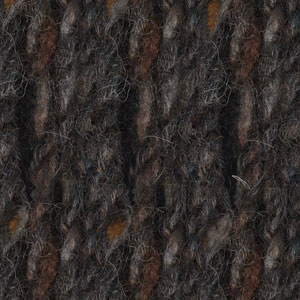
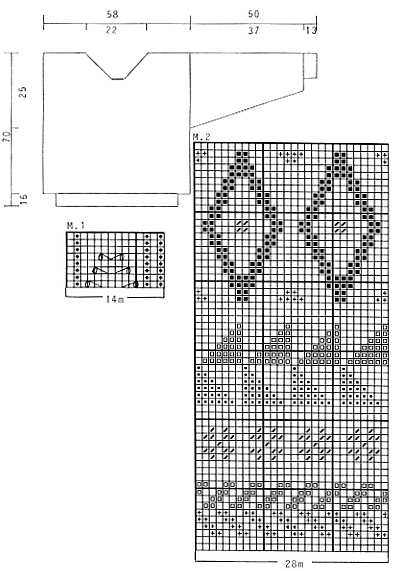
TENSIÓN DEL TEJIDO: 17 pts x 22 filas con ag tamaño 5 mm tejiendo el patrón = 10 x 10 cm. Recuerde que el número (tamaño) de las ag es orientativo. PATRÓN: Ver el diagrama (1 diagrama = 1 repetición del patrón). El diagrama se muestra por el LD. ---------------------------------------------------------------- CUERPO: El jersey se trabaja con ag circular y después se hacen los cortes para las sisas. Mont 182 pts con ag circular tamaño 4 mm con color café y trabajar 1 vta en pt jersey y después repetir M.1 en vertical un total de 5 vcs (= aprox 16 cm). Cambiar a ag circular tamaño 5 mm, continuar con M.2 y aum 14 pts repartidos en la 1ª vta = 196 pts. Recuerde mantener la misma tensión del tejido. Cuando la labor mida 45 cm aum 5 pts a cada lado para la sisa (estos pts se utilizan para el corte de la sisa y no están incl en el patrón - asegúrate de ajustar la repetición del patrón en el centro del delantero). Cuando la labor mida 55 cm desl los 8 pts centrales para el escote delantero a un gancho aux y completar la labor de ida y vta en ag. Continuar cerrando para la forma del escote cada 2ª fila: 1 pt 15 vcs. Al mismo tiempo cuando la labor mida 68 cm cerrar los 34 pts centrales para el escote de la espalda. Ahora cerrar 2 pts a cada lado en la sig fila para la forma del escote en la espalda. Rematar cuando la labor mida 70 cm (ajustar a después del patrón). MANGA: Mont 42 pts con ag de doble punta tamaño 4 mm con color café y trabajar 1 vta en pt jersey y después repetir M.1 en vertical un total de 4 vcs, al mismo tiempo aum en el centro bajo la manga cada 5ª fila: 1 pt 6 vcs. Cambiar a ag tamaño 5 mm, continuar con M.2 (asegúrate de ajustar una repetición del patrón en el centro de la parte superior de la manga) y aum 8 pts repartidos en la 1ª vta = 56 pts. Al mismo tiempo después de M.1 aum en el centro bajo la manga: 2 pts 15 vcs cada 5ª fila = 86 pts. Cuando la labor mida 50 cm trabajar 2 cm en pt jersey revés (para la costura de las mangas al cuerpo). Rematar. TERMINACIÓN: Insertar un hilo marcador en el centro de los pts aumentados para la sisa a cada lado. Hacer 2 costuras con máquina de coser alrededor del marcador, la 1ª= a ½ pt del marcador, la 2ª = a ½ pt de la 1ª costura. Cortar para la sisa. Coser los hombros. Recoger aprox 98 pts alrededor del escote con ag de doble punta tamaño 4 mm con color café y trabajar M.1 2 vcs en vertical, rematar. Montar las mangas como sigue: coser la última fila en pt jersey de la manga a la fila siguiente a la costura a máquina en la sisa. Dar la vta al jersey (de dentro hacia afuera) y asegurar la parte de pt jersey revés de la manga al cuerpo. |
||||||||||||||||||||||||||||||||||
Explicaciones del diagrama |
||||||||||||||||||||||||||||||||||
|
||||||||||||||||||||||||||||||||||
 |
||||||||||||||||||||||||||||||||||
¿Terminaste este patrón?Entonces, etiqueta tus fotos con #dropspattern o envíalas a la galería #dropsfan. ¿Necesitas ayuda con este patrón?Encontrarás 26 videos tutoriales, un espacio para comentarios/preguntas y más visitando la página del patrón en garnstudio.com © 1982-2026 DROPS Design A/S. Todos los derechos reservados. Este documento, incluyendo todas sus sub-secciones, está protegido por los derechos de autor (copyright). Lee más acerca de lo que puedes hacer con nuestros patrones en la parte de abajo de cada patrón de nuestro sitio. |
||||||||||||||||||||||||||||||||||


Con más de 40 años en el diseño de modelos de punto y de ganchillo, DROPS Design ofrece una de las más vastas colecciones de patrones gratuitos en el internet - traducidos en 17 idiomas. Al día de hoy, contamos con 324 catálogos y 12290 patrones - de los cuales 11685 están traducidos en español.
Nosotros trabajamos con mucho esmero para brindarte lo mejor que las labores de punto y ganchillo tienen para ofrecer,inspiración y consejos, así como hilos de magnífica calidad a precios increíbles! Te gustaría usar nuestros patrones para otro fin además del uso personal? Puedes leer acerca de lo que estás permitida a hacer en el texto de Copyright en la parte de abajo de todos nuestros patrones. Felices labores!
Escribe un comentario sobre DROPS 43-10
¡Nos encantaría saber qué piensas acerca de este patrón!
Si quieres escribir una pregunta referente al patrón, por favor asegúrate de elegir la categoría correcta en el formulario debajo, para acelerar el proceso de respuesta. Los campos obligatorios están marcados con un *.