
Categorías populares
¿Buscas un hilo?





























Comentarios / Preguntas (13)
 Lena Ohlander escribió:
Hur gör man omslaget mellan två maskor och hur stickar man sen det aviga varvet för? Jag får inga hål.
22.10.2026 - 21:00DROPS Design respondió:
Hej Lena. Du stickar bara fram till där du ska öka och gör ett omslag om stickan. T.ex. på A.1 varv 5; sticka 3 rätmaskor, sticka 2 maskor räta tillsammans, gör ett omslag om stickan, sticka 2 rätmaskor. På nästa varv stickas omslaget avigt för att skapa ett hål. Mvh DROPS Design
23.10.2026 - 12:21
 Wendy Mnookin escribió:
I see I need 200 grams for the blanket in size small, but how many yards is that? (I am changing to a different brand of yarn). Thank you.
05.10.2026 - 00:08DROPS Design respondió:
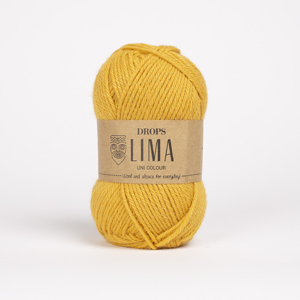
Dear Wendy, the yardage is calculated from the yardage of DROPS Lima. DROPS Lima is sold in 50gr ball of 100m each. Since you need 200gr you would need 4 balls of DROPS Lima, which would be a yardage of 400m or approx. 437 yards. Happy knitting!
05.10.2026 - 00:50
 Berit escribió:
Jeg finner ikke tips og hjelp eller den videoen dere viser til
11.09.2026 - 10:01DROPS Design respondió:
Hei Berit. Nå vises ikke ikke oppleggskanten til teppet, men avfellingskanten. Om du klikker på Tips & Hjelp, se da til venstre og under STRIKKEVIDEOER, velg da Legg opp. Her er det mange videoer som viser forkjellige oppleggsmetoder. På teppet er det nok brukt den mest vanlige: Hvordan legge opp med: Basic, Long tail cast on. På samme side (under STRIKKEVIDEOER), kan du også klikke på Avfelling. Og når du skal felle av, kan du velge den du syns blir penest. Her er det valgt: Hvordan felle av fra rettsiden. mvh DROPS Design
14.09.2026 - 13:13
Berit escribió:
Hvordan vil dere anbefale å legge opp maskene for å få den fine kanten i starten av teppet?
10.09.2026 - 23:38DROPS Design respondió:
Hei Berit, Under Tips & Hjelp på toppen av oppskriften, finner du en video om hvordan man legger opp maskene. Men uansett hvilken metode du bruker, så lenge du legger opp med jevne masker, blir kanten fin. Hilsen Drops Team.
11.09.2026 - 06:25
 Amy escribió:
Hi, I have made a small test swatch copying the pattern including edges and garter edge borders in super fine merino. It is beautiful but does not lay flat. This makes sense to me, as the holes created are larger than a stitch, so this will cause uneven row lengths. Do you recommend blocking this and other patterns with a lace design? What would be best for the super fine merino? Thank you!
10.09.2026 - 17:22DROPS Design respondió:
Dear Amy, make sure that you yarn overs are not worked too loose to avoid any changes in the texture/tension; you can also try to watch your swatch if the stitches will get more even after washing, this sometimes can help too. Your yarn store might have even more tips they will be pleased to share with you even per mail or telephone. Happy knitting!
11.09.2026 - 09:15
 Elly escribió:
Ik kom niet uit het telpatroon van A1 naald 7,want dat zijn 10 steken en als ik dan verder gaat met A2 komt het patroon niet goed uit. Kunt U mij zeggen wat ik verkeerd doe. Dank alvast.
22.08.2026 - 17:00DROPS Design respondió:
Dag Elly,
In de 72 naald maak je 2 minderingen (de schuine streepjes) maar ook 2 meerderingen door omslagen te maken. Hierdoor zit je in totaal weer op 7 steken.
25.08.2026 - 15:35
Bluebell escribió:
Hi … This is a lovely pattern not to overly fussy but just enough. I have been knitting for over 50yrs and I’ve never used one of your patterns nor free ones for that matter, but this diagram method has really confused me I find it difficult to understand in the UK are patterns are written in rows and you just follow along is there an easier way of doing this pattern. Many Thanks
07.08.2026 - 19:53
Amy escribió:
The cast-on edge looks beautiful in the photographs, which cast-on method should be used to achieve this? Also, I am struggling to get the i-cord method described to produce a nice edge, can you suggest an alternative way? Thank you.
05.08.2026 - 14:47DROPS Design respondió:
Hi Amy, If you click on Tips & Help at the top of the page, there is a video showing you the method we recommend to cast-on. Here is a link to another video showing you how to work the I-cord edge stitches : https://www.garnstudio.com/video.php?id=1805&lang=en Regards, Drops Team.
06.08.2026 - 06:30
 Francesca escribió:
Salve, sarebbe possibile avere lo schema scritto riga per riga? Io ho molta difficoltà a seguire il diagramma. Grazie! Francesca
27.07.2026 - 16:34DROPS Design respondió:
Buonasera Francesca, purtroppo non ci è possibile adattare i modelli alle singole esigenze. Buon lavoro!
30.07.2026 - 23:22
 Tanja escribió:
Hallo guten Tag , Ich stricke diese tolle Decke in gleicher Farbe und Wolle. Läßt sich toll verstricken, fusselt allerdings sehr. Gibt sich das durch späteres waschen, Kälte würde auch helfen, ließt man ?? Danke schon im Voraus
31.05.2026 - 14:44DROPS Design respondió:
Liebe Tanja, das könnte ja, hier lesen Sie etwas mehr. Viel Spaß beim Stricken!
01.06.2026 - 09:27
|
|||||||||||||
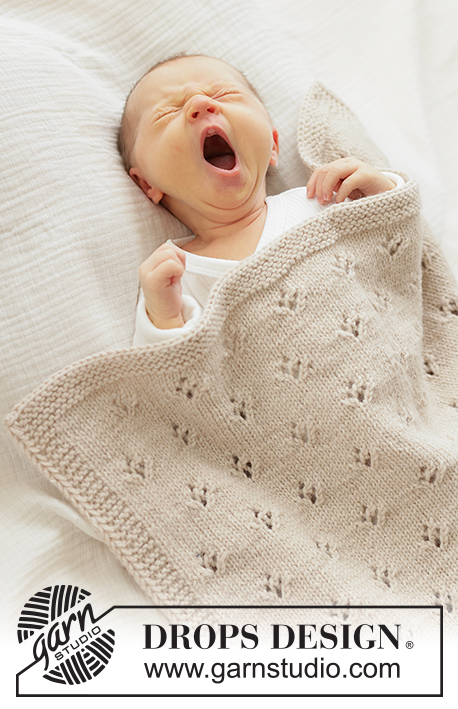
Honey Haze Blanket#honeyhazeblanket |
|||||||||||||
 |
 |
||||||||||||
Manta de punto para bebés en DROPS Lima. La pieza está tejida de ida y vuelta con patrón de calados, punto musgo y I-cord.
DROPS Baby 51-3 |
|||||||||||||
|
------------------------------------------------ EXPLICACIONES PARA REALIZAR EL PATRÓN: ------------------------------------------------ PUNTOS DE ORILLO CON I-CORD: PRINCIPIO DE LA HILERA: Tejer 2 puntos juntos retorcidos de derecho, hacer 1 lazada. FINAL DE LA HILERA: Tejer hasta que resten 2 puntos en la hilera, deslizar 2 puntos como de revés con el hilo al frente. Tejer de la misma manera tanto por el lado derecho como por el lado revés. PUNTO MUSGO: Tejer todas las hileras de derecho, tanto por el lado derecho como por el lado revés. 1 surco en altura = tejer 2 hileras de derecho. PATRÓN: Ver diagramas A.1 a A.3. Los diagramas se tejen de derecha a izquierda cuando se teje por el lado derecho y de izquierda a derecha cuando se teje por el lado revés. ------------------------------------------------ COMENZAR LA PIEZA AQUÍ: ------------------------------------------------ MANTA – RESUMEN DE LA PIEZA: La manta se teje de ida y vuelta con aguja circular. MANTA: Montar 101-121-141 puntos con aguja circular tamaño 4 mm y DROPS Lima. Tejer 2 PUNTOS DE ORILLO CON I-CORD – leer explicación arriba, tejer PUNTO MUSGO hasta que resten 2 puntos y tejer 2 puntos de orillo con I-cord. Tejer así hasta que se tenga 4 surcos en altura (ver PUNTO MUSGO); la pieza mide aprox. 2 cm. Ahora tejer el PATRÓN – leer explicación arriba, de la manera siguiente: HILERA 1 (lado derecho): Tejer 2 puntos de orillo como antes, 4 puntos musgo, tejer A.1 sobre 7 puntos, repetir A.2 hasta que resten 8 puntos, tejer A.3 sobre 2 puntos, tejer 4 puntos musgo y 2 puntos de orillo como antes. HILERA 2 (lado revés): Tejer 2 puntos de orillo como antes, 4 puntos musgo, tejer A.3 sobre 2 puntos, repetir A.2 hasta que resten 13 puntos, tejer A.1 sobre 7 puntos, tejer 4 puntos musgo y 2 puntos de orillo como antes. Recordar mantener la misma tensión de tejido de la muestra. Repetir los diagramas en altura hasta que la pieza mida 58-68-78 cm, ajustando para que haya 4 hileras sin patrón de calados y que la pieza empiece y termine de la misma manera. Tejer 2 puntos de orillo como antes, tejer punto musgo hasta que resten 2 puntos y tejer 2 puntos de orillo como antes. Tejer 4 surcos en altura. La pieza mide aprox. 60-70-80 cm. Rematar de derecho. |
|||||||||||||
Explicaciones del diagrama |
|||||||||||||
|
|||||||||||||
 |
|||||||||||||
¿Terminaste este patrón?Entonces, etiqueta tus fotos con #dropspattern #honeyhazeblanket o envíalas a la galería #dropsfan. ¿Necesitas ayuda con este patrón?Encontrarás 9 videos tutoriales, un espacio para comentarios/preguntas y más visitando la página del patrón en garnstudio.com © 1982-2026 DROPS Design A/S. Todos los derechos reservados. Este documento, incluyendo todas sus sub-secciones, está protegido por los derechos de autor (copyright). Lee más acerca de lo que puedes hacer con nuestros patrones en la parte de abajo de cada patrón de nuestro sitio. |
|||||||||||||






Con más de 40 años en el diseño de modelos de punto y de ganchillo, DROPS Design ofrece una de las más vastas colecciones de patrones gratuitos en el internet - traducidos en 17 idiomas. Al día de hoy, contamos con 333 catálogos y 12532 patrones - de los cuales 12026 están traducidos en español.
Nosotros trabajamos con mucho esmero para brindarte lo mejor que las labores de punto y ganchillo tienen para ofrecer,inspiración y consejos, así como hilos de magnífica calidad a precios increíbles! Te gustaría usar nuestros patrones para otro fin además del uso personal? Puedes leer acerca de lo que estás permitida a hacer en el texto de Copyright en la parte de abajo de todos nuestros patrones. Felices labores!
Escribe un comentario sobre DROPS Baby 51-3
¡Nos encantaría saber qué piensas acerca de este patrón!
Si quieres escribir una pregunta referente al patrón, por favor asegúrate de elegir la categoría correcta en el formulario debajo, para acelerar el proceso de respuesta. Los campos obligatorios están marcados con un *.