
Categorías populares
¿Buscas un hilo?


Comentarios / Preguntas (16)
![]() Lucie Jacques escribió:
Lucie Jacques escribió:
Dans votre patron bonnet enfant, il manque l'information pour le tour 3. S.V.P. pouvez m'informer par courriel. Merci!
06.04.2026 - 21:29DROPS Design respondió:
Bonjour Mme Jacques, vous tricotez au tour 3 comme au tour 2 et 4, autrement dit, quand on lit TOURS 2-4, on entend du tour 2 au tour 4, y compris le tour 3. Bon tricot!
08.04.2026 - 13:32
![]() Monique escribió:
Monique escribió:
Hoe keer ik het werk zoals genoemd wordt? Keer nu het werk om een mooie opzetrand te maken als de rand wordt omgevouwen, dus brei de rest van de muts in tegenovergestelde richting van de vouwrand. Brei dan recht boven recht en averecht boven averecht. Ik hoor het graag
15.02.2026 - 18:29DROPS Design respondió:
Dag Monique,
In een van de video's wordt getoond hoe je het werk keert, zodat de goede kant de verkeerde kant wordt en andersom.
16.02.2026 - 20:32
![]() Gunn escribió:
Gunn escribió:
Når man skal strikke motsatt vei betyr det at når arbeidet er snudd så strikker man motsatt av rett og vrang? At man fortsetter resten av luen med rett over vrang og motsatt?
12.12.2025 - 10:29DROPS Design respondió:
Hei Gunn. Nei, du skal fortsette med rett over rett og vrang over vrang. mvh DROPS Design
15.12.2025 - 08:10
![]() Wilma Van Schaik escribió:
Wilma Van Schaik escribió:
Bij de muts patroon bm-030-bn hoe brei je de andere kant op en je geen gat krijgt . En hoe hecht je een nieuwe kleur aan bij een rondbreinaald zonder overgang en verschil . Kunt U mij helpen
29.03.2025 - 11:44DROPS Design respondió:
Dag Wilma,
In een van de instructievideo's die bij het patroon staan kun je zien hoe je het werk keert zonder een hiaat te krijgen.
30.03.2025 - 10:06
![]() Iben escribió:
Iben escribió:
Hej, når jeg vender arbejdet ved ombukningskanten skal der så være en runde med ret for at markere? Jeg har indtil videre bare fortsat i rib og der fremkommer ingen forskel i stykket før og efter retningsskiftet.
12.02.2025 - 21:25DROPS Design respondió:
Hej Iben, nej det behøver du ikke gøre :)
18.02.2025 - 09:15
![]() Willemien escribió:
Willemien escribió:
Hallo, ik heb mijn muts gekeerd voor een mooie opzetrand maar ik zie er het nut niet van in, zie helemaal geen verschil en voor mijn gevoel had ik net zo goed gewoon door kunnen breien. Of deed ik het verkeerd ? Ik volgde uw video om t werk te keren.
25.11.2024 - 08:26DROPS Design respondió:
Dag Willemien,
Heb je er rekening mee gehouden dat de onderkant ook nog omgeslagen wordt bij het dragen van de muts?
25.11.2024 - 19:52
![]() Catherine P escribió:
Catherine P escribió:
Comment éviter le trou qui se forme quand on change de sens pour la bordure
15.10.2024 - 20:24DROPS Design respondió:
Bonjour Catherine, dans cette vidéo, nous glissons la 1ère maille sans la tricoter et continuons ensuite comme avant. Vous pouvez également utiliser n'importe quelle autre technique employée pour des rangs raccourcis. Bon tricot!
16.10.2024 - 07:29
![]() Wendy Hildebrandt escribió:
Wendy Hildebrandt escribió:
Winter Fun What do you mean change directions? It will match the rest of the hat better if you change direction at this point and continue in the round in the new direction.
31.07.2024 - 14:15DROPS Design respondió:
Dear Wendy, the whole hat is knitted in the round, you only change the direction the round is going (in other words, you change the right side and the wrong side) so the cast on edge would look better, when the edge is turned up. Happy Knitting!
31.07.2024 - 15:24
![]() Wendy Hildebrandt escribió:
Wendy Hildebrandt escribió:
"Winter Fun" Not sure what this means? Now turn the piece to make the cast on edge nice when the edge is folded up.
31.07.2024 - 08:32DROPS Design respondió:
Hi Wendy, The rib you have worked so far will be turned up to the outside on the finished hat. It will match the rest of the hat better if you change direction at this point and continue in the round in the new direction. Happy knitting!
31.07.2024 - 09:02
![]() Archana escribió:
Archana escribió:
Hello. I have started this pattern. It looks lovely. Can you clarify the reduction from row 14 onwards? "Knit all stitches together 2 by 2 until 1-0-0-1 stitch remains.." Thank you so much! I
11.11.2023 - 03:34DROPS Design respondió:
Dear Archana, just as in round 12, you knit all stitches together 2 by 2 but, since you had an odd number of stitches to begin with in some sizes, you will have 1 stitch remaining in these sizes, which can't be worked together with any stitch in the round. This is stitch is then knitted, as stated at the end of the round. After round 14 you should have 8-8-8-9 stitches and you will now cut the yarn and close the piece. Happy knitting!
12.11.2023 - 23:00
|
|
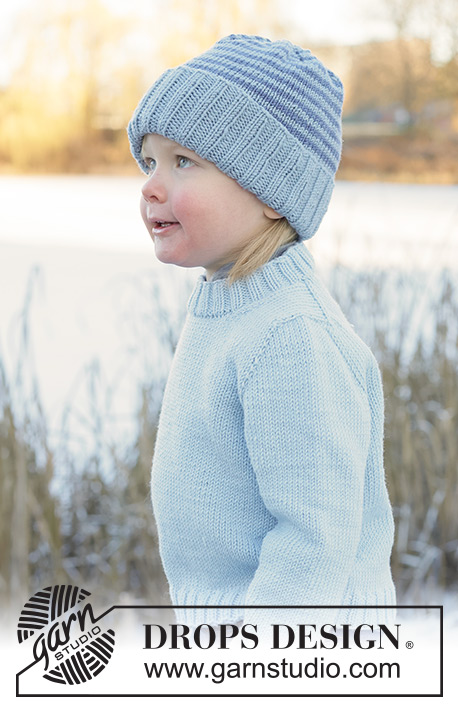
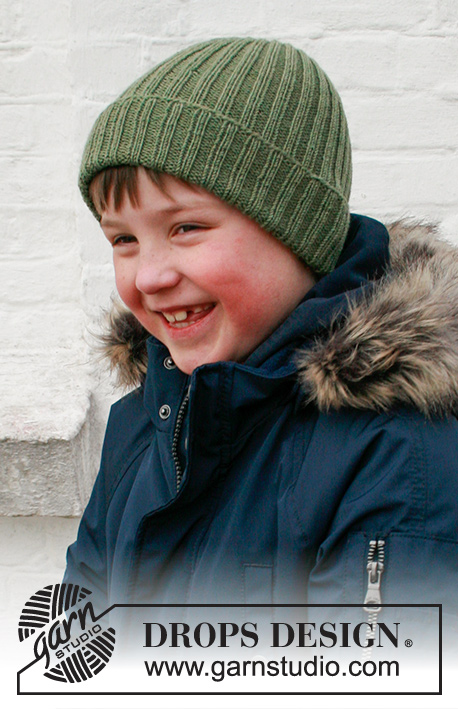
Winter Fun#winterfunhat |
|
 |
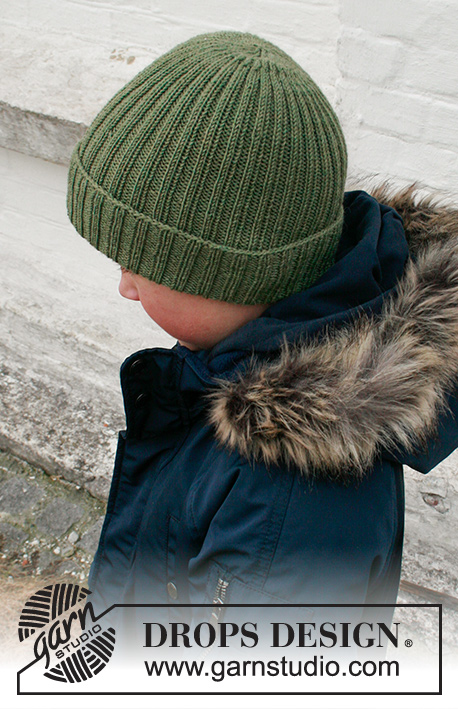 |
Gorro a punto en DROPS Baby Merino. La prenda está realizada con punto elástico con dobladillo. Tallas 2-12 años.
DROPS Children 41-27 |
|
|
COMENZAR LA LABOR AQUÍ: ---------------------------------------------------------- GORRO - RESUMEN DE LA LABOR: Trabajar en redondo con una aguja circular corta, de abajo arriba. Cambiar a agujas de doble punta al disminuir. GORRO: Montar 116-124-128-132 puntos con una aguja circular corta de 2.5 mm con DROPS Baby Merino. Trabajar 1 vuelta de derecho. Después trabajar el elástico en redondo (= 2 derechos/ 2 reveses) 5-5-6-6 cm. Ahora girar la labor para que el borde de montaje quede bien al doblar el borde hacia arriba, es decir, trabajar el resto del gorro en la dirección opuesta al borde de doblaje. Después trabajar derecho sobre derecho y revés sobre revés. RECORDAR MANTENER LA TENSIÓN DEL TEJIDO! Cuando la labor mida 20-21-23-24 cm, disminuir como se explica debajo. VUELTA 1: Disminuir todas las secciones de 2 reveses a 1 revés (2 puntos juntos de revés) = 87-93-96-99 puntos. VUELTAS 2-4: Derecho sobre derecho y revés sobre revés. VUELTA 5: Disminuir todas las secciones de 2 derechos a 1 derecho (2 puntos juntos de derecho) = 58-62-64-66 puntos. VUELTAS 6-8: Derecho sobre derecho y revés sobre revés. VUELTA 9: Trabajar todos los puntos juntos de derecho de 2 en 2 = 29-31-32-33 puntos. VUELTAS 10-11: Trabajar todos los puntos de derecho. VUELTA 12: Trabajar todos los puntos juntos de derecho de 2 en 2 hasta que quede 1-1-0-1 puntos en la vuelta, 1-1-0-1 derecho = 15-16-16-17 puntos. VUELTA 13: Trabajar todos los puntos de derecho. VUELTA 14: Trabajar todos los puntos juntos de derecho de 2 en 2 hasta que quede 1-0-0-1 punto, 1-0-0-1 derecho = quedan 8-8-8-9 puntos. Cortar el hilo y pasarlo por los puntos restantes, estirar y asegurar. El gorro mide aprox. 24-25-27-28 cm de arriba abajo. Doblar los 5-5-6-6 cm en la parte inferior hacia arriba. |
|
¿Terminaste este patrón?Entonces, etiqueta tus fotos con #dropspattern #winterfunhat o envíalas a la galería #dropsfan. ¿Necesitas ayuda con este patrón?Encontrarás 13 videos tutoriales, un espacio para comentarios/preguntas y más visitando la página del patrón en garnstudio.com © 1982-2026 DROPS Design A/S. Todos los derechos reservados. Este documento, incluyendo todas sus sub-secciones, está protegido por los derechos de autor (copyright). Lee más acerca de lo que puedes hacer con nuestros patrones en la parte de abajo de cada patrón de nuestro sitio. |
|


Con más de 40 años en el diseño de modelos de punto y de ganchillo, DROPS Design ofrece una de las más vastas colecciones de patrones gratuitos en el internet - traducidos en 17 idiomas. Al día de hoy, contamos con 324 catálogos y 12290 patrones - de los cuales 11685 están traducidos en español.
Nosotros trabajamos con mucho esmero para brindarte lo mejor que las labores de punto y ganchillo tienen para ofrecer,inspiración y consejos, así como hilos de magnífica calidad a precios increíbles! Te gustaría usar nuestros patrones para otro fin además del uso personal? Puedes leer acerca de lo que estás permitida a hacer en el texto de Copyright en la parte de abajo de todos nuestros patrones. Felices labores!
Escribe un comentario sobre DROPS Children 41-27
¡Nos encantaría saber qué piensas acerca de este patrón!
Si quieres escribir una pregunta referente al patrón, por favor asegúrate de elegir la categoría correcta en el formulario debajo, para acelerar el proceso de respuesta. Los campos obligatorios están marcados con un *.