
Categorías populares
¿Buscas un hilo?



























Comentarios / Preguntas (10)
 Mel escribió:
For the front and back, to work them separately, do I to put the “back piece” stitches onto a spare piece of yarn, then complete the front piece, then pick the back piece stitches up off the string and continue working the back, and all of that is done flat? So instead of knit stitches in the round, it’s knit flat, back and forth, one row K and one row P (with the bind offs along the Way) Apologies, trying my best to learn.
25.10.2026 - 20:18DROPS Design respondió:
Dear Mel, that's correct, up to the armholes you work the piece in the round. Then, you divide for the front and back pieces. You work one of them back and forth (flat) while the other piece is left on a thread or stitch holder. After finishing that piece, you slip the stitches of the other piece back onto the needles and work back and forth the second piece. The stocking stitch in the round is: Knit all rounds. The stocking stitch back and forth = knit from the right side and purl from the wrong side. Happy knitting!
25.10.2026 - 21:28
Mel escribió:
For the front and back, to work them separately, do I to put the “back piece” stitches onto a spare piece of yarn, then complete the front piece, then pick the back piece stitches up off the string and continue working the back, and all of that is done flat? So instead of knit stitches in the round, it’s knit flat, back and forth, one row K and one row P (with the bind offs along the Way) Apologies, trying my best to learn.
25.10.2026 - 20:18DROPS Design respondió:
Dear Mel, that's correct, up to the armholes you work the piece in the round. Then, you divide for the front and back pieces. You work one of them back and forth (flat) while the other piece is left on a thread or stitch holder. After finishing that piece, you slip the stitches of the other piece back onto the needles and work back and forth the second piece. The stocking stitch in the round is: Knit all rounds. The stocking stitch back and forth = knit from the right side and purl from the wrong side. Happy knitting!
25.10.2026 - 21:28
 Julie escribió:
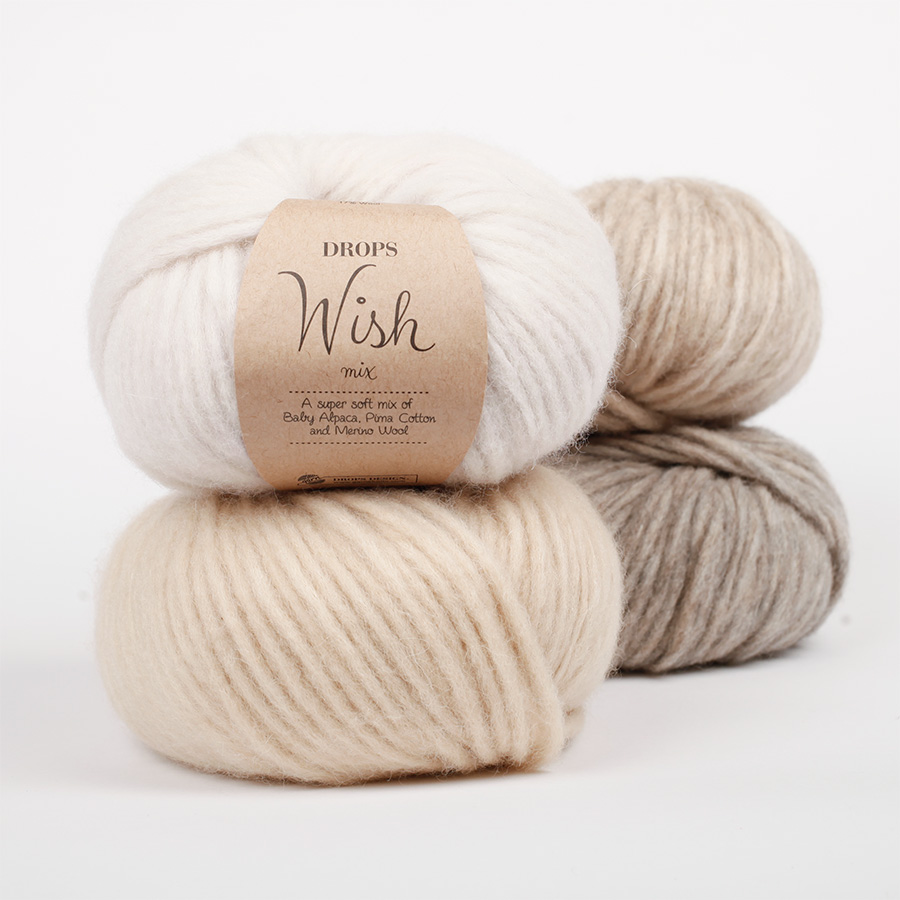
The yarn Wish is discontinued. Can you let me know how many metres are need to complete this pattern so I can substitute another yarn. Thank you.
07.09.2026 - 11:26DROPS Design respondió:
Hi Julie, The yarn Wish belonged to yarn group E (50 g balls, approx. 70 metres ). Any of our other yarns in yarn group E have the same weight, thickness and meterage as Wish and can be substituted in this pattern, Regards, Drops Team.
08.09.2026 - 06:59
 Denice escribió:
Hejsan, När det står: "Maska av 1 maska 3 gånger = 20-22-24-26-28-30 maskor" Ska man maska av från både rätsida och avigsidan då? Så att allt är avmaskat efter att man stickat fram och tillbaka 3 gånger?
16.06.2026 - 18:47DROPS Design respondió:
Hej Denice, du maskar av i början av varje varv, tills du har maskat av 3 maskor i varje sida, det blir avmaskning på totalt 6 varv :)
23.06.2026 - 14:38
 Bettina escribió:
Liebes Drops-Team! Gerne möchte ich solch eine Weste Stricken mit beidseitigem Knopfverschluss. Das Modell, das es gibt gefällt mit nicht. Wie kann ich dieses abändern oder gibt es einModell mit dünnerem Garn?
10.06.2026 - 10:38DROPS Design respondió:
Liebe Bettina, hier finden Sie alle Modellen für Westen & Tops, davon einige mit Knöpfe, vielleicht kann Ihnen ein davon inspirieren? Viel Spaß beim Stricken!
10.06.2026 - 16:31
 Anna escribió:
Hallo, ich habe diesen schönen Pullunder vor ein paar Jahren für meine Tochter gestrickt. Nun wünscht sie sich genau so einen nochmal. Ich stricke jetzt mit snow, weil es Wish ja nicht mehr gibt. Allerdings möchte sie unbedingt lange ärmel. Ich stricke die größte Größe. Haben Dir eine Idee für mich bzgl der Ärmel? Ich würde am liebsten auf einem Nadelspiel von unten nach oben und dann einnähen, habe das aber noch nie ohne Anleitung gemacht.
08.04.2026 - 14:08DROPS Design respondió:
Liebe Anna, hier finden Sie Pullover mit langen Ärmeln für ihre Größe, die Sie mit Snow stricken können, das kann Ihnen sicher inspirieren. Viel Spaß beim Stricken!
09.04.2026 - 10:11
 Amalie escribió:
Str. 7/8 forstykke. Jeg har 32 masker og der står: SAMTIDIG lukkes der af til ærmegab i begyndelsen af hver pind i hver side således: Luk 1 maske af 3 gange = 20-22-24-26-28-30 masker. Jeg lukker en maske 3 gange. Det kommer da aldrig til at give 26 masker?
09.03.2024 - 09:55DROPS Design respondió:
Hei Amalie. Jo, du har 32 masker, så skal det felles til ermhull 1 maske 3 ganger på begynnelsen av HVER pinne. Så når du skal felles på begynnelsen av hver pinne, må du felle både fra retten og fra vrangen. 1 maske 3 ganger = 3 masker i hver side = 6 masker. 32 masker - 6 masker = 26 masker etter fellingene. mvh DROPS Design
18.03.2024 - 09:40
Agnes Holst Kazuhara escribió:
Der sker fejl ved valg til spørgsmål - de bliver opfattet som kommentar af systemet. Bedes rettet. Jeg har så forgæves bestilt svar på spørgsmål.
30.01.2023 - 16:16
Agnes Holst Kazuhara escribió:
Hvor kan jeg finde en vest str. 13/14 år pige hhv dreng?
30.01.2023 - 16:09
Lexy Sellar escribió:
Are some of the stitch numbers incorrect for the shoulders on the back piece: On the next row cast off the middle 6-8-8-8-10-10 stitches for the neck and each shoulder is finished separately (= 7-8-9-10-10-11 stitches on each shoulder). On the piece you have 20-22-24-26-28-30 stitches so assuming the cast of stitch numbers are correct should the shoulders not be 7-7-8-9-9-10 stitches on each shoulder
27.01.2022 - 13:07DROPS Design respondió:
Dera Mrs Sellar, correct, there was a mistake in the English pattern, thanks for noticing. Happy knitting!
28.01.2022 - 10:17
|
|
Willow Wood Vest#willowwoodvest |
|
 |
 |
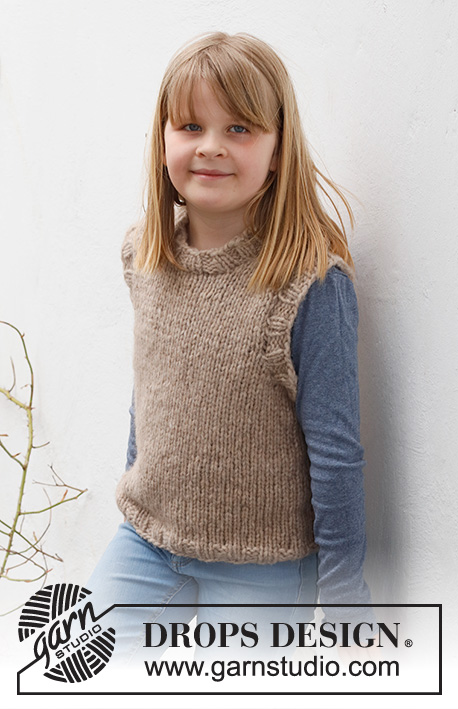
Chaleco / chaleco sin mangas de punto para niños en DROPS Wish. La pieza está tejida en punto jersey, con orillas en resorte. Tallas 2-12 años.
DROPS Children 40-4 |
|
|
EXPLICACIONES PARA REALIZAR EL PATRÓN: ------------------------------------------------ TIP PARA REMATAR: Para evitar que la orilla de remate quede apretada, se puede rematar con una aguja de tamaño más grande. Si la orilla aún estuviese apretada, hacer 1 lazada después de aprox. cada 4º punto al mismo tiempo que se rematan los puntos; rematar las lazadas como puntos normales. ------------------------------------------------ COMENZAR LA PIEZA AQUÍ: ------------------------------------------------ CHALECO – RESUMEN DE LA PIEZA: La pieza se teje en redondo con aguja circular, de la parte de abajo hasta las sisas. Después la pieza del frente y la pieza de la espalda son terminadas separadamente, de ida y vuelta. Se tejen orillas en resorte alrededor del escote y de las sisas al final. CUERPO: Montar 64-68-72-76-80-84 puntos con aguja circular tamaño 8 mm y DROPS Wish. Tejer 1 vuelta de derecho, después tejer el resorte en redondo (2 derechos, 2 reveses) durante 3 cm. Cambiar a aguja circular tamaño 9 mm. Tejer punto jersey hasta que la pieza mida 16-18-21-24-27-30 cm. Ahora rematar puntos para las sisas de la manera siguiente: Rematar los primeros 3 puntos, tejer los 26-28-30-32-34-36 puntos siguientes, rematar 6 puntos, tejer los 26-28-30-32-34-36 puntos siguientes y rematar los últimos 3 puntos = 26-28-30-32-34-36 puntos en la pieza de la espalda y en la pieza del frente. Terminar cada pieza separadamente. FRENTE: Tejer punto jersey de ida y vuelta – AL MISMO TIEMPO rematar para las sisas al principio de cada hilera de la manera siguiente: 1 punto 3 veces a cada lado = 20-22-24-26-28-30 puntos. Continuar tejiendo hasta que la pieza mida 26-29-33-36-40-43 cm. En la hilera siguiente, colocar los 6-6-6-6-8-8 puntos centrales en un hilo para el escote y terminar cada hombro separadamente (= 7-8-9-10-10-11 puntos en cada hombro). Continuar con punto jersey y rematar en cada hilera a partir del escote de la manera siguiente: 1 punto 1-2-2-2-2-2 veces = 6-6-7-8-8-9 puntos. Continuar tejiendo hasta que la pieza mida 33-36-40-44-48-52 cm. Rematar. Tejer el otro hombro de la misma manera. ESPALDA: Tejer punto jersey de ida y vuelta – AL MISMO TIEMPO rematar para las sisas al principio de cada hilera de la manera siguiente: 1 punto 3 veces a cada lado = 20-22-24-26-28-30 puntos. Continuar tejiendo hasta que la pieza mida 30-33-37-41-45-49 cm. En la hilera siguiente, rematar los 6-8-8-8-10-10 puntos centrales para el escote y terminar cada hombro separadamente (= 7-7-8-9-9-10 puntos en cada hombro). Continuar con punto jersey. Rematar 1 punto en la hilera siguiente a partir del escote = 6-6-7-8-8-9 puntos. Continuar tejiendo hasta que la pieza mida 33-36-40-44-48-52 cm. Rematar. Tejer el otro hombro de la misma manera. ENSAMBLAJE: Coser las costuras de los hombros orilla con orilla, en el bucle más externo del punto más externo de manera que la costura quede plana. ORILLA DE LAS SISAS: Comenzar por el lado derecho en la parte de debajo de la sisa y levantar 40 a 48 puntos en el interior de 1 punto alrededor de la sisa, usando agujas de doble punta/aguja circular corta tamaño 8 mm y DROPS Wish (el número de puntos debe ser múltiplo de 4). Asegurarse que la orilla no quede apretada (por otro lado, tampoco son deseables demasiados puntos de manera que la orilla se enrolle hacia fuera). Tejer en resorte en redondo (2 derechos, 2 reveses) durante 2½ cm. Rematar flojo con derecho sobre derecho y revés sobre revés - ¡leer TIP PARA REMATAR! Tejer la orilla de la otra sisa de la misma manera. CUELLO: Levantar 32 a 52 puntos (incluyendo los puntos del hilo) con agujas de doble punta/aguja circular corta tamaño 8 mm y DROPS Wish (el número de puntos debe ser múltiplo de 4). Tejer en resorte en redondo (2 derechos, 2 reveses) durante 2½ cm. Rematar con derecho sobre derecho y revés sobre revés - ¡recordar el TIP PARA REMATAR! |
|
 |
|
¿Terminaste este patrón?Entonces, etiqueta tus fotos con #dropspattern #willowwoodvest o envíalas a la galería #dropsfan. ¿Necesitas ayuda con este patrón?Encontrarás 14 videos tutoriales, un espacio para comentarios/preguntas y más visitando la página del patrón en garnstudio.com © 1982-2026 DROPS Design A/S. Todos los derechos reservados. Este documento, incluyendo todas sus sub-secciones, está protegido por los derechos de autor (copyright). Lee más acerca de lo que puedes hacer con nuestros patrones en la parte de abajo de cada patrón de nuestro sitio. |
|






Con más de 40 años en el diseño de modelos de punto y de ganchillo, DROPS Design ofrece una de las más vastas colecciones de patrones gratuitos en el internet - traducidos en 17 idiomas. Al día de hoy, contamos con 333 catálogos y 12532 patrones - de los cuales 12026 están traducidos en español.
Nosotros trabajamos con mucho esmero para brindarte lo mejor que las labores de punto y ganchillo tienen para ofrecer,inspiración y consejos, así como hilos de magnífica calidad a precios increíbles! Te gustaría usar nuestros patrones para otro fin además del uso personal? Puedes leer acerca de lo que estás permitida a hacer en el texto de Copyright en la parte de abajo de todos nuestros patrones. Felices labores!
Escribe un comentario sobre DROPS Children 40-4
¡Nos encantaría saber qué piensas acerca de este patrón!
Si quieres escribir una pregunta referente al patrón, por favor asegúrate de elegir la categoría correcta en el formulario debajo, para acelerar el proceso de respuesta. Los campos obligatorios están marcados con un *.