
Categorías populares
¿Buscas un hilo?

















Comentarios / Preguntas (13)
 Justine escribió:
I am very pleased with the result. I used self-patterning yarn to create an 'All Creatures Great and Small'-inspired tank top. I am not an experienced knitter, and I found it helpful to ask ChatGPT to explain the more technical parts of the pattern, like the decreases for the armholes and picking up stitches at the end for the ribbed edges. As an inexperienced knitter, I prefer the pattern to describe the steps in more detail, row by row.
18.10.2026 - 18:28
 SANDHYA escribió:
The pattern says stocking stitch, which means 1 row is knit and 1 row purl, but the pop up also says when in round, then all rows knit. Can you please advise if all rows will be knit or alternate rows Thanks
13.07.2026 - 09:57DROPS Design respondió:
Hi Sandhya, Stocking stitch in the round on the body is "knit all rounds". When you have divided for the back and front pieces, each of these is continued back and forth. Then you knit 1 row and purl 1 row for stocking stitch. Regards, Drops team.
15.07.2026 - 06:28
SANDHYA escribió:
Hi, for a 7-8 year size, how many balls (100 gms) is needed for this vest ? Thanks
02.07.2026 - 17:46DROPS Design respondió:
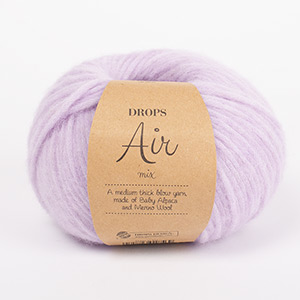
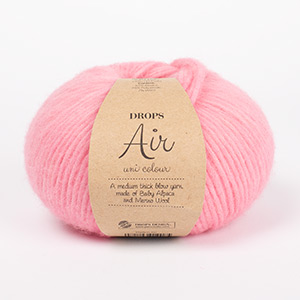
Dear Sandhya, you will find the requested amount of yarn required for each size on top of the page under tab "Pattern"; so in size 7/8 you need 100 g DROPS Air / 50 g a ball Air = 2 balls. If you like to work with another yarn, read more here. Happy knitting!
03.07.2026 - 07:31
 Heidi escribió:
Hallo! Wenn ich 60 Maschen für den Halsausschnitt aufnehme (5 - 6 Jahre) bei einer Mapro von 17 M, sind das rund 35 cm für den Kopfumfang, wobei sich das 2 re 2 li Muster noch zusammenzieht mit der 4er-Nadel. Ein Kind von 5 bis 6 Jahren hat mindestens 50 cm Kopfumfang. Wie soll das gehen? Selbst mit elastischem Abketten erreiche ich diesen Umfang nicht. Bitte um Erklärung.
10.05.2026 - 17:35DROPS Design respondió:
Liebe Heidi, beachten Sie, daß der Halskanteumfang nicht soweit wie der Kopfumfang sein soll, sonnst wäre den Hals viel zu weit; beachten Sie, daß die Maschen wirklich locker abgekettet werden, damit das Kopf dadurch passen kann. Siehe hier unterschiedliche Techniken zum Abketten. Viel Spaß beim Stricken!
11.05.2026 - 09:23
 Robin Johnson escribió:
I recently asked about the bind off instructions for the Spring Creek slipover. They were slightly ambiguous but after re-reading them several times I think I understand now. At the beginning of the row bind off 2, begin the next row and bind off 2, next row bind off 2, next row bind off 2, next row bind off 1, etc. Hopefully this is what you meant but confirmation would be appreciated. Thank you for your patience.
08.03.2026 - 03:06
Robin Johnson escribió:
Thank you for answering my last question. I have a new one. In the Spring Creek slipover pattern it says bind off 2 sts two times and 1 st. 3 times. I don't understand the difference. Wouldn't you just say bind off 3 sts four times? Is there a video showing the difference between binding off 1 st and binding off 2 sts? Thank you
07.03.2026 - 18:28DROPS Design respondió:
Dear Mrs Johnson, when working back and front piece separately back and forth you will decrease for armholes first 2 stitches at the beginning of next 4 rows (from both RS and WS), ie 2 sts 2 times in each side; then cast off 1 stitch at the beginning of next 6 rows (from both RS and WS), ie 1 st 3 times in each side. You have then cast off (2x2 + 3x1)= 7 sts in each side, 14 sts in total =56-14= 42 sts remain. Happy knitting!
09.03.2026 - 08:44
Robin Johnson escribió:
Is there any way to get this pattern in standard measurements instead of metric?
13.02.2026 - 04:16DROPS Design respondió:
Hi Robin, There is a language drop-down menu to the right of the main photo. If you choose US English it will give you inches as well as cms. Regards, Drops Team.
13.02.2026 - 06:21
 Agnes Holst Kazuhara escribió:
Mht garnet AIR har jeg strikket 2 veste iflg denne opskrift. Det er dog ærgerligt, for efter kort tid ser vestene helt fnuldrede ud. Nok pgr de 28% polyamid.
30.01.2023 - 16:02
Helle Hermann escribió:
Det var et spørgsmål ikke en kommentar!
20.01.2023 - 21:58DROPS Design respondió:
Hei Helle. Se vår svart under. mvh DROPS design
23.01.2023 - 10:58
Helle Hermann escribió:
Vest til dreng. 62 masker på pinden . Luk 2 masker 1 gang og 1 maske 3 gange = 5 masker. Hvorfor står der, at der så er 52 masker tilbage??? Svar venligst asap
20.01.2023 - 21:56DROPS Design respondió:
Hei Helle. Du har ikke nevnt hvilken str. du strikker, men tar utgangspunkt at det er str. 7/8 år. Husk at du skal felle i hver side på bakstykket og på forstykket. Du har 62 masker og skal fell av 2 masker 1 ganger og 1 maske 3 ganger = 5 masker i hver side = 10 felte masker. Du hadde 62 masker og feller 5 masker i hver side = 62-5-5= 52 masker. mvh DROPS Design
23.01.2023 - 10:58
|
|
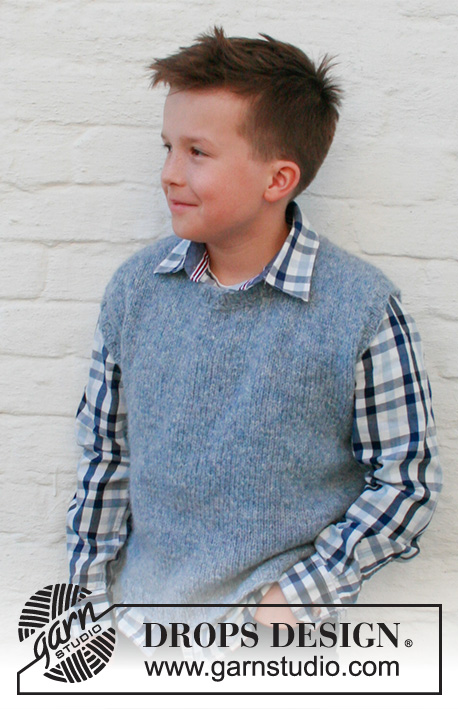
Spring Creek Slipover#springcreekslipover |
|
 |
 |
Chaleco / chaleco sin mangas de punto para niños en DROPS Air. La pieza está tejida en punto jersey con orillas en resorte. Tallas 3 a 14 años.
DROPS Children 40-10 |
|
|
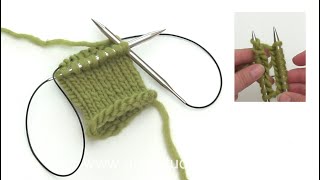
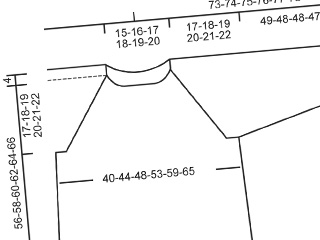
EXPLICACIONES PARA REALIZAR EL PATRÓN: ------------------------------------------------ TIP PARA DISMINUIR (distribuidos equitativamente): Para calcular cómo disminuir equitativamente, contar el número total de puntos en la aguja (p. ej. 136 puntos) y dividirlo entre el número de disminuciones a hacer (p. ej. 12) = 11.3. En este ejemplo, disminuir tejiendo juntos de derecho cada 10º y 11º punto aprox. TIP PARA REMATAR: Para evitar que la orilla de remate quede apretada, se puede rematar con una aguja de tamaño más grande. Si la orilla aún estuviese apretada, hacer 1 lazada después de aprox. cada 6º punto al mismo tiempo que se rematan los puntos; rematar las lazadas como puntos normales. ------------------------------------------------ COMENZAR LA PIEZA AQUÍ: ------------------------------------------------ CHALECO – RESUMEN DE LA PIEZA: El cuerpo se teje en redondo con aguja circular, de abajo hacia arriba. Se rematan puntos para las sisas y la pieza del frente y la pieza de la espalda son terminadas separadamente, de ida y vuelta en la aguja. Las costuras de los hombros son cosidas entre sí y, para terminar, se tejen orillas en resorte alrededor de las mangas y se teje el cuello. CUERPO: Montar 136-140-148-156-164-172 puntos con aguja circular tamaño 4 mm y DROPS Air. Tejer 1 vuelta de derecho, después tejer el resorte en redondo (2 derechos, 2 reveses) durante 3 cm. Tejer 1 vuelta de derecho disminuyendo 12-12-12-12-16-16 puntos distribuidos equitativamente – leer TIP PARA DISMINUIR = 124-128-136-144-148-156 puntos. Insertar 1 marcador al principio de la vuelta; dejar que el marcador siga la labor a medida que se teje; marca el lado y el principio de la vuelta. Cambiar a aguja circular tamaño 5 mm y continuar con punto jersey en redondo. ¡RECORDAR MANTENER LA MISMA TENSIÓN DE TEJIDO DE LA MUESTRA! Cuando la pieza mida 22-25-28-31-33-35 cm, rematar para las sisas en la vuelta siguiente de la manera siguiente: Comenzar 3 puntos antes del marcador, rematar 6 puntos, tejer 56-58-62-66-68-72 puntos (= pieza del frente), rematar 6 puntos y tejer 56-58-62-66-68-72 puntos (= pieza de la espalda). Colocar los puntos de la pieza del frente en un hilo o en una aguja suplementaria y tejer la pieza de la espalda. ESPALDA: Continuar con punto jersey de ida y vuelta y rematar para las sisas al principio de cada hilera de la manera siguiente: 2 puntos 2-1-1-1-1-1 veces y 1 punto 3-3-3-4-4-4 veces en ambos lados = 42-48-52-54-56-60 puntos. Continuar con punto jersey. Cuando la pieza mida 38-42-46-50-53-56 cm, rematar los 20-22-24-24-26-26 puntos centrales para el escote y cada hombro es terminado separadamente. Continuar tejiendo y rematar 1 punto en la hilera siguiente a partir del escote = 10-12-13-14-14-16 puntos. Tejer hasta que la pieza mida 40-44-48-52-55-58 cm. Rematar. Tejer el otro hombro de la misma manera. FRENTE: Continuar con punto jersey de ida y vuelta y rematar para las sisas al principio de cada hilera de la manera siguiente: 2 puntos 2-1-1-1-1-1 vez y 1 punto 3-3-3-4-4-4 veces en ambos lados = 42-48-52-54-56-60 puntos. Cuando la pieza mida 34-38-41-45-47-50 cm, colocar los 8-10-10-10-12-12 puntos centrales en un hilo y cada hombro es terminado separadamente. Continuar tejiendo y rematar al principio de cada hilera a partir del escote de la manera siguiente: 2 puntos 2-2-2-2-2-2 veces y 1 punto 3-3-4-4-4-4 veces = 10-12-13-14-14-16 puntos. Tejer hasta que la pieza mida 40-44-48-52-55-58 cm. Rematar. Tejer el otro hombro de la misma manera. ENSAMBLAJE: Coser las costuras de los hombros. ORILLA DE LAS MANGAS: Comenzar por el lado derecho en la parte de abajo de la sisa y levantar en el interior de 1 punto de orillo 64-68-72-76-80-84 puntos alrededor de la sisa con agujas de doble punta/aguja circular corta tamaño 4 mm y DROPS Air – el número de puntos debe ser múltiplo de 4. Tejer en resorte en redondo (2 derechos, 2 reveses) durante 2-2-2-3-3-3 cm. Rematar con derecho sobre derecho y revés sobre revés – leer TIP PARA REMATAR. Tejer la orilla de la otra manga de la misma manera. CUELLO: Comenzar por el lado derecho en uno de los hombros y levantar 56-60-68-68-72-72 puntos alrededor del escote (incluyendo los puntos en el hilo en el frente), en el interior de 1 punto de orillo con agujas de doble punta/aguja circular corta tamaño 4 mm y DROPS Air – el número de puntos debe ser múltiplo de 4. Tejer en resorte en redondo (2 derechos, 2 reveses) durante 2-2-2-3-3-3 cm. Rematar con derecho sobre derecho y revés sobre revés – recordar el TIP PARA REMATAR. |
|
 |
|
¿Terminaste este patrón?Entonces, etiqueta tus fotos con #dropspattern #springcreekslipover o envíalas a la galería #dropsfan. ¿Necesitas ayuda con este patrón?Encontrarás 16 videos tutoriales, un espacio para comentarios/preguntas y más visitando la página del patrón en garnstudio.com © 1982-2026 DROPS Design A/S. Todos los derechos reservados. Este documento, incluyendo todas sus sub-secciones, está protegido por los derechos de autor (copyright). Lee más acerca de lo que puedes hacer con nuestros patrones en la parte de abajo de cada patrón de nuestro sitio. |
|

Con más de 40 años en el diseño de modelos de punto y de ganchillo, DROPS Design ofrece una de las más vastas colecciones de patrones gratuitos en el internet - traducidos en 17 idiomas. Al día de hoy, contamos con 333 catálogos y 12548 patrones - de los cuales 12041 están traducidos en español.
Nosotros trabajamos con mucho esmero para brindarte lo mejor que las labores de punto y ganchillo tienen para ofrecer,inspiración y consejos, así como hilos de magnífica calidad a precios increíbles! Te gustaría usar nuestros patrones para otro fin además del uso personal? Puedes leer acerca de lo que estás permitida a hacer en el texto de Copyright en la parte de abajo de todos nuestros patrones. Felices labores!
Escribe un comentario sobre DROPS Children 40-10
¡Nos encantaría saber qué piensas acerca de este patrón!
Si quieres escribir una pregunta referente al patrón, por favor asegúrate de elegir la categoría correcta en el formulario debajo, para acelerar el proceso de respuesta. Los campos obligatorios están marcados con un *.