
Popular categories
Looking for a yarn?


Comments / Questions (29)
![]() Marit wrote:
Marit wrote:
Hei. Takk for en fin oppskrift. Jeg har kommet til hvor det økes og felles 1 m i ytterste av de merkede 14 m i forstykkene. Videre skjønner ikke hvordan de økte og felt maskene skal strikkes inn i vrangborden slik det ser ut i bildet?
02.04.2020 - 14:13DROPS Design answered:
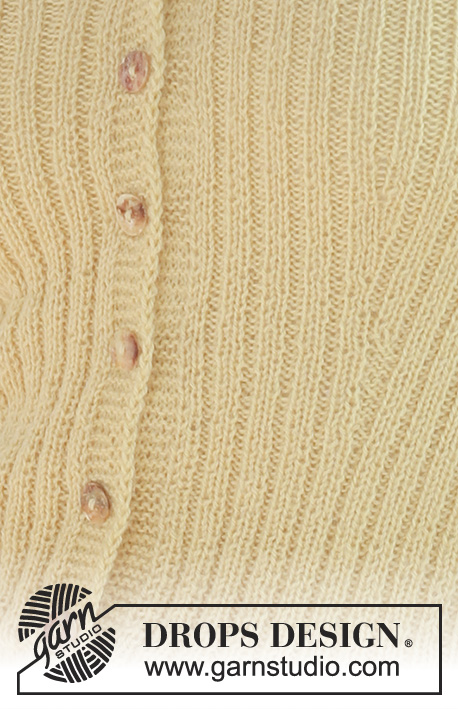
Hej Marit, når du tager ud i vrangmaskerne, skal de nye masker strikkes vrang til du har nok masker til at du kan strikke vrang på hver side af retmaskerne, se gerne det højre billede af blusen. God fornøjelse!
21.04.2020 - 11:08
![]() Brita Carlsson wrote:
Brita Carlsson wrote:
Görs minskningar och ökningar vart 4:e varv eller ska det vara 4 varv emellan varje minskning och ökning?
09.06.2015 - 21:57DROPS Design answered:
Hej På vart 4:e varv ska det vara. Lycka till!
10.06.2015 - 09:40
![]() Marit Rasmussen wrote:
Marit Rasmussen wrote:
Find a patton in same yarn as this one, a jacket with long sleeves f.e. and end up with the same nr. of stitch as this model. Good luck! Marit
27.08.2009 - 20:25
![]() Michele wrote:
Michele wrote:
I would like to make this sweater with longer straight sleeves, can someone help? thank you
23.08.2009 - 16:05Lucia wrote:
Necesito ayuda en español sobre esta parte del patron, por favor: "Now inc and dec on every 6-6-6-4-4-4 row as follows: inc 1 st towards mid front in the outermost st of the 14-14-18-18-22-22 sts between markers towards mid front and dec 1 st towards the side by K or P tog the 2 outermost sts." GRACIAS
05.08.2009 - 20:49
![]() Drops Design wrote:
Drops Design wrote:
Jo, når du tager en maske ud i den ene side så strikker du den ind i ribben. Og den maske du tager ind i den anden side vil også automatisk blive en del af ribben når du strikker dem sammen som beskrevet. I og med at du tager ud i den ene side og ind i den anden, så vil ribben forflytte sig ud mod siden. Du ser ret tydeligt på billedet hvad vi mener med det. God fornøjelse!
04.08.2009 - 15:45
![]() Indialucia wrote:
Indialucia wrote:
Quisiera que lo tradujeran al español, por favor!!!
05.07.2009 - 23:59
![]() Rosa wrote:
Rosa wrote:
J'aime beaucoup le dessin fait pas les côtes au niveau de la taille, ainsi que les manches et le bas évasés.
16.02.2009 - 21:09
![]() Anja wrote:
Anja wrote:
Heel subtiel! Komt toch snel hoop ik?!
04.02.2009 - 21:23
![]() Beatrice wrote:
Beatrice wrote:
Vacker, ungdomlig modell.
01.02.2009 - 13:49
|
|
Lemon Drop#lemondropcardigan |
|
 |
 |
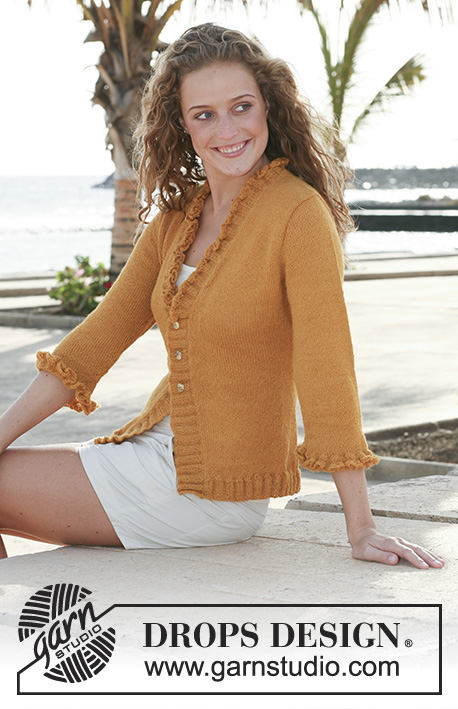
Knitted DROPS jacket in rib in ”Alpaca”. Size S to XXXL.
DROPS 111-35 |
|
|
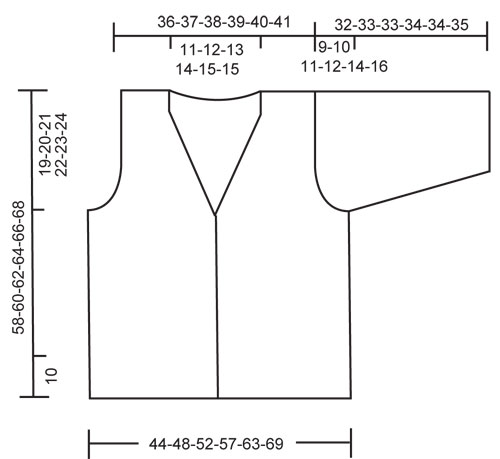
GARTER ST (back and forth on needle): K all rows. DECREASING TIP-1: K2 OR P2 tog, according to rib. INCREASING TIP: Work 1 extra st in the outermost st. BUTTONHOLES: Make buttonholes on right front band. 1 buttonhole = cast off 3rd and 4th st from mid front and cast on 2 new sts on return row. Make buttonholes when piece measures: SIZE S: 10, 15, 20, 26, 32 and 38 cm. SIZE M: 10, 15, 21, 27, 33 and 39 cm. SIZE L: 10, 16, 22, 28, 34 and 40 cm. SIZE XL: 10, 16, 22, 28, 34 and 41 cm. SIZE XXL: 10, 16, 22, 28, 35 and 42 cm. SIZE XXXL: 10, 16, 22, 29, 36 and 43 cm. DECREASING TIP-2: Make all dec from RS inside 6 sts. After 6 sts: slip 1 st as if to K, K1, psso Before 6 sts: K2 tog. -------------------------------------------------------- BODY PIECE: Worked back and forth on circular needle from mid front. Cast on 232-252-272-292-324-356 sts (includes 6 front band sts each side) on circular needle size 3 mm with Alpaca. Work 10 rows garter st - see above. Continue in stocking st with 6 front band sts each side in garter st. When piece measures 10 cm dec 10 sts evenly = 222-242-262-282-314-346 sts. Remember BUTTONHOLES on right front band – see above. Now continue as follows, from RS: 6 front band sts, rib, K2/P2, across the row until 8 sts remain, K2, 6 front band sts in garter st. When piece measures 18 cm insert 4 markers in piece as follows: M-1 after 24-24-24-28-28-32 sts, M-2 after 38-38-42-46-50-54 sts, M-3 after 184-204-220-236-264-292 sts and M-4 after 198-218-238-254-286-314 sts (= 14-14-18-18-22-22 sts between markers on each front piece). READ ALL OF THE FOLLOWING SECTION BEFORE CONTINUING! Now inc and dec on every 6-6-6-4-4-4 row as follows: inc 1 st towards mid front in the outermost st of the 14-14-18-18-22-22 sts between markers towards mid front and dec 1 st towards the side by K or P tog the 2 outermost sts. SEE INCREASING TIP and DECREASING TIP-1! Incorporate the inc sts in rib as you go along – the 14-14-18-18-22-22 sts in the middle of front piece will now shift towards the side of the jacket. Continue like this, shifting the 14-14-18-18-22-22 sts on every 6-6-6-4-4-4 row a total of 8-8-8-12-12-12 times. Continue as follows from RS: 6 front band sts, * K2/P2 *, repeat from *-* until 8 sts remain, K2 and 6 front band sts. Insert 2 new markers in piece, 58-63-68-73-81-89 sts in from each side (back piece = 106-116-126-136-152-168 sts). When piece measures 39-40-41-42-43-44 cm cast off 6-6-6-8-8-8 sts each side (= 3-3-3-4-4-4 sts on each side of marker). Now complete back and front pieces separately. BACK PIECE: = 100-110-120-128-144-160 sts. Continue with K over K and P over P. AT THE SAME TIME cast of to shape the armhole each side on every other row: 3 sts 0-0-0-1-2-3 times, 2 sts 2-4-5-5-7-8 times and 1 st 3-3-4-4-4-6 times = 86-88-92-94-96-98 sts. When piece measures 54-56-58-60-62-64 cm work garter st on the middle 38-40-44-46-48-48 sts with remaining sts as before. When piece measures 56-58-60-62-64-66 cm cast off the middle 24-26-30-32-34-34 sts for neck and complete each shoulder separately. Cast off 1 st on neckline on next row = 30-30-30-30-30-31 sts left on shoulder. Continue with K over K and P over P with 6 garter sts each side towards neckline. Cast off when piece measures 58-60-62-64-66-68 cm. LEFT FRONT PIECE: = 55-60-65-69-77-85 sts. Continue with K over K and P over P with front band in garter st as before. AT THE SAME TIME cast off for armhole at the side as described for back piece, and AT THE SAME TIME dec to shape the neckline inside 6 front band sts – SEE DECREASING TIP-2: 1 st on every other row a total of 18-19-21-22-23-23 times. When all dec for armhole and neckline are complete there are 30-30-30-30-30-31 sts left on shoulder. Continue until piece measures 58-60-62-64-66-68 cm and cast off with K over K and P over P. RIGHT FRONT PIECE: = 55-60-65-69-77-85 sts. Like left front piece, but mirrored. SLEEVE: Worked back and forth on pointed needles. Cast on 84-84-88-88-92-96 sts (includes 1 edge st each side) on needle size 3 mm with Alpaca. Work 10 rows garter st and continue in stocking st. When piece measures 13-13-12-12-10-9 cm K 1 row AT THE SAME TIME dec 10 sts evenly = 74-74-78-78-82-86 sts. Continue in rib, K2/P2, with 1 edge st each side. AT THE SAME TIME Inc 1 st each side and repeat the inc on every 6-4-4-2-2-2 row a total of 5-7-7-11-12-13 times = 84-88-92-100-106-112 sts (incorporate inc sts in rib as you go along). When piece measures 23-23-22-22-20-19 cm (less for the larger sizes because of longer sleeve cap and wider shoulder) cast off for sleeve cap each side at the beg of every row: 3 sts 1 time, 2 sts 5 times and 1 st 2-4-6-7-10-13 times, then 2 sts each side until piece measures approx 31-32-32-33-33-34 cm, now cast off 3 sts each side 1 time and cast off remaining sts. Piece measures approx 32-33-33-34-34-35 cm. ASSEMBLY: Sew shoulder seams. Sew sleeve seams and set in sleeves. Sew on buttons. |
|
 |
|
Have you finished this pattern?Tag your pictures with #dropspattern #lemondropcardigan or submit them to the #dropsfan gallery. Do you need help with this pattern?You'll find 15 tutorial videos, a Comments/Questions area and more by visiting the pattern on garnstudio.com. © 1982-2026 DROPS Design A/S. We reserve all rights. This document, including all its sub-sections, has copyrights. Read more about what you can do with our patterns at the bottom of each pattern on our site. |
|


With over 40 years in knitting and crochet design, DROPS Design offers one of the most extensive collections of free patterns on the internet - translated to 17 languages. As of today we count 324 catalogues and 12290 patterns translated into English (UK/cm).
We work hard to bring you the best knitting and crochet have to offer, inspiration and advice as well as great quality yarns at incredible prices! Would you like to use our patterns for other than personal use? You can read what you are allowed to do in the Copyright text at the bottom of all our patterns. Happy crafting!
Post a comment to pattern DROPS 111-35
We would love to hear what you have to say about this pattern!
If you want to leave a question, please make sure you select the correct category in the form below, to speed up the answering process. Required fields are marked *.