
Popular categories
Looking for a yarn?


Comments / Questions (23)
![]() Silva wrote:
Silva wrote:
Hallo, ich würde den Poncho gerne ein gutes Stück länger stricken; ca auf Kniehöhe. Würde das gehen, einfach nur länger stricken oder müsste er dann unten weiter werden, also mit mehr Maschen arbeiten. Doppelte Garnmenge würde wohl reichen?
30.08.2017 - 06:50DROPS Design answered:
Liebe Silva, leider können wir nicht jeder unserer Anleitung nach jedem Geschmack anpassen. Gerne können Sie sich von anderen ähnlichen Modellen inspirieren - Ihr DROPS Laden wird Ihnen auch gerne damit helfen. Viel Spaß beim stricken!
30.08.2017 - 09:21
![]() Ellen wrote:
Ellen wrote:
Kva storleik tilsvarer str. L/XL?
05.01.2017 - 14:38DROPS Design answered:
Hej Ellen. Se maalskitsen nederst i opskriften. Her staar alle maal i cm per störrelse. Du kan ogsaa laese mere her hvordan du vaelger str
09.01.2017 - 15:15
![]() Ingrid Schwarzer wrote:
Ingrid Schwarzer wrote:
Hallo! Toller Poncho! Habe nur die Anleitung nicht ganz verstanden.. Muss ich die Abnahme nur ein einziges Mal machen, oder dann in die Höhe alle 6 cm?! Danke und Lg
14.05.2016 - 14:15DROPS Design answered:
Liebe Ingrid, Sie machen die Abnahmen alle 6 cm, je nach Größe 7-8-9 Mal.
16.05.2016 - 12:30
![]() Inge wrote:
Inge wrote:
Maar je kan toch gewoon doorbreien op je rondbreinaald en dan heb je ineens een gesloten poncho en moet je hem nadien niet meer dichtnaaien???
12.11.2013 - 16:55DROPS Design answered:
Hoi Inge. Dat is inderdaad wel mogelijk. Niet iedereen willen alleen in de rondte breien, dus daarom hebben wij ook gekozen voor een patroon waar je heen en weer kan breien. Je mag natuurlijk altijd zelf aanpassen als je dat wilt.
13.11.2013 - 15:18
![]() Inge wrote:
Inge wrote:
Hallo Waarom moet er heen en weer gebreid worden op de rondbreinaald en nadien aaneengezet? Waarom mag er niet ineens een gesloten ponch o gebreid worden op de rondbreinaald? Vriendelijke groet
12.11.2013 - 12:13DROPS Design answered:
Hoi Inge. Je kan veel meer steken kwijt op een rondbreinaald - en dat lukt niet altijd op een rechte nld.
12.11.2013 - 12:53Adiela Sanguino Trillos wrote:
Que rico poder tener mas claro el patron para hacerlo y lucirlo pues esta hermoso
01.04.2012 - 02:22
![]() Carla wrote:
Carla wrote:
Wat een prachtige patronen ! Dank voor deze gratis voorziening. Deze oma is heel erg blij met die mogelijkheid. Groet Carla
01.11.2011 - 10:14
![]() Hilly wrote:
Hilly wrote:
Prachtige poncho
20.06.2011 - 18:33
![]() Bärbel wrote:
Bärbel wrote:
Der Poncho ist sicher leicht zu stricken, sieht kuschelig warm aus.
18.06.2011 - 19:27Mariely wrote:
Es hermoso.!!!!!Por favor el patrón para hacerlo.gracias
15.06.2011 - 18:29
|
|
Macy Mae#macymaeponcho |
|
 |
 |
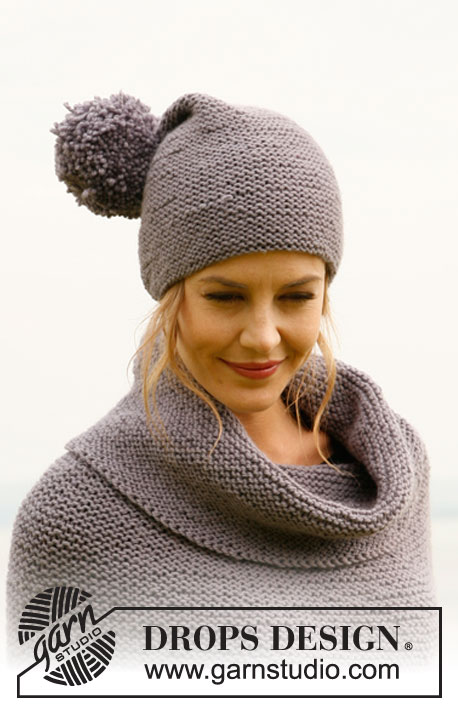
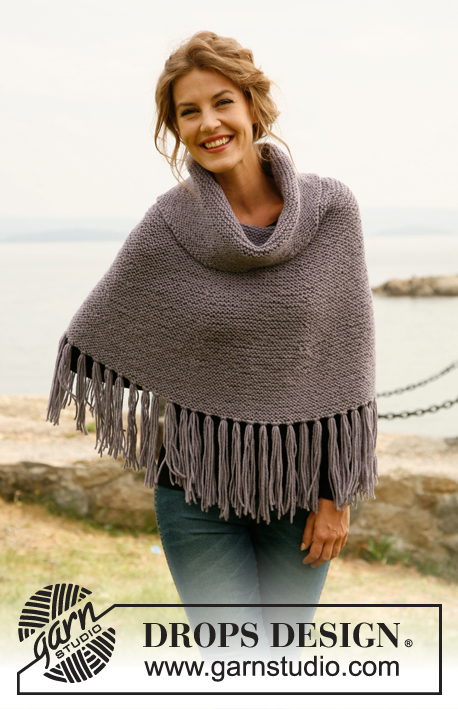
Knitted DROPS poncho with fringes and large collar and hat in garter st with pompom in ”Nepal”. Size: S to XXXL
DROPS 134-16 |
|
|
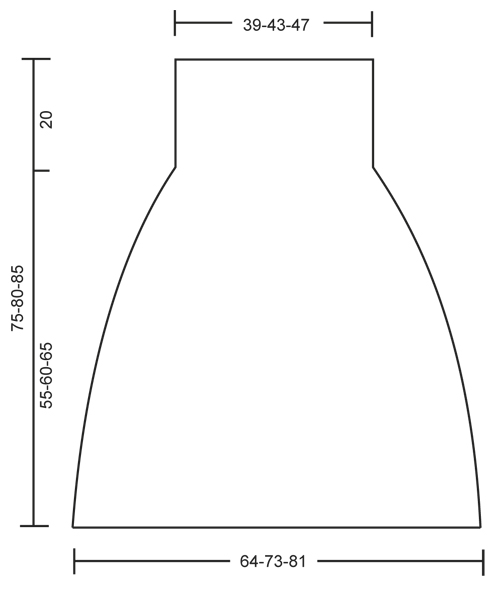
GARTER ST (back and forth on needle): K all rows. -------------------------------------------------------- -------------------------------------------------------- PONCHO: Worked back and forth on circular needle (to make room for all the sts), work bottom up. Cast on 180-204-228 sts on circular needle size 6 mm / US 10 with Nepal. Work in GARTER ST - see explanation above! REMEMBER THE GAUGE! When piece measures 12 cm / 4¾", insert 6 markers as follows: 1st marker after 15-17-19 sts, then insert the next 5 markers 30-34-38 sts apart, 15-17-19 sts remain after last marker. On next row, dec 1 st on each side of every marker by K 2 tog (= 12 sts dec). Repeat dec every 6 cm / 2⅜" a total of 7-8-9 times = 96-108-120 sts. When piece measures 55-60-65 cm / 21½"-23½"-25½", inc 1 st on each side of every marker by working 2 sts in 1 st = 108-120-132 sts. When piece measures 75-80-85 cm / 29½"-31½"-33½", LOOSELY bind off. ASSEMBLY: Sew poncho tog mid back, edge to edge with 1 stitch in every st to avoid a chunky seam. FRINGES: Insert fringes in every 4th st at the bottom along cast on edge. 1 FRINGE = Cut 4 strands with a length of 45 cm / 18" each. Fold them double and pull loop through cast on edge. Then pull yarn ends through the loop and tighten. -------------------------------------------------------- HAT: Worked back and forth on needle, bottom up. Cast on 80-88 sts with Nepal on needle size 4.5 mm / US 7. Work in GARTER ST - see explanation above! REMEMBER THE GAUGE! When piece measures 16-17 cm / 6¼"-6¾", insert 8 markers in the piece – insert first marker after 5-5 sts, then insert the next 7 markers 10-11 sts apart, 5-6 sts remain after last marker. * On next row K 2 tog after every marker. K 3 rows without dec. On next row K 2 tog before every marker. K 3 rows without dec *. Repeat from *-* a total of 3 times = 32-40 sts. Work next row as follows: * K 2, K 2 tog *, repeat from *-* the entire row = 24-30 sts. K 1 row without dec. Work next row as follows: * K 1, K 2 tog *, repeat from *-* the entire row = 16-20 sts. On next row, K2 tog across = 8-10 sts. Cut the yarn and pull it through the remaining sts. Sew hat tog mid back, edge to edge to avoid a chunky seam. The hat measures approx. 24-25 cm / 9½"-9¾" vertically. POMPOM: Make a large compact pompom approx. 10 cm / 4" in diameter and sew it to the top of hat. |
|
 |
|
Have you finished this pattern?Tag your pictures with #dropspattern #macymaeponcho or submit them to the #dropsfan gallery. Do you need help with this pattern?You'll find 8 tutorial videos, a Comments/Questions area and more by visiting the pattern on garnstudio.com. © 1982-2026 DROPS Design A/S. We reserve all rights. This document, including all its sub-sections, has copyrights. Read more about what you can do with our patterns at the bottom of each pattern on our site. |
|


With over 40 years in knitting and crochet design, DROPS Design offers one of the most extensive collections of free patterns on the internet - translated to 17 languages. As of today we count 324 catalogs and 12290 patterns - 12280 of which are translated into English (US/in).
We work hard to bring you the best knitting and crochet have to offer, inspiration and advice as well as great quality yarns at incredible prices! Would you like to use our patterns for other than personal use? You can read what you are allowed to do in the Copyright text at the bottom of all our patterns. Happy crafting!
Post a comment to pattern DROPS 134-16
We would love to hear what you have to say about this pattern!
If you want to leave a question, please make sure you select the correct category in the form below, to speed up the answering process. Required fields are marked *.