Comments / Questions (195)
![]() Aurélie wrote:
Aurélie wrote:
Bonjour J'arrive quasiment au bout du modèle (il me reste environ 10 cm de dos à tricoter, les poches et les coutures) mais je suis au bout de la 6e pelote. Je n'aurai clairement pas suffisamment pour terminer, j'ai donc commandé une nouvelle pelote chez Kalidou. Un peu déçue cependant de ne pas avoir la possibilité de finir mon modèle avant cette nouvelle livraison. J'espère que cela n'est pas fréquent (j'ai un second modèle drops en vue). Merci
31.01.2021 - 10:22DROPS Design answered:
Bonjour Aurélie, aviez-vous bien le bon échantillon et avez-vous bien conservé la même tension que pour l'échantillon? Et tricotez-vous bien en Merino Extra Fine (ou avez-vous bien adapté la quantité à l'alternative choisie via le convertisseur par exemple). Nous n'avions eu jusqu'alors aucun retour sur la quantité de ce modèle. Nous prenons note de votre retour, merci. Bon tricot!
01.02.2021 - 10:38
![]() Katarina wrote:
Katarina wrote:
Hej! Jag ska sticka bakstycket men stöter på problem med mönstret M.1. Detta uppstår då framsidorna är stickade spegelvända mot varandra. Höger framsida stickar sitt första varv på mönstret åt höger, medan vänster framsida stickar sitt första varv på mönstret åt vänster. När jag nu ska sticka över båda kommer mönstret att krocka i mitten. Tacksam för hjälp!
09.01.2021 - 18:27
![]() Aurélie wrote:
Aurélie wrote:
Bonjour Les augmentations pour les manches doivent elles intervenir avant ou après la maille lisière ? Cette dernière est elle gardée ? Merci beaucoup
29.12.2020 - 16:21DROPS Design answered:
Bonjour Aurélie, les mailles des manches ne sont pas à proprement parlé "augmentées" mais "montées" en fin de rang sur le côté (sur l'endroit pour le devant droit, sur l'envers pour le devant gauche) comme le montre cette vidéo. Tricotez ensuite les nouvelles mailles au rang suivant en suivant M.1, et quand elles sont toutes montées, avec 6 m point mousse. Bon tricot!
04.01.2021 - 11:47
![]() Lene Knudsen wrote:
Lene Knudsen wrote:
Jeg strikker cardiganen i str. 12/18 mnd. Jeg ønsker ikke V-udskæring i hals, men vil gerne strikke forstykkerne lige op med rund hals. Jeg har prøvet at kigge på de andre babycardiganer med rund hals i samme garn, men kan ikke finde nogen med samme pinde nr. eller strikket på samme måde, så jeg er i tvivl om hvordan jeg lukker af til hals. Håber meget I kan hjælpe. På forhånd tak for svar. Mvh Lene
25.10.2020 - 23:05DROPS Design answered:
Hei Lene. Du kan evnt strikke som bakstykket, men starte fellingene til hals noen pinner tidligere. God Fornøyelse!
26.10.2020 - 15:18
![]() MRS M F SHEEKEY wrote:
MRS M F SHEEKEY wrote:
Deux questions au sujet du montage 1- Pourquoi faire 6 mailles au point mousse,ce qui représente 2cm si le revers fait 5cm ?? de plus lepoint fantaise retournén e fait pas très joli à mon humble avis 2- je nevois pas der revers de manche sur la photo attenante aux explications.Est ce un erreur||?
25.10.2020 - 19:53DROPS Design answered:
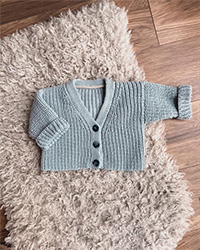
Bonjour Mme Sheekey, la bordure des manches se compose de 6 mailles au point mousse, nous vous proposons de retourner les manches sur 5 cm si vous le souhaitez - on voit la bordure repliée de la manche gauche sur la 2ème photo - ainsi le gilet "grandit" avec bébé. Bon tricot!
26.10.2020 - 13:00
![]() Sue wrote:
Sue wrote:
Hi I have got to the point where I have just completed the increasing for the sleeve and am about to continue but am not sure what the pattern means about the 6sts in garter stitch for each side. Does it mean that I knit 6 sets in garter stitch at the end of the increased sleeve stitches?
06.10.2020 - 16:37DROPS Design answered:
Dear Sue, after you have cast on all stitches for sleeve, you work the 6 sts towards mid front in garter stitch as before and work the last 6 sts towards bottom of sleeve (= the last stitches seen from RS) in garter stitch for the edge of sleeve and work the other stitches in between in pattern as before. Happy knitting!
06.10.2020 - 17:14
![]() Andrea Hedworth wrote:
Andrea Hedworth wrote:
I’ve looked at the pattern it does not say how many stitches you start with when you increase or decrease in fact it don’t tell you much of anything
03.09.2020 - 11:30DROPS Design answered:
Dear Mrs Hedworth, start piece with RIGHT FRONT PIECE, you will then read how many sts you have to cast on depending on the size, and how to cast on stitches for sleeves, etc... Happy knitting!
03.09.2020 - 13:53
![]() Le wrote:
Le wrote:
I have the impression that the sts indication for the pocket slit is not correct: “When piece measures 7-8-9 (10-11) cm, work next row as follows from RS: 6 band sts in garter st, diagram M.1 over the next 18-22-22 (26-26) sts, slip the last 12-16-16 (20-20) sts ...“ After 6 sts for the band, if we do 18 stitches in M1 (size 1/3 months) then there are only 7 sts left. It’s impossible to still have 12 sts for the slit and another 6sts M1 and 1 edge st. Could you please check?
22.08.2020 - 14:42DROPS Design answered:
Dear Le, in size 1/3 months you should slip the last 12 sts worked on a thread; this means the 31 sts will look like this: 6 front band sts, 6 sts in M.1, 12 sts on a thread, 6 sts in M.1, 1 edge st. Happy knitting!
24.08.2020 - 09:21
![]() Anabela Ramalho wrote:
Anabela Ramalho wrote:
Tinha este.modrlo numa revista Diana Bebé n 35 que perdi. Como posso fazer para comprar outa
19.08.2020 - 00:52DROPS Design answered:
Bom dia, Basta ir à página do modelo e tem lá as explicações completas com tutoriais em vídeo no fundo da página. O link para as explicações em português está aqui: https://www.garnstudio.com/pattern.php?id=5449&cid=28 Bom Tricô!
19.08.2020 - 09:47
![]() Laurie Garris wrote:
Laurie Garris wrote:
For Checco's Dream pattern, not sure how many skeins of DROPS Merino Extra Fine mix (50g) are needed for the size 1/3 years. Is it 5 skeins (250 g)? Please clarify. Thank you.
04.07.2020 - 03:50DROPS Design answered:
Dear Lauris, for the smallest size ( for 1/3 months) you will need 200 gramms (= 4 balls), for the size that fits 3/4 years old children) you will need 300 gramms (= 6 balls). Happy Knitting!
06.07.2020 - 03:25
Checco's Dream#checcosdreamcardigan |
|||||||
 |
 |
||||||
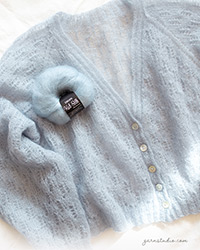
Knitted jacket with seamless sleeves in moss st for baby and children in DROPS Merino Extra Fine
DROPS Baby 21-11 |
|||||||
|
GARTER ST (back and forth on needle): K all rows. PATTERN: See diagram M.1 - diagram shows pattern from RS. BUTTON HOLES: Cast off for button holes on right band. 1 button hole = K tog 3rd and 4th st from edge and make 1 YO, on next row K YO. Cast off for button holes when piece measures: Size 1/3 months: 2, 6, 11 and 15 cm. Size 6/9 months: 2, 7, 12 and 16 cm. Size 12/18 months: 2, 8, 13 and 19 cm. Size 2 years: 2, 7, 12, 17 and 22 cm Size 3/4 years: 2, 8, 13, 19 and 24 cm DECREASE TIP (applies to V-neck): All dec are done from RS! DEC AFTER 6 BAND STS AS FOLLOWS: When first st should be K: Slip 1 st as if to K, K 1, psso. When first st should be P: P 2 twisted tog (i.e. work in back loop of st instead of front). DEC BEFORE 6 BAND STS AS FOLLOWS: When last st should be K: K 2 tog. When last st should be P: P 2 tog. -------------------------------------------------------- JACKET: Worked back and forth on circular needle. Beg on front piece, cast on new sts for sleeve and work up to the shoulder. Work the other front piece, then place both front pieces tog and work down the back piece. RIGHT FRONT PIECE: Cast on 31-35-39 (43-43) sts (incl 6 band sts towards mid front and 1 edge st in the side) on circular needle size 4 mm with Merino Extra Fine. P 1 row from WS. Then work next row as follows from RS: 6 sts in GARTER ST – see explanation above (= band), * K 2, P 2 *, repeat from *-* until 1 st remains and finish with 1 edge st in GARTER ST. When a total of 4 rows in rib have been worked, continue with diagram M.1 with 6 band sts in garter st towards mid front and 1 edge st in garter st in the side. REMEMBER BUTTON HOLES ON RIGHT BAND - see explanation above. REMEMBER THE KNITTING TENSION! When piece measures 7-8-9 (10-11) cm, work next row as follows from RS: 6 band sts in garter st, diagram M.1 over the next 18-22-22 (26-26) sts, slip the last 12-16-16 (20-20) sts that were worked on a stitch holder for pocket slit, continue diagram M.1 over the next 6-6-10 (10-10) sts and finish with 1 edge st in garter st. On next row cast on 12-16-16 (20-20) new sts over the sts on stitch holder = 31-35-39 (43-43) sts. Work pattern as before until piece measures 16-17-20 (23-25) cm. READ ALL OF THE FOLLOWING SECTION BEFORE CONTINUING! V-NECK: Work 2 rows in garter st back and forth over the 6 band sts at beg of row (do not work the other sts on row) – this is done to make the V-neck pretty. Then work over all sts again while AT THE SAME TIME dec for V-neck every other row (i.e. on every row from RS) as follows: Dec 1 st a total of 12-14-16 (16-16) times – read DECREASE TIP. INCREASE FOR SLEEVE: AT THE SAME TIME cast on new sts at the end of every row towards the side for sleeve: 5 sts 4-4-5 (5-5) times, 7 sts 0-1-1 (2-3) times and 25-24-21 (22-27) sts 1 time. After last inc, continue diagram M.1 with 6 sts in garter st in each side for band and sleeve edge until piece measures 27-29-33 (37-40) cm. There are now 64-72-76 (88-100) sts on needle. Insert a marker here – NOW MEASURE PIECE FROM HERE. Continue pattern as before until 1 cm have been worked from marker – adjust so that last row is from WS. Slip the sts on a stitch holder. LEFT FRONT PIECE: Work as right front piece but reversed. Also make sure that M.1 is worked mirrored in relation to the right front piece. NOTE: Do not cast off for button holes on left band. BACK PIECE: Slip the 64-72-76 (88-100) sts from right front piece back on circular needle size 4 mm, cast on 14-14-18 (18-22) new sts on needle (= neck line in back of neck) and slip the 64-72-76 (88-100) sts from left front piece on to same circular needle = 142-158-170 (194-222) sts. Work next row as follows from RS: 6 sts in garter st (= sleeve edge), diagram M.1 as before over the next 52-60-64 (76-88) sts, 26-26-30 (30-34) sts in garter st (= neck edge at the back), diagram M.1 over the next 52-60-64 (76-88) sts and 6 sts in garter st (= sleeve edge). Continue like this until 2 ridges (= 4 rows in garter st) have been worked over the middle 26-26-30 (30-34) sts. Then continue diagram M.1 as before over all sts with 6 sts in garter st in each side for sleeve edges. When piece measures 7½-8-8 (8½-8½) cm from marker on shoulder, cast off at beg of every row in each side as follows: 25-24-21 (22-27) sts 1 time, 7 sts 0-1-1 (2-3) times and 5 sts 4-4-5 (5-5) times = 52-56-64 (72-76) sts remain on back piece. Continue diagram M.1 with 1 edge st in garter st in each side until piece measures 25-27-31 (35-38) cm from marker. Work next row as follows from RS: 1 edge st in garter st, * K 2, P 2 *, repeat from *-* until 3 sts remain and finish with K 2 and 1 edge st in garter st. When a total of 4 rows in rib have been worked, K 1 row (from RS) over all sts before loosely casting off. ASSEMBLY: Sew the side and underarm seams inside 1 edge st. Sew on buttons. Fold up the bottom 5 cm on each sleeve and fasten if necessary the fold up edge with a couple of neat little stitches. POCKET SLIT: Slip the 12-16-16 (20-20) sts from stitch holder on one front piece back on circular needle size 4 mm. Work rib back and forth with 1 st in garter st and 2 K sts in each side (seen from RS). When pocket slit measures 2½-2½-3 (3-3) cm, loosely cast off with K over K and P over P. Sew pocket slit to front piece with duplicate sts in each side. Sew pocket opening to bottom of pocket slit (where sts were put on a stitch holder) on the back of piece. Work another pocket slit the same way on the other front piece. |
|||||||
Diagram explanations |
|||||||
|
|||||||

|
|||||||
Have you finished this pattern?Tag your pictures with #dropspattern #checcosdreamcardigan or submit them to the #dropsfan gallery. Do you need help with this pattern?You'll find 15 tutorial videos, a Comments/Questions area and more by visiting the pattern on garnstudio.com. © 1982-2025 DROPS Design A/S. We reserve all rights. This document, including all its sub-sections, has copyrights. Read more about what you can do with our patterns at the bottom of each pattern on our site. |
|||||||



Post a comment to pattern DROPS Baby 21-11
We would love to hear what you have to say about this pattern!
If you want to leave a question, please make sure you select the correct category in the form below, to speed up the answering process. Required fields are marked *.