
Popular categories
Looking for a yarn?


Comments / Questions (86)
![]() Beth wrote:
Beth wrote:
For my size, before starting M1 on sleeve, I should have 52 stitches. After an increase on each side of marker a total of 8 times I should have 68 but pattern says 62 after all increases and decreases. The pattern doesn't call for any decreases on sleeve. Also, when I put sleeves on needle with body, will it just be the 24 stitches with the cables with the test on a holder?
12.12.2018 - 04:23DROPS Design answered:
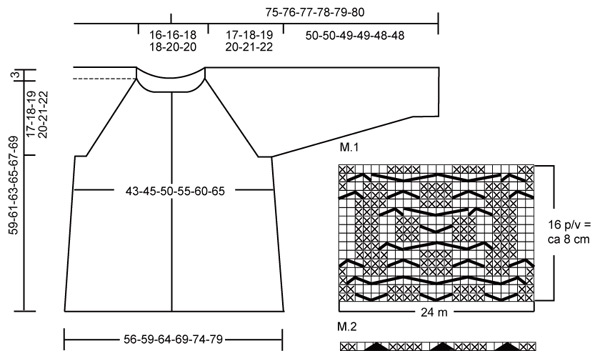
Dear Beth, after all increases are done you will have 68 sts, but after you have worked M.2 over M.1 you will decrease 6 sts in M.2 (see last symbol under diagram text worked in A.2 over the cables = 2 sts dec over each cable) = 62 sts remain. Happy knitting!
12.12.2018 - 10:00
![]() Thecraftywiccan wrote:
Thecraftywiccan wrote:
I'm really enjoying knitting this project, I am however having a few issues with the pattern, its quite confusing to read scattered around as it it. I already have a few more patterns bookmarked and Im looking forward to knitting them.
16.03.2018 - 13:23
![]() Tammy Lebel wrote:
Tammy Lebel wrote:
Also, it says to insert a M1, 11 stitches after M1, I just don’t understand
10.10.2017 - 07:44DROPS Design answered:
Dear Mrs Lebel, you are inserting a marking thread = MT for marking thread. Happy knitting!
10.10.2017 - 09:45
![]() Tammy Lebel wrote:
Tammy Lebel wrote:
Thanks for the fast response, I’ve read the chart that way, still not working out, when it says to increase 6 stitches evenly, do I do that in the reverse stockingnette part of the sleeve?
10.10.2017 - 07:38DROPS Design answered:
Dear Mrs Lebel, row 1 in M.1= P2, Slip 2 sts on cable needle behind piece, K2, K2 from cable needle, P4, Slip 2 sts on cable needle behind piece, K2, K2 from cable needle, P4, Slip 2 sts on cable needle behind piece, K2, K2 from cable needle, P2. The 6 sts increased evenly on sleeve after M.1 are increased all the sts worked in garter st except over M.1. Happy knitting!
10.10.2017 - 09:44
![]() Tammy Lebel wrote:
Tammy Lebel wrote:
I’m not understanding this M1, do I read leftvto right? This is the first cable pattern that is not written out, so I’m struggling with the chart
09.10.2017 - 09:51DROPS Design answered:
Dear Mrs Lebel, read diagrams from the right towards the left from RS and from the left towards the right from RS, starting from bottom corner on the right side. Happy knitting!
09.10.2017 - 10:12
![]() Sue wrote:
Sue wrote:
Hi I am afraid that I can't read a chart is it possible to have written instructions for the 2 charts please? Many thanks Sue
16.08.2016 - 16:53DROPS Design answered:
Dear Sue, only diagram is available to this pattern, but please read more about diagrams here and remember your DROPS store will have more tips & advices for you, even per mail or telephone. Happy knitting!
17.08.2016 - 09:03
![]() Becky Matthews wrote:
Becky Matthews wrote:
Not sure what to do after I put the 10 stitches on the stitch holder. When I am knitting the next row, do I tighten up my yarn behind the ten stitches or leave a loose line of yarn. I can't visualize what the ten stitches do.
06.07.2016 - 00:01DROPS Design answered:
Dear Mrs Matthews, these 10 sts will be then worked tog with the hood afterwards. From RS work these 10 sts and slip them onto a stitch holder (to avoid cutting yarn), then work remaining sts on row, turn, work the first 10 sts from WS, slip them on to a st holder, work remaining sts. And continue casting off for neck as stated. Happy knitting!
06.07.2016 - 08:07
![]() Brigid McHugh wrote:
Brigid McHugh wrote:
I am having problems with the diagram. Am I supposed to read from the bottom up or the top down? I've tried it 5 different ways and not getting the cable to come out correctly. Mind you I have made many cable knit sweaters... Please help?
01.03.2016 - 07:31Brigid McHugh answered:
I see what I have done. Nevermind :-)
01.03.2016 - 07:46
![]() Janine wrote:
Janine wrote:
Just saw where I went wrong. I decrease 8 sts x 13 not 4 x 13.
18.02.2016 - 06:33
![]() Janine wrote:
Janine wrote:
Help - Stuck on yoke. Making size M. Have 228 sts on needle. After decreasing every 4th row 13 times I have 176 sts. After decreasing every other row 2 times I have 168 sts. Put 10 sts each side mid front leaves me with 148 stitches. I understand that at neck have to bind off 2 sts 3 times every row (-12sts) which leaves me with 136 stitches then 1 stitch 5 times (-10) which leaves me with 126 sts. I’m supposed to be left with 66 sts. Can anyone tell me where I have gone wrong?
18.02.2016 - 06:27
|
||||||||||||||||||||||||||||
Celtic Charm |
||||||||||||||||||||||||||||
 |
 |
|||||||||||||||||||||||||||
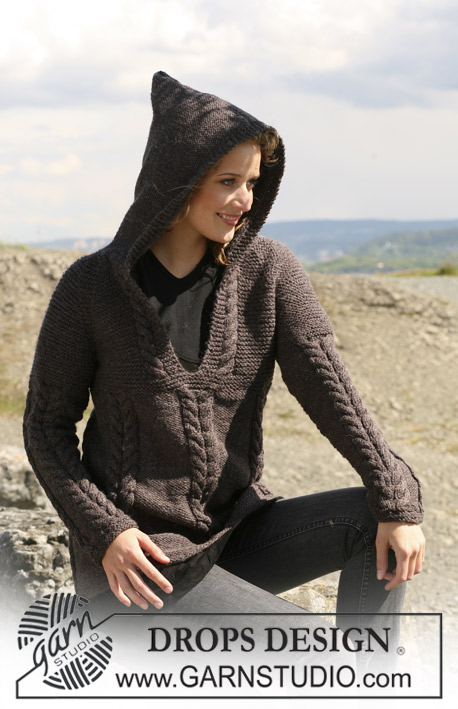
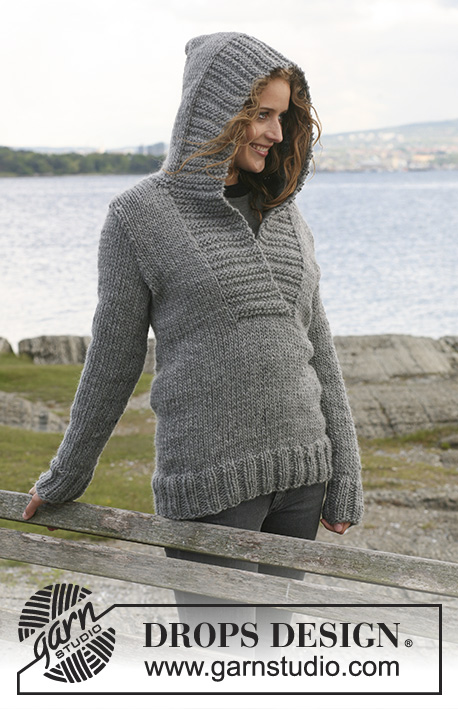
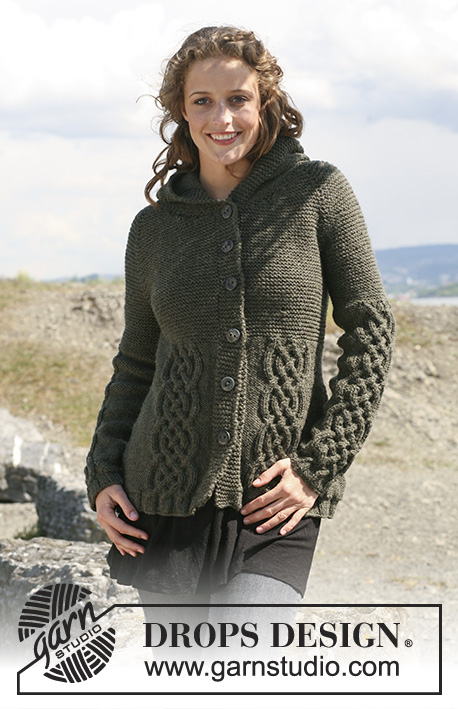
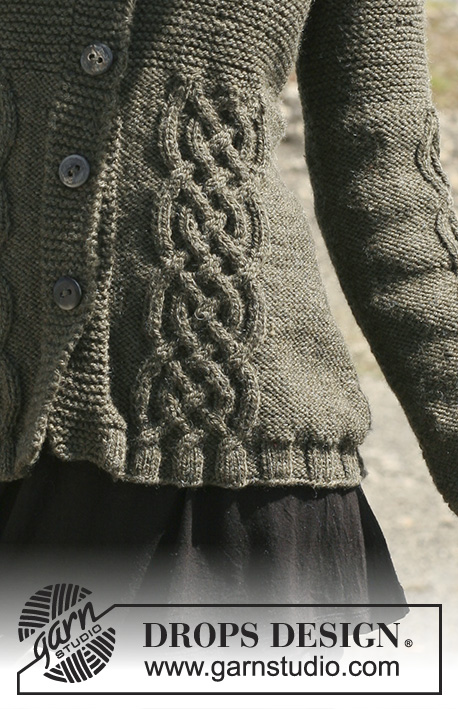
Knitted DROPS jacket in ”Alaska” with cables, raglan sleeves and hood. Size S - XXXL.
DROPS 109-3 |
||||||||||||||||||||||||||||
|
Garter st back and forth on needle: K all rows. Garter st in the round: K 1 round, P 1 round. Pattern: See diagram M.1 and M.2. Diagram shows the pattern from the RS. Knitting tip: If your knitting tension is too tight, the raglan will be too short and the armhole to small. You may compensate for this by working 1 extra row without dec at regular intervals between dec. Decreasing tip, applies to raglan: Make all dec from the RS as follows: Beg 2 sts before Marking Thread (MT), K2 tog, MT, slip 1 st as if to K, K1, psso. Buttonholes: Cast off for buttonholes on right front piece. 1 buttonhole = cast off 4th st from mid front and cast on 1 new st on return row. Cast off for buttonholes when piece measures: Size S: 16, 23, 30, 37, 44 and 52 cm. Size M: 16, 23, 30, 38, 46 and 54 cm Size L: 16, 24, 32, 40, 48 and 56 cm. Size XL: 16, 23, 30, 37, 44, 51 and 58 cm. Size XXL: 16, 23, 30, 37, 44, 52 and 59 cm. Size XXXL: 16, 23, 30, 37, 45, 53 and 61 cm. Body piece: Worked back and forth on circular needle from mid front. Cast on 220-228-244-260-276-292 sts (includes 8 front band sts each side) on circular needle size 5 mm with Alaska. P 1 row from WS and continue as follows: 8 garter sts (front band), rib, K4/P4, on the next 200-208-224-240-256-272 sts, finish with K4 and 8 garter sts (front band). When piece measures 4 cm change to circular needle size 5.5 mm and continue as follows from RS: 8 garter sts, 6-6-6-6-14-14 sts in reverse stocking st, M.1 (= 24 sts), 40-40-48-56-56-64 sts in reverse stocking st, M.1, 16-24-24-24-24-24 sts in reverse stocking st, M.1, 40-40-48-56-56-64 sts in reverse stocking st, M.1, 6-6-6-6-14-14 sts in reverse stocking st, and finish with 8 garter sts. Note: 4 K sts in M.1 should sit over K4 from rib. Insert 2 Marking Threads (MT) in piece, 59-61-65-69-73-77 sts in from each side (back piece = 102-106-114-122-130-138 sts). Continue in pattern. Remember the knitting tension! When piece measures 8 cm dec 1 st on each side of both MT (= 4 dec per row) on every 2 cm a total of 11 times = 176-184-200-216-232-248 sts. Remember to cast off for buttonholes – see above. After 4 vertical repeats of M.1 (piece measures approx 36 cm), work 1 vertical repeat of M.2 over M.1, continue in reverse stocking st on remaining sts = 152-160-176-192-208-224 sts. On next row change to needle size 5 mm and now complete piece in garter st – see above. When piece measures 42-43-44-45-46-47 cm cast off 8 sts each side for armhole (i.e. 4 sts on each side of both MT) = 136-144-160-176-192-208 sts. Put piece aside. Sleeve: Worked in the round on double pointed needles. Cast on 40-40-40-48-48-48 sts on double pointed needles size 5 mm with Alaska. Work 4 cm rib, P4/K4. Change to double pointed needles size 5.5 mm and work next round as follows: 10-10-10-18-18-18 sts in reverse stocking st, M.1 (= 24 sts) and finish with 6-6-6-6-6-6 sts in reverse stocking st. Note: 4 K sts in M.1 should sit over K4 from rib. On next round inc 2-4-6-0-2-4 sts evenly = 42-44-46-48-50-52 sts, do not inc on M.1. Insert 1 MT in piece 9-10-11-12-13-14 sts after M.1 = mid under sleeve. Continue in M.1 and reverse stocking st. When piece measures 8 cm inc 1 st on each side of MT on every 9.5-7.5-7.5-6-5-5 cm a total of 5-6-6-7-8-8 times. After 5 vertical repeats of M.1 (piece measures approx 44 cm), work 1 vertical repeat of M.2 over M.1, continue in reverse stocking st on remaining sts. Change to needle size 5 mm and complete piece in garter st. After all dec and inc are complete there are 46-50-52-56-60-62 sts on round. When piece measures 50-50-49-49-48-48 cm – less on the larger sizes because of longer sleeve cap and wider shoulders - cast off 4 sts on each side of MT for armhole = 38-42-44-48-52-54 sts. Put piece aside and knit the other sleeve. Yoke: See Knitting tip! Slip sleeves in on the same circular needle size 5 mm as body piece where cast off for armholes = 212-228-248-272-296-316 sts. Insert 1 MT in all transitions between body piece and sleeves = 4 MT. Work yoke in garter st, back and forth on needle. Work 2-1-0-1-0-1 rows and now dec for raglan – see Decreasing tip! Dec on every 4th row: 13-13-14-13-13-13 times and then on every other row: 0-2-2-5-7-8 times. At the same time when piece measures 53-55-57-59-60-62 cm slip 10 sts each side on separate stitch holders towards mid front. Cast off to shape the neckline at the beg of every row: 2 sts 3-3-6-8-9-9 times and 1 st 5-5-2-0-0-0 times. After all dec are complete there are 66-66-72-76-80-86 sts on row. K 1 row dec 8-8-12-16-16-22 sts evenly = 58-58-60-60-64-64 sts. Hood: Pick up 25-25-28-28-30-30 sts on each front piece (incl sts from stitch holders) = 108-108-116-116-124-124 sts. Change to needle size 5.5 mm and work 4 rows garter st, at the same time dec 18 sts evenly on first row = 90-90-98-98-106-106 sts. Insert 1 MT mid back (after 45-45-49-49-53-53 sts). Continue in reverse stocking st with 8 garter sts each side. At the same time inc 1 st on each side on MT on every 8th row a total of 4 times = 98-98-106-106-114-114 sts. Cast off when hood measures 38-38-39-39-40-40 cm. Assembly: Sew openings under arms. Sew on buttons. Fold hood double and sew tog at top from the RS. |
||||||||||||||||||||||||||||
Diagram explanations |
||||||||||||||||||||||||||||
|
||||||||||||||||||||||||||||
|
||||||||||||||||||||||||||||
Have you finished this pattern?Tag your pictures with #dropspattern or submit them to the #dropsfan gallery. Do you need help with this pattern?You'll find 23 tutorial videos, a Comments/Questions area and more by visiting the pattern on garnstudio.com. © 1982-2025 DROPS Design A/S. We reserve all rights. This document, including all its sub-sections, has copyrights. Read more about what you can do with our patterns at the bottom of each pattern on our site. |
||||||||||||||||||||||||||||


With over 40 years in knitting and crochet design, DROPS Design offers one of the most extensive collections of free patterns on the internet - translated to 17 languages. As of today we count 314 catalogues and 11820 patterns translated into English (UK/cm). 11820
We work hard to bring you the best knitting and crochet have to offer, inspiration and advice as well as great quality yarns at incredible prices! Would you like to use our patterns for other than personal use? You can read what you are allowed to do in the Copyright text at the bottom of all our patterns. Happy crafting!
Post a comment to pattern DROPS 109-3
We would love to hear what you have to say about this pattern!
If you want to leave a question, please make sure you select the correct category in the form below, to speed up the answering process. Required fields are marked *.