
Popularne kategorie
Szukasz włóczki?


Dodawanie i zamykanie oczek - czapeczka dziecięca
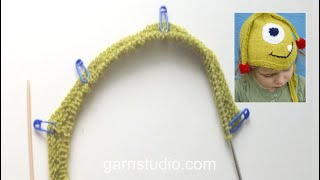
Nabierz liczbę oczek jak w opisie, w tym jest 1 o. brzegowe z każdej strony, 2 oczka brzegowe są przerabiane ściegiem francuskim (= we wszystkich rzędach na prawo).
Przerobiliśmy już 12 rzędów, w tym ściegiem francuskim i umieściliśmy 7 markerów.
Na początku filmu pokazujemy jak na prawej stronie robótki nabieramy o. w miejscu 1-szego markera wykonując 1 narzut, dalej w miejscu 2-giego markera zamykamy 1 o. z każdej strony markera następująco: zacząć 1 o. przed oczkiem z markerem, zdjąć 1 o. zdjąć 1 o. na drut pomocniczy za robótką, zdjąć 1 o. (= to z markerem), przerobić razem na prawo następne oczko i oczko z drutu pomocniczego, wreszcie przełożyć oczko zdjęte powyżej.
Powtórzyć dodawanie o. przez dodanie 1 narzutu w miejscu 3-ciego, 5-tego i 7-mego markera oraz powtórzyć zamykanie oczek w miejscu 4-tego i 6-tego markera. Przerabiać na prawo oczka między markerami i zakończyć rząd przerabiając 1 o. brzegowe na prawo.
Na lewej stronie robótki przerobić 1 o. brzegowe z każdej strony na prawo, pozostałe oczka przerobić na lewo, a narzuty przekręcona na lewo (wbijając drut z tyły robótki zamiast z przodu), aby uniknąć dziur.
Wzory, w których została wykorzystana ta technika


Video #401, wymienione w: Video do wzoru, Baby & Children, Wzory na druty - instrukcje video
Nasze instrukcje video są bez dźwięku. Jesteśmy międzynarodową firmą, a nasze video są oglądane przez ludzi na całym świecie, mówiących różnymi językami, z których wielu nie zna polskiego. Więc skoro nie ma określonego języka, którego moglibyśmy używać, zamiast dźwięku naszym filmom towarzyszą krótkie opisy, a dźwięk nie rozprasza podczas oglądania.
Możesz dostosować prędkość wyświetlania klikając na ikonkę na pasku zadań.
Zostaw komentarz lub pytanie do tej instrukcji video
Twój adres email nie będzie opublikowany. Pola obowiązkowe są oznaczone *.
Może Ci się również spodobać...


Posiadając 40 lat doświadczenia w projektowaniu wzorów na druty i szydełko, DROPS Design oferuje jedną z największych kolekcji bezpłatnych wzorów w internecie – przetłumaczonych na 17 języków. Obecnie jest dostępnych 324 katalogów i 12290 wzorów w języku polskim.
Dokładamy wszelkich starań, aby oferować Wam druty i szydełka, inspiracje, fachowe porady oraz doskonałej jakości włóczki w najlepszych cenach! Zamierzasz wykorzystać nasze wzory inaczej niż tylko do osobistego użytku? Przeczytaj jakie masz prawa w Copyright, który znajdziesz na końcu każdego wzoru. Miłej pracy!
Is the decrease stitch worked with a third needle called Central Double Decrease? (CDD)
20.06.2021 - 02:56DROPS Design Odpowiedź:
Dear Sophia, the decrease is worked here as follows: starting 1 stitch before the stitch with marker, slip 1 stitch on cable needle behind piece, slip 1 st (= st with marker), knit together next stitch and st on cable needle, pass slipped stitch over. Hope this will help. Happy knitting!
21.06.2021 - 09:05Hi - hope you can help I am up to where I am decreasing on RS and it states to decrease at 25th stitch then 59th stitch then 93rd stitch (2nd,4th and 6th marker)so I gather then when I have less than 93 stitches I then only decrease twice in row then when I have less than 59 stitches I decrease only once in row so how do I get down to 15 stitches when I am supposed to decrease on 25th stitch. Thanking You in anticipation. Regards Ann
23.08.2020 - 04:00DROPS Design Odpowiedź:
Dear Mrs Plummer, you have to insert the markers between stitches as stated, ie in first size in the 2nd st, then in the 25th st, 48th st etc.. leave the marker in place and decrease/increase before/after markers as explained, the number of stitches between markers will then vary. Happy knitting!
24.08.2020 - 09:27Wie unvorteilhaft, dass hier so dünne Wolle genommen wurde zum Zeigen. Ich kann es nicht erkennen.
23.09.2019 - 19:03The video shows one increase or decrease at each marker only while the directions state 'on each SIDE of the marker'. That would suggest TWO increases/decreases at each marker (one on EACH side of the marker). Have I missed something?
06.10.2018 - 12:41DROPS Design Odpowiedź:
Dear Mrs Clifford-Rosengren, the video shows how to increase and decrease in this pattern, ie you inc 1 st after 1st marker and before 7th marker, and then dec 1 st on each side of 2nd, 4th and 6th marker = 2 sts in total at these markers (as under DECREASE TIP) and inc 1 st on each side of 3rd and 5th marker (= 2 sts in total at these markers). Happy knitting!
09.10.2018 - 10:06Tusind tak for tippet, Anne Marie. Og tak til Garnstudio for alle de gode hjælpe videoer.
08.10.2014 - 08:00Det er meget nemmere at strikke Indtagningerne sådan: masken før OG midtermasken tages løs af (som vrangmaske), strik næste ret, træk begge de løse masker over. Voila, resultatet er helt det samme uden ekstrapind mm!
09.08.2014 - 12:09Es fehlt der Ton, Schade :-(
11.11.2013 - 10:16Renate Odpowiedź:
Hallo Yvonne, diese Video-Anleitungen sind "stumm" damit jede(r) sie ohne Sprachbarriere verstehen kann. Einfach nur durch sehen bzw. schauen. Man kann sie anhalten oder immer wieder anschauen. Das ist der "Trick" :-)
23.11.2013 - 14:02Leider fehlt die Lautstärke.
11.11.2013 - 10:16Super strona bardzo często z niej korzystam Jadzia
29.09.2013 - 16:50