
Popular categories
Looking for a yarn?


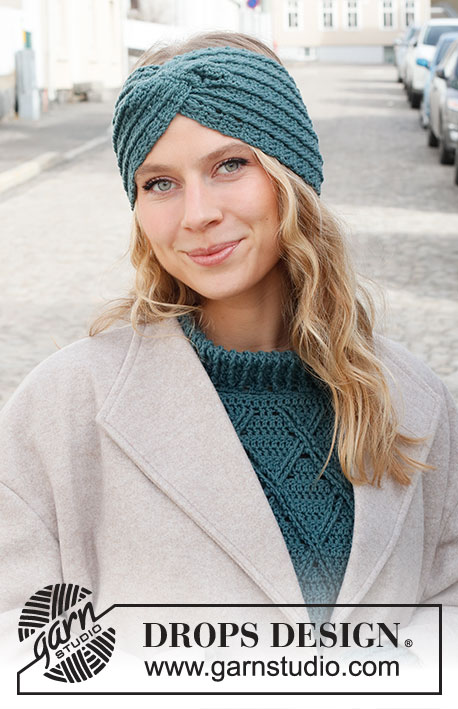
How to assembly a head band so that it becomes a braid in front
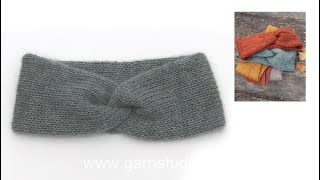
The head band is worked as a tube with an opening at each end. When assembly, lay the tube flat - make sure that the tube is not twisted. Sew the openings at the ends with a seam on each side, sew in the outermost loop of the outermost stitch so that the seam does not become thick. The piece is now a flat rectangle, fold the rectangle lengthwise so that it lies double. Now lay the long sides of the head band together in layers without twisting the work.
The ends of the head band now lies alternately inside and outside each other, and the edges lies edge to edge.
Sew through all layers with tight whip stitches with 1 stitch in each stitch - it is important that it is sewn through all layers so that the seam do not show when the work is turned inside out.
Turn the work inside out, so that the seam is on the inside of the head band.
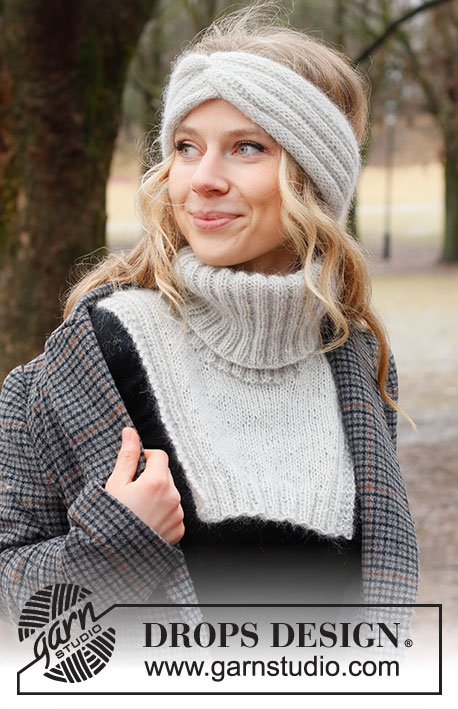
This head band is worked in DROPS Alpaca and DROPS Kid-Silk, the same qualities we use in the video.
You must also read the pattern and look at the charts to be able to follow this video properly. You’ll find the pattern by clicking on the picture below.
Patterns using this technique


Video #1582, listed in: Assembly Videos, Sew together, Sew together a knitted piece
Our videos do not have sound. We are a worldwide company and our videos are watched by people speaking endless of different languages and many do not understand English. So since there is not a given language for us to use, we instead have written instructions to accompany the video, and then there is no sound to disturb while watching.
You can adjust the speed of this video by clicking on the icon, on the play bar.
Leave a comment or question to this video
Your email address will not be published. Required fields are marked *.
You might also like


With over 40 years in knitting and crochet design, DROPS Design offers one of the most extensive collections of free patterns on the internet - translated to 17 languages. As of today we count 325 catalogues and 12298 patterns translated into English (UK/cm).
We work hard to bring you the best knitting and crochet have to offer, inspiration and advice as well as great quality yarns at incredible prices! Would you like to use our patterns for other than personal use? You can read what you are allowed to do in the Copyright text at the bottom of all our patterns. Happy crafting!
Hvor mange nøgler garn skal bruges til str. 12 år?
11.12.2025 - 22:56DROPS Design :
Hei Gitte. Tenker du da på Winter Smiles Headband i DROPS 214-68? Da er den minste størrelsen i oppskriften S/M - 54/56 cm. Her er det brukt 50 gram Alpaca og 25 gram Kid-Silk. Man får ikke kjøpt nøster med mindre gram i disse kvalitetene, så trenger du 1 nøste Alpaca og 1 næste Kid-Silk. mvh DROPS Design
15.12.2025 - 06:55Stort tack för videon hur man omlott får i hop knuten fram på ett pannband.
21.01.2024 - 23:00Grazie per questo video esplicativo. Sto facendo una fascia in questi giorni e la finirò come spiegato nel video.
13.09.2022 - 21:31Har dere en instruksjon video på hvordan strikke tubestrikk på dette Pannebåndet, winter Smiles? Er helt ny på strikking!
17.02.2022 - 19:53DROPS Design :
Hei Andrea. Til dette pannebåndet har vi kun video på hvordan du skal montere oppleggskanten og avfellingkanten slik at det blir en flette. Når du skal strikke en tube, strikker du bare rundt og rundt og rundt. Legg opp det maskeantallet i den str. du skal ha som det står i oppskriften, så strikker du rettmasker rundt og rundt til ferdig mål, så sys oppleggskanten og avfellingkanten sammen slik det står i oppskriften. mvh DROPS Design
21.02.2022 - 08:38Hei🤗Ser dere opplyser i oppskriftene deres at det skal brukes tykkere pinne når en vil at arbeidet skal bli MINDERE, og motsatt tynnere pinne for at arbeidet skal bli større…. Det er feil ! Om man vil at arbeidet skal bli større , må det tykkere pinner til, da blir maskene større, og tynnere pinner for at arbeidet skal bli mindre. Det sier seg i grunn selv. Så jeg håper det blir rettet på nyere oppskrifter fra dere.
15.11.2021 - 11:35Har prøvd og stikke dette pannebåndet mange ganger nå men forstår ikke hvordan jeg skal sy det i sammen? Håper dere kan gi meg en skikkelig enkel og god forklaring på hvordan jeg kan gjøre dette?
17.03.2021 - 12:47DROPS Design :
Hei Cecilie. Til dette pannebåndet er det skrevet en forklaring, det er laget 5 skisser hvordan delene ser ut og hvor og hvordan det skal sys sammen + en video på hvordan det sys sammen. Så hvor er det det stopper opp for deg? mvh DROPS design
22.03.2021 - 09:34Flott oppskrift og veldig fin video. Pannebåndet ble veldig bra. Takk for oppskrift og video.
14.03.2021 - 17:28Heel goed uitgelegd kort en duidelijk
06.02.2021 - 16:21Bedankt voor de goede uitleg prachtig resultaat .
06.02.2021 - 16:19Genial idé, utrolig kreativ! Flotte instruksjoner og til slutt en fenomenal video!
01.02.2021 - 12:08