
Popular categories
Looking for a yarn?


Comments / Questions (1)
![]() Anne Hoffmann wrote:
Anne Hoffmann wrote:
In der Anleitung steht bei Stiel: „zu Maulwurf wechseln…“ Was ist damit gemeint?
27.09.2021 - 14:40DROPS Design answered:
Liebe Frau Hoffmann, hier soll man die Farbe wechseln und mit der Farbe 23, maulwurf wechseln. Viel Spaß beim stricken!
27.09.2021 - 16:52
|
|
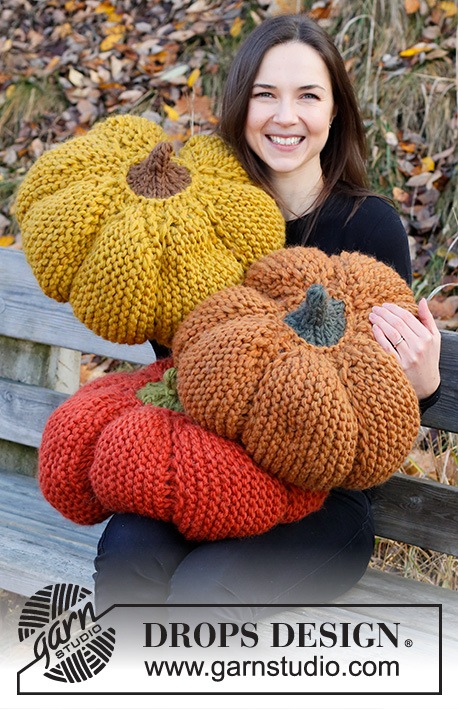
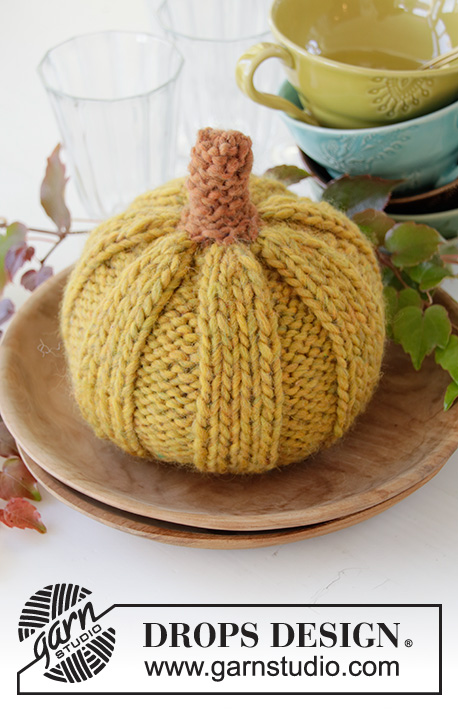
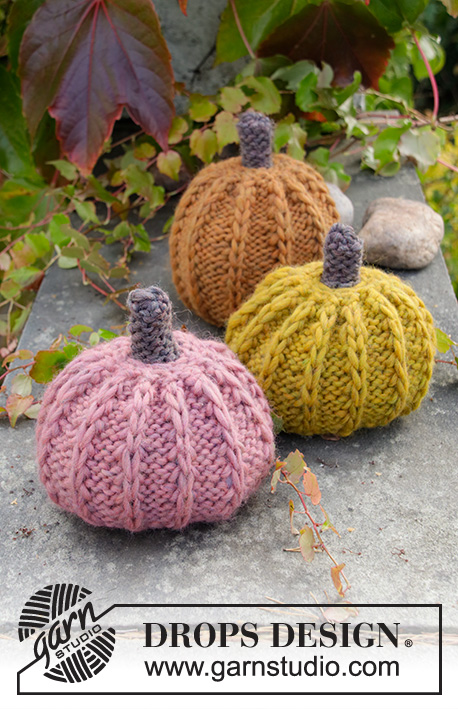
Cinderella's Pumpkins#dropscinderellaspumpkins |
|
 |
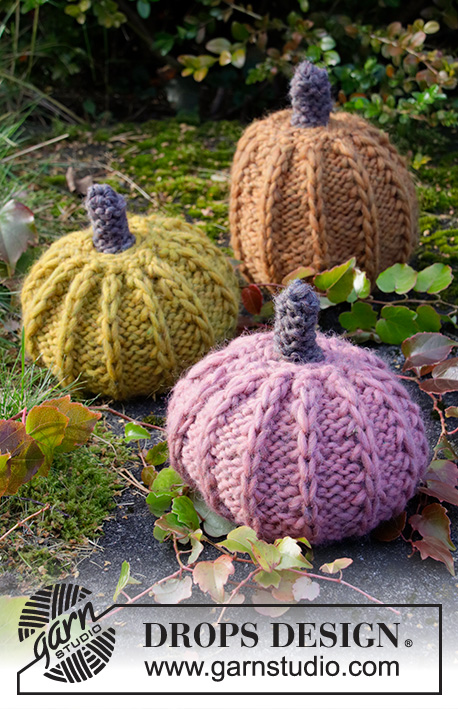 |
Knitted pumpkin with English rib in DROPS Snow. Theme: Halloween.
DROPS Extra 0-1500 |
|
|
---------------------------------------------------------- EXPLANATION FOR THE PATTERN: ---------------------------------------------------------- GARTER STITCH (back and forth): Knit all rows. ENGLISH RIB STITCH: Insert right needle through stitch from previous row, knit 1 and slip stitch worked in off the left needle. ---------------------------------------------------------- START THE PIECE HERE: ---------------------------------------------------------- PUMPKIN – SHORT OVERVIEW OF THE PIECE: Worked back and forth on needle, from the bottom and up to stem. Pumpkins are worked in 2 different sizes. Pumpkin in copper is more narrow and higher than pumpkins in mauve and curry. PUMPKIN: Cast on 13-15 stitches on double pointed needles size 6 mm with Snow. Work back and forth on row as follows: ROW 1 (= wrong side): Work 1 stitch in GARTER STITCH - read explanation above - * knit 1, make 1 yarn over *, repeat from *-* until 1 stitch remains on needle, and work 1 stitch in garter stitch. There are 11-13 yarn overs on needle. ROW 2 (= right side): Work 1 stitch in garter stitch, purl yarn overs twisted and purl stitches until 1 stitch remains on needle, and work 1 stitch in garter stitch. There are 24-28 stitches on needle. ROW 3 (= wrong side): Work 1 stitch in garter stitch, * knit 2, make 1 yarn over *, repeat from *-* until 1 stitch remains on needle, and work 1 stitch in garter stitch. There are 11-13 yarn overs on needle. ROW 4 (= right side): Work 1 stitch in garter stitch, purl yarn overs twisted and purl stitches until 1 stitch remains on needle, and work 1 stitch in garter stitch. There are 35-41 stitches on needle. ROW 5 (= wrong side): Work 1 stitch in garter stitch, * knit 3, make 1 yarn over *, repeat from *-* until 1 stitch remains on needle, and work 1 stitch in garter stitch. There are 11-13 yarn overs on needle. ROW 6 (= right side): Work 1 stitch in garter stitch, purl yarn overs twisted and purl stitches until 1 stitch remains on needle, and work 1 stitch in garter stitch. There are 46-54 stitches on needle. ROW 7 (= wrong side): Work 1 stitch in garter stitch, knit until 1 stitch remains on needle, and work 1 stitch in garter stitch. ROW 8 (= right side): Work 1 stitch in garter stitch, * work 1 ENGLISH RIB STITCH - read explanation above - purl 3 *, repeat from *-* until 1 stitch remains on needle, and work 1 stitch in garter stitch. REMEMBER THE KNITTING TENSION! Repeat ROW 7 and 8 until piece measures approx. 18-15 cm from cast-on edge, adjust so that next row is from wrong side (= the side with the most knitted stitches). ROW 9 (= wrong side): Work 1 stitch in garter stitch, knit 2 together until 1 stitch remains on needle, and work 1 stitch in garter stitch. There are 24-28 stitches on needle. ROW 10 (= right side): Work 1 stitch in garter stitch, purl 2 together until 1 stitch remains on needle, and work 1 stitch in garter stitch. There are 13-15 stitches on needle. ROW 11 (= wrong side): Knit 1, knit 2 together until 2-0 stitches remain on needle, and knit 2-0 stitches. There are 8-8 stitches on needle. The main part of the pumpkin is now done, let the yarn be approx. 50 cm long, this is used for assembly. Switch colour - work stem from here. STEM: Switch to taupe and continue in garter stitch until stem measures approx. 5 cm. Knit stitches together 2 by 2. Cut the yarn but let the yarn end be approx. 15 cm. Use a needle and pull thread through the remaining stitch, tighten together and fasten - do not cut the yarn, it is used for assembly. ASSEMBLY: Fold piece so that wrong side is outwards (= the side with the most knit stitches). Begin by sewing the main part together with yarn end in same colour, sew outer sides together inside 1 edge stitch in garter stitch, to that the pattern looks nice on the right side. Turn the piece so that right side outwards. Use yarn from the end of stem to sew the outer sides of stem together in outermost loop of edge ridge. Fasten yarn on the inside of piece. Fill the main part with some cotton wool. Use a needle and a yarn in the same colour as main part to tighten together opening underneath. To shape the pumpkin pull a yarn from the underside and up through main part to where stem begins at the top. Then pull yarn back to the underside. Tighten yarn so that the pumpkin gets a nice shape. |
|
Have you finished this pattern?Tag your pictures with #dropspattern #dropscinderellaspumpkins or submit them to the #dropsfan gallery. Do you need help with this pattern?You'll find 11 tutorial videos, a Comments/Questions area and more by visiting the pattern on garnstudio.com. © 1982-2025 DROPS Design A/S. We reserve all rights. This document, including all its sub-sections, has copyrights. Read more about what you can do with our patterns at the bottom of each pattern on our site. |
|


With over 40 years in knitting and crochet design, DROPS Design offers one of the most extensive collections of free patterns on the internet - translated to 17 languages. As of today we count 314 catalogues and 11822 patterns translated into English (UK/cm).
We work hard to bring you the best knitting and crochet have to offer, inspiration and advice as well as great quality yarns at incredible prices! Would you like to use our patterns for other than personal use? You can read what you are allowed to do in the Copyright text at the bottom of all our patterns. Happy crafting!
Post a comment to pattern DROPS Extra 0-1500
We would love to hear what you have to say about this pattern!
If you want to leave a question, please make sure you select the correct category in the form below, to speed up the answering process. Required fields are marked *.