
Popular categories
Looking for a yarn?


Comments / Questions (14)
![]() Lia wrote:
Lia wrote:
Ik heb net mijn proeflapje gemaakt. De breedte klopt. Maar de hoogte is 12 cm ipv 10. Wat moet ik nu doen?\r\nLia
04.03.2025 - 18:11
![]() Debbie wrote:
Debbie wrote:
I am not understanding after I have knitted 26 rows how to finish off. I am assuming , I am binding off in some fashion and making the wedges individually then connecting them together. I am just unclear about the binding off.
01.04.2022 - 19:33DROPS Design answered:
Dear Debbie, after you have knitted 26 ridges (= 52 rows), continue with the same colour and work the next row row over all stitches with yarn overs (= 55 sts on needle), turn and knit all stitches from WS. Now change colours and repeat the same repetition as before. After you have worked all repeats, then cast off all stitches and sew them to the cast on stitches on first repeat. Happy knitting!
04.04.2022 - 08:09
![]() Debbie wrote:
Debbie wrote:
After I knit 2 together at the end of the row do I leave the rest of stitches on the needle and turn or do I knit 2 together and knit the remaining stitches and then turn ?
23.03.2022 - 15:34DROPS Design answered:
Dear Debbie, after you have finished the short row with knit 2 together, turn leaving the remaining stitches unworked on the left needle and work return row over the stitches you just worked. Happy knitting!
23.03.2022 - 16:28
![]() Jeanette Pedersen wrote:
Jeanette Pedersen wrote:
Har jeg forstået det rigtigt? 1. pind:når jeg har strikket 2 ret sammen ( 1 maske tilbage som ikke strikkes) så vender jeg , 2. pind: tager den masker jeg lige har strikket sammen over på højre pind og strikker tilbage. Derefter strikker jeg på retsiden til jeg har det antal masker tilbage (de masker som er strikket sammen) og gentager som beskrevet. De sidste masker på retsiden bliver ikke strikket med. Måske en ny video omkring dette tilfælde? Forkortet pinde viser det ikke
28.05.2021 - 23:03DROPS Design answered:
Hei Jeanette. Det er kun fra retten det strikkes 2 masker sammen og det snus før alle maskene er strikket. Når det strikkes fra vrangen strikkes hele pinnen ut (alle masker). 1. pinne, strikk til det gjenstår 3 masker, 2 masker rett sammen snu. 2.pinne, strikk alle maskene tilbake. 3. pinne, strikk til det gjenstår 4 masker, 2 rett sammen, snu. 4. pinne strikk alle maskene tilbake. 5. pinne, strikk til det gjenstår 5 masker, 2 rett sammen, snu, osv. mvh DROPS design
31.05.2021 - 09:25
![]() Jeanette Pedersen wrote:
Jeanette Pedersen wrote:
Hej Når jeg skal lave vendinger er det så German short row eller vender jeg bare. For jeg synes der kommer “hul” afstand mellem maskerne?
28.05.2021 - 07:39DROPS Design answered:
Hej Jeanette, vi vender som du kan se i videoen nederst i opskriften. Men du vælger den teknik som passer dig bedst :)
28.05.2021 - 13:46
![]() Charlene wrote:
Charlene wrote:
Is this pattern worked as separate sections then stitched together at the end?
28.01.2021 - 18:27DROPS Design answered:
Dear Charlene, the pattern is worked in one piece changing colour for every repetition - see description under carpet both sizes. There will be only one seam at the end where you will sew the cast off edge to the cast on edge (and tighten the middle of piece to close the hole). Happy knitting!
29.01.2021 - 07:29
![]() Rikke Lise Olsen wrote:
Rikke Lise Olsen wrote:
Er det rigtig forstået at vendingerne kun er på hver 2. pind??? Når der er to masker tilbage på pinden og det er tid til at lave omslag, de masker der skal strikkes ret, er det masker som er strikkede op i den maske hvor der tidligere er strikket to sammen??? Til sidst vil der være samme antal masker som man startede med ved den første og så gør man det på ny???
20.10.2019 - 09:22DROPS Design answered:
Hei Rikke. Ja, det stemmer. Og når du har strikket alle vendingene på en rapport, bytter du farger. God Fornøyelse!
21.10.2019 - 11:32
![]() Merete W wrote:
Merete W wrote:
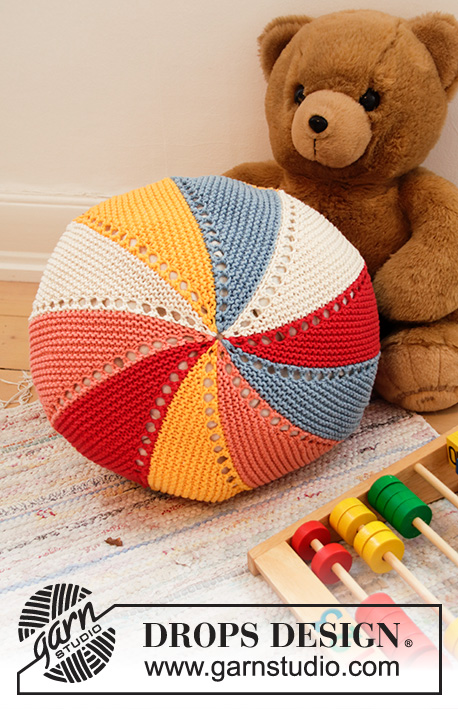
Det går da helt galt idag, jeg er vist ikke vågen endnu: det ser ud til at være en fin model, hvor stor er den ca i diameter? Og man kan vel bruge 2 tæpper til en puf?
17.09.2019 - 08:35
![]() Merete W wrote:
Merete W wrote:
Har vist skrevet uden at tjekke før jeg sendte. Der skulle jo stå “ hvor stort er tæppet i diameter ca” og ikke noget om nogle tæppevirksomheder😂😂 Hilsen Merete
17.09.2019 - 08:32
![]() Merete W wrote:
Merete W wrote:
Det ser ud til at være en fin modelvirksomhed stor er diameteren på tæppet ca? Man kan vel bruge 2 tæpper til en puf? Tror i ikke?
17.09.2019 - 08:29
|
|
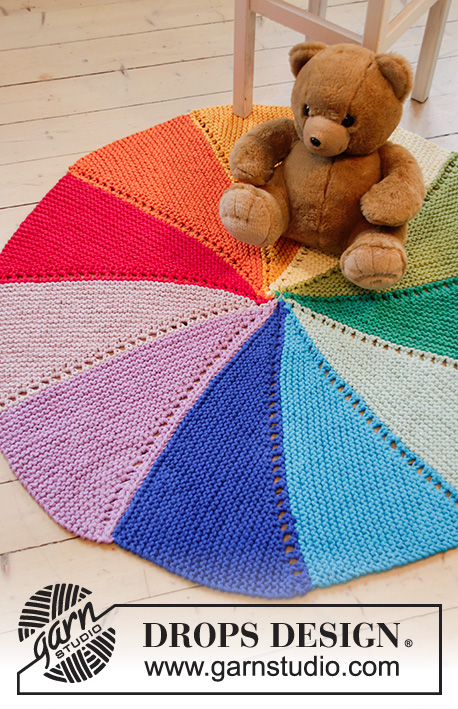
Colour Wheel Carpet#colourwheelcarpet |
|
 |
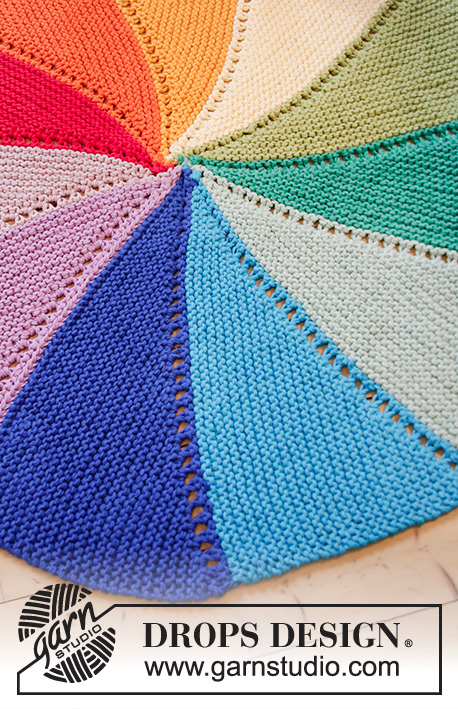 |
Knitted carpet in 3 strands DROPS Paris. Piece is knitted with stripes, garter stitch and short rows.
DROPS Children 35-5 |
|
|
---------------------------------------------------------- EXPLANATION FOR THE PATTERN: ---------------------------------------------------------- GARTER STITCH (back and forth): 1 ridge = knit 2 rows. KNITTING TIP: When knitting 2 stitches together in short rows, make sure not to work stitches too loose. STRIPES: Work every repetition with short rows using three strands of the same colour with the following stripes: 1st repetition: with 3 strands royal blue 2nd repetition: with 3 strands turquoise 3rd repetition: with 3 strands mint green 4th repetition: with 3 strands opal green 5th repetition: with 3 strands wasabi 6th repetition: with 3 strands light yellow 7th repetition: with 3 strands dandelion 8th repetition: with 3 strands orange 9th repetition: with 3 strands red 10th repetition: with 3 strands powder pink 11th repetition: with 3 strands lilac ---------------------------------------------------------- START THE PIECE HERE: ---------------------------------------------------------- CARPET - SHORT OVERVIEW OF THE PIECE: Work piece back and forth on circular needle. Work garter stitch and short rows in stripes and work lace pattern between every repetition. CARPET APPROX. 100 CM: Cast on 55 stitches on circular needle size 7 mm with 3 strands royal blue. Work GARTER STITCH and STRIPES - read explanation above, AT THE SAME TIME work short rows (1st row = right side). Work until 3 stitches remain, knit 2 together - read KNITTING TIP, turn and work back. Work until 4 stitches remain, knit 2 together, turn and work back, work until 5 stitches remain, knit 2 together, turn and work back, work until 6 stitches remain, knit 2 together, turn and work back. REMEMBER THE KNITTING TENSION! Continue like this until 26 ridges have been worked, and 1 stitch less has been worked for every short row. There are now 2 stitches on needle. Work next row over all stitches as follows: 2 stitches in garter stitch, * 1 stitch in garter stitch (the one previously worked knit 2 together), 1 yarn over *, repeat from *-* until 1 stitch remains, finish with 1 stitch in garter stitch. Turn and work back, NOTE: Do not work yarn overs twisted on this row, they should make holes. 1st repetition on carpet has been worked. Continue with short rows and next stripes for every repetition until 11 repetitions of short rows have been worked in total. NOTE: If the carpet does not lay flat work one more repetition (choose the colour you want). Cast off. ASSEMBLY: Sew a yarn through all edge stitches in the middle and tighten tog. Fasten the yarn tightly. Sew tog the cast-on and cast-off edge. CARPET APPROX. 125 CM: Cast on 69 stitches on circular needle size 7 mm with 3 strands royal blue. Work GARTER STITCH and STRIPES - read explanation above, AT THE SAME TIME work short rows (1st row = right side). Work until 3 stitches remain, knit 2 together - read KNITTING TIP, turn and work back. Work until 4 stitches remain, knit 2 together, turn and work back, work until 5 stitches remain, knit 2 together, turn and work back, work until 6 stitches remain, knit 2 together, turn and work back. REMEMBER THE KNITTING TENSION! Continue like this until 33 ridges have been worked, and 1 stitch less has been worked for every short row. There are now 2 stitches on needle. Work next row over all stitches as follows: 2 stitches in garter stitch, * 1 stitch in garter stitch (the one previously worked knit 2 together), 1 yarn over *, repeat from *-* until 1 stitch remains, finish with 1 stitch in garter stitch. Turn and work back, NOTE: Do not work yarn overs twisted on this row, they should make holes. 1st repetition on carpet has been worked. Continue with short rows and next stripes for every repetition until 11 repetitions of short rows have been worked in total. NOTE: If the carpet does not lay flat work one more repetition (choose the colour you want). Cast off. ASSEMBLY: Sew a yarn through all edge stitches in the middle and tighten tog. Fasten the yarn tightly. Sew tog the cast-on and cast-off edge. |
|
Have you finished this pattern?Tag your pictures with #dropspattern #colourwheelcarpet or submit them to the #dropsfan gallery. Do you need help with this pattern?You'll find 11 tutorial videos, a Comments/Questions area and more by visiting the pattern on garnstudio.com. © 1982-2025 DROPS Design A/S. We reserve all rights. This document, including all its sub-sections, has copyrights. Read more about what you can do with our patterns at the bottom of each pattern on our site. |
|


With over 40 years in knitting and crochet design, DROPS Design offers one of the most extensive collections of free patterns on the internet - translated to 17 languages. As of today we count 314 catalogues and 11822 patterns translated into English (UK/cm).
We work hard to bring you the best knitting and crochet have to offer, inspiration and advice as well as great quality yarns at incredible prices! Would you like to use our patterns for other than personal use? You can read what you are allowed to do in the Copyright text at the bottom of all our patterns. Happy crafting!
Post a comment to pattern DROPS Children 35-5
We would love to hear what you have to say about this pattern!
If you want to leave a question, please make sure you select the correct category in the form below, to speed up the answering process. Required fields are marked *.