


Komentáře / Otázky (94)
![]() Michèle BITOUN napsala:
Michèle BITOUN napsala:
Bonjour, je suis au moment où j'ai séparé les manches et monté 12 mailles. J augmente toujours avant et après les parties au point mousse (4 augmentations) mais où dois-je faire mes diminutions ? J 'avais ccompris sur les mailles montées à la place des manches ? (je crois que j'ai mal compris !) Merci de votre aide
23.05.2025 - 19:30Odpověď DROPS Design :
Bonjour Mme Bitoun, les 12 m montées sous chaque manche lors de la division se tricotent au point mousse, comme les mailles point mousse des raglans; vous allez maintenant augmenter le nombre de mailles jersey pour diminuer le nombre de mailles point mousse ainsi: tricotez jusqu'aux mailles point mousse sur un des côtés, faites 1 jeté (augm à tricoter en jersey), tricotez les mailles point mousse et tricotez 2 m ens à l'end avant le fil marqueur + 2 m ens à l'end après le fil marqueur, tricotez les mailles point mousse restant sur ce côté, 1 jeté (à tricoter en jersey); répétez à l'autre marqueur =votre nombre de mailles reste le même. Bon tricot!
26.05.2025 - 08:34
![]() Michèle BITOUN napsala:
Michèle BITOUN napsala:
Bonjour, je commence le modèle stone fields. Si j'ai bien compris les 16 mailles envers au point mousse n'augmentent pas. Vous parlez de tricoter les jetés à l'endroit en maille torse. Or sur la photo, à la place du jeté je vois un trou comme si cette maille avait été tricotée à l'endroit. Merci de votre réponse
14.04.2025 - 10:19Odpověď DROPS Design :
Bonjour Mme Bitoun, les 16 mailles tricotées à l'envers au 1er tour sont effectivement les mailles des raglans et ne vont pas augmenter; elles sont à tricoter au point mousse ( donc alternativement à l'envers puis à l'endroit) - en tricotant les jetés torse, les trous sont plus petits que si on les tricote dans le brin avant; si vous voulez éviter totalement des trous, vous pouvez essayer de faire vos jetés plus serrés ou bien d'augmenter différemment, au choix. Bon tricot!
22.04.2025 - 08:49
![]() Mamaknits napsala:
Mamaknits napsala:
Hello, if you can explain why is there decrease after working 4 ridges in garter at the beginning ? what would the purpose of that be ?thank you
01.11.2024 - 04:21Odpověď DROPS Design :
Dear Mamaknits, you need more stitches with the smaller needle sizes than with the larger needle size for the requested circumference, reason why you will decrease 8 or 12 stitches after the 4 ridges, just before switching to larger needles. Happy knititng!
01.11.2024 - 09:55
![]() Paula napsala:
Paula napsala:
Hola! Las hebras se hacen en las vueltas donde los 16 puntos se hacen al revés? Porque entonces no quedan igual las de un lado y las de otro.
28.02.2024 - 23:55Odpověď DROPS Design :
Hola Paula, los aumentos se hacen a cada lado (antes y después) de los 16 puntos de revés, formando las líneas del raglán. En la siguiente vuelta las hebras se trabajan de derecho retorcido. ¿Puedes aclarar por qué no te quedan iguales estos puntos?
29.02.2024 - 22:59
![]() Idella Meier napsala:
Idella Meier napsala:
You have so many great videos. I have looked for one on the Stonefield for where you do increases on knits and purls. I can’t find one. Is there one?
03.02.2024 - 20:48
![]() Kat napsala:
Kat napsala:
Hi, have just started knitting this lovely pattern. When I first read it, I thought „hm, no increases on the collar, won‘t it stick up?“ Decided to just go with it, but exactly what I expected has happened, the collar (the 4 ribs of garter knitted on the smaller needles) are sticking up and it looks more like a mandarin collar than a crewneck. Where did I go wrong?
28.10.2023 - 14:23Odpověď DROPS Design :
Dear Kat, you don't have any increases on the collar but rather you decrease later on for the beginning of the raglan. You have extra stitches when working the collar so it should be more loose than the next part of the piece. If the collar sticks up it's most likely due to the gauge. Happy knitting!
29.10.2023 - 22:19
![]() Idella Meier napsala:
Idella Meier napsala:
The pattern doesn’t seem to explain how to increase very well . If you do a yarn over in knit before and after your maker do you knit one stitch first then do the yarn over. If you do it this way how do you do that with the 2 stitches. I hope someone can explain this better then how it explains it in the pattern.
26.10.2023 - 23:57Odpověď DROPS Design :
Dear Mrs Meier, to increase for raglan, make a yarn over, on next round knit the yarn overs twisted; You increase for the raglan on either side of the 16 sts in garter stitch on each raglan line: work until the 16 sts, make 1 yarn over, work the 16 sts in garter stitch, make 1 yarn over; repeat like this at each raglan line for each increase. Happy knitting!
27.10.2023 - 09:31
![]() Idella Meier napsala:
Idella Meier napsala:
I am a fairly need knitter and do not read patterns well. Do you put your marker where it says yarn over . This is right after you change your knitting needles from the 4 to 5 mm. Is there any more instructions that could make me understand better for this sweater. Thank you so much
14.10.2023 - 06:43Odpověď DROPS Design :
Dear Idella, the marker indicated there is inserted in the piece just to measure, so it can be inserted anywhere in the round, although it's normally inserted at the beginning of the round. This marker will stay in this row and not move downward as you continue working. You can personally insert markers in the piece when working the increases so as to remember where to work the increases. All relevant videos and lessons can be found after the pattern instructions and you can always ask your specific questions here. Happy knitting!
16.10.2023 - 00:25
![]() Diane napsala:
Diane napsala:
Bonjour, en mesurant sur le dessus de la manche je peux qu'à partir du début du tricot, donc de la manche entière avec la bordure du col. J'ai 69cm au lieu de 61cm. Le bout m'arrive déjà en bas du poignet mais par contre, pour ne pas que la manche roule, je me rend compte que je vais devoir faire tout de même une bordure. J'essaierai de 3cm au lieu de 6.
07.05.2023 - 21:28
![]() Diane napsala:
Diane napsala:
Bonjour, je tricote la 4e taille et je suis rendue à faire les 6cm en mousse au bout de la manche mais je me suis rendue compte qu'elle mesure 41 cm sans ces 6 cm de bordure. J'ai mesuré depuis le marqueur mis au début de la partie de la manche. La partie qu'il fallait rapetisser à tous les 4rangs, est-ce bien 69 rangs qu'il fallait faire?
02.05.2023 - 01:41Odpověď DROPS Design :
Bonjour Diane, effectivement, autrement dit, ces 69 rangs doivent mesurer environ 28 cm - mesurez la longueur de la manche au milieu du dessus de la manche (pas le long du milieu sous la manche). Bon tricot!
02.05.2023 - 09:56
|
|
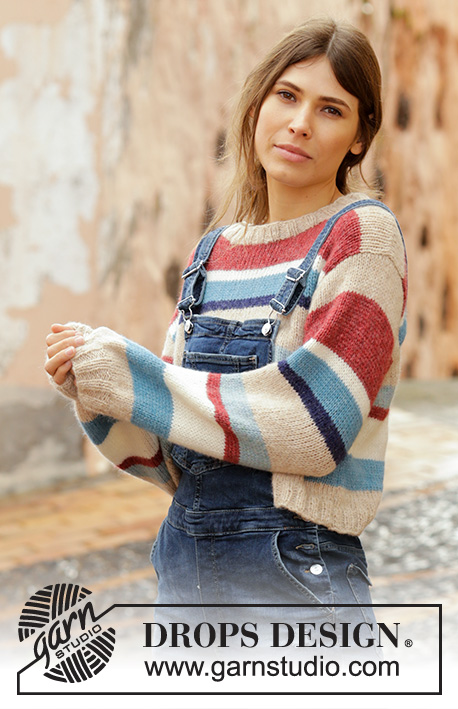
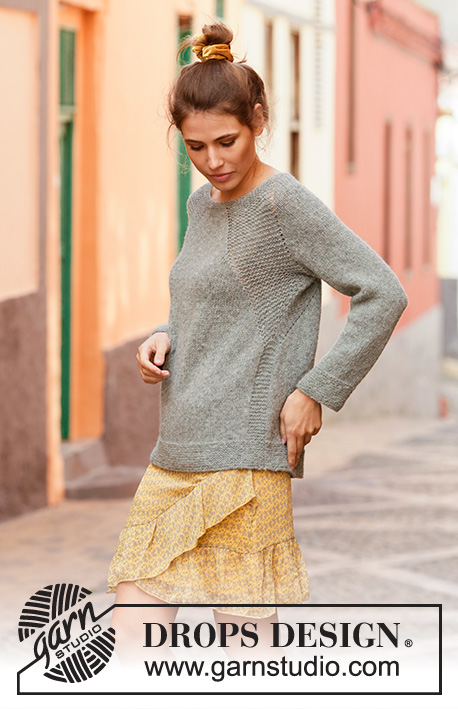
Stone Fields#stonefieldssweater |
|
 |
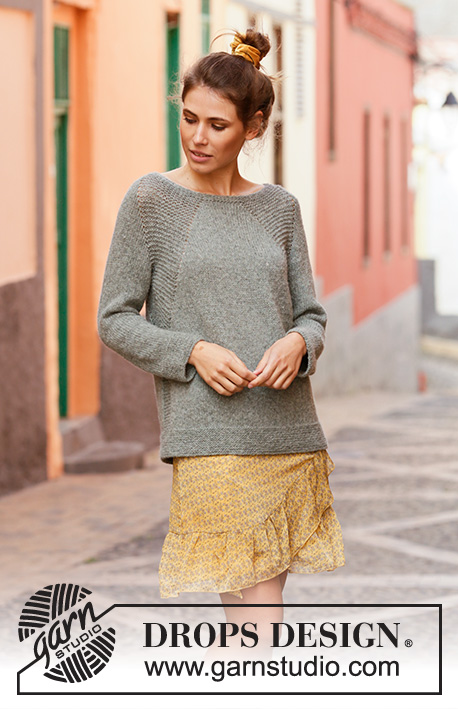 |
Raglánový pulovr pletený shora dolů vroubkovým vzorem a lícovým žerzejem z příze DROPS Sky. Velikost: S - XXXL
DROPS 202-8 |
|
|
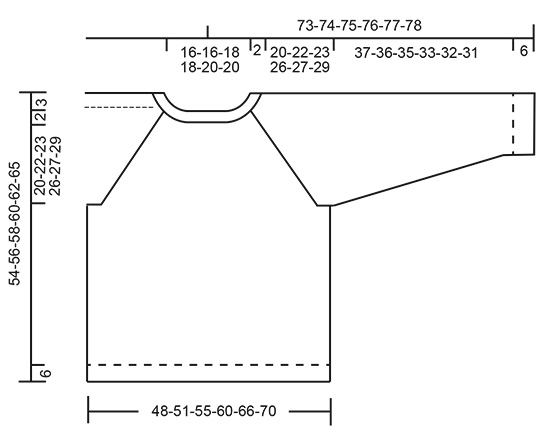
---------------------------------------------------------- VYSVĚTLIVKY: ---------------------------------------------------------- VROUBKOVÝ VZOR: 1 vroubek = 2 kruhové řady. Pleteme střídavě 1 kruhovou řadu hladce, 1 obrace. TIP – UJÍMÁNÍ/PŘIDÁVÁNÍ: Abychom vypočítali, v jakých rozestupech máme ujímat/přidávat, vydělíme celkový počet ok, nad nimiž potřebujeme ujmout/přidat (tj. 96 ok) počtem ok, která potřebujeme ujmout/přidat (např. 8), takže 95 : 8 = 12. V tomto případě tedy spleteme dohromady každé 11. a 12. oko. Pokud přidáváme, pak 1x nahodíme za každým 12. okem. V následující kruhové řadě pleteme nahození hladce za zadní nit, aby se v pletenině netvořily dírky. TIP: Vzhledem k výraznému pruhu vroubkovým vzorem bude pletenina při volném rozložení mírně stažená a zdeformovaná – měříme ji proto vždy vyvěšenou či lehce napnutou. Pokud vám sedlo vychází příliš krátké, pokračujte v pletení vzoru jako dříve, ale už nepřidávejte. TIP - UJÍMÁNÍ (rukávy): Na každé straně značky ujmeme 1 oko, takto – začínáme 3 oka před značkou: 1 oko sejmeme hladce, 1 upleteme hladce a sejmuté přes ně přetáhneme, 2 oka upleteme hladce (značka leží uprostřed těchto ok), následující 2 oka spleteme hladce. ---------------------------------------------------------- POPIS PRÁCE: ------------------------------------------------------- PULOVR - JAK BUDEME POSTUPOVAT: Pleteme v kruhových řadách na kruhové jehlici, shora dolů. Rukávy pleteme v kruhových řadách na ponožkových jehlicích/krátké kruhové jehlici. SEDLO: Na kruhovou jehlici č.4 nahodíme přízí Sky 96-100-104-112-120-124 ok a upleteme 4 vroubky VROUBKOVÝM VZOREM – viz výše. Pak upleteme 1 kruhovou řadu lícovým žerzejem a SOUČASNĚ ujmeme rovnoměrně 8-8-8-12-12-12 ok – viz TIP – UJÍMÁNÍ/PŘIDÁVÁNÍ = 88-92-96-100-108-112 ok. Pleteninu převedeme na kruhovou jehlici č.5 a vložíme značku - NYNÍ MĚŘÍME DÍL OD TOHOTO MÍSTA! V následující kruhové řadě začneme plést vzor a přidávat pro raglánové zkosení. Pleteme takto (začátek kruhové řady = střed zad): 5-6-7-8-9-10 ok lícovým žerzejem (= polovina zadního dílu), 1x nahodíme, 16 ok obrace (= vroubek, vzor začínáme první kruhovou řadou obrace), 1x nahodíme, 2-2-2-2-4-4 oka lícovým žerzejem (= rukáv), 1x nahodíme, 16 ok obrace (= vroubek), 1x nahodíme, 10-12-14-16-18-20 ok lícovým žerzejem (= přední díl), 1x nahodíme, 16 ok obrace (= vroubek), 1x nahodíme, 2-2-2-2-4-4 oka lícovým žerzejem (= rukáv), 1x nahodíme, 16 ok obrace (= vroubek), 1x nahodíme a 5-6-7-8-9-10 ok lícovým žerzejem (= polovina zadního dílu) zpět ke středu zad. Upleteme 1 kruhovou řadu hladce, nahození pleteme za zadní nit (= přidaná oka pleteme lícovým žerzejem). První raglánové přidávání máme teď hotové (= v kruhové řadě jsme přidali 8 ok). Pokračujeme lícovým žerzejem a vroubkovým vzorem a SOUČASNĚ přidáváme 1 oko na každé straně pruhu ze 16 ok vroubkovým vzorem mezi rukávy a trupem; přidávání opakujeme v každé 2. kruhové řadě, celkem 25-27-29-32-34-36x (včetně prvního přidání, které je popsáno výše). Po posledním raglánovém přidání máme na jehlici 288-308-328-356-380-400 ok. Sedlo by mělo měřit 20-22-23-26-27-29 cm od značky - viz TIP! Následující kruhovou řadu pleteme takto: 30-33-36-40-43-46 ok lícovým žerzejem, 12-11-11-12-14-14 ok vroubkovým vzorem (= polovina zadního dílu), následujících 60-66-70-74-76-80 ok odložíme na pomocnou jehlici (= rukáv), nahodíme 8-8-10-10-12-12 nových ok (= podpaží), 12-11-11-12-14-14 ok vroubkovým vzorem, 60-66-72-80-86-92 ok lícovým žerzejem, 12-11-11-12-14-14 ok vroubkovým vzorem (= přední díl), dalších 60-66-70-74-76-80 ok odložíme na pomocnou jehlici (= rukáv), nahodíme 8-8-10-10-12-12 nových ok (= podpaží), 12-11-11-12-14-14 ok vroubkovým vzorem, posledních 30-33-36-40-43-46 ok lícovým žerzejem (= polovina zadního dílu). Rukávy a trup dokončíme odděleně. NYNÍ MĚŘÍME DÍL OD TOHOTO MÍSTA! TRUP: = 184-192-208-228-252-264 ok. Doprostřed 8-8-10-10-12-12 nových ok nahozených v podpaží na každé straně dílu vložíme značku (= boky). Kruhová řada začíná u jedné z těchto značek (značky během pletení snímáme vždy do aktuálně pletené řady). NEŽ BUDETE PLÉST DÁL, PŘEČTĚTE SI POZORNĚ CELÝ NÁSLEDUJÍCÍ POPIS! Pokračujeme v kruhových řadách lícovým žerzejem a vroubkovým vzorem na bocích (= oka vroubkovým vzorem, která zůstala na každé straně předního/zadního dílu a nová oka nahozená v podpaží), SOUČASNĚ v každé 2. kruhové řadě pokračujeme v nahazování - 1x nahodíme na obou vnějších okrajích každé sekvence pletené vroubkovým vzorem (tj. jak na předním, tak na zadním dílu, jako dosud; = v kruhové řadě tedy přidáme celkem 4 oka) a SOUČASNĚ ujímáme 2 oka uprostřed každé vroubkové sekvence (tj. prostřední 4 oka spleteme po 2 dohromady; = v kruhové řadě tak ujmeme celkem 4 oka). Takto přidáváme/ujímáme až do chvíle, kdy máme na každém boku pouze 8 ok vroubkovým vzorem. POZN.: počet ok v kruhové řadě zůstane stejný, ale oka pletená vroubkovým vzorem se postupně ztratí a nahradí je oka pletená lícovým žerzejem. Pleteme lícovým žerzejem s 8 oky vroubkovým vzorem na každém boku, a to až do výše 23-23-24-23-24-25 cm od podpaží (asi 48-50-52-54-56-59 cm od ramene). Pleteninu převedeme na kruhovou jehlici č.4 a upleteme 6 cm výšky vroubkovým vzorem. Pak všechna oka volně uzavřeme. Pulovr měří asi 54-56-58-60-62-65 cm (od ramene). RUKÁV: Odložených 60-66-70-74-76-80 ok jednoho rukávu vrátíme z pomocné jehlice zpět na krátkou kruhovou jehlici/ponožkové jehlice č.5 a navíc k nim nabereme po 1 oku z každého z 8-8-10-10-12-12 nových ok nahozených v podpaží = 68-74-80-84-88-92 ok. Doprostřed 8-8-10-10-12-12 nových ok v podpaží vložíme značku – kruhová řada začíná zde. Pleteme v kruhových řadách lícovým žerzejem, vnitřní stranu rukávu pleteme vroubkovým vzorem (= pokračujeme v pletení vroubkovým vzorem nad oky rukávu a také nad nově nahozenými oky v podpaží), SOUČASNĚ v každé 2. kruhové řadě pokračujeme v nahazování - 1x nahodíme na obou vnějších okrajích sekvence pletené vroubkovým vzorem, jako dosud (= v kruhové řadě přidáme celkem 2 oka) a SOUČASNĚ ujímáme 2 oka uprostřed každé vroubkové sekvence (tj. prostřední 4 oka spleteme po 2 dohromady; = v kruhové řadě ujmeme celkem 2 oka). POZN.: počet ok v kruhové řadě zůstane stejný, ale oka pletená vroubkovým vzorem se postupně ztratí a nahradí je oka pletená lícovým žerzejem. Takto přidáváme/ujímáme až do chvíle, kdy všechna vroubková oka nahradí lícový žerzej – dál pleteme všechna oka jen lícovým žerzejem. Nyní ujmeme na každé straně značky 1 oko – viz TIP - UJÍMÁNÍ. Takto ujímáme v každé 6.-5.-4.-4.-4.-4. kruhové řadě, celkem 13-15-17-18-18-19x = 42-44-46-48-50-54 ok. Pokračujeme v pletení až do výše 37-36-35-33-32-31 cm od podpaží. Pleteninu převedeme na kruhovou jehlici č.4 a upleteme 6 cm výšky vroubkovým vzorem. Rukáv měří asi 43-42-41-39-38-37 cm (od podpaží). Všechna oka volně uzavřeme. Stejným způsobem upleteme i druhý rukáv. |
|
|
|
Dokončili jste tento model?Pak označte své fotky tagem #dropspattern #stonefieldssweater nebo je pošlete do galerie #dropsfan. Potřebujete s tímto návodem poradit?Otevřete-li si návod na stránce garnstudio.com, najdete tam 23 výukových video-ukázek, Komentáře/Dotazy a další užitečné informace. © 1982-2025 DROPS Design A/S. Vyhrazujeme si veškerá práva. Tento dokument, včetně všech jeho dílčích částí, podléhá autorským právům. Podrobnější komentář k možnostem užití našich návodů najdete dole pod každým návodem na našich stránkách. |
|


V oblasti pletené a háčkované módy působí DROPS Design více než 40 let. Díky tomu vám můžeme nabídnout jednu z nejrozsáhlejších kolekcí modelů s bezplatnými návody dostupnými na internetu - navíc v 17 jazycích. K dnešnímu dni máme na 314 katalogů a 11822 návodů celkem - z nich je už 7048 dostupných v [češtině].
Přidejte komentář k návodu DROPS 202-8
Rádi bychom věděli, co si o tomto modelu myslíte!
Pokud se chcete na něco zeptat, dbejte prosím na to, abyste ve formuláři níže vybrali správnou kategorii - díky tomu se dříve dozvíte, co potřebujete vědět. Povinná pole jsou označena *.