
Popular categories
Looking for a yarn?


Comments / Questions (14)
![]() Sonja Löschen wrote:
Sonja Löschen wrote:
Hallo, warum werden in der 6. Reihe jeweils am Rand 5 Doppelstäbchen, anstatt wie im Rest der Anleitung 7 Doppelstäbchen gehäkelt? Außerdem sind die 6fach-Stäbchen zumindest in den ersten 1- 3 Reihen sehr lang und machen den Rand unregelmäßig. Danke im voraus für eine Antwort. Freundliche Grüße!
09.07.2024 - 16:53DROPS Design answered:
Liebe Sonja, es liegt an der Art der Zunahmen, daher werden 5 bzw. 7 Doppelstäbchen gehäkelt. Wenn die Sechsfachstäbchen bei Ihnen zu lang sind, versuchen Sie, sie etwas fester zu häkeln. Beachten Sie aber, dass das Tuch Dehnfähigkeit braucht, gerade auch am Anfang, daher sollten diese Sechsfachstäbchen nicht zu stramm sein. Viel Spaß beim Weiterhäkeln!
15.07.2024 - 22:15
![]() Georgia-Alice Bunge wrote:
Georgia-Alice Bunge wrote:
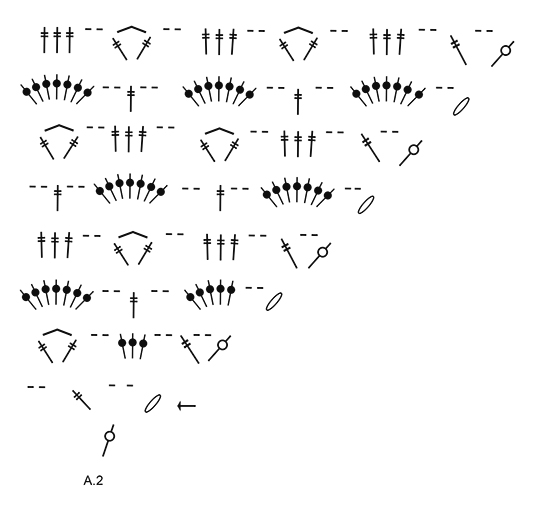
Hi, I have started crocheting this pattern. I have completed A.1 but A.2 looks confusing to me. It doesn't show the full pattern for each row. For example, in the first row, what do I crochet after I have done the treble crochet and the chain two? In the A1 diagram I worked around from one side to the other and because it had the row below to work from I could see exactly which stitch to put the next stitch into and how much of a gap to leave. Not sure how do tell in the next diagram. Thanks
17.04.2024 - 07:29DROPS Design answered:
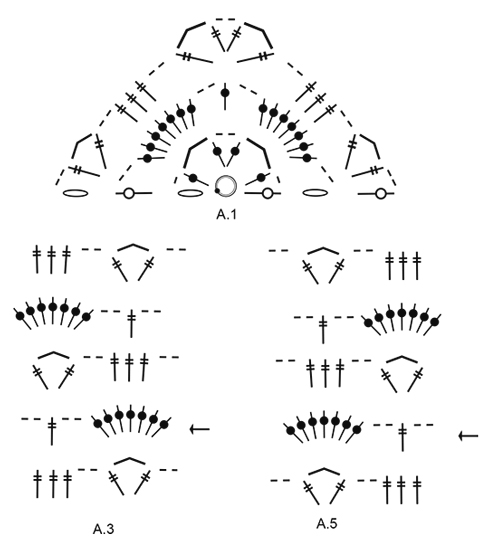
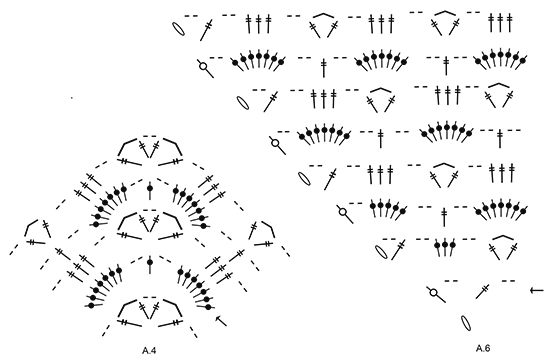
Dear Mrs Bunge, after A.1 work as follows from RS: A.2, A.3, A.4, A.5 and end with A.6; from WS read diagrams left towards right: A.6, A.5, A.4, A.3, A.2. Starting with the arrow in diagram work A.2 on first row: 6 chains (2nd symbol), 2 chains, 1 str in the last stitch from previous row, 2 chains. Then work A.3 starting also with the row with an arrow, then work A.4 for tip on schal in the tip of A.1, work A.5 and end with A.6. Happy crocheting!
17.04.2024 - 08:38
![]() Wagemans wrote:
Wagemans wrote:
Ik kan na het haken van patroon A1, niet overgaan op de 1 rij van A2. Ik zie niet wat ik moet haken: er staat alleen een begin van 6 losse, dan 2 losse en dan een dubbelstokje en dan weer 2 losse. Waar haak in die en wat is het vervolg van deze toer.....
13.02.2021 - 20:37DROPS Design answered:
Dag Wagemans,
Je begint met 6 lossen, dan 2 lossen dan een dubbel stokje in het zesdubbele stokje van de vorige toer. Vervolgens ga je verder met A.3, ook weer beginnend op de toer met de pijl. De toer daarvoor is al gehaakt, deze is erin getekend zodat je kunt zien in welke steken je moet haken.
15.02.2021 - 10:26
![]() Katarina wrote:
Katarina wrote:
Fruktansvärt rörigt mönster ,hur ska en nybörjare klara av att göra denna sjal. Skärpning. Ge sjutton i att göra diagram och skriv ett riktigt mönster i stället.
08.11.2020 - 17:08
![]() Susanne Wissing wrote:
Susanne Wissing wrote:
Hej. Findes der en opskrift - ikke diagram men opskrift - til sjalet Seven Seas?? Jeg er så dårlig til at forstå diagrammer. Mvh Susanne Wissing
15.07.2020 - 15:49DROPS Design answered:
Hej Susanne, opskriften kan kun strikkes efter diagram. Nederst i opskriften ser du hvordan du hækler efter diagrammer. Det er slet ikke så svært, vi har masser af videoer som kan guide dig. Prøv at følge en af de komplette opskrifter - hæklet
28.07.2020 - 14:03
![]() Betti wrote:
Betti wrote:
Kedves Drops csapat! A minta magyar nyelvű leírása nem egyezik az angollal, a magyar fordítás több helyen nem jó. Pl. A magyar 4 rahajtasos pálcát ír, az angol 6-ot, a magyar verzióból a minta lépéseinek követése sem érthető. Érdemes lenne javítani.
18.02.2020 - 20:12
![]() Zuzana Vernerova wrote:
Zuzana Vernerova wrote:
Hi sorry for posting again but when I do 6 double trebles in the ring it does not look right. I don't understand what you mean when you said around the 4 chain in both sides. Is there any chance you could post a video of this please?
11.03.2019 - 08:21DROPS Design answered:
Dear Mrs Vernerova, it looks like the first row in A.1, reading from the left towards theh right = 6 chains, 1 ch, 1 double treble around the chain stitch ring, 4 chains, 1 double treble around the chain stitch ring, 2 chains, 1 double treble around the chain stitch rinb, 4 chains, 1 double treble around the chain stitch ring, 1 chain, 1 six double treble (see at the beg of the pattern). Turn and work row 2 from the right towards the left. Happy crocheting!
11.03.2019 - 11:42
![]() Zuzana Vernerova wrote:
Zuzana Vernerova wrote:
Hi I can't figure out the last 6 double trebles in A1 in the first row. I don't know where to insert the hook. If I insert into the ring the whole thing looks weird and I'm sure it's not meant to be like that. Is there any chance of a video for the first row? Otherwise j will never be able to do this shawl and I love it. Thank you
10.03.2019 - 21:53DROPS Design answered:
Dear Zuzana, the 6 double treble should be done around the 4 chain stitch crocheted in both side. I hope this helps. Happy Crafting!
10.03.2019 - 22:16
![]() Sophie wrote:
Sophie wrote:
Bonjour, pouvez vous me dire s'il faut faire le diagramme A2 dans sa globalité et ensuite passer au A3 dans sa globalité aussi et ainsi de suite ou bien si les diagrammes sont à coller les uns aux autres. Je ne comprends pas très bien. D'avance merci pour votre aide.
03.05.2018 - 23:53DROPS Design answered:
Bonjour Sophie, il faut crocheter chaque rang des diagrammes l'un après l'autre, soit par ex: rang 1 de A.2, A.3, A.4, A.5 et A.6 sur l'endroit, puis au rang suivant sur l'envers: rang 2 de A.6, A.5, A.4, A.3 et A.2 et ainsi de suite. Bon crochet!
04.05.2018 - 08:54
![]() Sofia Broborg wrote:
Sofia Broborg wrote:
Redigering möjlig av placeringen av diagramdelarna så de är lika stora och ligger bredvid varandra i den ordning de ska virkas? Nu är det mycket svåravläst. Utskrift via er utskriftsoptimerade funktion lägger delarna på olika sidor och att försöka pussla ihop det själv i t ex word går inte då A1, A3 och A5 ligger som en gemensam bild och A4 och A6 i en bild. Tänker att fler skulle vara hjälpta av det.
27.03.2018 - 21:19DROPS Design answered:
Hej Sofia, vi skickar din önskan vidare, och hoppas vi kan göra det enklare framöver. Lycka till med den fina sjalen!
26.04.2018 - 11:28
|
|||||||||||||||||||||||||
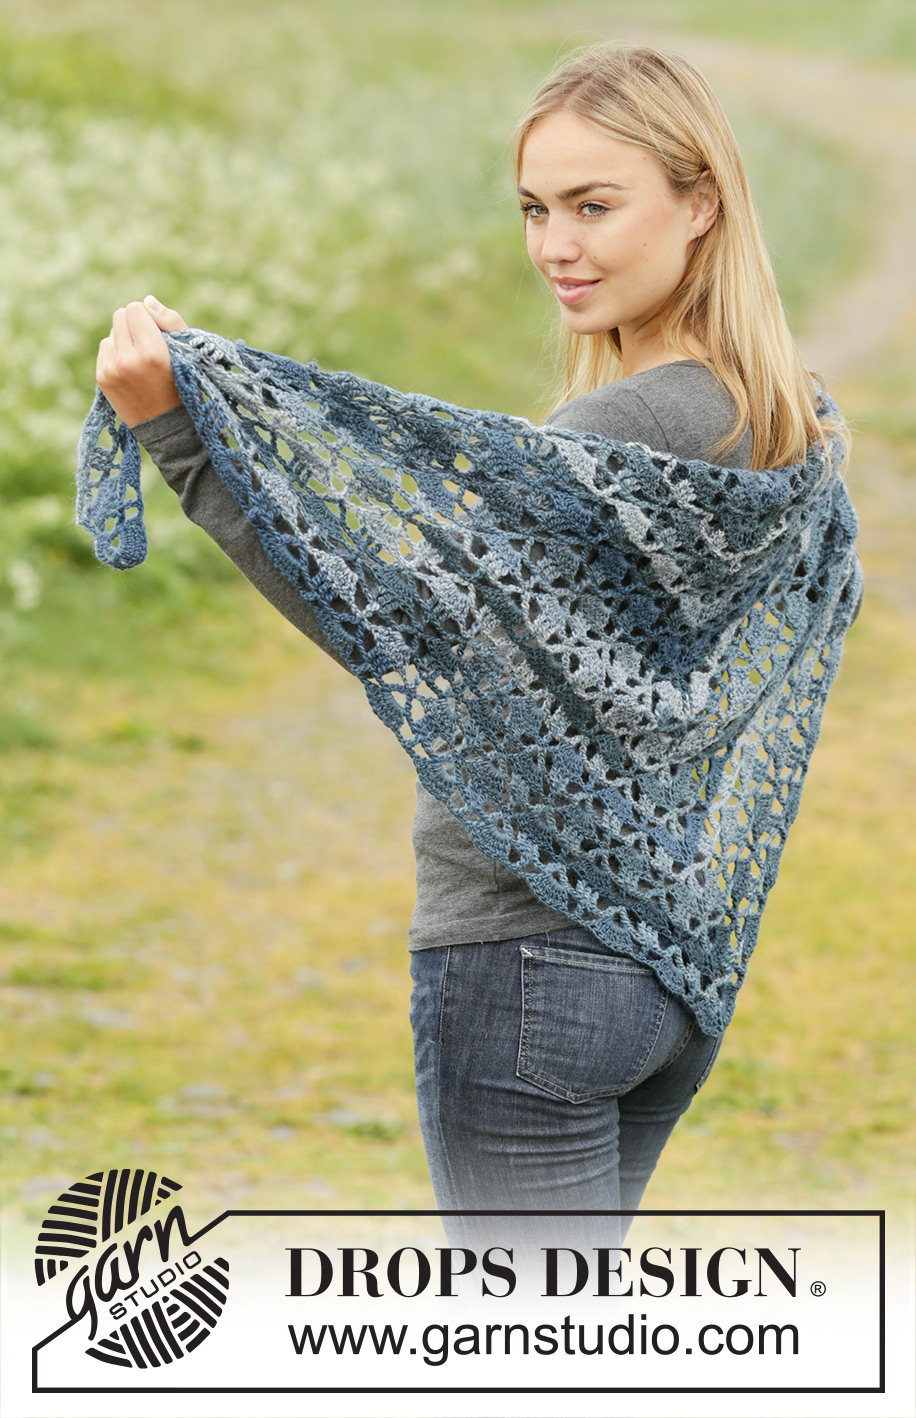
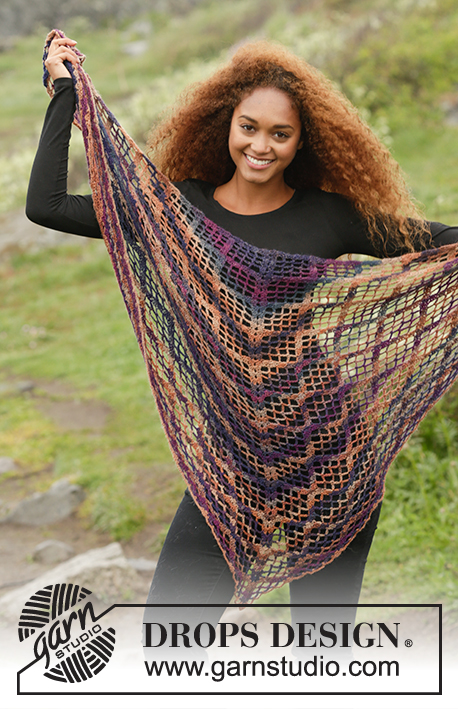
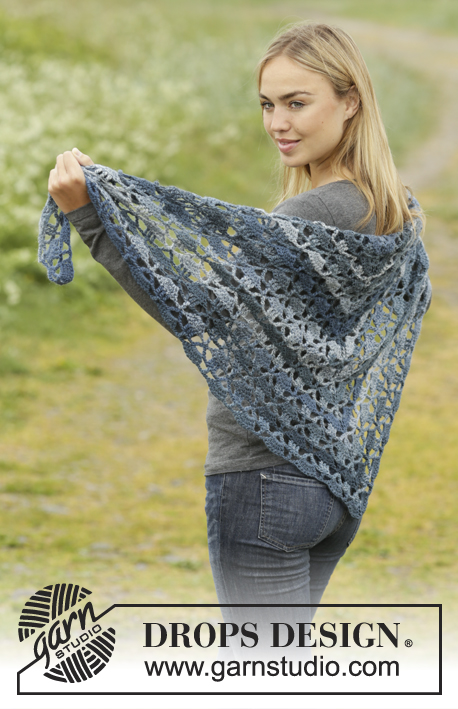
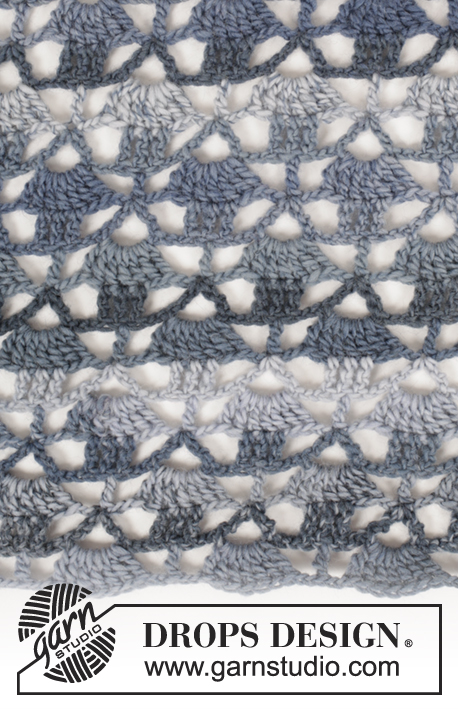
Seven Seas#sevenseasscarf |
|||||||||||||||||||||||||
 |
 |
||||||||||||||||||||||||
Crochet DROPS shawl with fans, worked top down in ”Big Delight”.
DROPS 171-41 |
|||||||||||||||||||||||||
|
SEXTUPLE TR: Make 6 YOs on hook, insert hook in 6th ch on beg of previous row, make 1 YO and pull yarn through this st, * 1 YO on hook, pull yarn through the next 2 sts on hook *, repeat from *-* 6 more times = 1 loop on hook. PATTERN: See diagrams A.1 to A.6. ---------------------------------------------------------- SHAWL: Worked back and forth, top down. Beg with hook size 5 mm and Big Delight and work pattern according to diagram A.1. When A.1 has been worked vertically, piece measures approx. 8.5 cm measured along inc in the middle of shawl. REMEMBER THE CROCHET TENSION! Now continue from row with arrow in diagram A.2-A.6 as follows: Work A.2 (= inc in the side), A.3, work A.4 (= inc in the middle), work A.5 and finish with A.6 (= inc in the side). When diagram has been worked vertically, repeat repetitions from row with arrow, i.e. there are more and more repetitions of A.3 and A.5 between inc in the middle and in the sides. Continue pattern like this until piece measures approx. 72 cm measured along inc in the middle of shawl - adjust so that last row worked is a row with dtr groups with 7 dtr. Fasten off. |
|||||||||||||||||||||||||
Diagram explanations |
|||||||||||||||||||||||||
|
|||||||||||||||||||||||||
|
|||||||||||||||||||||||||
|
|||||||||||||||||||||||||
|
|||||||||||||||||||||||||
Have you finished this pattern?Tag your pictures with #dropspattern #sevenseasscarf or submit them to the #dropsfan gallery. Do you need help with this pattern?You'll find 5 tutorial videos, a Comments/Questions area and more by visiting the pattern on garnstudio.com. © 1982-2025 DROPS Design A/S. We reserve all rights. This document, including all its sub-sections, has copyrights. Read more about what you can do with our patterns at the bottom of each pattern on our site. |
|||||||||||||||||||||||||


With over 40 years in knitting and crochet design, DROPS Design offers one of the most extensive collections of free patterns on the internet - translated to 17 languages. As of today we count 314 catalogues and 11822 patterns translated into English (UK/cm).
We work hard to bring you the best knitting and crochet have to offer, inspiration and advice as well as great quality yarns at incredible prices! Would you like to use our patterns for other than personal use? You can read what you are allowed to do in the Copyright text at the bottom of all our patterns. Happy crafting!
Post a comment to pattern DROPS 171-41
We would love to hear what you have to say about this pattern!
If you want to leave a question, please make sure you select the correct category in the form below, to speed up the answering process. Required fields are marked *.