
Popular categories
Looking for a yarn?


|
|
Winter Jolly |
|
|
|
|
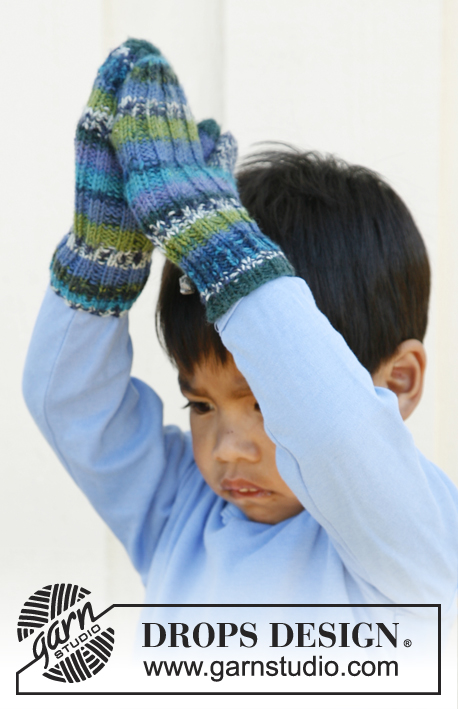
Knitted balaclava hat in DROPS Delight, with pompom. Size children 3 to 12 years.
DROPS Children 22-38 |
|
|
DECREASE TIP: Work until 2 sts remain before marker, K 2 tog (marker), slip 1 st as if to K, K 1, psso. MONK'S COWL: Work from bottom up. Cast on 324-348-372 sts on circular needle size 2.5 mm (60 cm) with Delight. Work 4 rounds in rib = K 2/P 2. Work next round as follows: * K 2, P 2, P 2 tog, P 2, P 2 tog, P 2 *, repeat from *-* the entire round = 270-290-310 sts. Continue with * K 2, P 8 *. At the same time on 3rd-4th-5th round, dec 1 st in every P-section by P the last 2 P sts tog, repeat dec every 3rd-4th-5th round until only 2 P sts remain in every P-section – NOTE: Dec alternately at the beg and end of every P-section (switch to a shorter circular needle when there are too few sts for the long one) = 108-116-124 sts. Piece measures approx. 7-8-10 cm. Work K 2/P 2 for 3-4-5 cm. On next round, inc all 2 P sts to 3 P sts = 135-145-155 sts. Work 2 rounds with K 2/P 3. On next round, cast off the first 12 sts for opening for face. NOW MEASURE PIECE FROM HERE! Then work back and forth on circular needle until finished measurements. AT THE SAME TIME cast off 1 st at beg of every row 7 times in each side = 109-119-129 sts remain on needle. Continue rib with 1 st in garter st in each side for approx. 16-18-20 cm (from where the first 12 sts were cast off), finish after 1 row from WS. Continue with upper piece. UPPER PIECE: Work 1 row in rib as before (from RS) and cast on 37 new sts at the end of row = 146-156-166 sts. Work 1 round over all sts as follows: P 1, * K 2, P 3 *, repeat from *-* until 3 sts remain before the new sts, K 2, P 1, then work the new sts as follows: * K 2, P 3 *, repeat from *-*, and finish with K the last 2 sts (i.e. the rib does not work out in the transitions between upper piece and the rest of the cowl, this will not be visible because of dec). Now work back and forth over the new sts while at the same time dec sts from each side, i.e. work as follows: Turn piece, * work back from WS until 1 st remains of the new sts, then P 2 tog. Turn piece, slip first as if to K, work until 1 st remains of the new sts, slip this st as if to K, K 1 and psso. Turn piece, slip first st as if to P *, repeat from *-* until 38-43-48 sts have been dec in each side. 70 sts now remain on needle and the rib works out the entire round in K 2/P 3. Continue with the tail. TAIL: Now continue in the round on double pointed needle over all sts – insert a marker in the middle of the 2 K sts at the beg and end of upper piece. When 3-3-4 rounds have been worked, dec 1 st on each side of both markers – SEE DECREASE TIP, repeat dec every 4th-4th-5th round a total of 15 times = 10 sts remain on needle. Cut the thread and pull it through the remaining sts, tighten tog and fasten. Tail measures approx. 17-17-21 cm. EDGE AROUND FACE: Knit up 130-140-150 sts on a short circular needle size 2.5 mm inside 1 edge st around the opening of cowl – NOTE: Along the upper piece knit up 2 sts over the 2 K sts and 2 sts over the 3 P sts. Then work rib = K 2/P 2 (make sure that K and P sts match on top of each other at the top of upper piece) for approx. 5-6-7 cm, cast off with K over K and P over P. Fold the rib double towards WS and fast in the knit up-edge. POMPOM: Make a dense pompom with a diameter of approx 4-5 cm and fasten at the tip of the tail. |
|
|
Have you made this or any other of our designs? Tag your pictures in social media with #dropsdesign so we can see them! Do you need help with this pattern?You'll find tutorial videos, a Comments/Questions area and more by visiting the pattern on garnstudio.com. © 1982-2024 DROPS Design A/S. We reserve all rights. This document, including all its sub-sections, has copyrights. Read more about what you can do with our patterns at the bottom of each pattern on our site. |


With over 40 years in knitting and crochet design, DROPS Design offers one of the most extensive collections of free patterns on the internet - translated to 17 languages. As of today we count 304 catalogues and 11422 patterns - 11422 of which are translated into English (UK/cm).
We work hard to bring you the best knitting and crochet have to offer, inspiration and advice as well as great quality yarns at incredible prices! Would you like to use our patterns for other than personal use? You can read what you are allowed to do in the Copyright text at the bottom of all our patterns. Happy crafting!
Comments / Questions (48)
Bonjour, je tricote avec plaisir cette cagoule pour mon fils le modèle est magnifique! Je commence la section dessus de la tete: après avoir monté les 37 mailles, on tricote bien un tour en rond? Et ensuite on repasse en a/r uniquement sur les 37 m montées ou sur tout l'ouvrage? Pourquoi ne reste-til que 70m à la fin alors que l'on a diminué que 38 m et qu'avant les mailles montées on en avait 146. Merci de m'éclairer.
10.01.2018 - 20:01DROPS Design answered:
Bonjour Mme Goux, c'est bien exact, on continue en allers et retours en diminuant 1 maille de chaque côté à la fin de chaque rang jusqu'à ce que 38 m aient été diminuées de chaque côté, il y avait 146 m - 38 m diminuées x 2 côtés = il reste 70 m. Bon tricot!
11.01.2018 - 08:42Ik ben nog met zelfde mutsje bezig. Kom nu bij bovenste deel en ik begrijp niet wat daar de bedoeling is. Een zin al: tot er 3 st over zijn voor de nieuwe st, 2st r, 1 st av, etc enfin daar doe ik dan maar wat. Maar je zou denken dat ik dan alleen over de laatst opgezette steken moet breien, n.l ‘ brei nu heen en weer over de nieuwe steken’, maar dat is niet t geval, want dan zou ik nooit aan iedere kant 38 st kunnen minderen. Wat is de bedoeling?
03.12.2017 - 10:36DROPS Design answered:
Hoi Simone, Nadat je de 37 nieuwe steken hebt opgezet, keer je het werk niet, maar brei je 1 hele naald in de rondte. Tijdens deze naald moet je op een gegeven moment breien tot er 3 steken over zijn voor de 37 opgezette steken, dus tot je 40 steken op de linker naald hebt. Daarna brei je de nieuwe opgezette steken verder volgens instructie. Als je deze naald in de rondte helemaal hebt gedaan, brei je de nieuw opgezette steken heen en weer. En door het minderen aan beide kanten, brei je a.h.w. de bovenkant aan de zijkanten vast.
13.12.2017 - 18:27Ik moet beginnen met 324 steken op te zetten dat is 124 cm. Lijkt me erg breed voor kinderschoudertjes. Al snel wordt ee geminderd naar 270 steken, wat toch nog 70 cm is. Lijkt me voor een kindernekje ook nog behoorlijk breed. Kunt u me uitleggen hoe dit toch goed kan zijn, zodat ik er aan durf te beginnen.
23.11.2017 - 13:49DROPS Design answered:
Hallo Simone, Het lijkt inderdaad erg breed, maar ik heb het nagekeken en het zou moeten kloppen. Als je bij het mutsgedeelte bent heb je inmiddels geminderd naar het aantal steken overeenkomen met de halswijdte, waardoor het mooi aansluit.
24.11.2017 - 09:36Bonjour, est ce possible de faire la cagoule sans faire la pointe et comment.
27.10.2017 - 23:09DROPS Design answered:
Bonjour Madame Morin, nous ne sommes malheureusement pas en mesure de pouvoir adapter chaque demande individuelle. Pour toute modification et ajustements d'un modèle, n'hésitez pas à demander conseil auprès du magasin où vous avez acheté la laine. Bon tricot!
30.10.2017 - 08:54Hallo ich bitte um hilfe, habe die maschen angeschlagen u. hänge hier. "Wie folgt 1 Runde über alle M. stricken: 1 li., * 2 re., 3 li.*, von *-* wiederholen bis vor den neuen M. noch 3 M. übrig sind, 2 re., 1 li., danach über die neue M. wie folgt: * 2 re., 3 li.*, von *-* wiederholen und mit 2 re. abschliessen. Muss ich hier wieder die runde schließen? Ich wäre über eine Antwort sehr dankbar. LG
21.10.2017 - 10:06DROPS Design answered:
Liebe Frau Schuster, nach dieser Reihe stricken Sie hin und zurück über die neuen M wie beschrieben, dh: Die Arbeit drehen * auf der Rückseite zurück stricken und die letzte der neuen M. und die nächste M. li. zusammen stricken. Die Arbeit drehen und die erste M. abheben, zurück stricken und die letzte der neuen M. re. abheben, die nächste M. stricken und die abgehobene über die gestrickte ziehen, die Arbeit drehen und die erste M. abheben *, von *-* wiederholen bis auf beiden Seiten 38-43-48 M. abgenommen sind und noch 70 M. übrig sind. Viel Spaß beim stricken!
23.10.2017 - 10:01Hallo ich komme leider nicht weiter. Was ist mit "Mit dem Bündchen und je 1 M. Krausrippe auf beiden Seiten weiterstricken bis die Arbeit i ca. 16-18-20 cm misst und mit 1 R. von der Rückseite abschliessen." gemeint? Vielen Dank schon mal. LG chrisi
02.10.2017 - 14:26DROPS Design answered:
Liebe Chrisi, Sie stricken jetzt Bündchen mit 1 Randmasche kraus rechts auf beiden Seiten bis die Arbeit ca 16-18-20 cm (siehe Größe) ab den 12 abgeketteten Maschen mist. Der letzte Reihe soll eine Rückseite sein, damit nächste Reihe eine Hinreihe ist. Viel Spaß beim stricken!
02.10.2017 - 15:08J"aimerais faire la cagoule en laine unie. SVP me conseiller une laine en particulier pour arriver au résultat. Je demeure à Montréal et aimerais avoir un endroit pour acheter vos produits.Besoin de votre aide...Merci.
26.09.2017 - 16:32DROPS Design answered:
Bonjour Mme Primeau, vous pouvez réaliser la cagoule avec une autre qualité de laines du groupe A (voir plus d'infos ici) - Retrouvez les revendeurs DROPS au /pour le Canada ici. Bon tricot!
27.09.2017 - 09:10Ich bin schon verwirrt bei der anzuschlagenden Maschenzahl. Da komme ich bei der Größe 3/5 auf 124 cm Durchmesser. Das ist sehr viel für ein Kleinkind. Ich habe schon ein paar mal mit unterschiedlicher Maschenzahl gestrickt, aber es ist so groß. Das Kind ist 1 Jahr und ich habe deshalb auch die Anzahl der Maschen reduziert und trotzdem stimmt die Größe nicht. Was mache ich hier verkehrt.
11.01.2017 - 23:05DROPS Design answered:
Liebe Silke, Beachten Sie zuerst Ihre Maschenprobe, dann wird diese Maschenanzahl schon bei der 5. Reihe abnehmen, und dann immer mehr abnehmen ( 108 M nach 7 cm). Viel Spaß beim stricken!
12.01.2017 - 08:50Hallo ich habe eine Frage zu diesem Abschnitt der Anleitung: "Von hier wird die Arbeit weitergemessen. ... weiterstricken bis die Arbeit i ca. 16-18-20 cm misst " Misst die Arbeit jetzt insgesamt 16 cm (bei der kleinsten Größe ab Saumkante gemessen) oder misst die gesamte Arbeit jetzt insgesamt 26 cm (7 + 3+16)? 16 cm für die Höhe des Gesichtsausschnitts kommen mir etwas viel vor!
21.12.2016 - 09:15DROPS Design answered:
Liebe Katrin, diese 16 cm werden von dem 12 abgeketteten Maschen gemessen. Viel Spaß beim stricken!
21.12.2016 - 09:44Bonjour, j'ai besoin d'aide au sujet des diminutions. On doit donc faire 1 rang de diminutions 3 rangs pour la taille 3 ans puis un rang de diminutions? Et non 1 rang de dim 2rangs et 1 rang de dim ? Merci de votre aide
23.10.2016 - 01:04DROPS Design answered:
Bonjour Mme Caux, au début de la cagoule (quand on a 270 m), on doit diminuer d'abord au 3ème tour, puis tricoter 2 tours, et diminuer au 3ème tour (= tous les 3 tours). Bon tricot!
24.10.2016 - 10:16